


We may receive a commission when you use our affiliate links. However, this does not impact our recommendations.
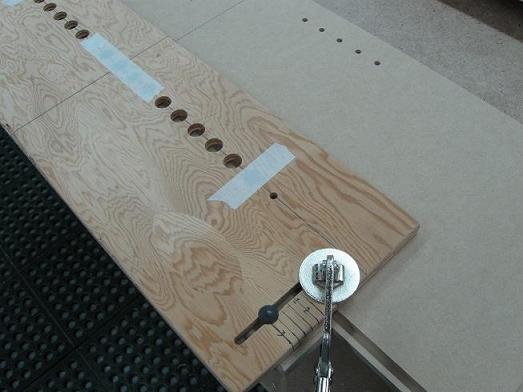
No mill the holes for the adjustable shelves of the uprights I chuck up a 1/4’’ spiral bit because of its plunge feature and a 5/8’’ guide bushing. Note that my jig has been designed to use such 5/8’’ guide bushing. I set the plunge depth of the router to 1/2’’ using a machined measuring bar. This bar is easier to use than the original depth ruler gauge of the router. The jig and the upright properly secured to the workbench, I bore the specified hole placements.

Here are the holes near the face side of the uprights. Here we can see the need of the center line.

For the back of the uprights, I must consider the rabbets and readjust my jig accordingly to bring it further away from the edge (3/8’’).
Here are the completed and uniform upright holes.

Before proceeding with the first dry fit, I sand the shelves and the inside of the uprigths.
To learn more about this technique, click here to be temporarely linked to the appropriate page of my website.
Best,
Serge
www.atelierdubricoleur.spaces.live.com
Here are some supplies and tools we find essential in our everyday work around the shop. We may receive a commission from sales referred by our links; however, we have carefully selected these products for their usefulness and quality.


