


We may receive a commission when you use our affiliate links. However, this does not impact our recommendations.
 Dress Up Your Custom Furniture With Custom Knobs
 Dress Up Your Custom Furniture With Custom Knobs
Why would you ever make your own when you can buy them for less than a buck? I can think of many reasons. One is wood choice: many knobs are only available in oak, birch/ maple and sometimes pine, cherry and walnut. Perhaps the best reason is design: most production knobs look pretty plain due to the constraints imposed by mass production. It’s a crime to cap off custom furniture or cabinetry pieces with run-of-the-mill production knobs. It’s better to enhance the style of the piece with fine detailing that you just don’t see in manufactured knobs. Plus, there’s the undeniable satisfaction you get from making your own knobs rather than purchasing them.
When you make your own knobs, the first thing to consider is grain direction. Long-grain knobs are turned with the grain orientation parallel to the bed of the lathe, as in spindle turning. Long-grain knobs can have slender, delicate shanks. Short-grain knobs are turned with the grain at a right angle to the bed of the lathe, as in bowl turning. Short-grain knobs match drawer and door fronts better, because the grain is oriented the same way. Knob making is a great exercise in understanding grain orientation and how to work with it.
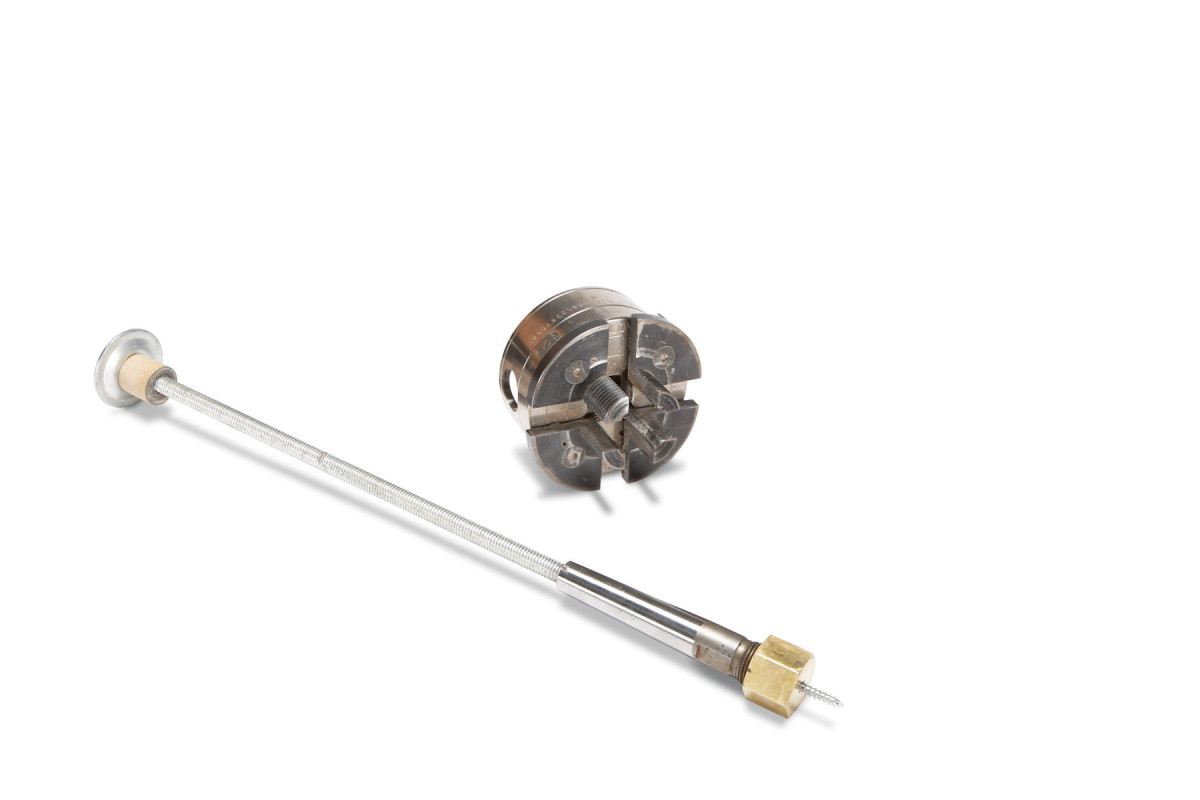
PHOTO 1. To turn long-grain knobs, you’ll need a four-jaw scroll chuck to hold the stock. For short-grain knobs, use a screw center chuck with an attached shop-made drawbar to keep the chuck assembly from popping out of the headstock. A shop-made drawbar consists of a threaded rod, wood spacer, washer and nut. The drawbar keeps the chuck from popping out of the lathe.
The tools you’ll need for turning both types of knobs include; a detail/spindle gouge, a parting tool and a skew chisel. You’ll also want a scroll chuck and a screw center chuck (Photo 1) to hold the stock on the lathe.
Long-Grain Knobs
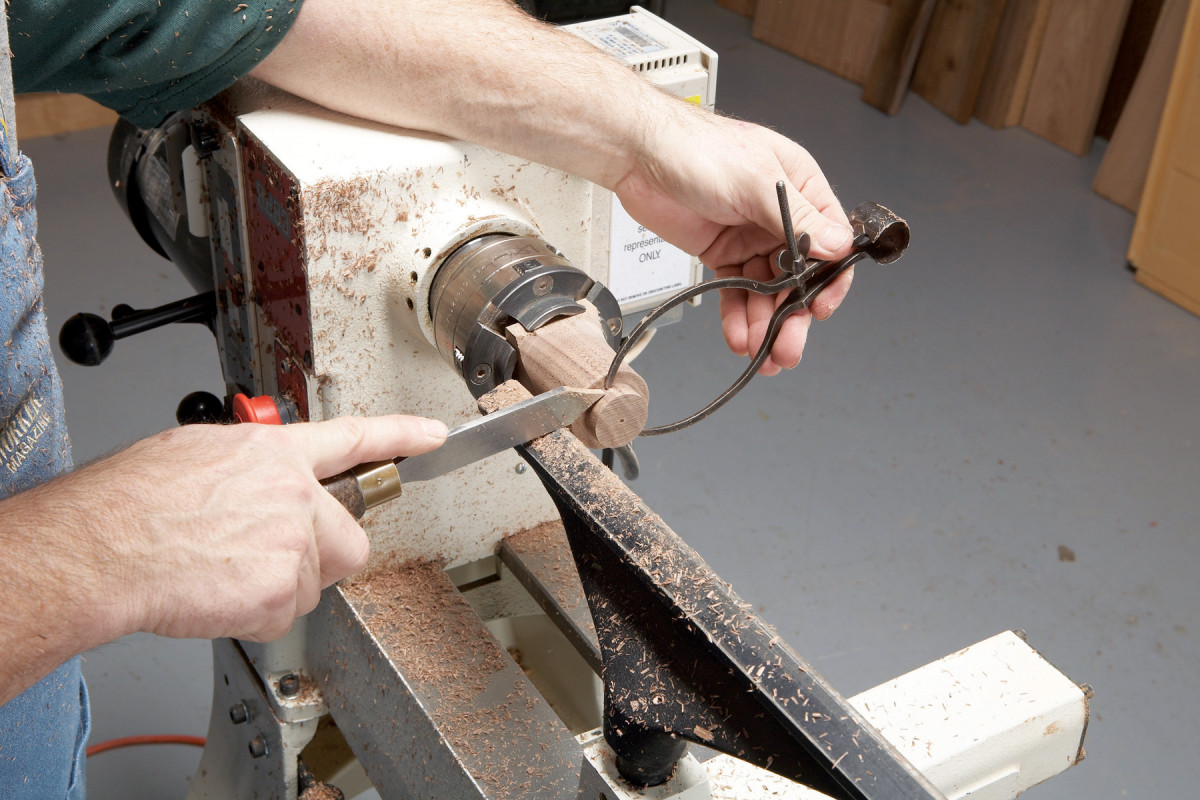
PHOTO 2. Start a long grain knob with a blank mounted in a scroll chuck. Establish the knob’s diameter with a parting tool and outside calipers. Note: Make sure the caliper points are rounded and smooth so they won’t catch.
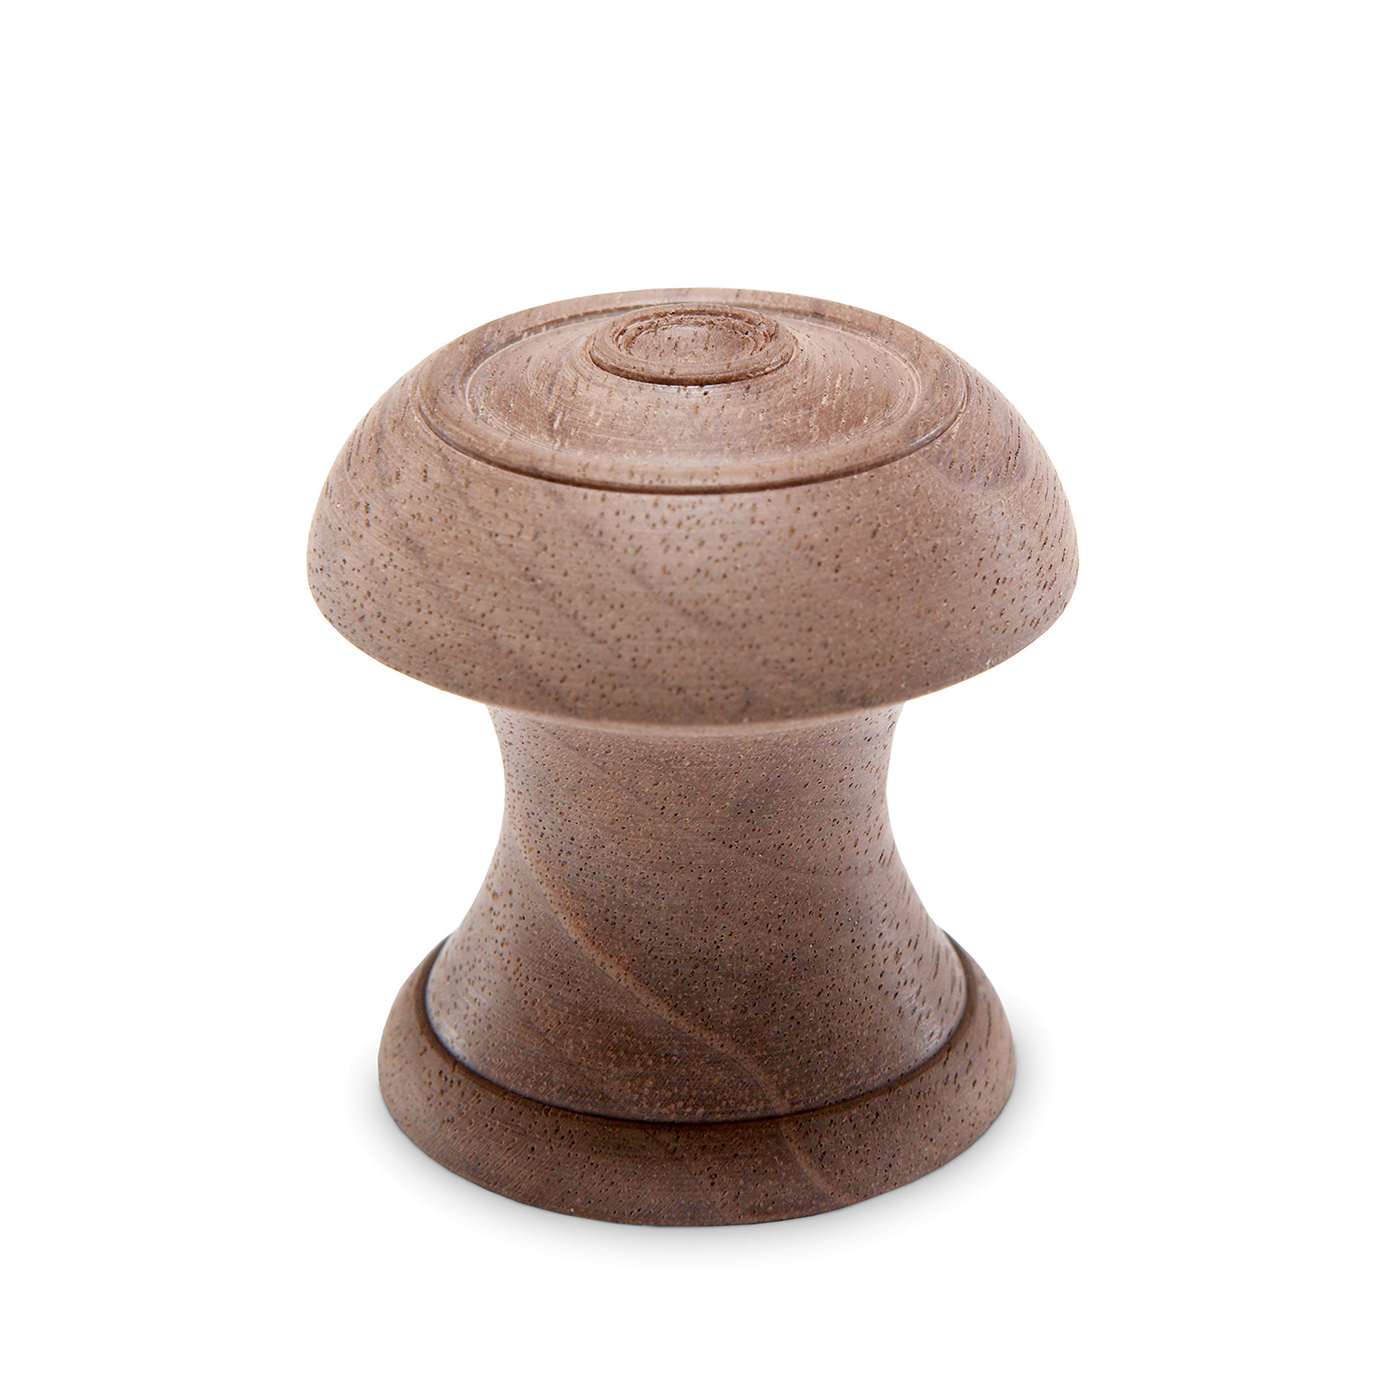
The long grain orientation is the best for a knob with a tenon that gets glued into the work door or drawer. Long-grain knobs are strong because the grain runs along the axis of the knob. This makes them the best choice for fine detailing, delicate shapes and small sizes.
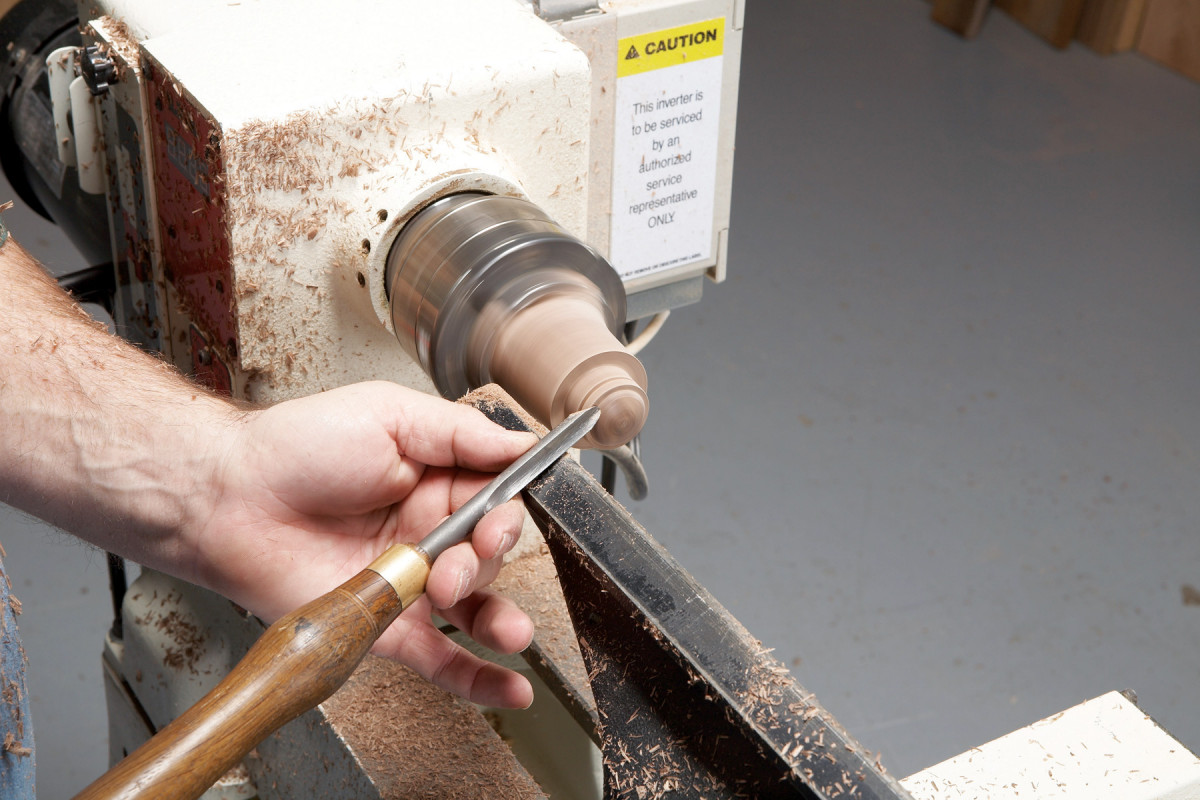
PHOTO 3. Use a detail/spindle gouge to shape the outside face of the knob. Work from large to small diameter.
Even though the grain orientation is the same as spindle work, it’s best to avoid mounting the stock between centers. Instead, hold the stock in a chuck that provides clear access to the face of the work. Mount a piece of wood in a scroll chuck. You can easily chuck enough wood to do several pulls at a time. Allow sufficient wood for waste material in the chuck and between the knobs.
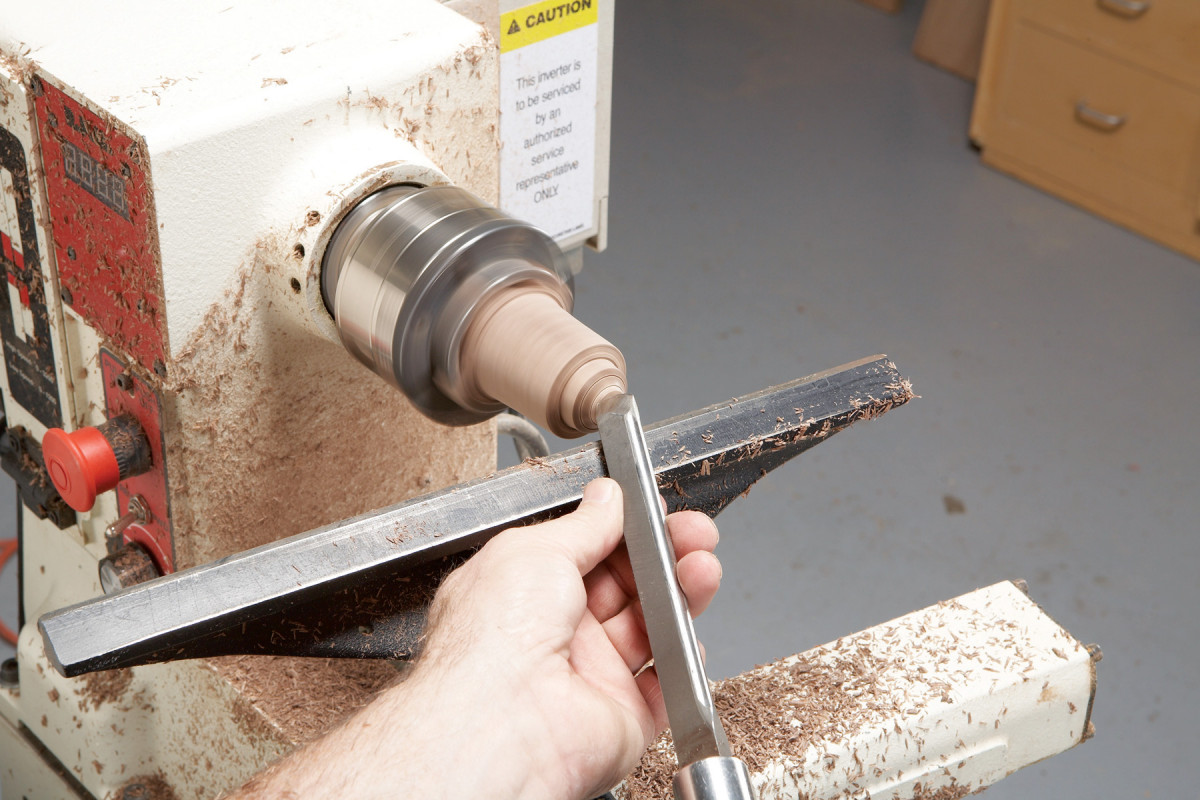
PHOTO 4. Detail the knob’s face with the long point of a skew chisel.
Once mounted, the turning is fundamental spindle work. Start by establishing the knob’s diameter (Photo 2). Then, shape the face of the knob, cutting from larger to smaller diameter (Photo 3). Use a skew to add details (Photo 4). Then, cut the finger recess on the sides. Again, work from large to small diameter (Photo 5). Finally, cut the tenon to fit the hole drilled in your door or drawer (Photo 6).
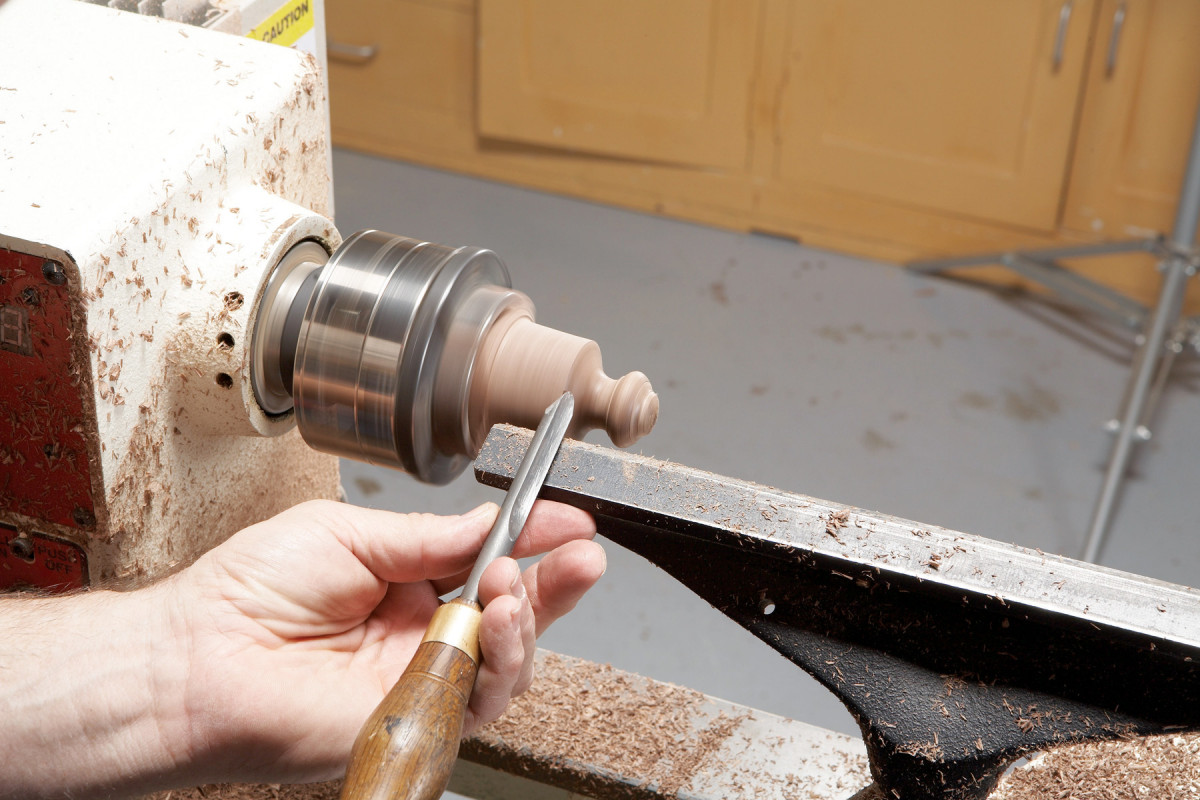
PHOTO 5. Use the gouge to create a finger recess between the knob’s head and its base. Long-grain knobs can be turned to slender diameters and still maintain sufficient strength.
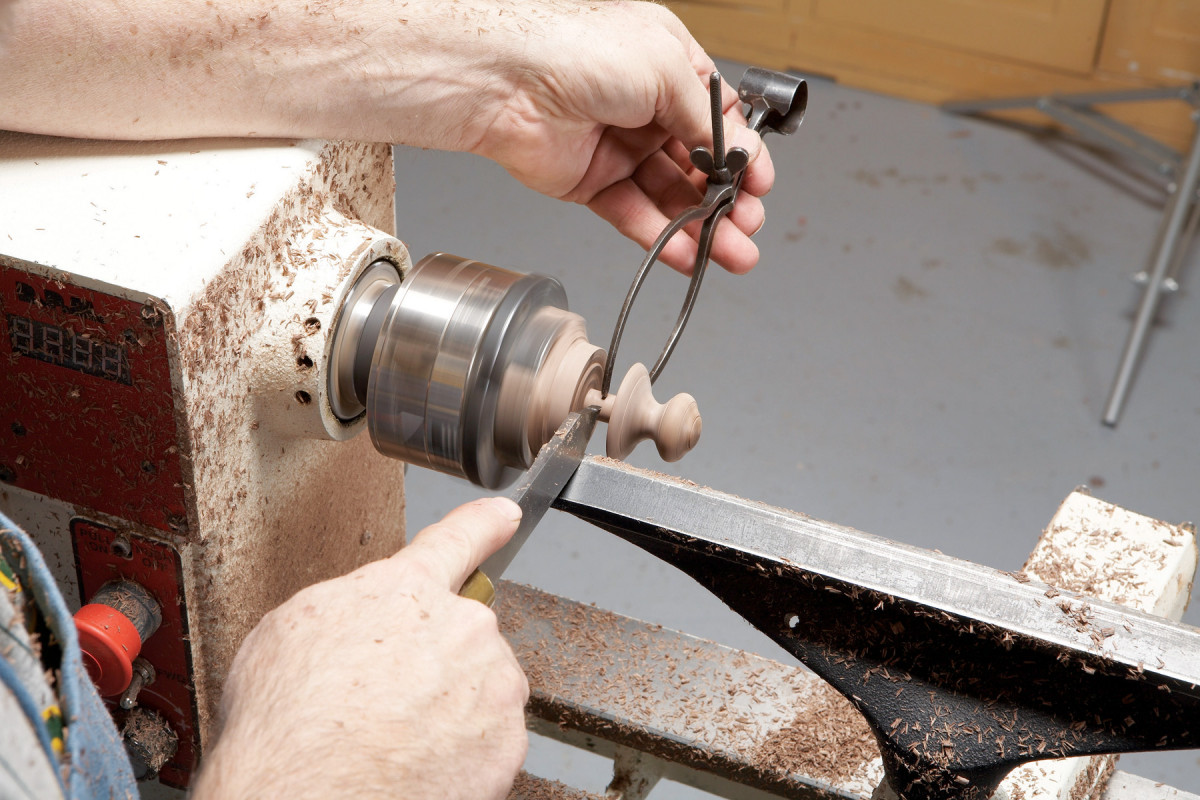
PHOTO 6. Size the tenon with the parting tool and outside calipers. Go slow and make sure your calipers are set for a perfect fit. Accurate sizing is essential for a strong joint.
Short Grain Knobs
When you turn the shanks of short-grain knobs, keep in mind their weak short grain structure. I seldom go below 1/2-in.-dia. behind the face of the knob. Short-grain knobs rely on a screw to hold them in place. This style knob is a better choice when the wood is to be stained, because the face-grain takes stain more evenly than the end grain. These knobs are turned larger in diameter in order to accommodate the weaker short grain structure.
A screw-type chuck is the best device for mounting a face-grain knob blank for turning. (Photo 1). This method has the added benefit of creating a centered screw hole for mounting the knob on the furniture. I use a screw chuck that takes different length screws combined with a shop-made drawbar that prevents the chuck from pulling out while turning. The stock must have a flat shoulder to rest against the chuck. Use material slightly thicker than the desired height of the pull. It’s best to turn short-grain knobs one at a time. Cut out a series of blanks for the knobs, adding one or two extras just in case.
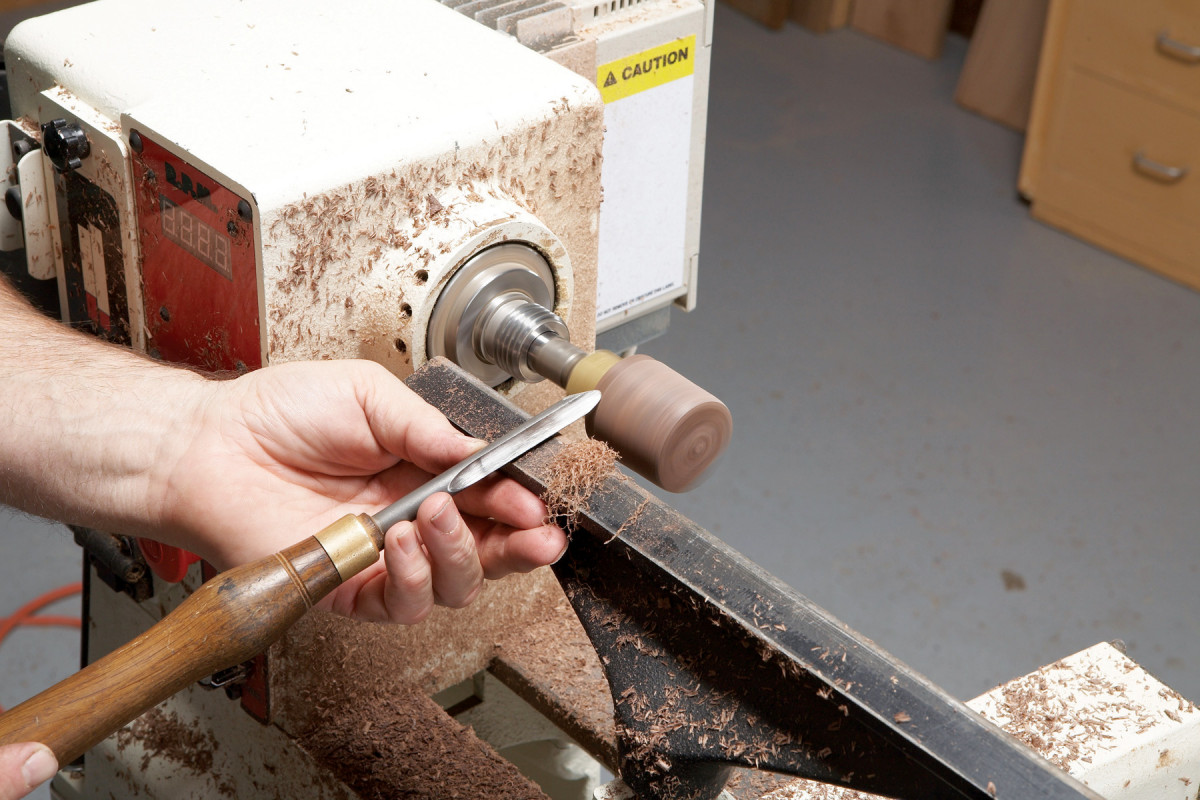
PHOTO 7. Mount short-grain knob blanks on a screw chuck. Turning these knobs takes a light touch, as heavy cuts can strip the screw hole. Start by creating a cylinder. Work from the ends towards the middle to avoid chipping out the outside corners.
Turning a face-grain knob resembles bowl turning because the grain runs at a right angle to the lathe’s bed, just like a bowl blank. You will quickly discover that cutting coves and fine detail on the side of the knob is more of a challenge than with long-grain knobs. That’s because the side of the stock alternates between end-grain and long-grain as it turns. On the plus side, fine detailing on the face is much easier than with long-grain knobs.
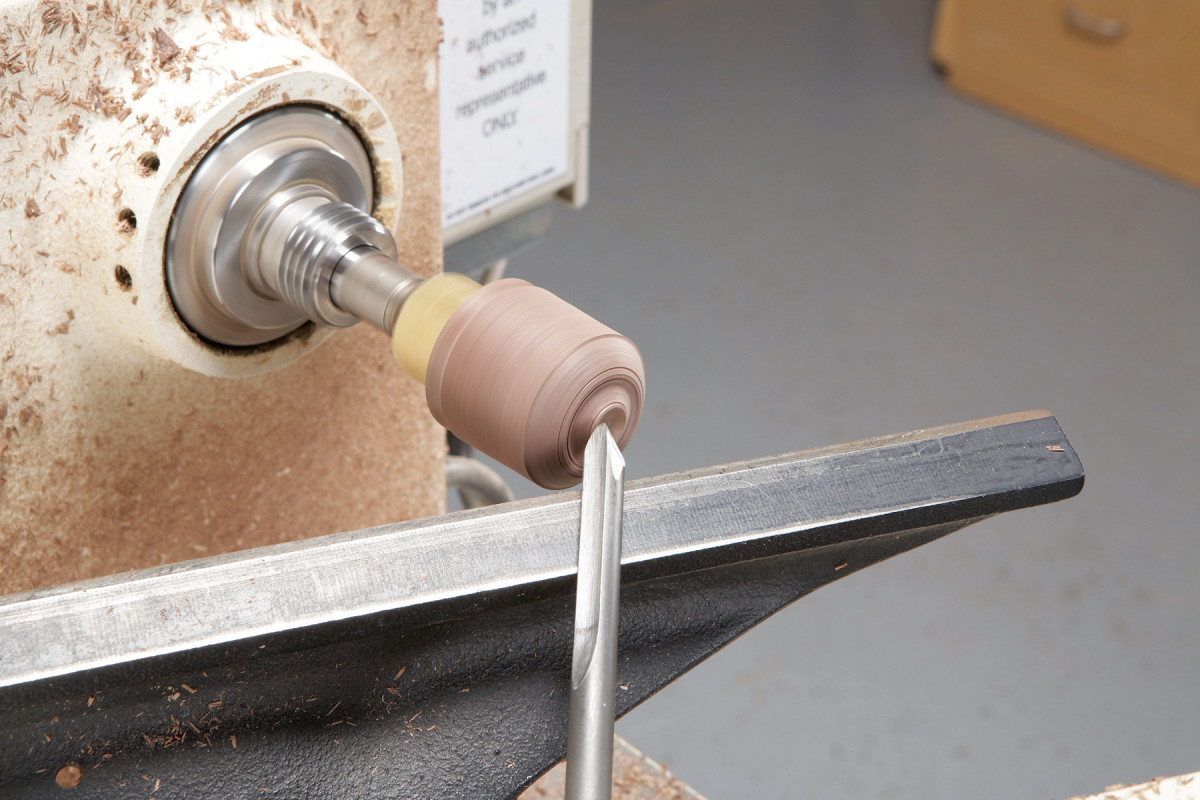
PHOTO 8. Detail the face of the knob with the detail/spindle gouge. The surface is similar to the outside of a tiny bowl, so your cut should travel from small diameter to large diameter.
To round up the cylinder without chip-out on the ends, start the cuts from off the work at both ends and meet in the center (Photo 7). Cut from smaller to larger diameters when detailing or shaping a face grain knob (Photo 8). To hollow the face of a pull, treat it just like a bowl: work from a larger inside diameter to a smaller inside diameter, finishing in the center.
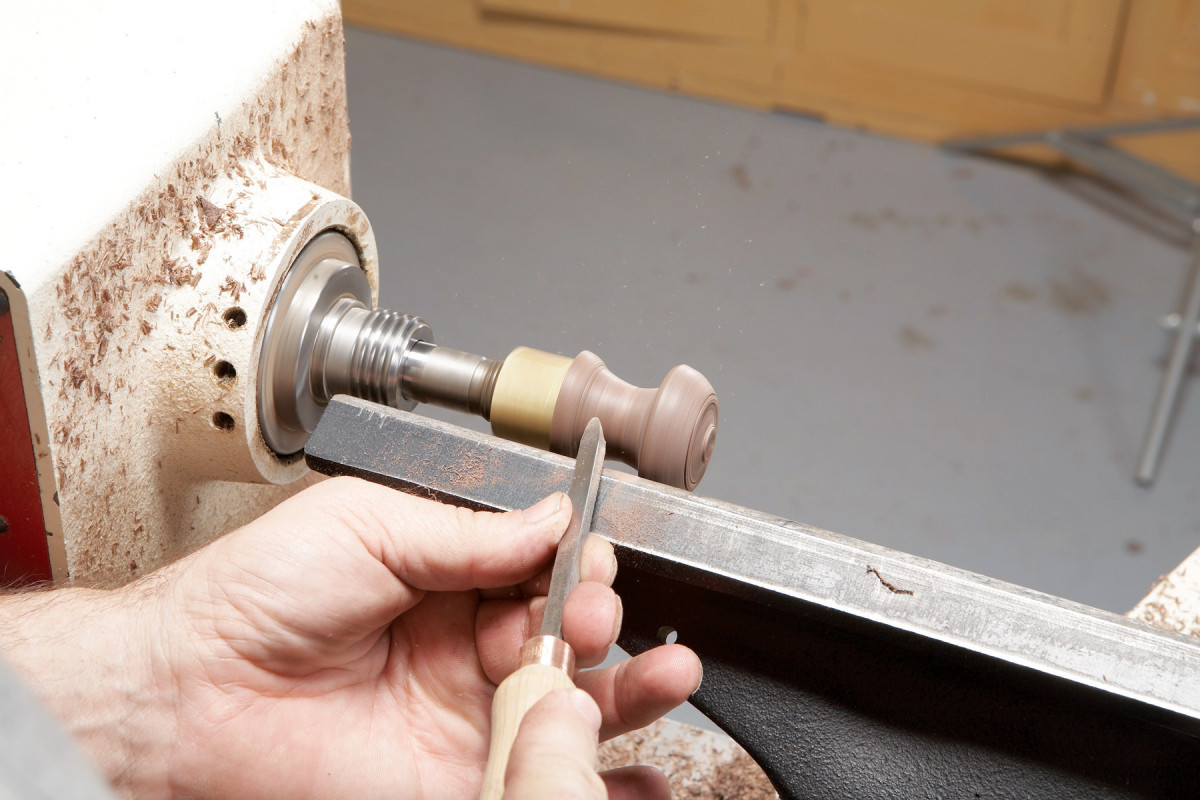
PHOTO 9. Create the knob’s neck by working from smaller diameters to larger diameters. Face-grain turning requires a different technique than long-grain turning: Cuts are made in the opposite direction.
Once the face is complete, you can turn to the side of the knob. Here’s where things get a little tricky. Remember to work from a small diameter to a large in this area (Photo 9). Do your fine detail work with a skew chisel (Photo 10).
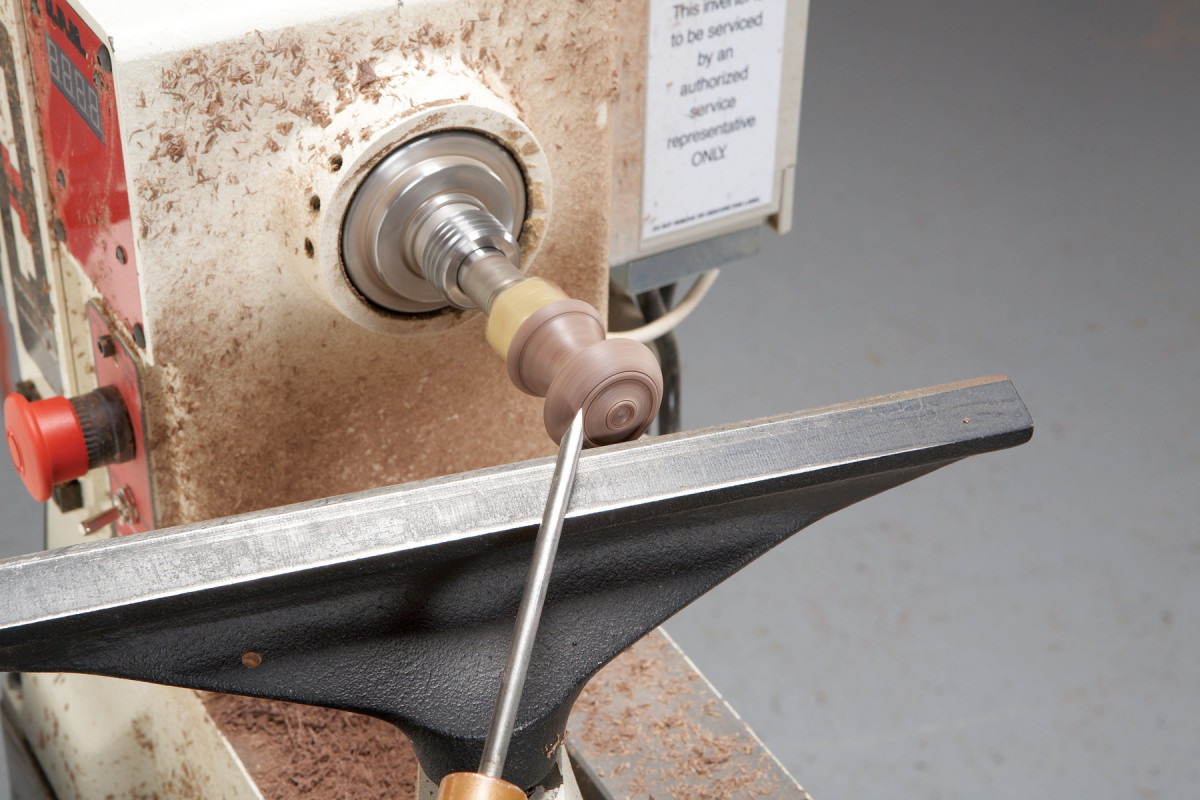
PHOTO 10. Crisp detailing separates handwork from production pieces. Again, the long point of the skew allows for exact work and crisp lines.
Here are some supplies and tools we find essential in our everyday work around the shop. We may receive a commission from sales referred by our links; however, we have carefully selected these products for their usefulness and quality.


