


We may receive a commission when you use our affiliate links. However, this does not impact our recommendations.
 For the October 2011 issue, I built the simple bench pictured at left for our I Can Do That project. Our designer, Linda Watts, chose the cheerful red paint job (she also got her hands dirty by doing the actual painting – thank you Linda!). Why red? Well, red looks nice on the white background on which we photograph the I Can Do That Projects for the magazine page (and by the by, all the ICDT projects are free on our site once you register (registration is also free)). But red also looks nice on Linda’s porch – which is where the bench now sits.
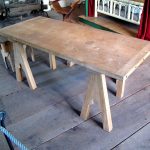
I mentioned in the article that I got the idea from an antique choir bench in my mom and stepfather’s house, but that I made a few changes from the original. Some of those changes were so the project would fit the ICDT paradigm; others were aesthetic. Since the issue’s been out, I’ve received several requests for a picture of the inspiration piece. So here you go (with my apologies for the poor image quality):
 The sides of the choir bench felt a little confining for mass appeal (ha!), so for the ICDT design, I decided to cut them away.
I eschewed the moulding around the top edge (click on the picture and you’ll be able to see it more clearly), because it makes the back a darn uncomfortable surface against which to lean (perhaps that’s a design feature meant to keep churchgoers awake?).
I also added a shelf across the bottom of my version to help prevent racking – but I think the choir bench had a shelf at some point, because the sides were made from one piece of wood (one of which is now split), so the battens on the antique bench weren’t structurally necessary (though with that split, one of them now is!).
I also forwent the S-shaped cutouts (those would have been mighty tricky to do well using the ICDT tool kit), and I opted for paint. The big box pine usually looks better with paint than with stain, plus I knew this bench was destined for a porch and paint is good protection against the elements.
I’d like to build the choir bench closer to it’s original form. I’ll be free to visit my local lumber purveyor rather than the home center for material, so I’ll be able to buy stain-worthy stock (and the bench will end up in my upstairs hallway rather than in the wind and rain, so no reason to paint). I like the look of the shelter arms so I’ll keep those, but I’ll likely employ some kind of edge treatment on the top (a simple chamfer or cove, perhaps) instead of uncomfortable applied moulding. And, I’ll change the cutouts to something more personal (a triskele or some other Celtic knot, perhaps).
So what changes, if any, would you make?
• If you’re looking for projects that are designed for the great outdoors, check out “Backyard Projects for Today’s Homestead” by Chris Gleason. From a chicken coop to an Adirondack chair, deck storage to a pergola, you’ll find it in this book.
Here are some supplies and tools we find essential in our everyday work around the shop. We may receive a commission from sales referred by our links; however, we have carefully selected these products for their usefulness and quality.


Nice turn of phrase, Megan: “m(M)ass appeal…” Just remember, Dear: don’t laugh when you’re the one saying something clever (“ha!”) It’s bad form. If they get it, they’ll laugh; if they don’t, well… [sigh!]
And a beautiful bench. One of my winter projects. Thanks very much for sharing this. Nice work.
I was actually trying to save as much as I can the original design. Here is where the ICDT Board of Education may need to enhance the curriculum by adding a compass or pair of trammel points to the measuring and layout tools. Since you already have a jigsaw and a drill in the tool kit, it seems to me that you can incorporate the original cutout from the old bench into the new bench. First, lay out the design with the compass or trammel points, then drill holes in the waste part, then use the jigsaw to cut out the design.
As for the top edges of the back and sides, I would probably see if I could use half-rounds and quarter rounds to come up with some form of molded edging, making sure that the edge of the molding is flush with the inside faces of the back and sides.
FWIW, I would love to see the next bench finished. I like the lines of the original a lot, and if you’re going top put celtic stuff on it, it sounds like my kind of project 🙂
I like the design of the little red bench a lot. If it was headed for a mudroom, I might be tempted to make the bottom support wider and be able to hold shoes.
But since I don’t have a mudroom, I’m trying to think of a good place in one of my children’s home.
I would probably eschew the screws and use biscuits. The last thing like this that I made, I forwent the battens to avoid cross-grain construction that might lead to splitting.
When I was growing up, the pews in our church, including the choir pews, had a rack on the back for hymnals. That way, the people in the pew behind could access to the hymnals on the back of the pew in front of them. You probably don’t want to put a rack like that on the back but maybe on the sides? It was a fairly simple structure with a rail for the hymnal to rest on and another above it, at an angle, holding the books in place.
Also, I recall my church pews looking a little more comfortable. The seat back was pitched back a little and the seat was contoured. Maybe that’s a protestant thing. Was “comfortable pews” included in Martin Luther’s call for church reform?
Could you please explain eschew, forwent, and purveyor? 🙂
I’d keep the applied moulding but fit it so that it’s flush with the inside faces of the back and sides.
I would sneak some storage into the design. A simple box about four to six inches deep just below the seat (seat would be the lid for the box)would make a nice little storage area. I’d explain it away as a place for hymnals. I suppose with a little thinking the storage area could be made into a quasi-torsion box to add some strength as well.
Tim