


We may receive a commission when you use our affiliate links. However, this does not impact our recommendations.
 The April 2013 cover project is a “City Sideboard” built by Mario Rodriguez of the Philadelphia Furniture Workshop. The sideboard, which is sized for smaller, contemporary spaces, is designed to introduce students to a traditional form of cabinetry but using modern materials. Thus, the build combines some typical approaches for a solid-wood project, such as web frames to house the drawers, with a plywood case. The goal, says Mario, is for students to learn how to make a well-built piece with some advanced construction techniques, but in a less intimidating size and with lighter-weight, stable materials. You could (as always) adjust the techniques to suit yourself (for example, attach the solid wood top to a plywood sub-top rather than to a web frame).
One of the “tricks” Mario teaches his students is how to square a case during assembly – a shop-made “scissors brace.” You can read about it below. The April 2013 issue is available at ShopWoodworking.com.
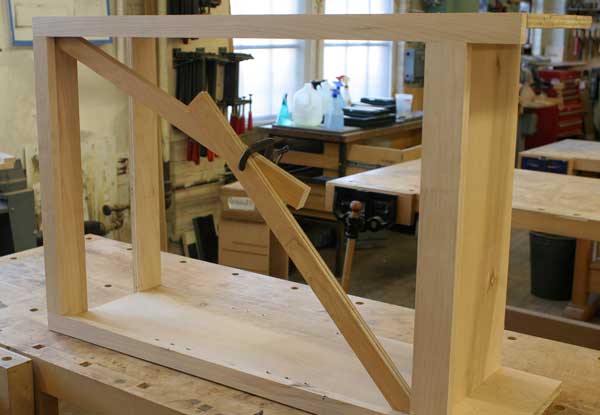
When gluing/assembling a cabinet, we all strive for perfectly square. But sometimes, because of excessive clamp pressure or maybe a misplaced clamp, the assembly needs a little help. The quickest way (back) to square is a “scissor brace.”
Step 1: after measuring the assembly diagonally, from corner-to-corner, identify the shorter of the two (measurements).
Step 2: from the scrap bin, collect two rips (of plywood) that are approximately 1-1/2″ wide. The length of each piece should be approximately half the diagonal measurement of your assembly, plus 8″.
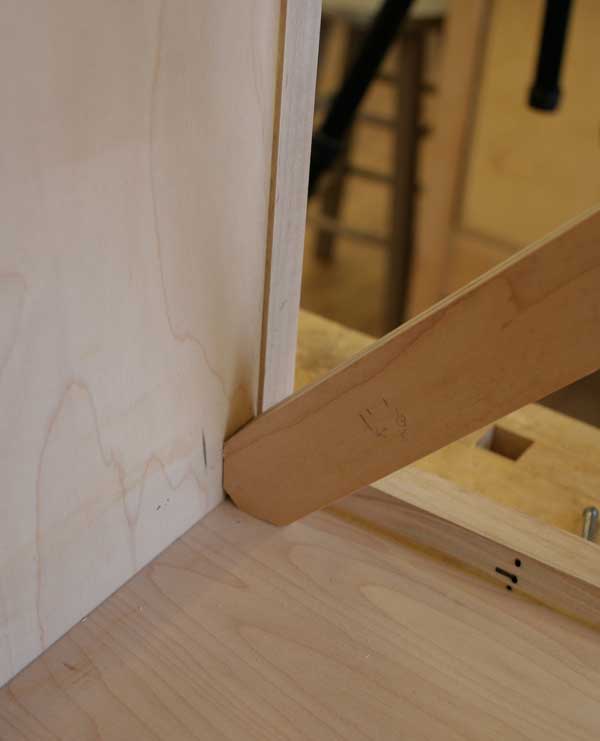
Cut flats on the ends for a solid fit to the case sides.
Step 3: Cut flats on the end of each piece so that they better “sit” into a corner. These cuts don’t have to be a perfect fit; close will do.
Step 4: Set the pointed end of each piece in opposite corners of the shorter corner-to-corner dimension. Overlapping the pieces in the middle and clamp them together.
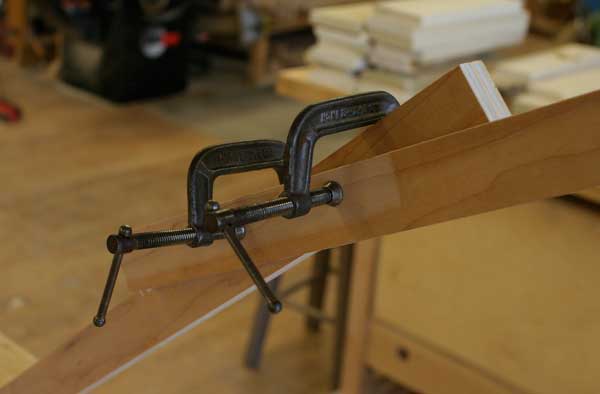
When the case is square, apply a second clamp to the brace to hold it in place while the assembly dries.
Step 5: Now push on the ends of each piece to spread the scissor brace apart until you have achieved square or equal corner-to-corner dimensions. Apply a second clamp to fix the brace’s position. That’s it!
— Mario Rodriguez
Philadelphia Furniture Workshop
Here are some supplies and tools we find essential in our everyday work around the shop. We may receive a commission from sales referred by our links; however, we have carefully selected these products for their usefulness and quality.


What kind of glue are we using while fiddling around with the scissors brace?
Is there any problem with the scissor brace separating the pieces of wood that form the corners?
very similar to what I do to put a little pressure where it is needed. Instead of using two clamps, I drive a screw through both pieces as a pivot point rather than try and fight two clamps at the same time. Then when I get the diagonal where I want it, I lock the brace in place with a clamp.
Used resourcefully that same brace becomes that third hand you so often wish for on dry fits, assemblies, and just when you are trying to figure out what size will this need to be to……
Seeing it here it is another thing some take for granted, but darned if I have ever seen it offered up as a woodworking tip. Carpenters use them all the time, theirs are just crossed outside of the walls into a stake pounded in the ground, where this is crossed and clamped inside.
That’s a nice trick. Thanks Mario!