We may receive a commission when you use our affiliate links. However, this does not impact our recommendations.
A small project such as this pen box is a great way to hone your skills and focus on precision work.
Project #2406 • Skill Level: Intermediate • Time: 3 Days • Cost: $35
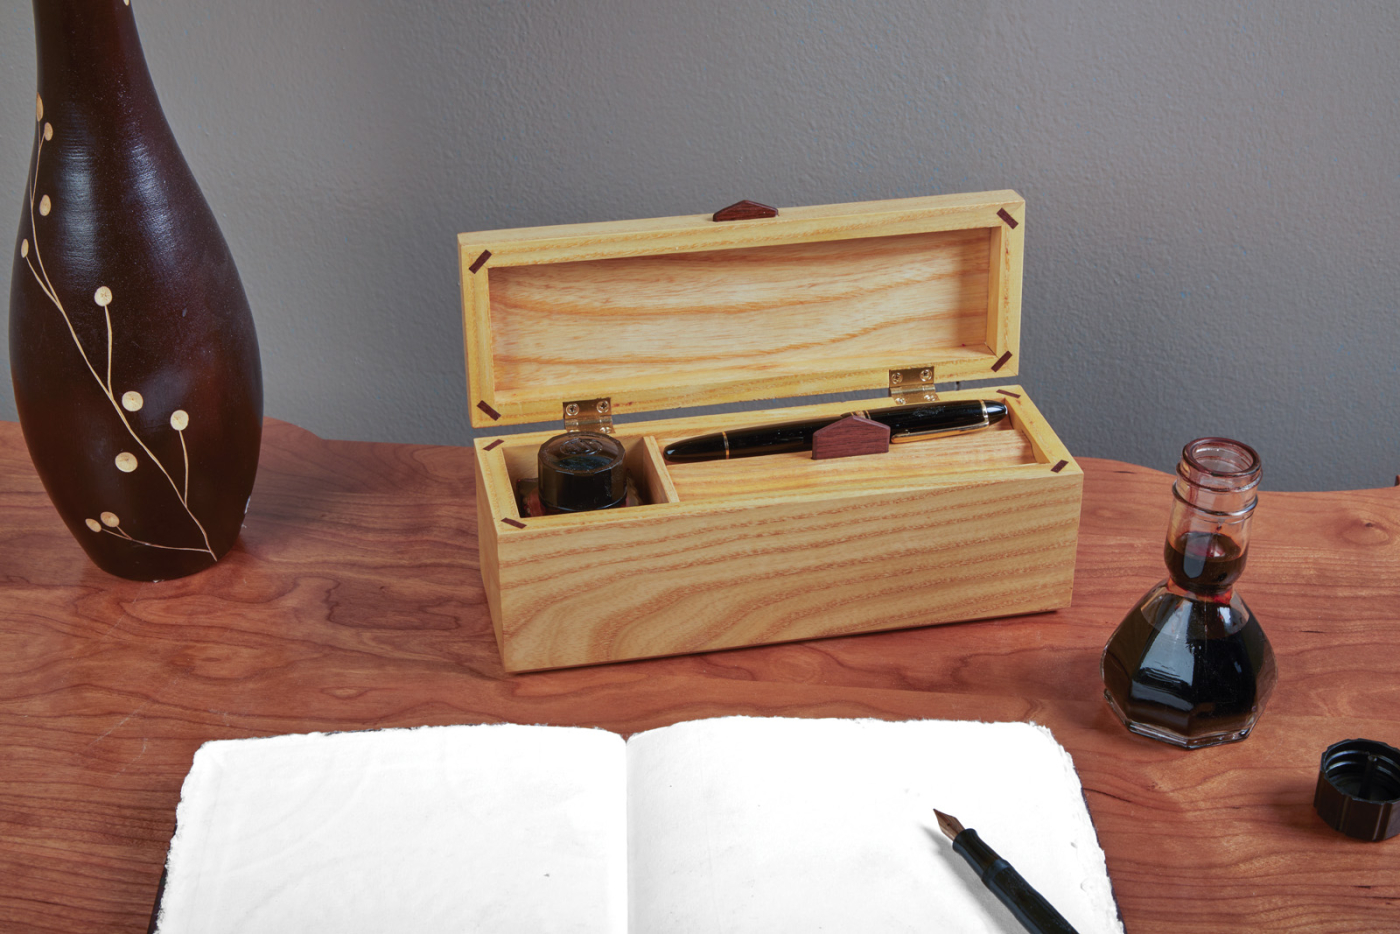
I was asked by a friend to design a box to hold a bottle of ink and two fountain pens. These days while inkjets and lasers spew out dozens of pages per minute and keyboards are so heavily relied upon to express thought, it may seem unusual that someone might savor the smooth flow of letters from mind, to hand and thence to page, but there are those (thankfully) in the world of a more sensitive type.
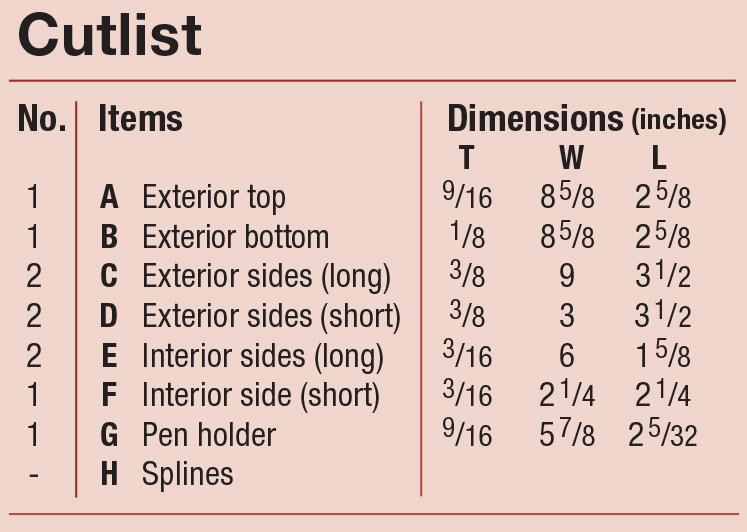
Cutlist and Diagrams
Designing the Box
The first part of designing this box was to settle on the design of the ink bottle. They come in odd shapes and sizes, so there’s no way a box like this can be made to fit all. But a carefully chosen bottle can be refilled with the ink of choice. I chose a nice square glass bottle of ink and designed the box around it, knowing that a good bottle can be refilled with fresh ink for generations to come.
The other thing of importance in making this box, is that it needed to be designed to be lovely enough to reside on a lawyer’s desk, keeping his instruments of writing at hand.
I chose to make the box from ash and to use walnut accents both as the lift tab at the front and in the hidden splines that strengthen the mitered corners of the box. You can use other woods and other corner joints if you prefer.
Lastly, why make one box when you can just as easily make two? The answer for me is clear. So, I made an extra one at the same time knowing that there are other lovers of fine writing left in the world that would like a box.
Getting Started
Start by resawing 4/4 stock right down the middle. The selected stock should be 25“ long and about 3-3/4“ wide to start out. Then plane the wood to a thickness of 3/8“. While you can make the sides thicker and thinner than that, the 3/8“ thickness works well with my choosing of Brusso hinges for the finished box, and to allow sufficient space for the ink bottle and pens to fit within.
For the Sides
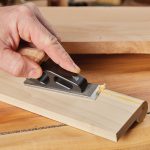
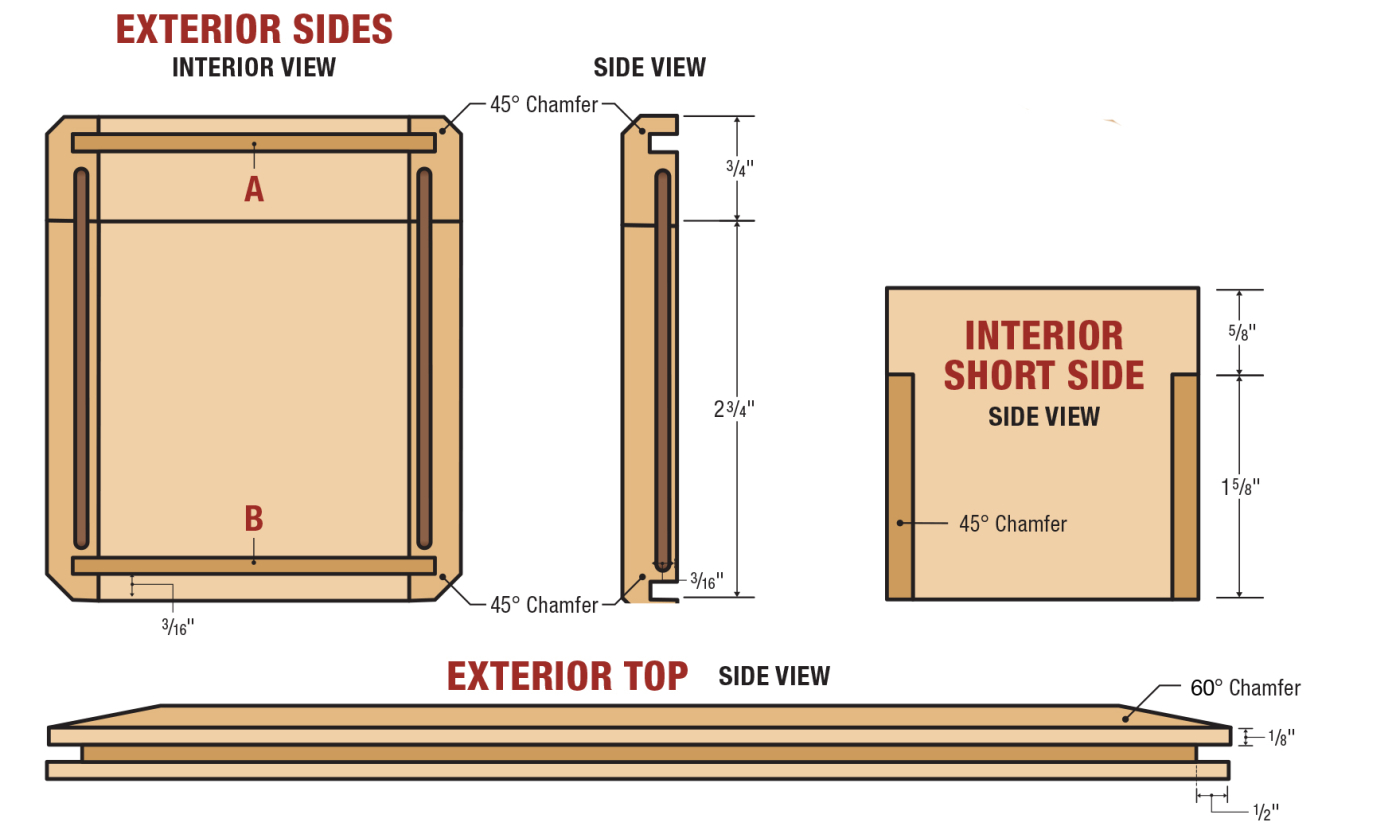
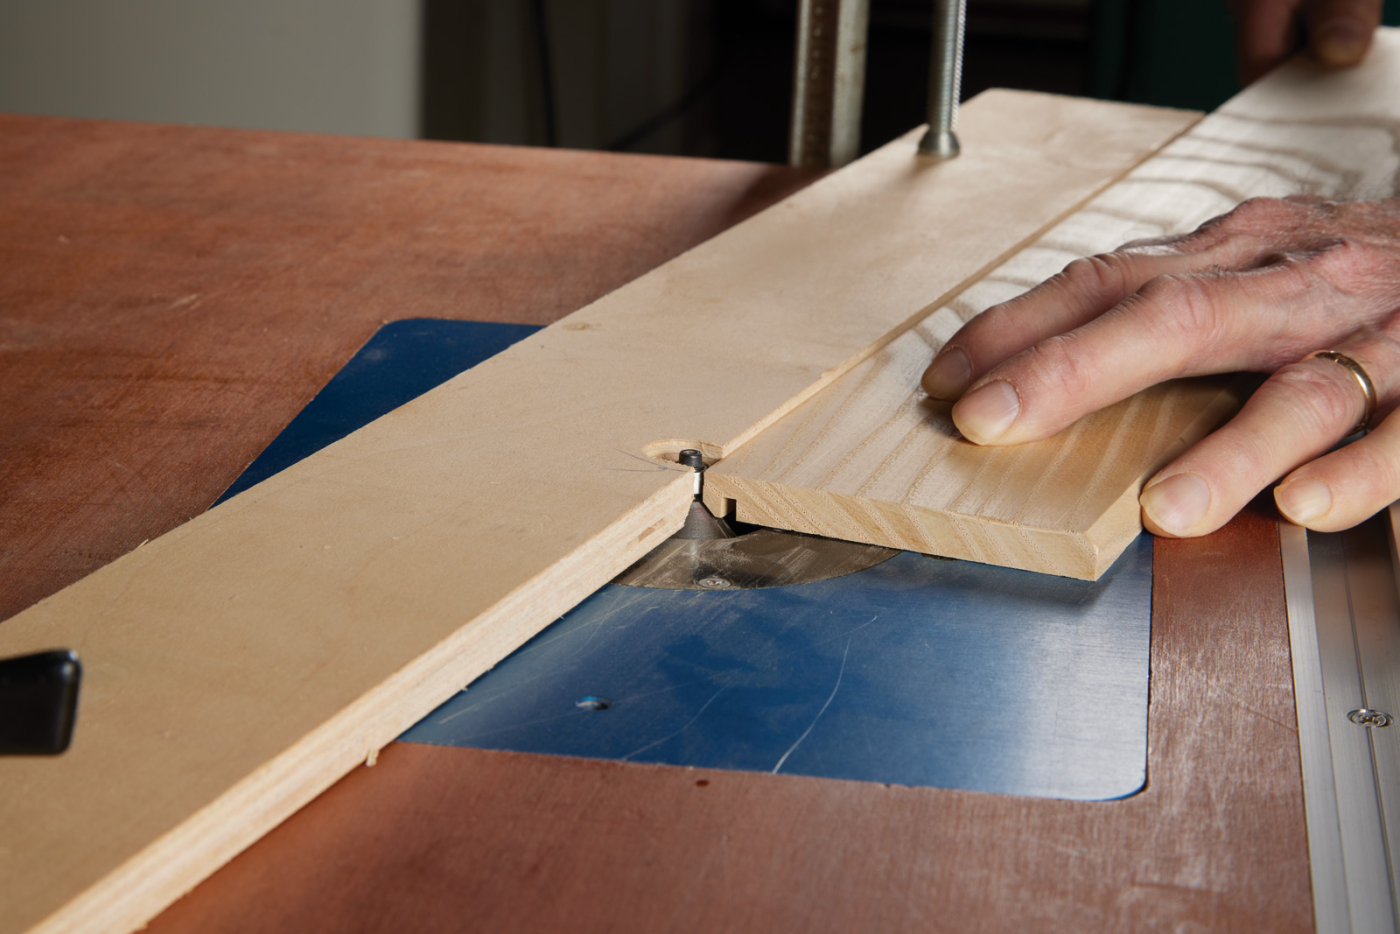
Joint one edge of the stock and then rip it to a uniform width. Then cut the groove for a bottle panel to fit. I use a Forrest WW2 blade with a square top cut to make sure the bottom panel is easy to fit. Cut the groove 3/16“ from the bottom edge of the box and 3/16“ deep.
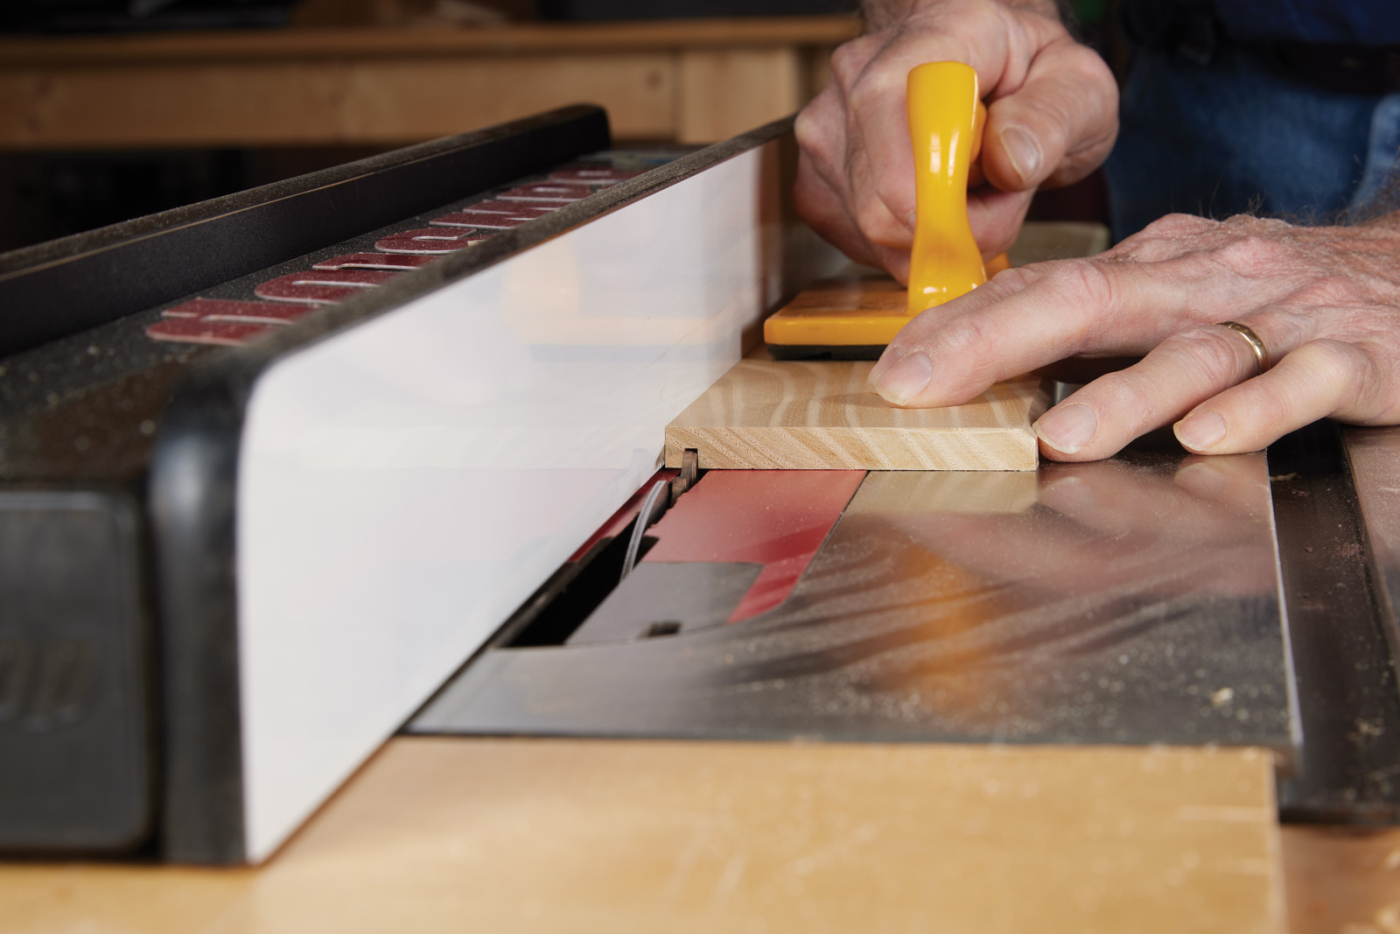
1 With a square-ground blade, cut a groove in a long piece of stock.
Next use the router table and 45° chamfering bit to chamfer the top outside edge and bottom inside edge of the stock. These operations done on the stock for the box sides will help in recognizing where the sides will fit to each other with matching grain at each corner but one.
2 Chamfer one edge of the grooved stock.
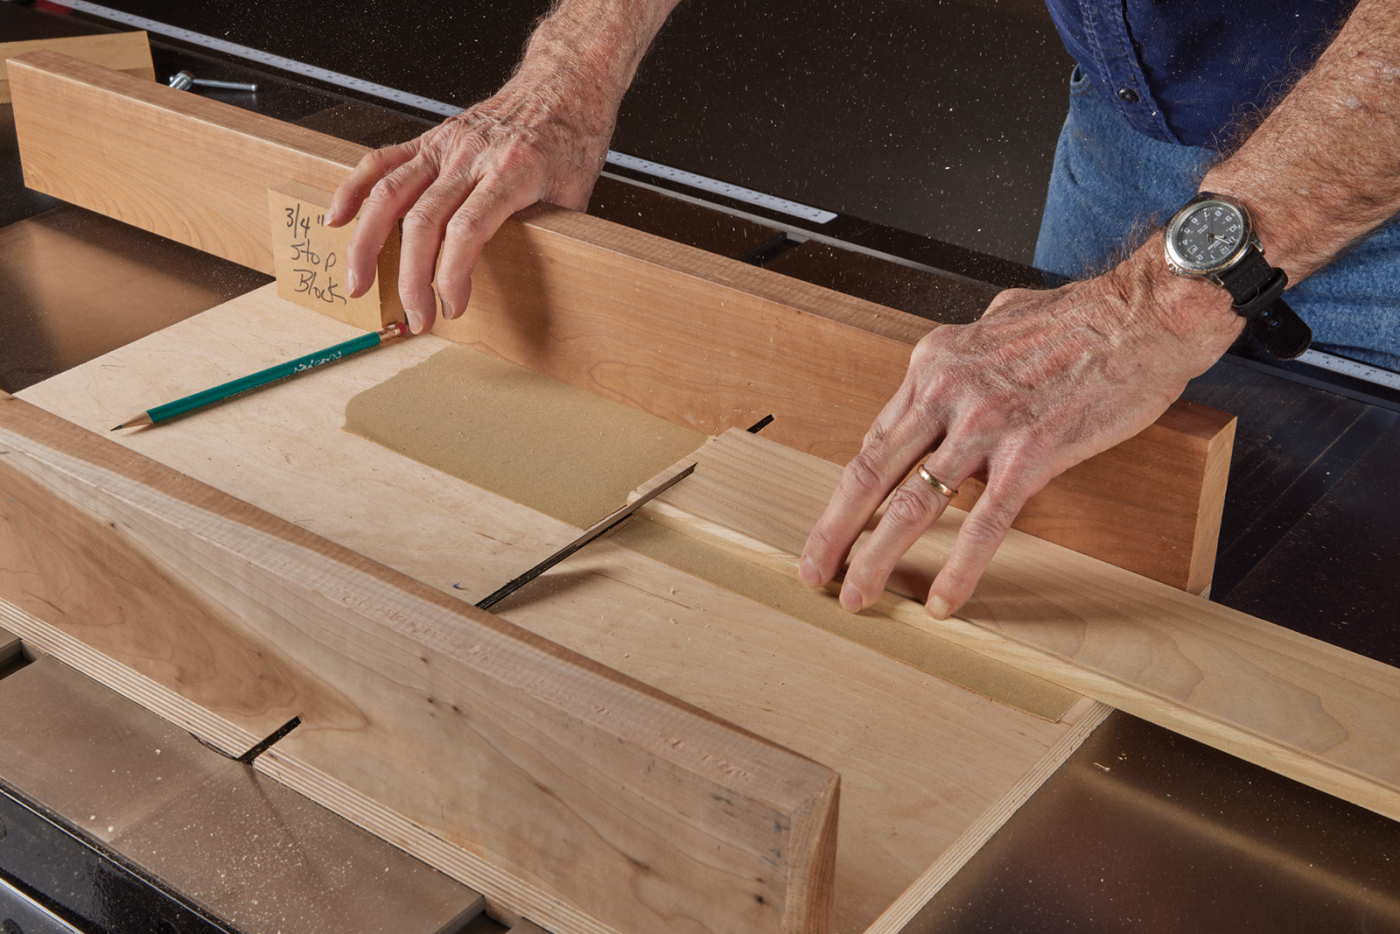
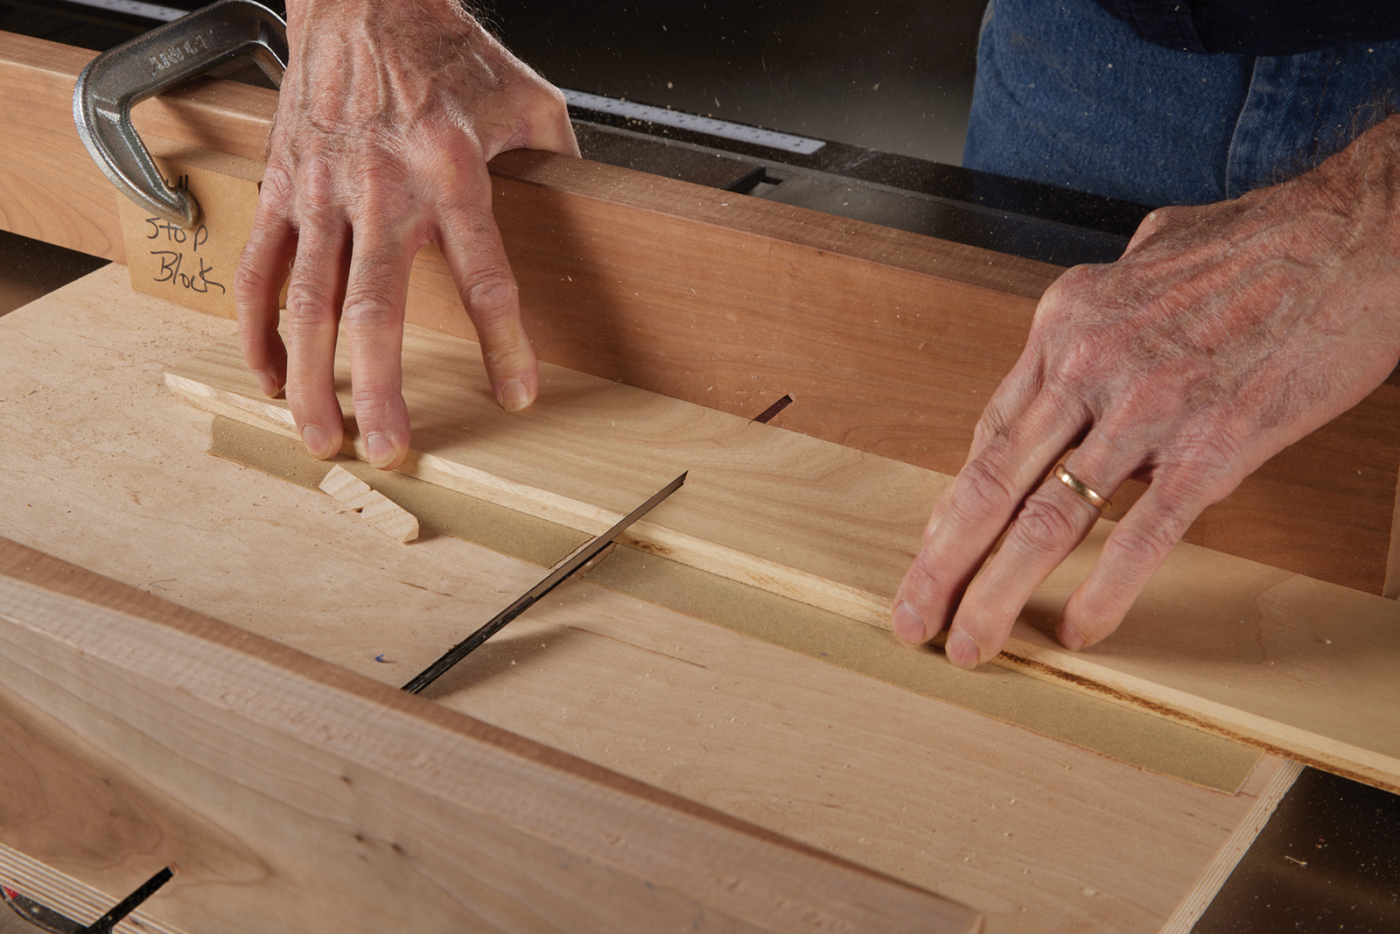
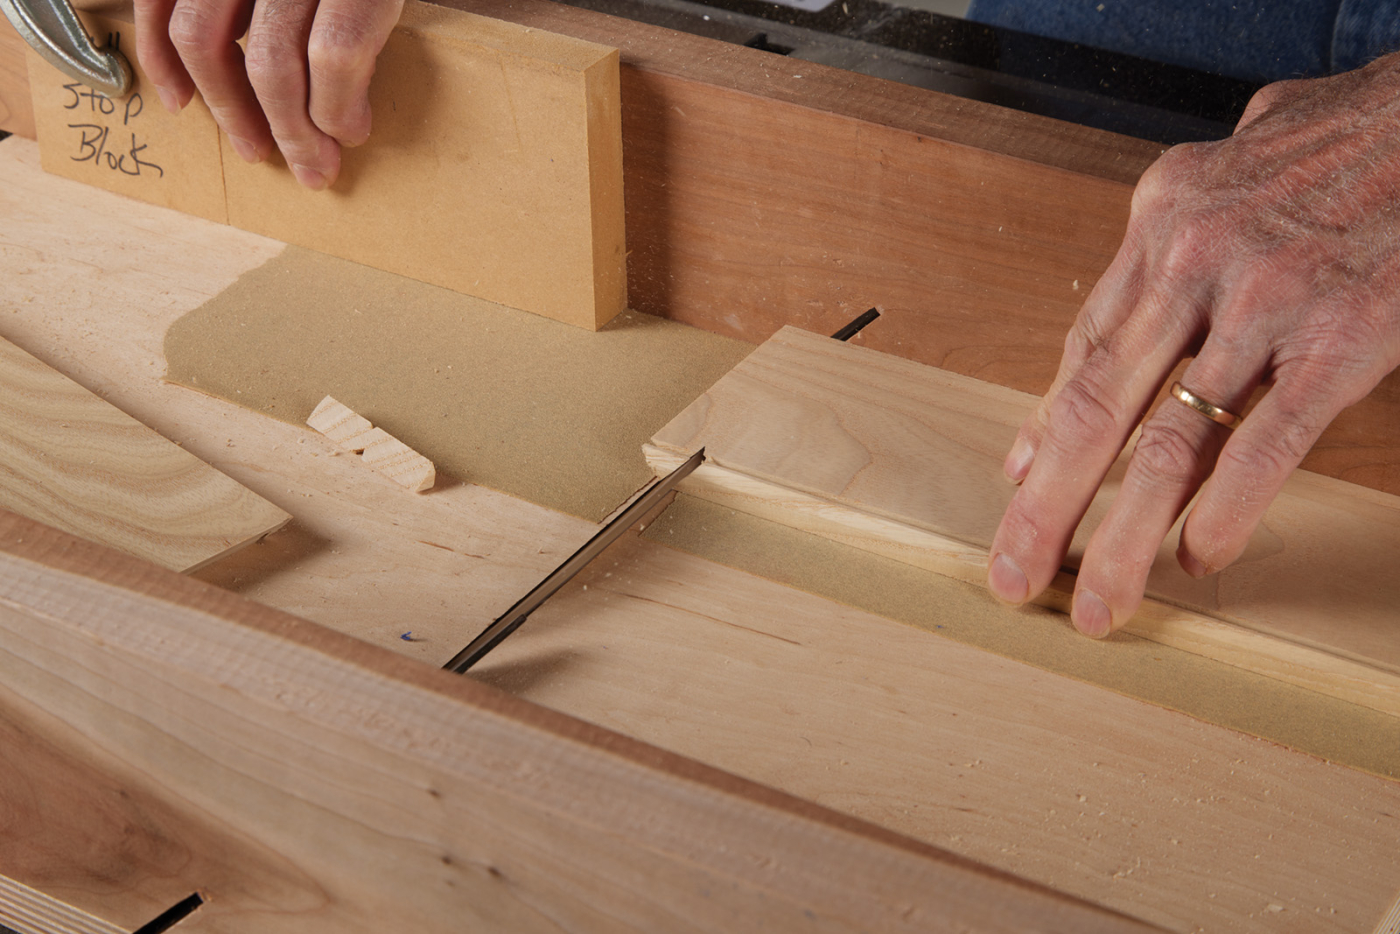
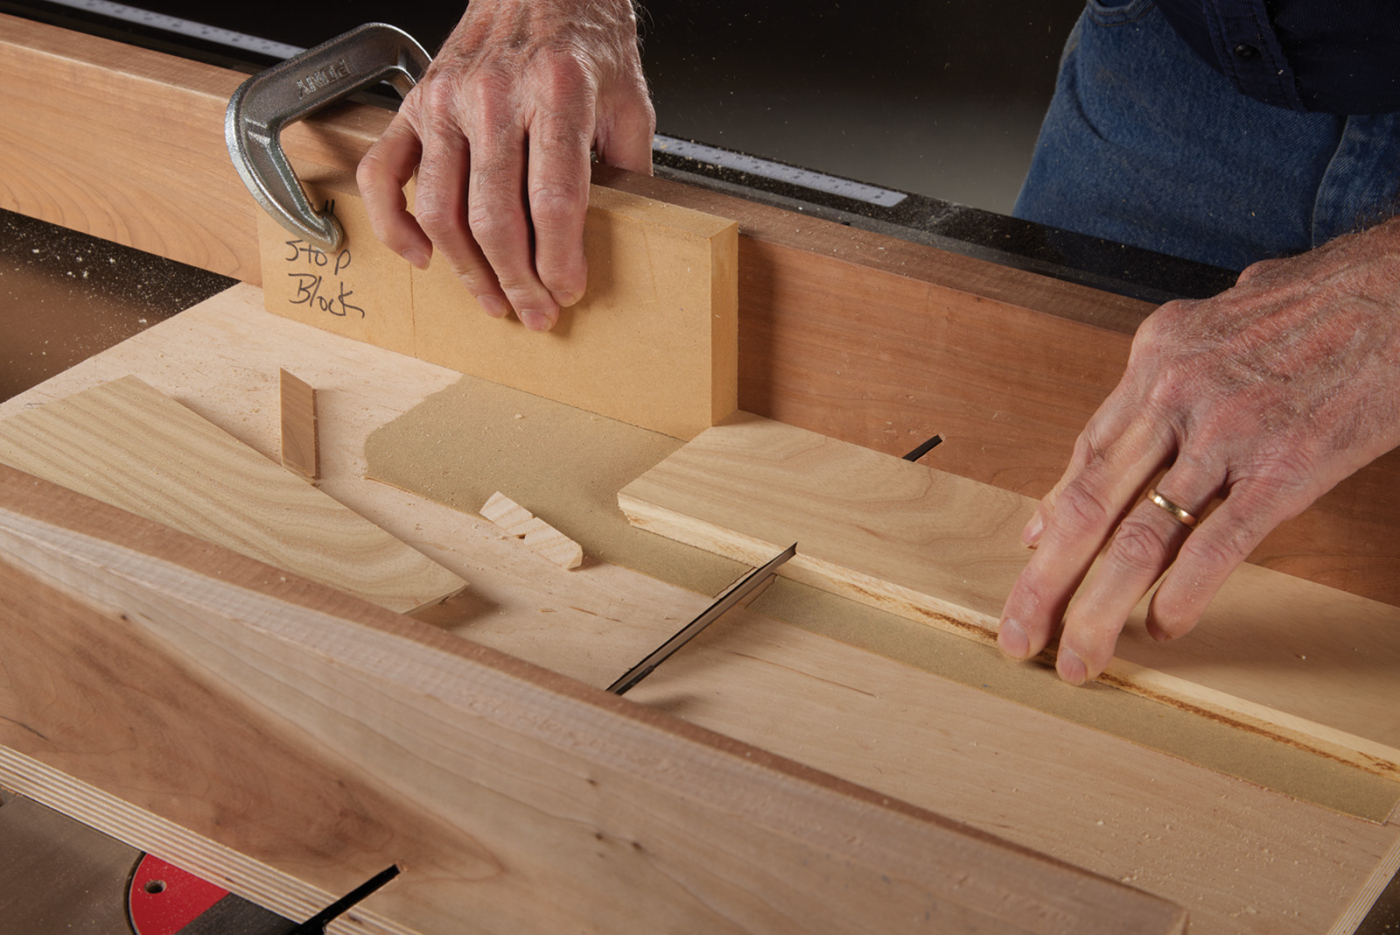
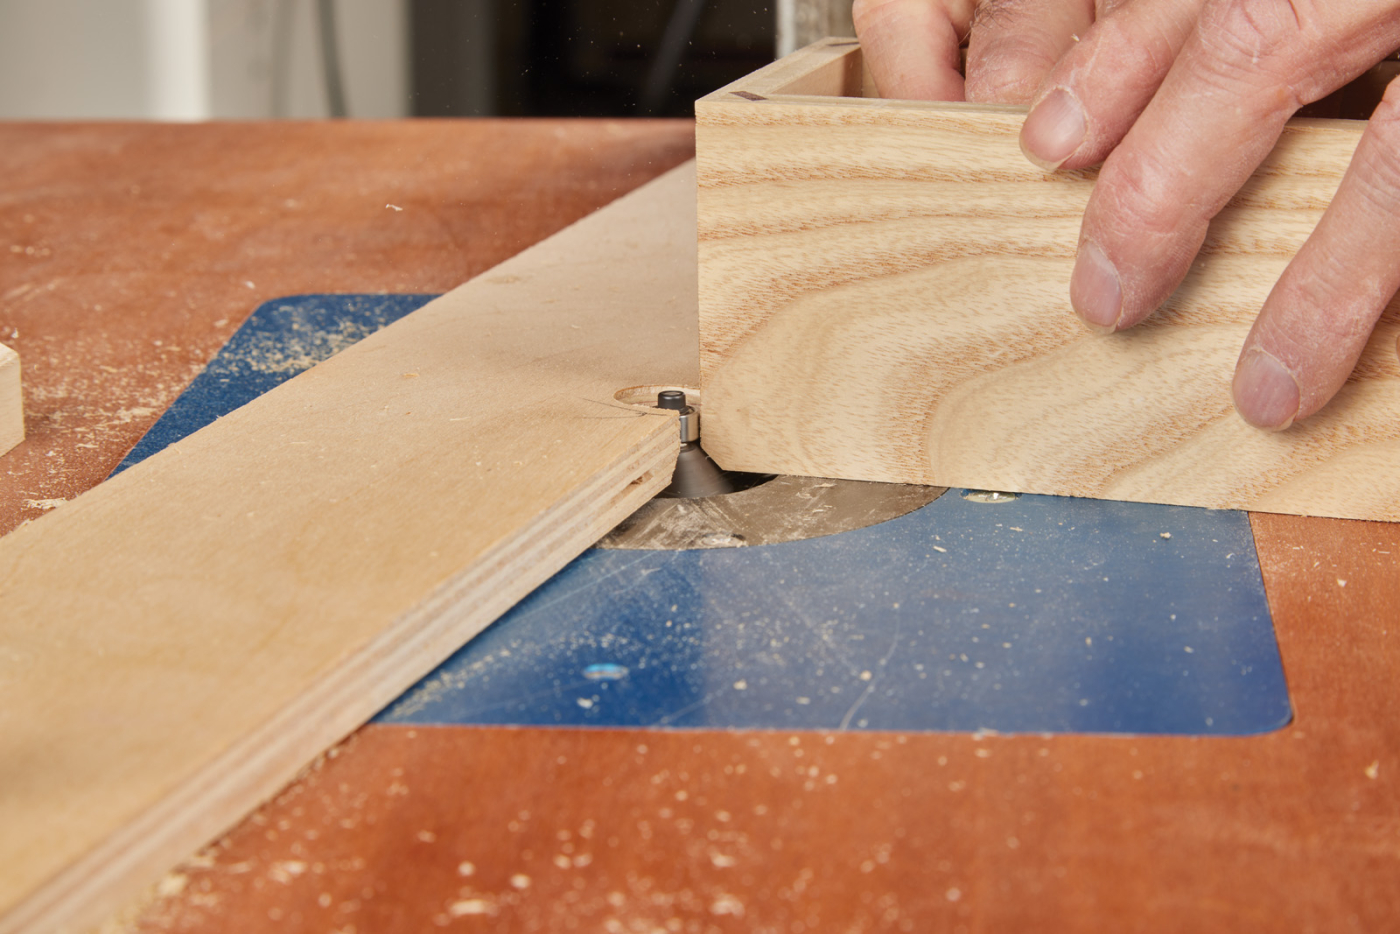
I use a miter sled and stop block with a spacer to alternate between long and short cuts, forming the front and back of the box and the matching ends. Careful grain matching is essential in a quality box. For this box, alternating between cuts requires a spacer block 6“ long. The sequence is simple. Confusing at first perhaps, but there’s a rhythm to it that makes sense after making a few boxes. Making a trimming cut at one end of the stock forms the first miter, making sure that the outside face is down on the sled. Then mark the length of the stock for a long side and use that mark to position the stop block. The second cut bringing the long side to length and forming a miter at its other end is made with the stock outside face up. To form the short side with the grain matching, make a trimming cut with the stock outside face down. Then flip the stock and with the spacer in place, cut the miter on the opposite end. By going long, short, long, short in sequence by removing or replacing the spacer block between cuts, grain matched box sides are formed.
3 Miter one end of the workpiece first.
4 Use a stop block to position the next cut, and cut a front/back of the box.
5 Flip the piece over to cut the miter the opposite direction.
6 Reposition the stop block to cut the ends of the box.
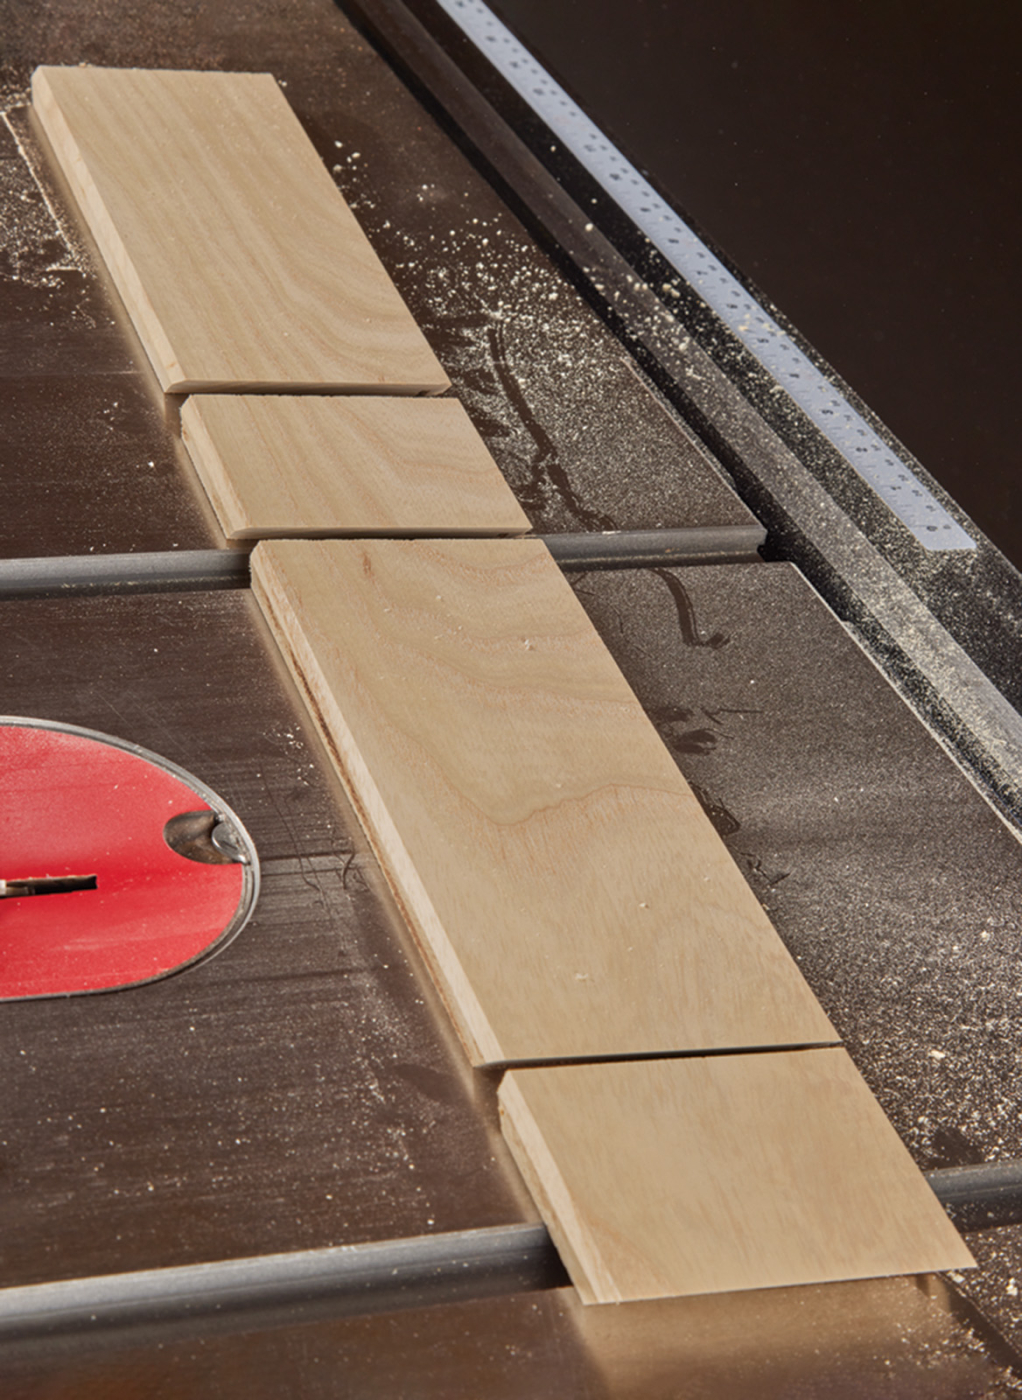
7 All of the box parts laid out with continuous grain.
Top & Bottom
With the box sides taped together you can measure for the top panel to fit. Planning to install a floating panel top, I measure the opening and add 3/8“ to allow for a tongue to be formed fitting into a groove to be cut into the box sides.
8-9 Rip stock for the top and bottom of the box.
Cut the top panel and bottom plywood to size and set up to cut the grooves in the panel and box sides for the panel to fit.
10-11 With a rip blade set low, cut a groove around the perimeter of the top of the box.
Final Grooves & Chamfers
You may ask why I didn’t cut the grooves in the box sides earlier when I cut the groove for the bottom to fit. It’s because to get a perfect fit cutting the grooves at the edges of the top panel, cutting the grooves at the same time in the sides makes sense as the table saw setting will be the same. With the blade with a flat top grind in the table saw, adjust the height of the cut to 3/16“ and the distance between the blade and fence to 1/8“. I do a test cut on scrap wood to see that I’ve set up for a perfect fit. Not too tight so that the box will be a challenge to assemble, and not too sloppy loose where the top panel will rattle or slide around in the finished box.
12 Now, groove the box for the top.
Cut the groove in the sides and then the grooves in the top panel. This can also be done safely using a slotting cutter on the router table. Lastly, use the table saw to chamfer the top panel. Chamfer the ends first then the sides.
13 Bevel the lid of the box.
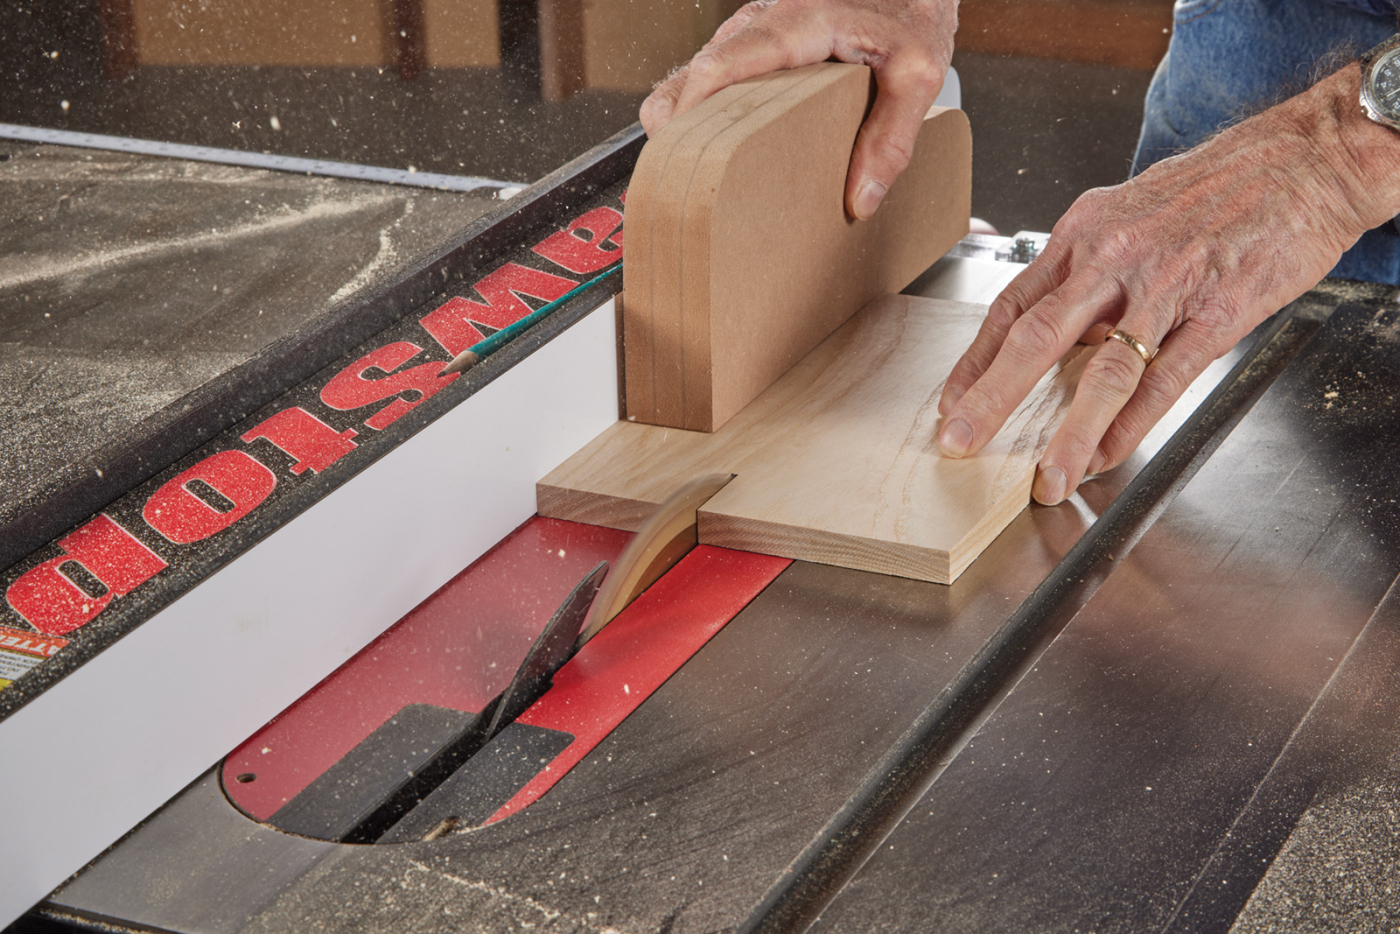
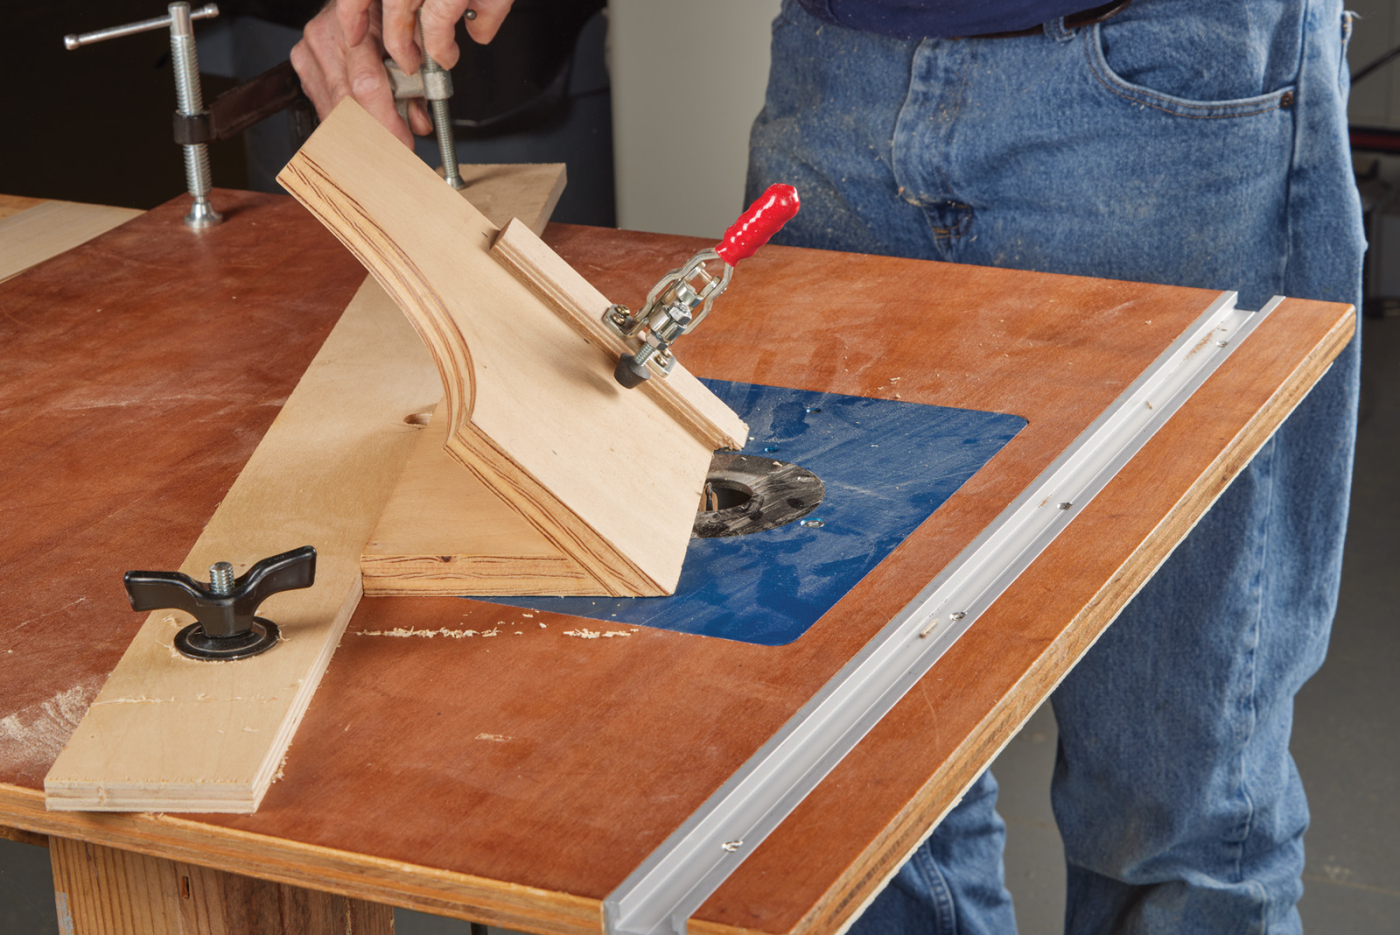
Rout for Hidden Splines
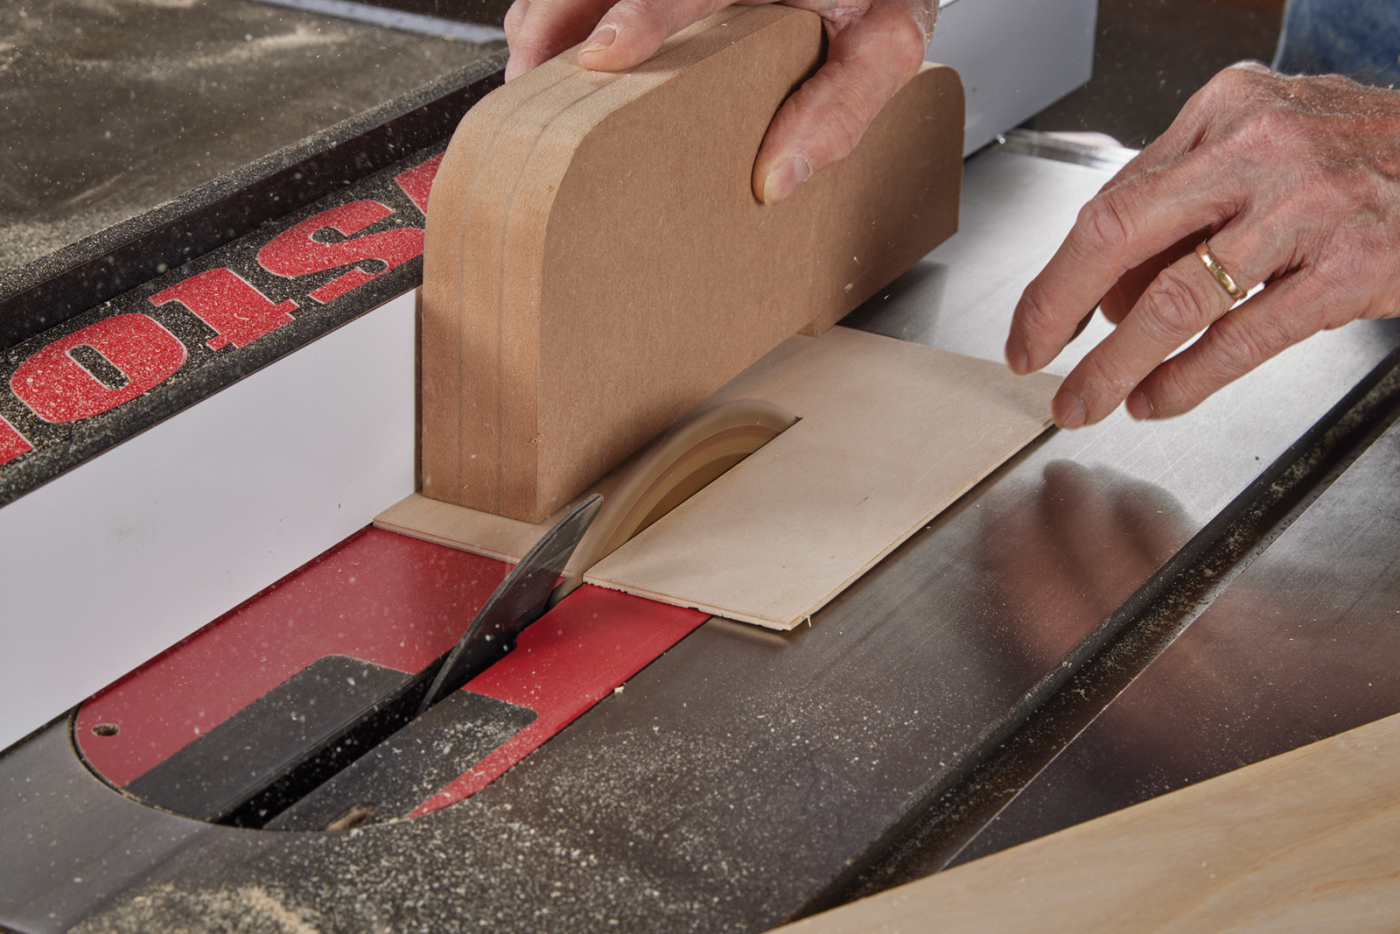
With the sides cut to length it’s time to rout for the hidden splines to fit. I use a shop made jig that holds the workpiece at 45° as it passes over a 1/8“ straight cut bit in the router table and between stops. By mounting the work piece in the jig inside out you can observe and measure to set up the router table stops. A low fence and low stop block work best for this operation as they are less likely to interfere with the use of the jig.
14 A miter sled holds the mitered parts of the box with the mitered face down.
15 Carefully measure the bit location as to not rout through the ends of the parts.
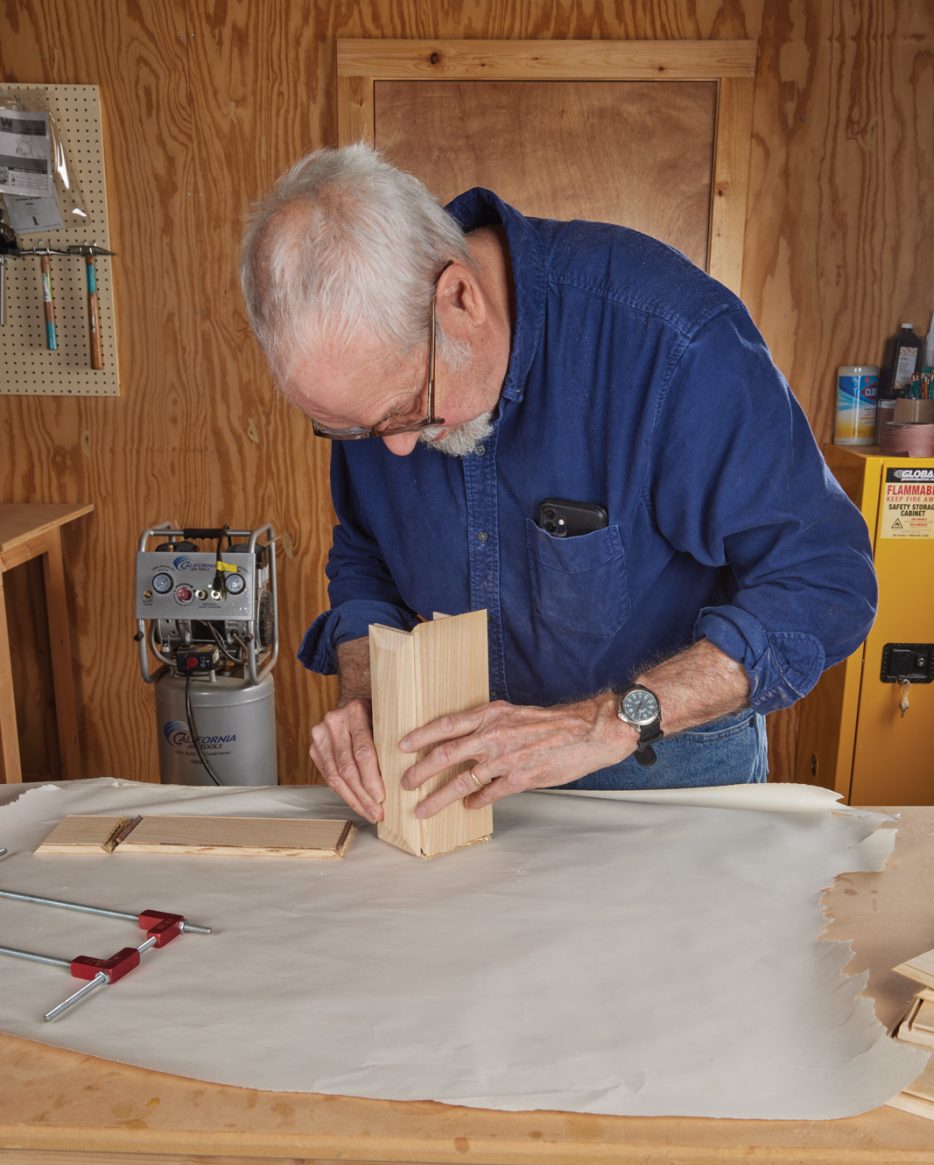
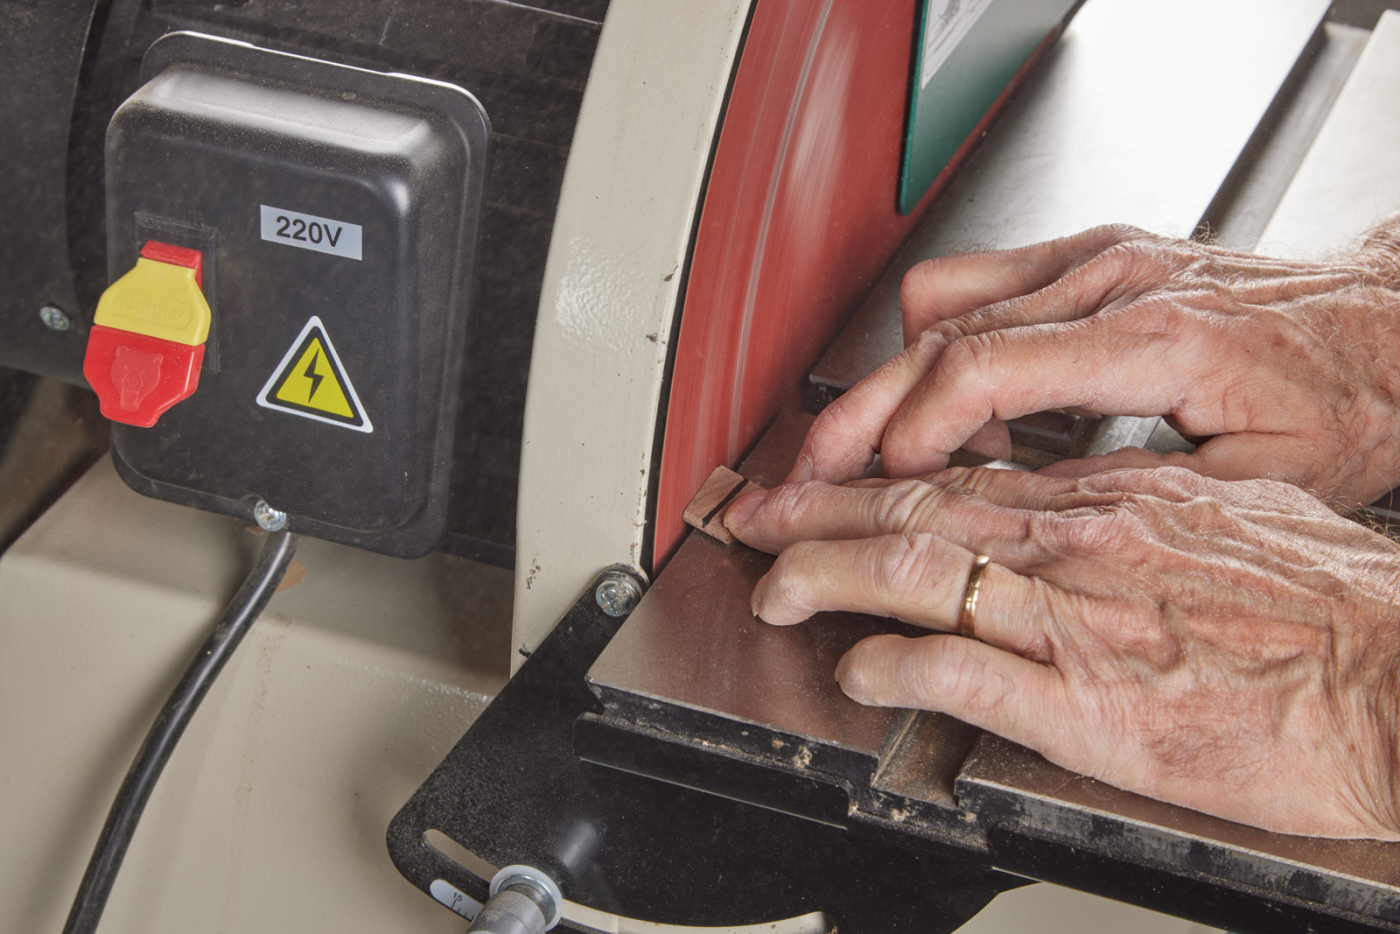
I use walnut as a contrasting wood so that the hidden spline will be visible when and only when the box is open. A sign that a craftsman’s attention has been applied, but one that’s not immediately visible on the outside of the box. To make the spline stock I saw and plane a piece of contrasting wood to a thickness to match the grooves routed at the ends of the mitered parts. Getting the spline stock to the right thickness and then the splines to the right lengths requires special attention. I use a crosscut sled and stop block to cut the splines to length.
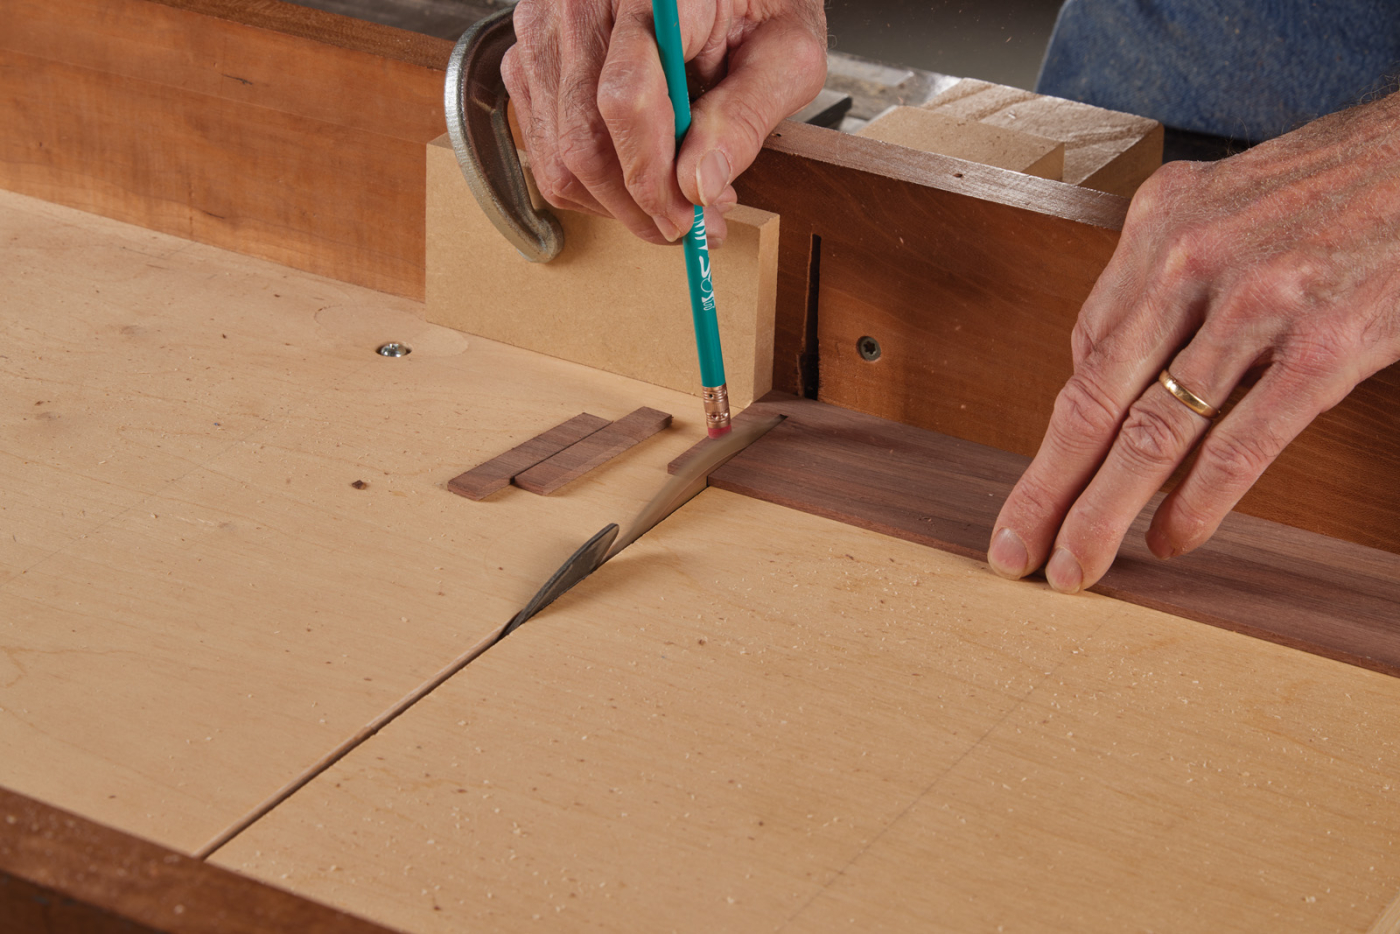
16 Cut spline material out of a contrasting wood.

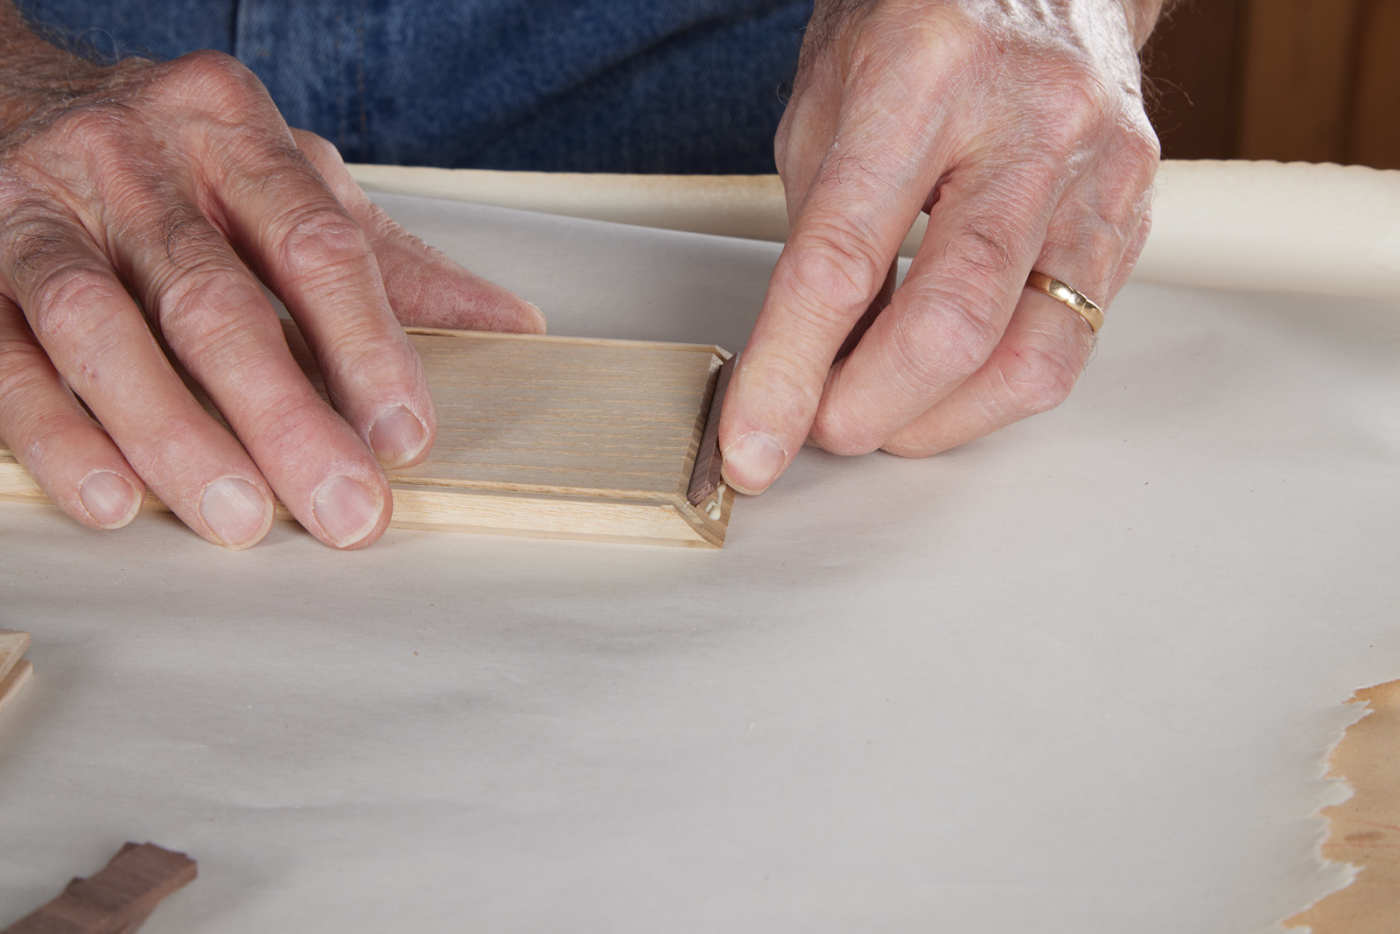
17-18 Glue the splines in place.
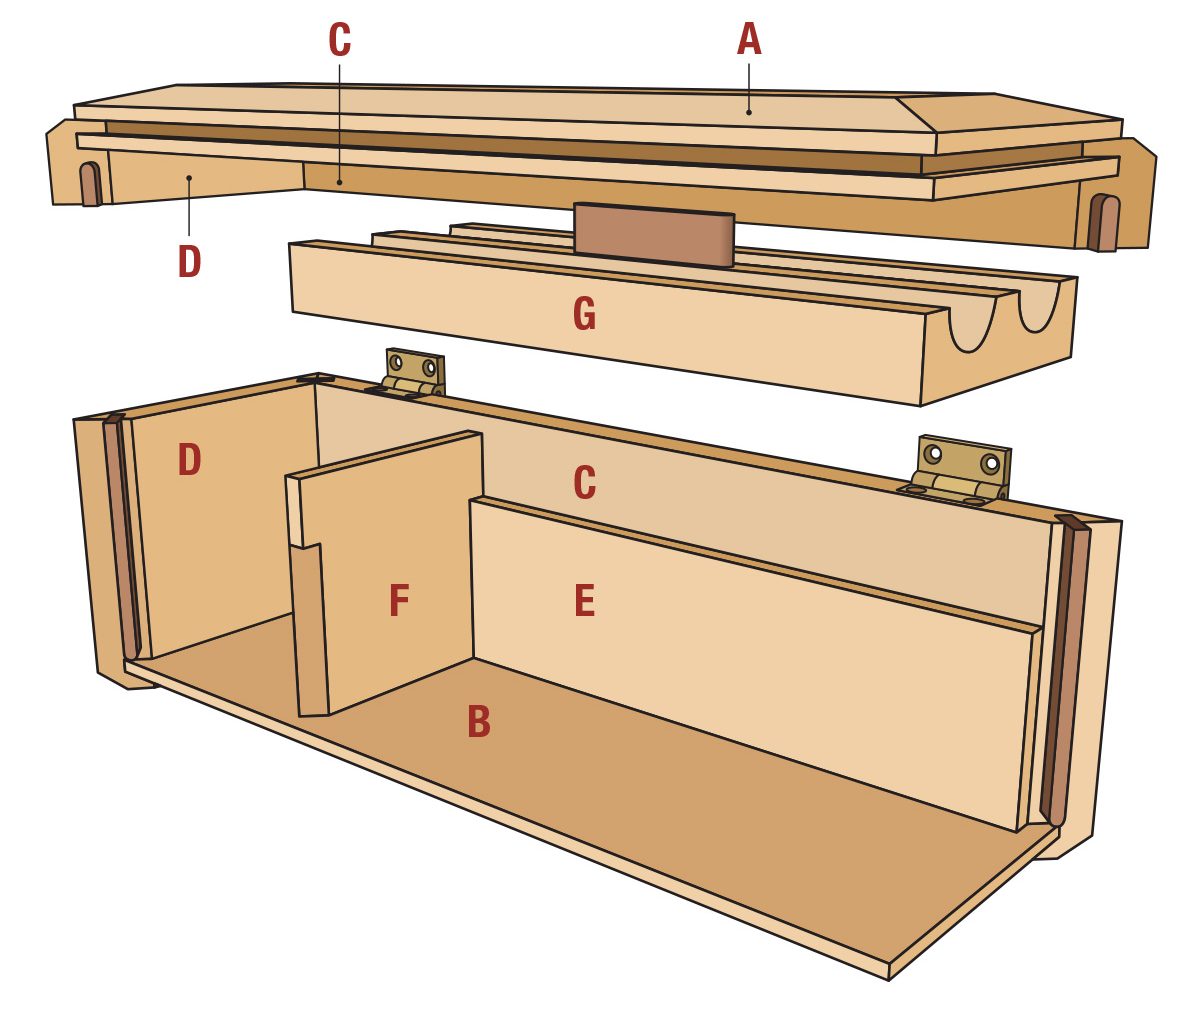
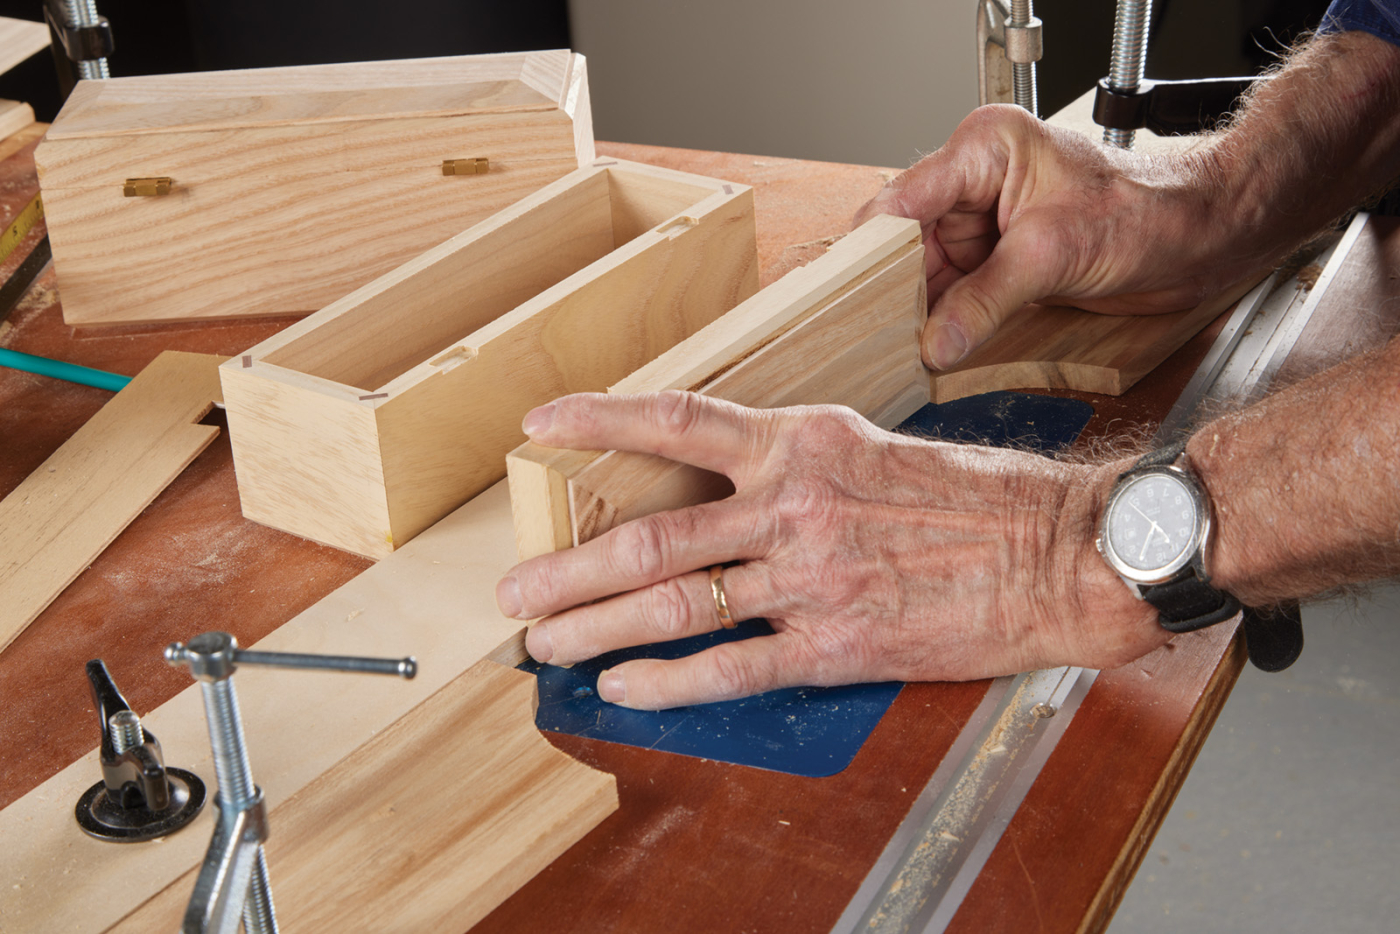
Assemble the Box
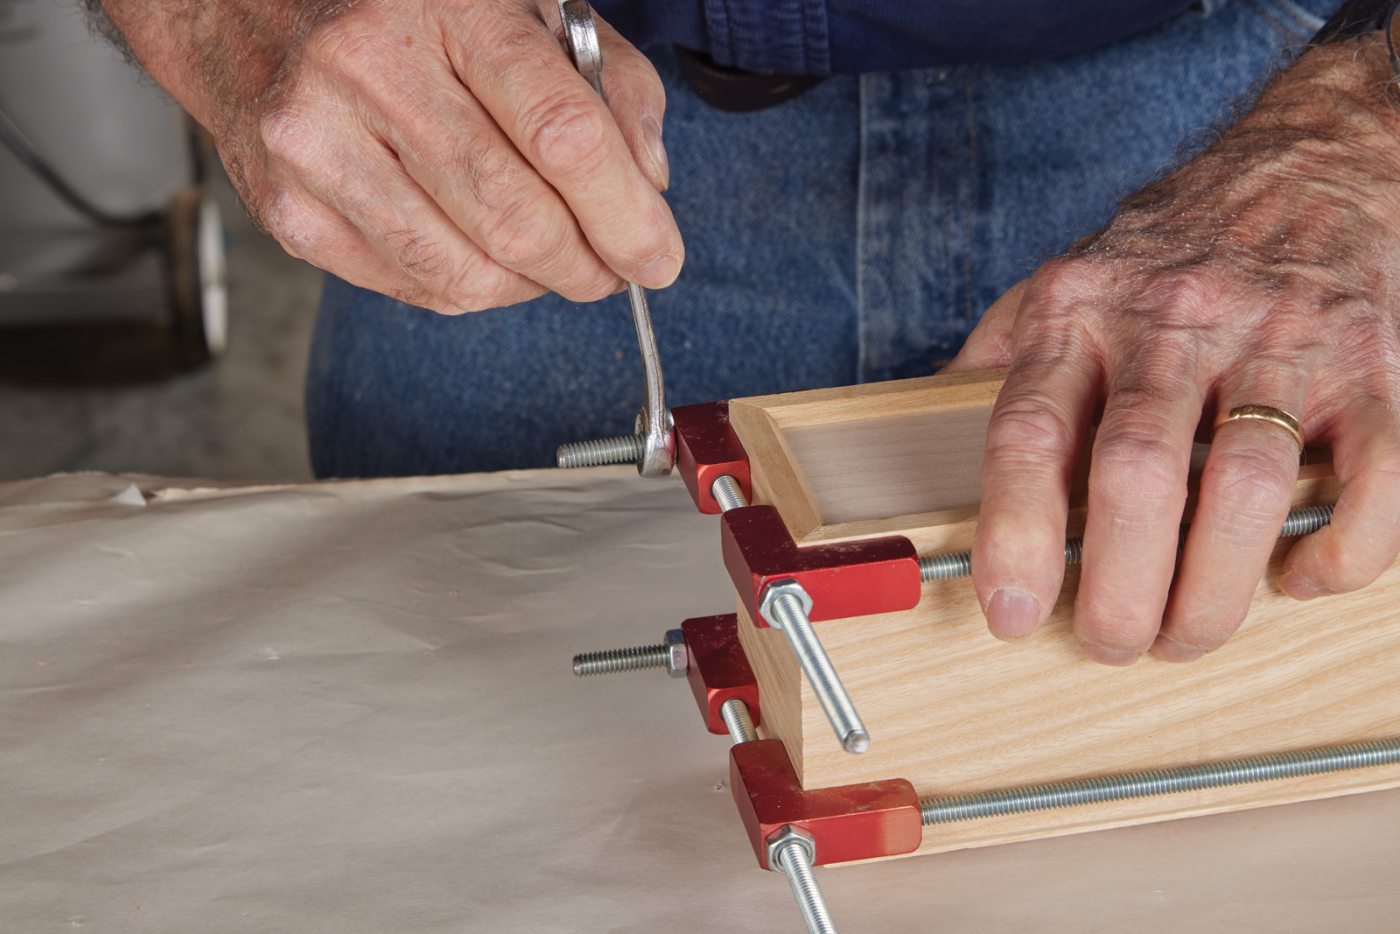
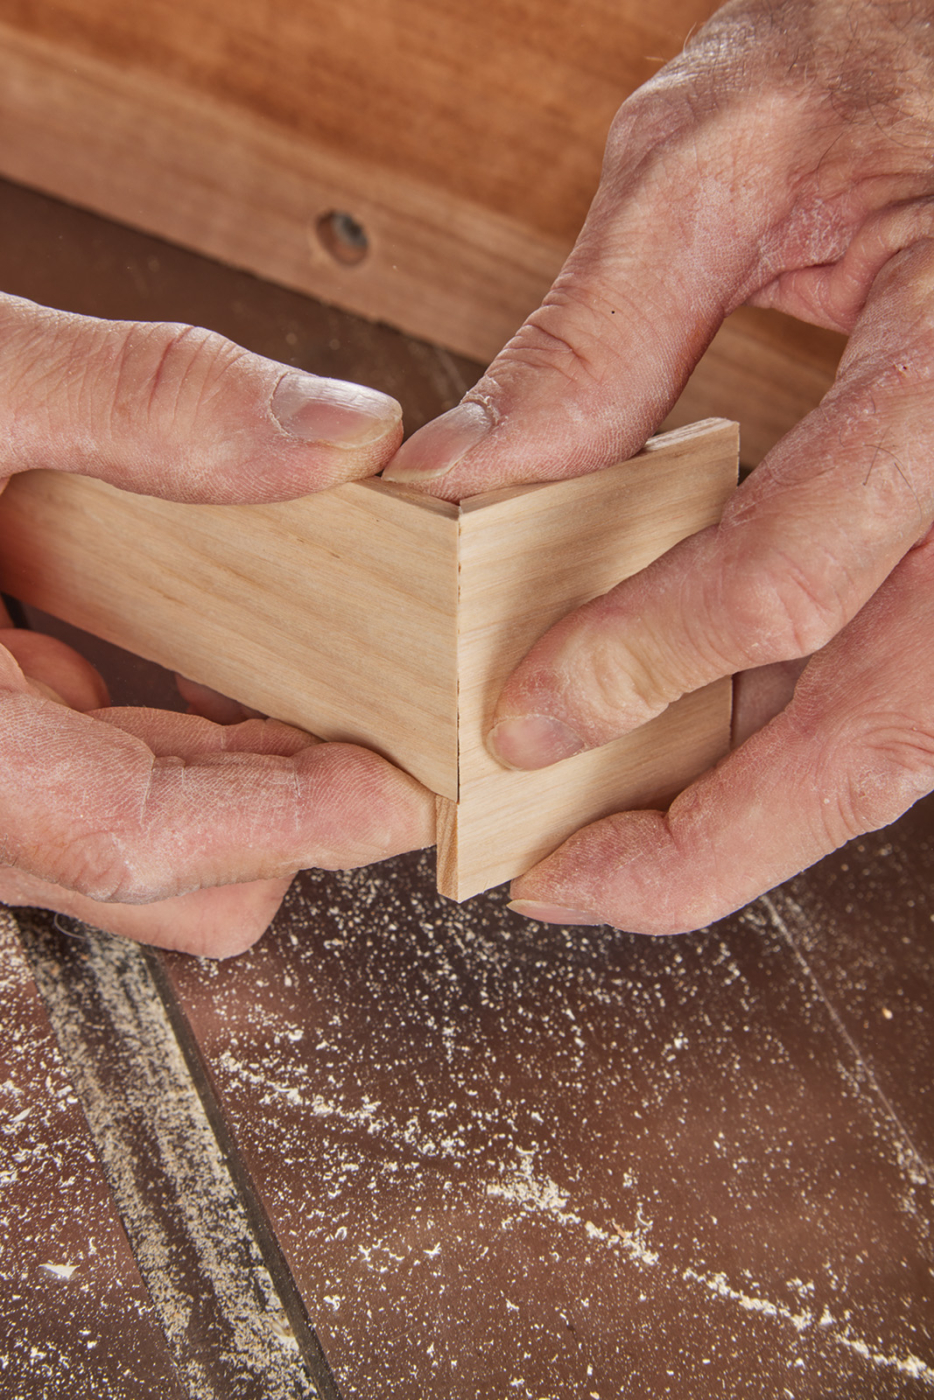
The hidden spline joint is one of the few mitered joints for the box making that require the use of clamps. Normally rubber bands or tape is sufficient to pull the joints tight. But with the hidden splines between the joints and the box being pulled in from four directions at once, frame clamps are ideal for this box. Work the four sides into position and use the clamps to pull the corners tight. With this joint I always do a trial assembly first to make certain that the splines are cut to the right length.
19 Fit the lid in place as you assemble the outside parts of the box.
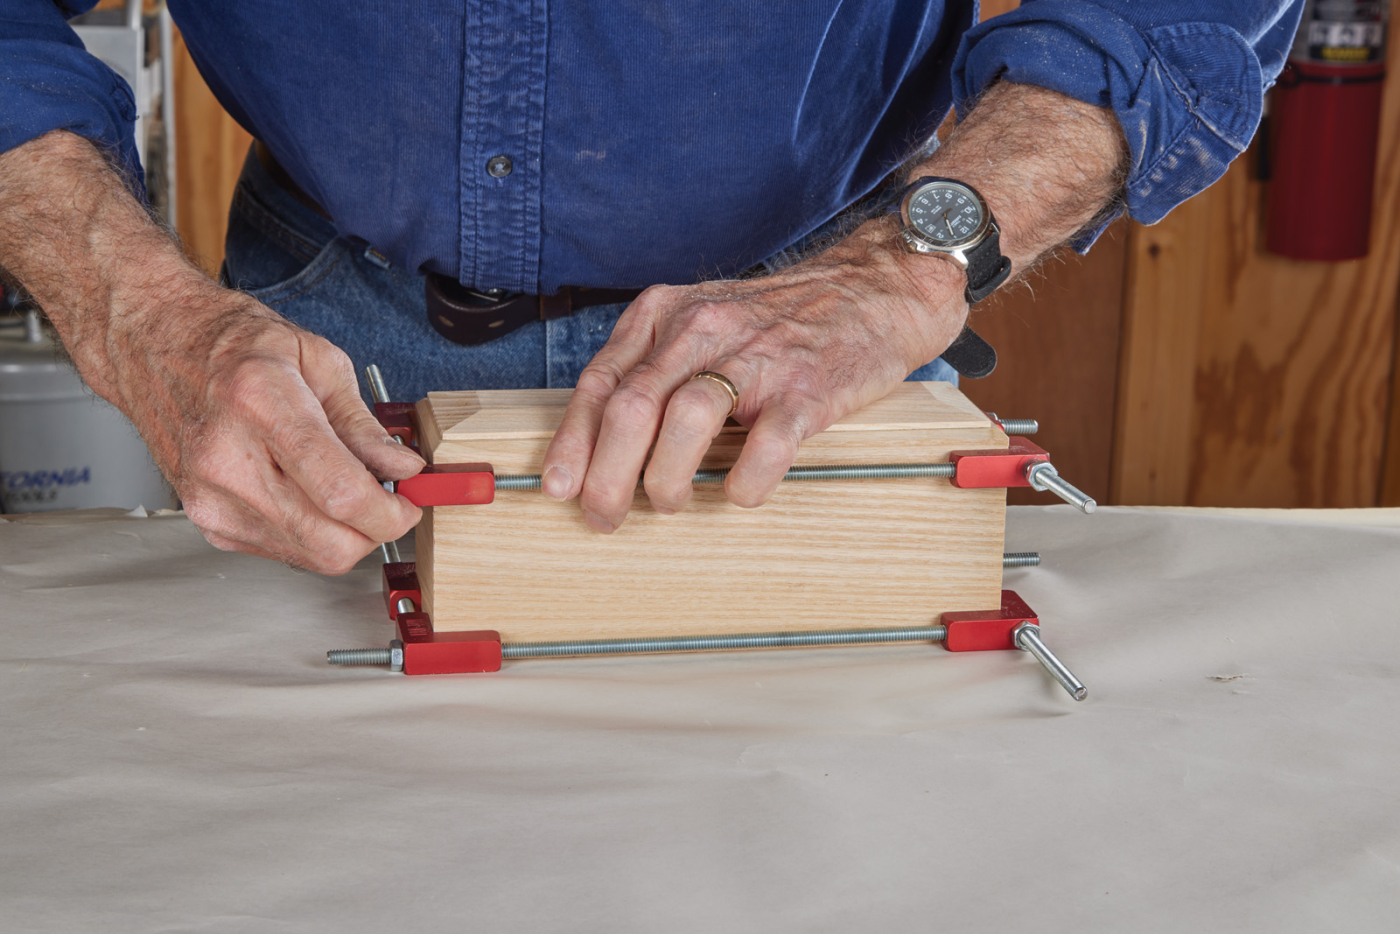
20-21 Specialty box clamps hold everything tight and square as the glue cures.
Add the Hinge
Once dry, cut the lid from the body of the box and sand the surfaces smooth on a sanding table. Rout a 45° chamfer to the bottom edges of the box to give it a unique look.
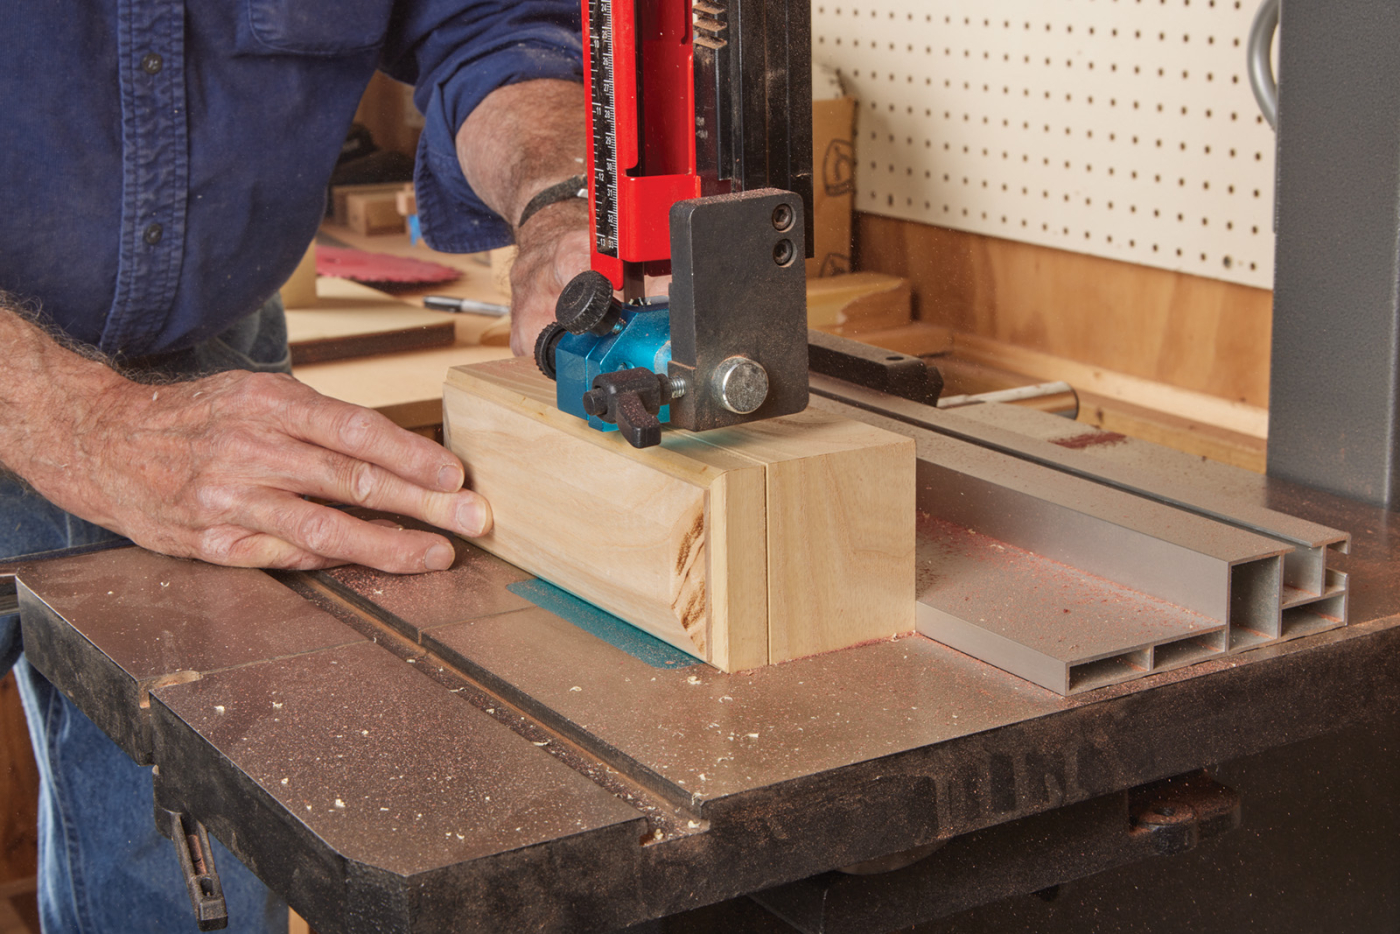
22 Cut the lid free from the box.
23 Add a chamfer around the bottom edge of the box.
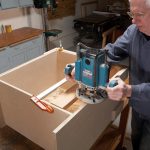
Next, cut the hinge mortises in the top and body of the box using the router table and stops. I make a story stick the same length as the box, cut a recess in it to the exact fit of the Brusso hinge chosen for this box. With a 1/8“ upcut router bit in the router table, adjust the bit height to half the thickness of the hinge. Set the fence distance from the outside of the bit to control the depth of the mortise from the back edge of the box. Then use the story stick to set stop blocks to control the travel of the box body and lid on the router table. Rout the lid and body at the first step up, and then use the story stick to reposition the stop blocks for the matching mortises on the other side. Then use a chisel to square the corners of the hinge mortises.
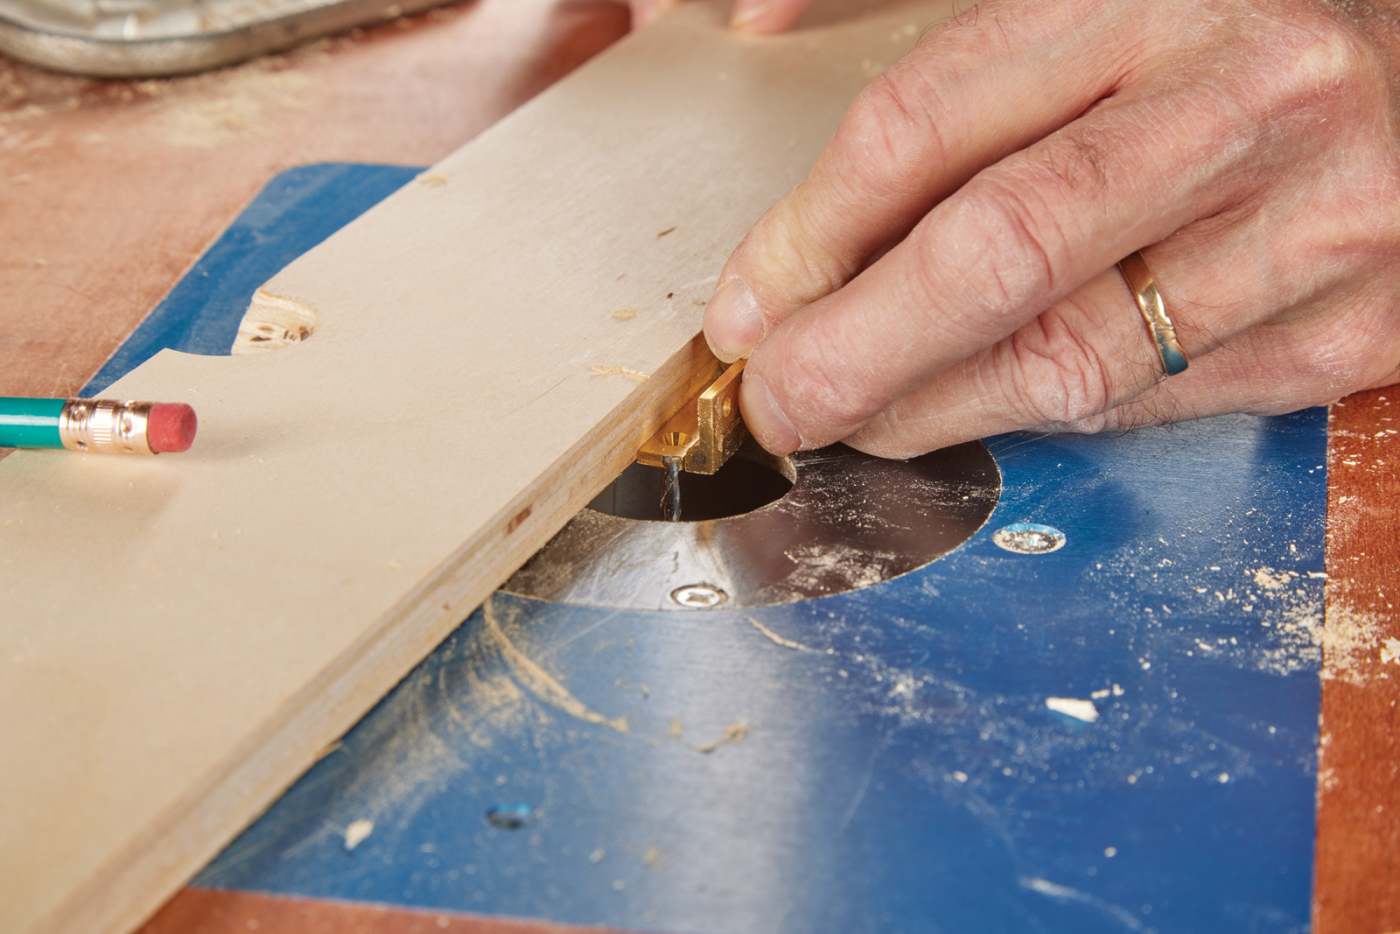
24 Adjust the router bit height to match the thickness of the hinge leaf.
25 Set a template up with stops for routing the hinge mortise.
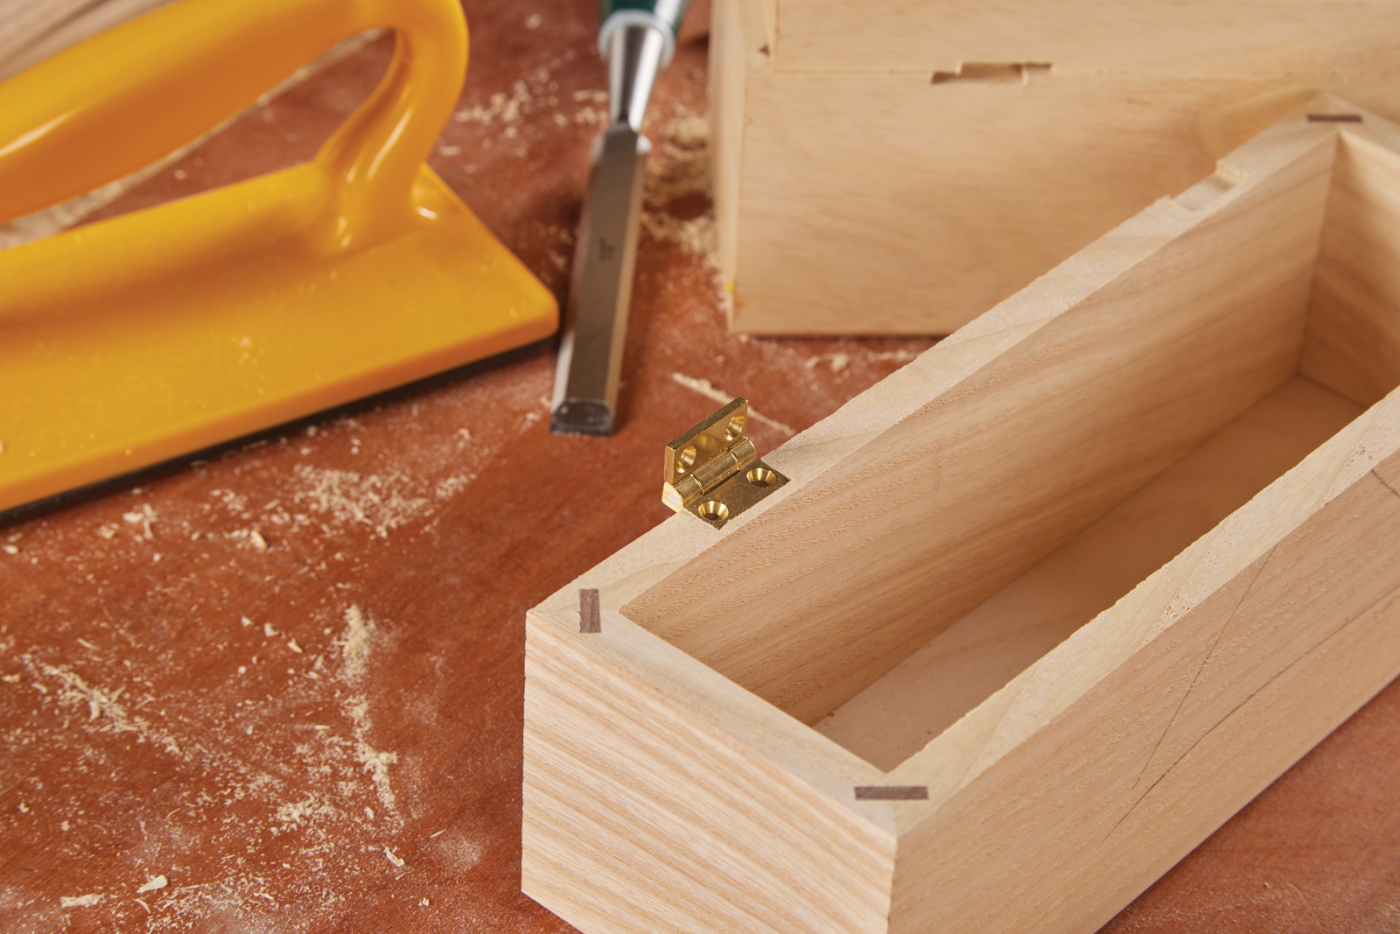
26-27 Guide the lid into the bit and slide it back and forth to form the mortise. Check the hinge fit in the box.
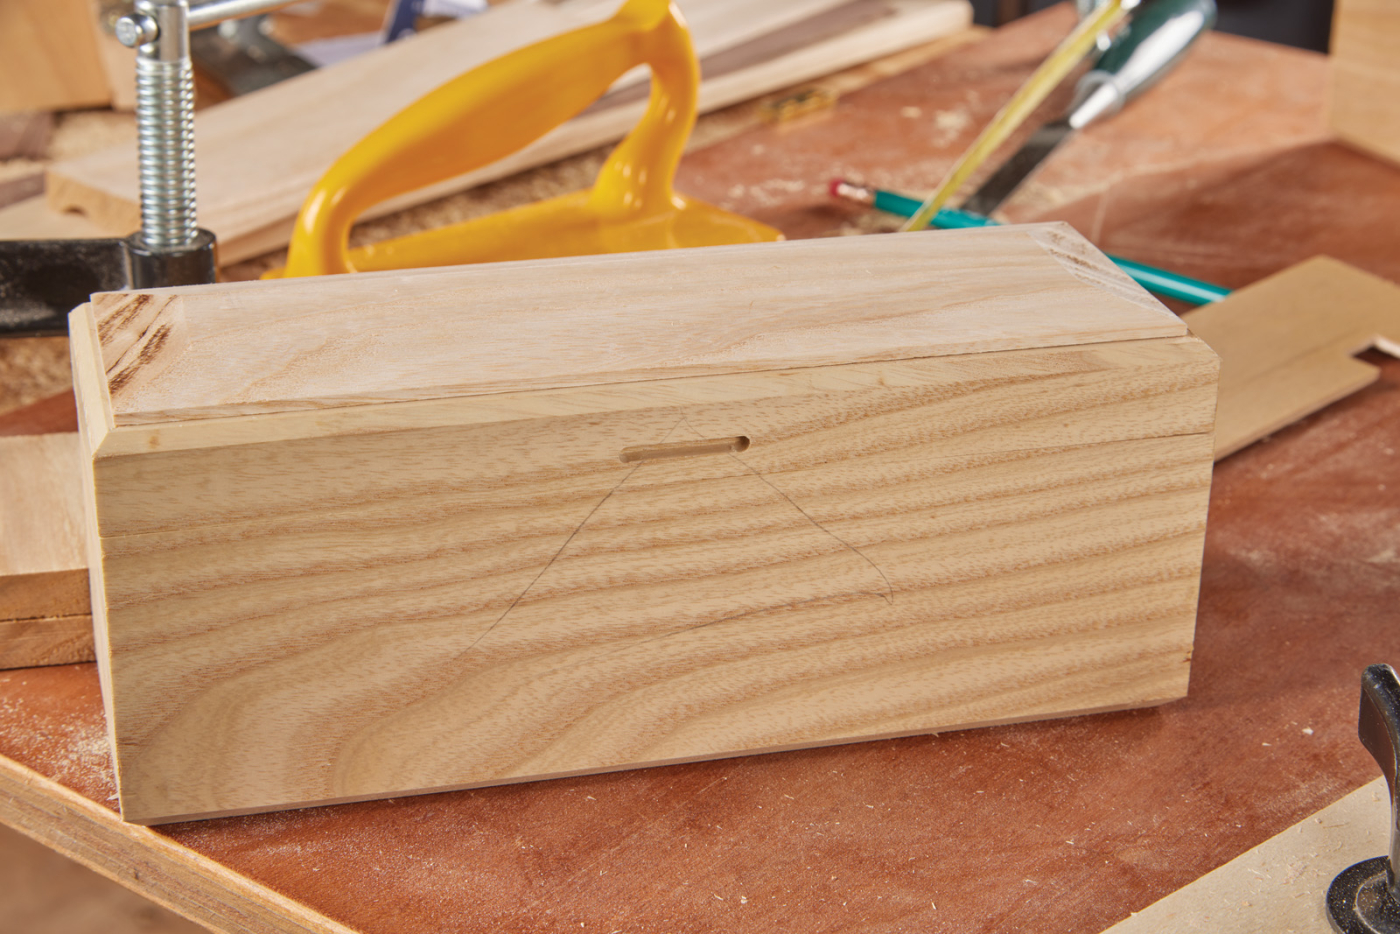
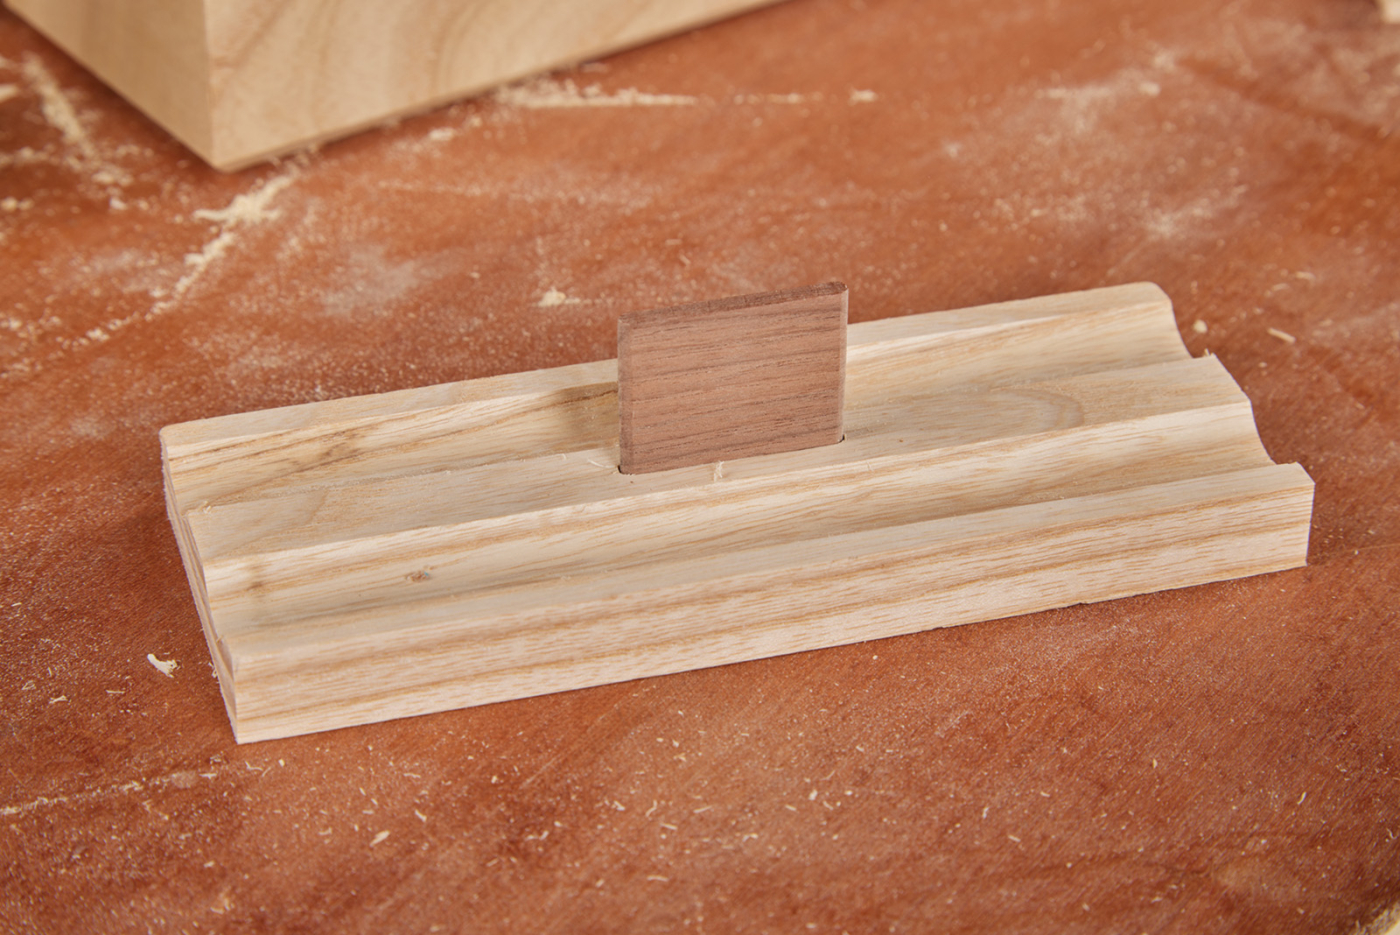
Create & Install a Lift Tab
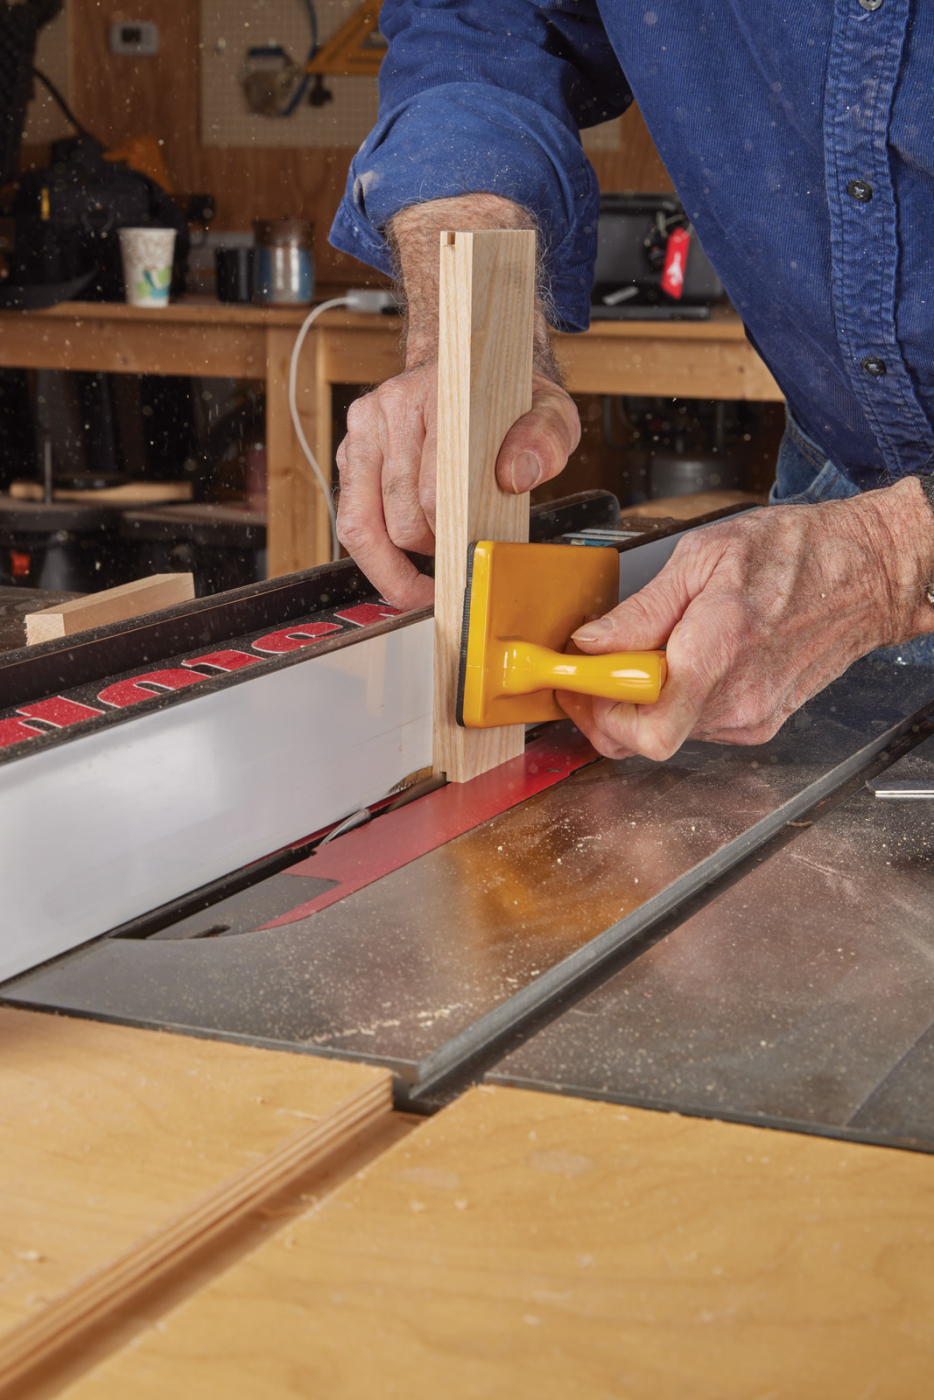
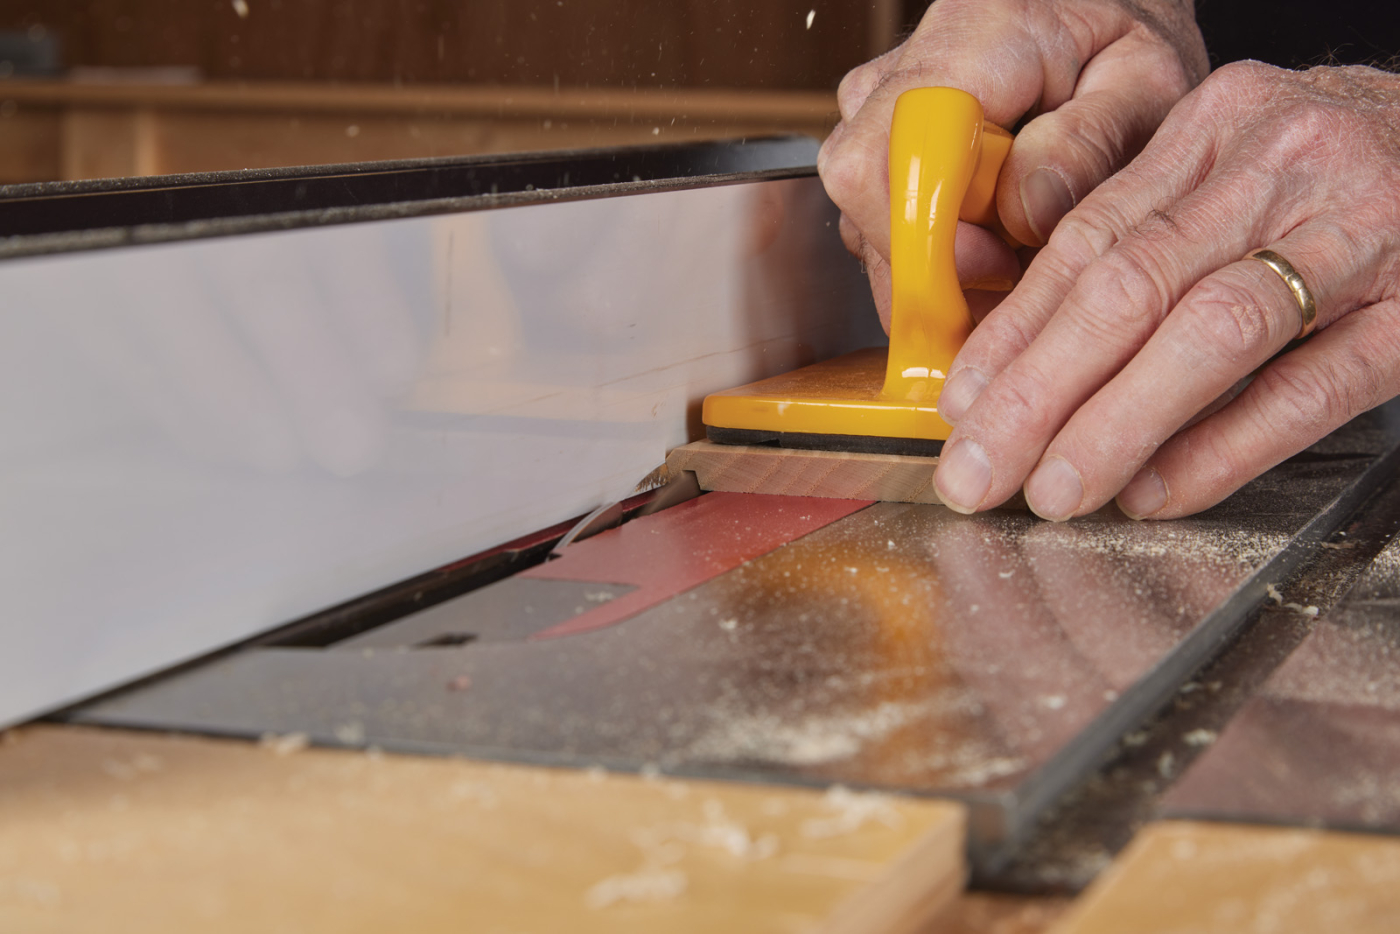
To install a lift tab at the front of the box, raise the router bit slightly (to about 3/16“) and use the story stick to position the groove for the lift tab to fit. I mark on the story stick the approximate width of the lift table and set a stop block using that mark as my guide. With the story stick against the stop block, drill through using the router bit. Then turn off the router and flip the story stick to set up the stop block on the opposite side. With the stop blocks in place, lower the lid on the router bit and rout between stops to form the groove for the lift tab to fit.
28 Adjust the bit height and stop block locations to rout a slot in the front edge of the lid for a lift tab.
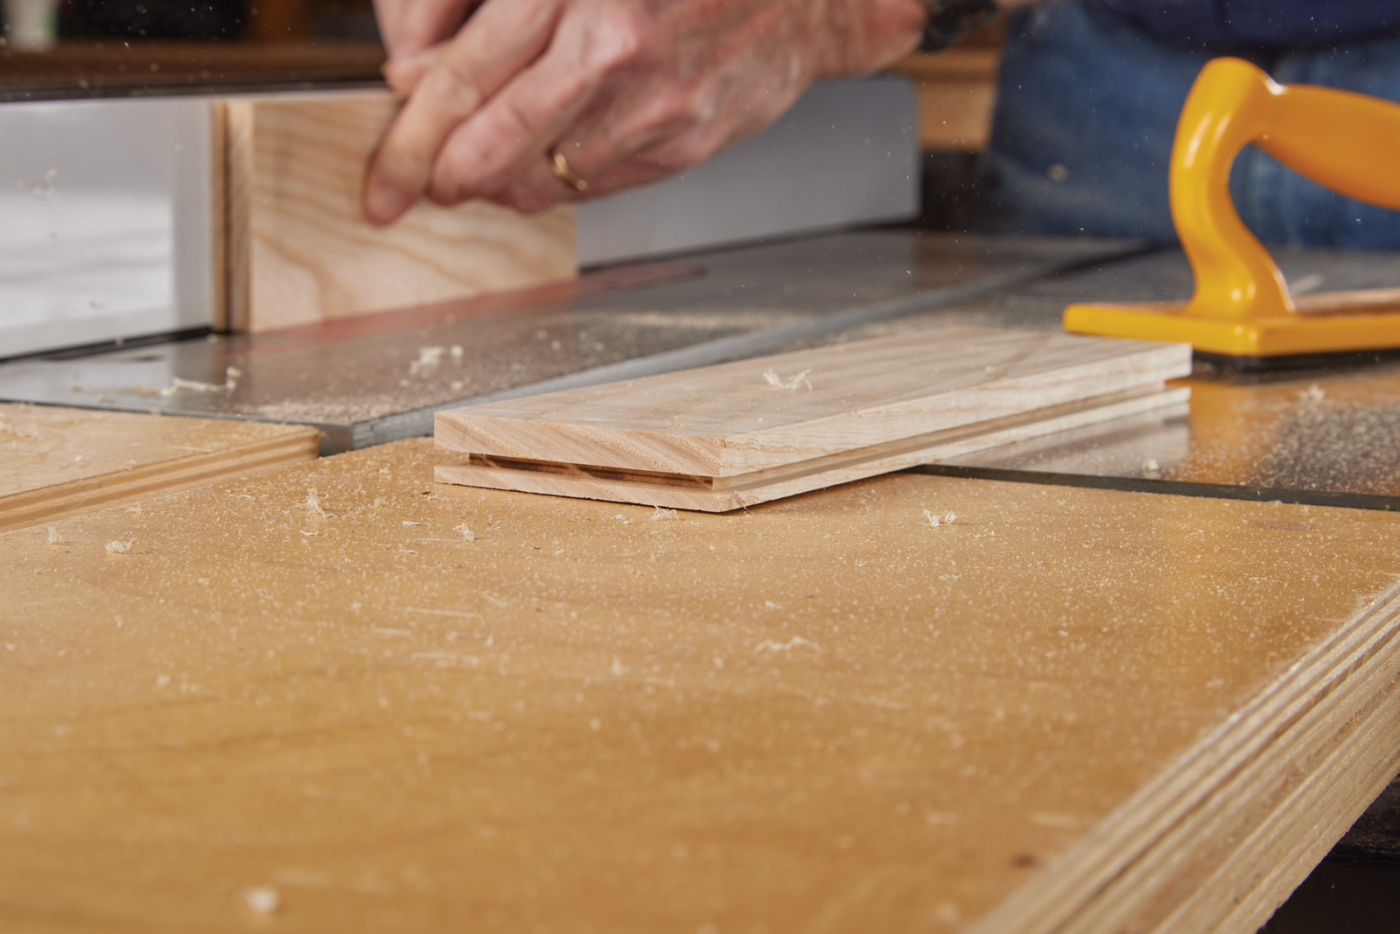
29 Mortise formed by routing.
30 Use a piece of walnut and shape a lid lifter.
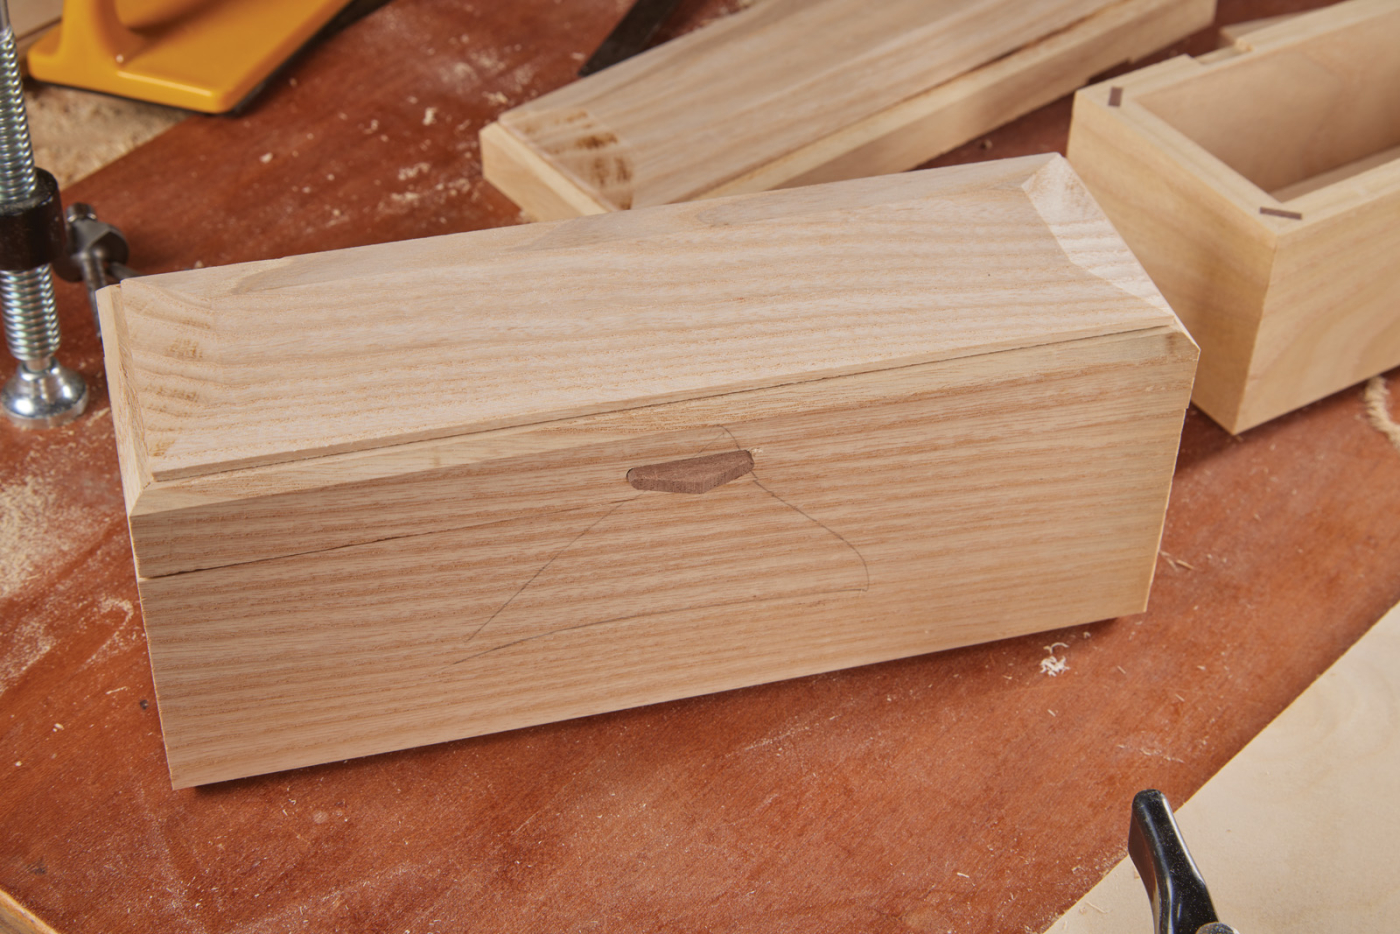
31 The final shape of the lid lifter once it’s installed into the mortise in the box lid.
Shape a tab to fit using stock 1/8“ thick. First cut the stock to length and round the edges on both ends to fit the groove. Then, shape the front of the pull using a disk sander and glue it into place.
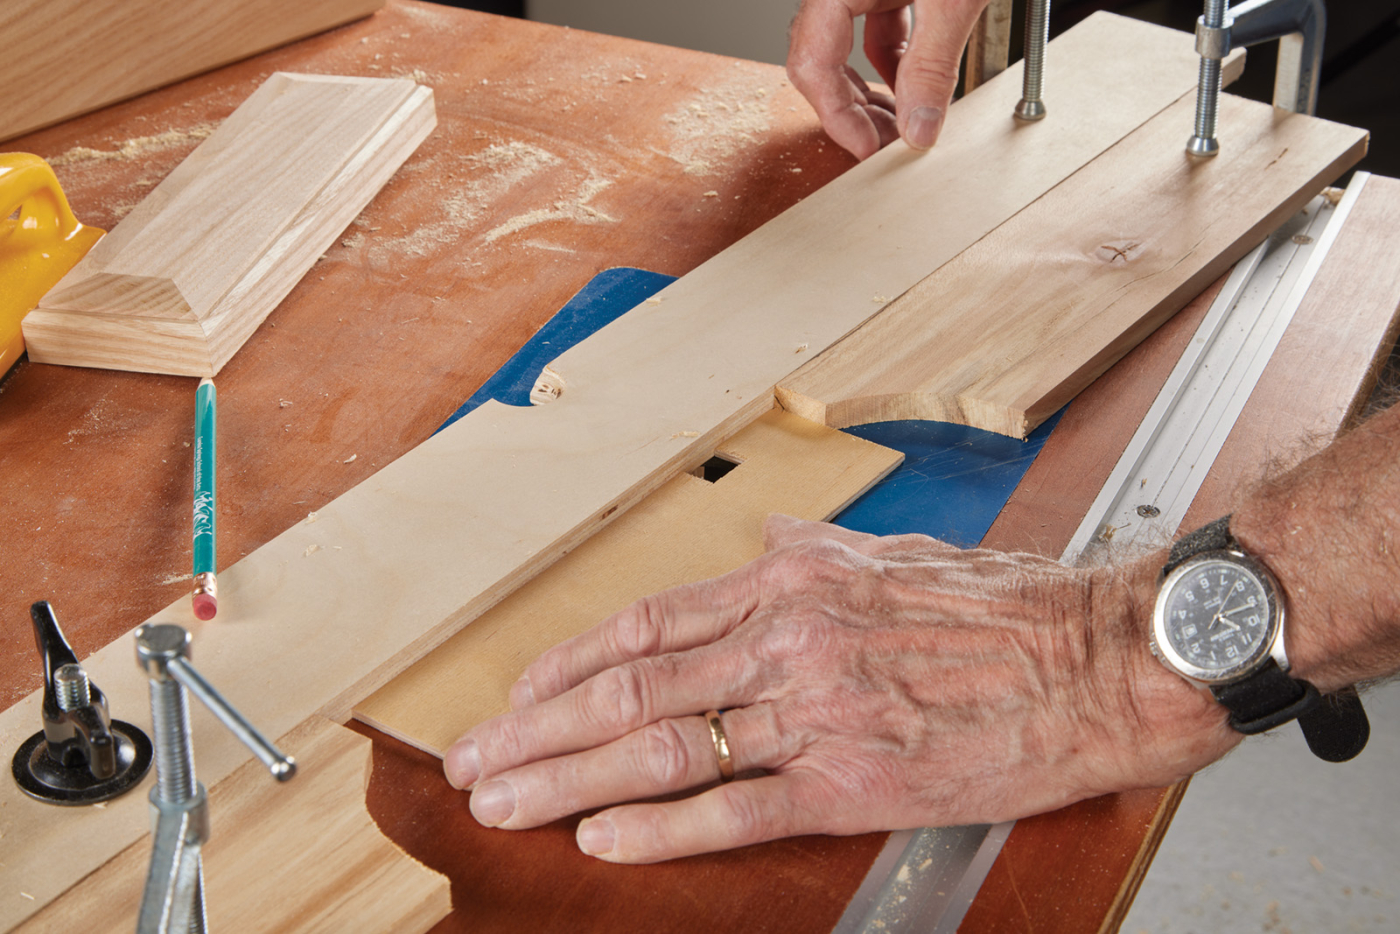
Lastly, the Interior
Next, form the parts to divide the inside of the box and support the tray inside. I resaw material to 3/16“ thickness for these parts. Miter the ends of the tray support and then make partial miter cuts on the divider. This is a delicate operation requiring a clamp on the miter gauge to hold the stock in position. Glue the parts in position.


32-33 Miter the ends of the box liners.
34 The divider is mitered only part of the way up.
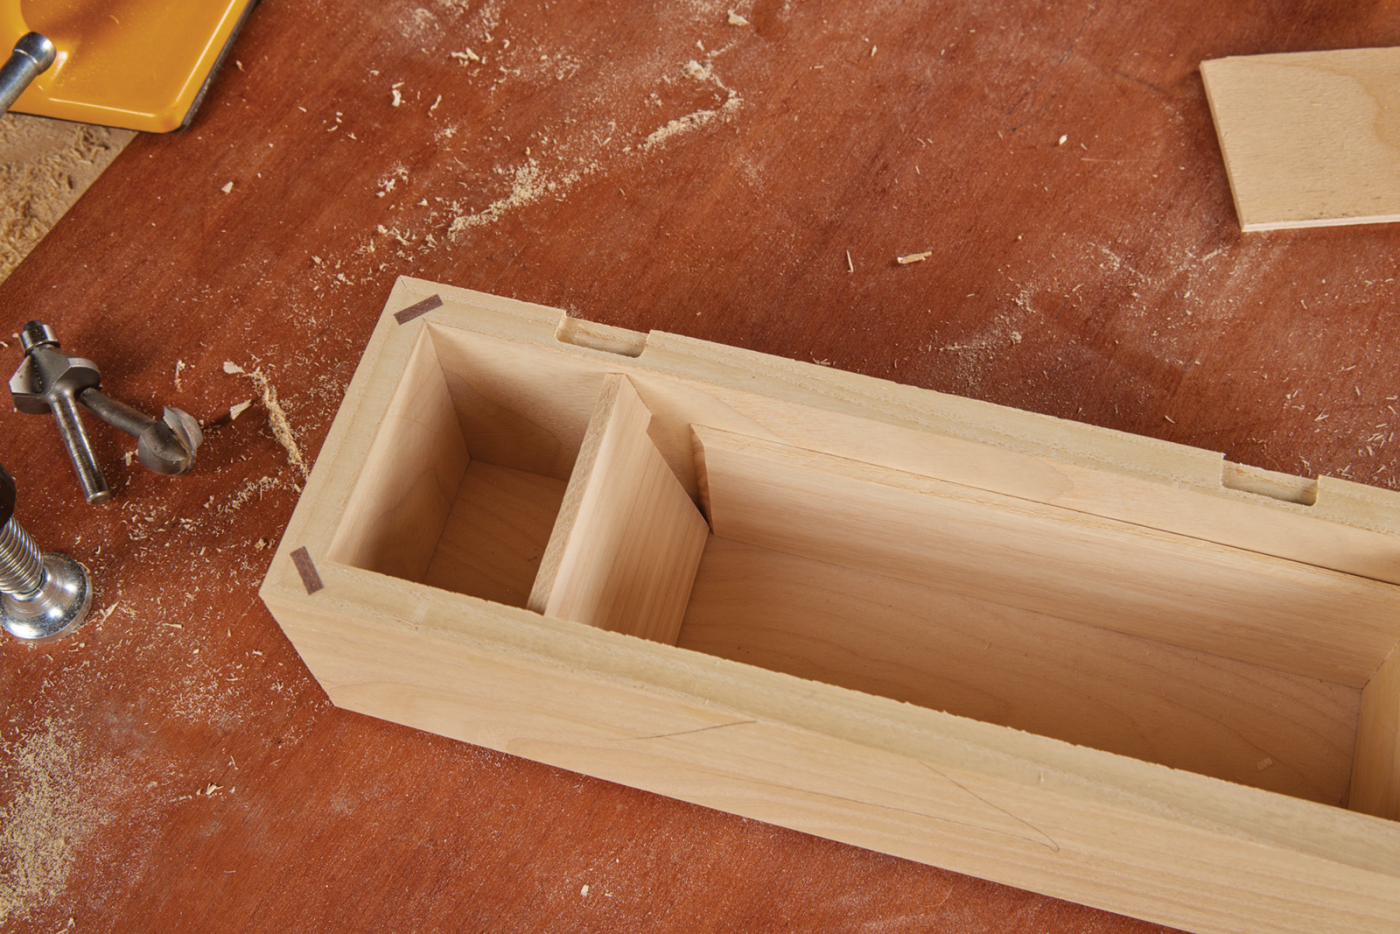
35 The liner parts are placed loosely in the box.
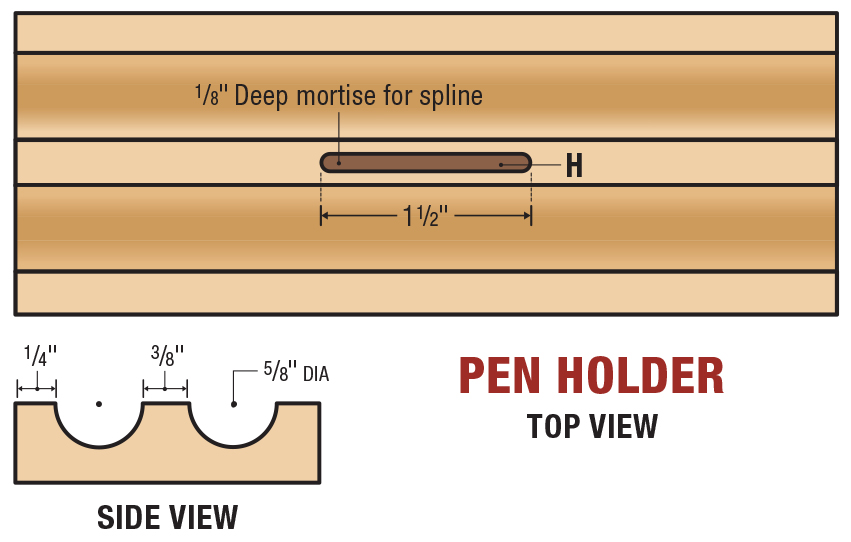
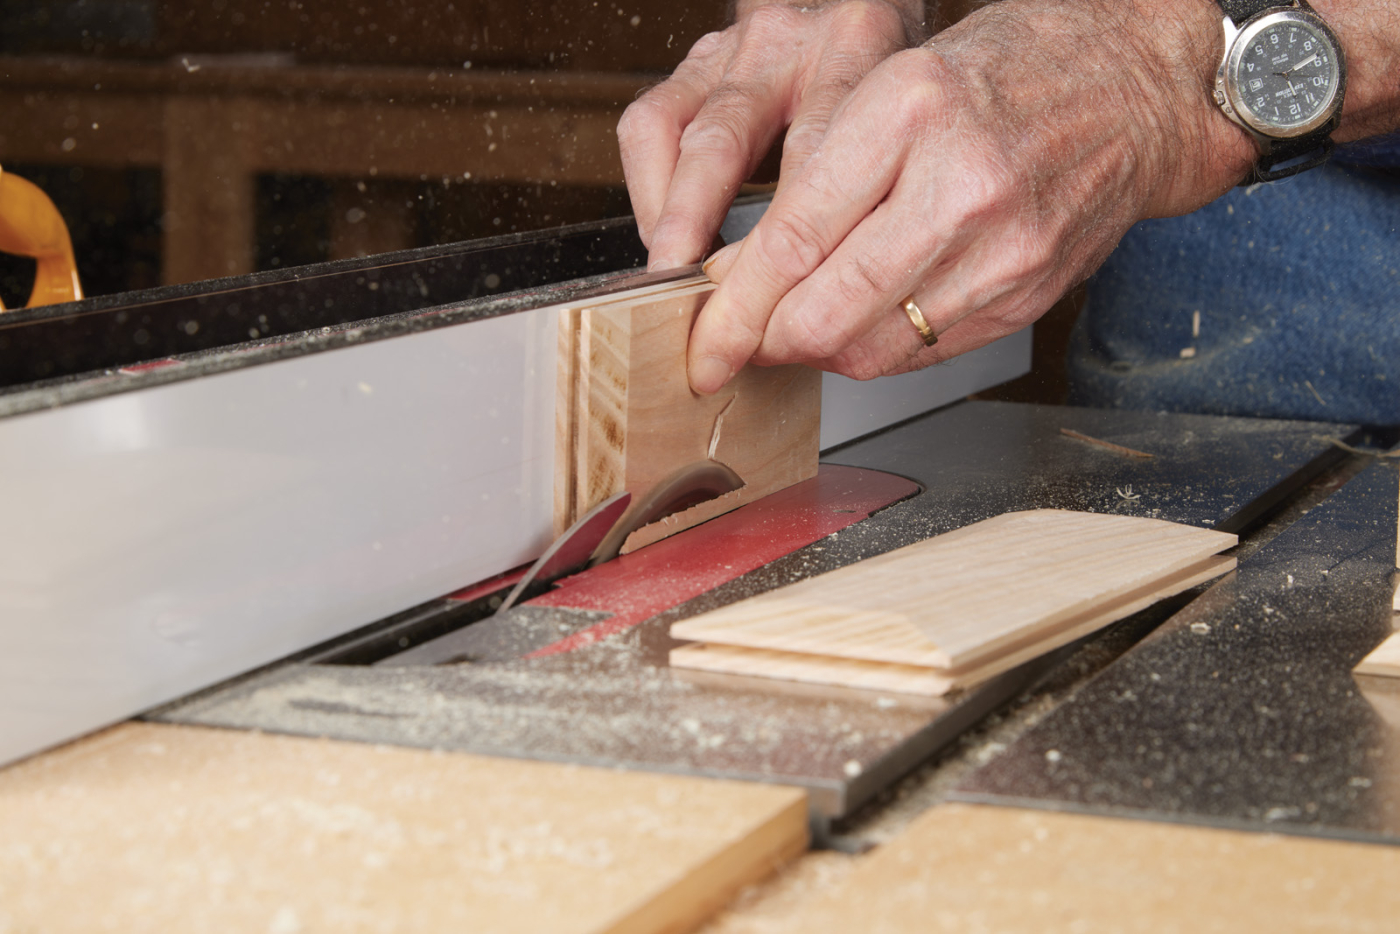
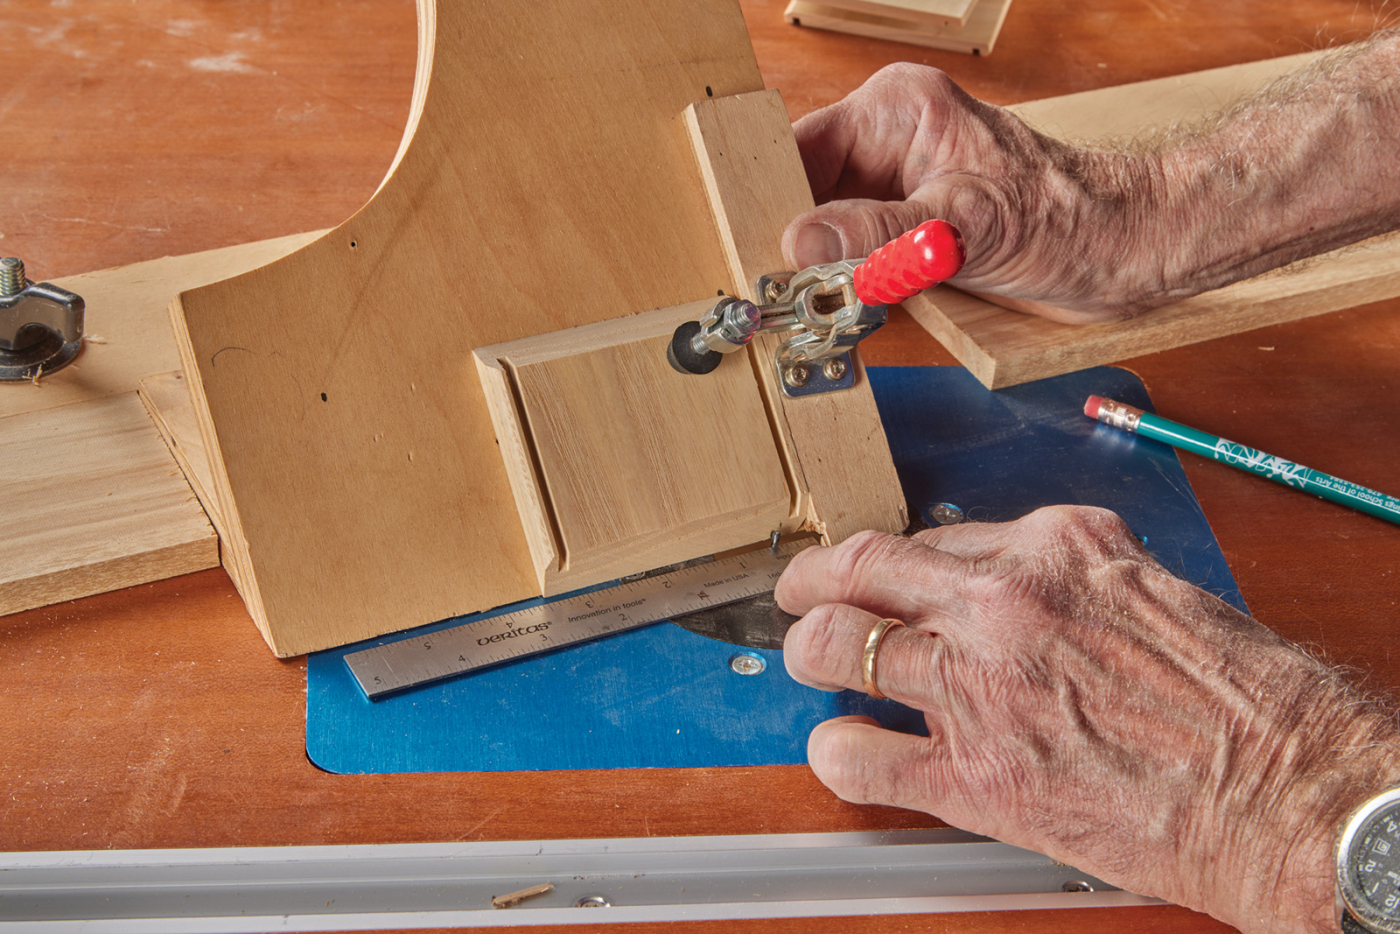
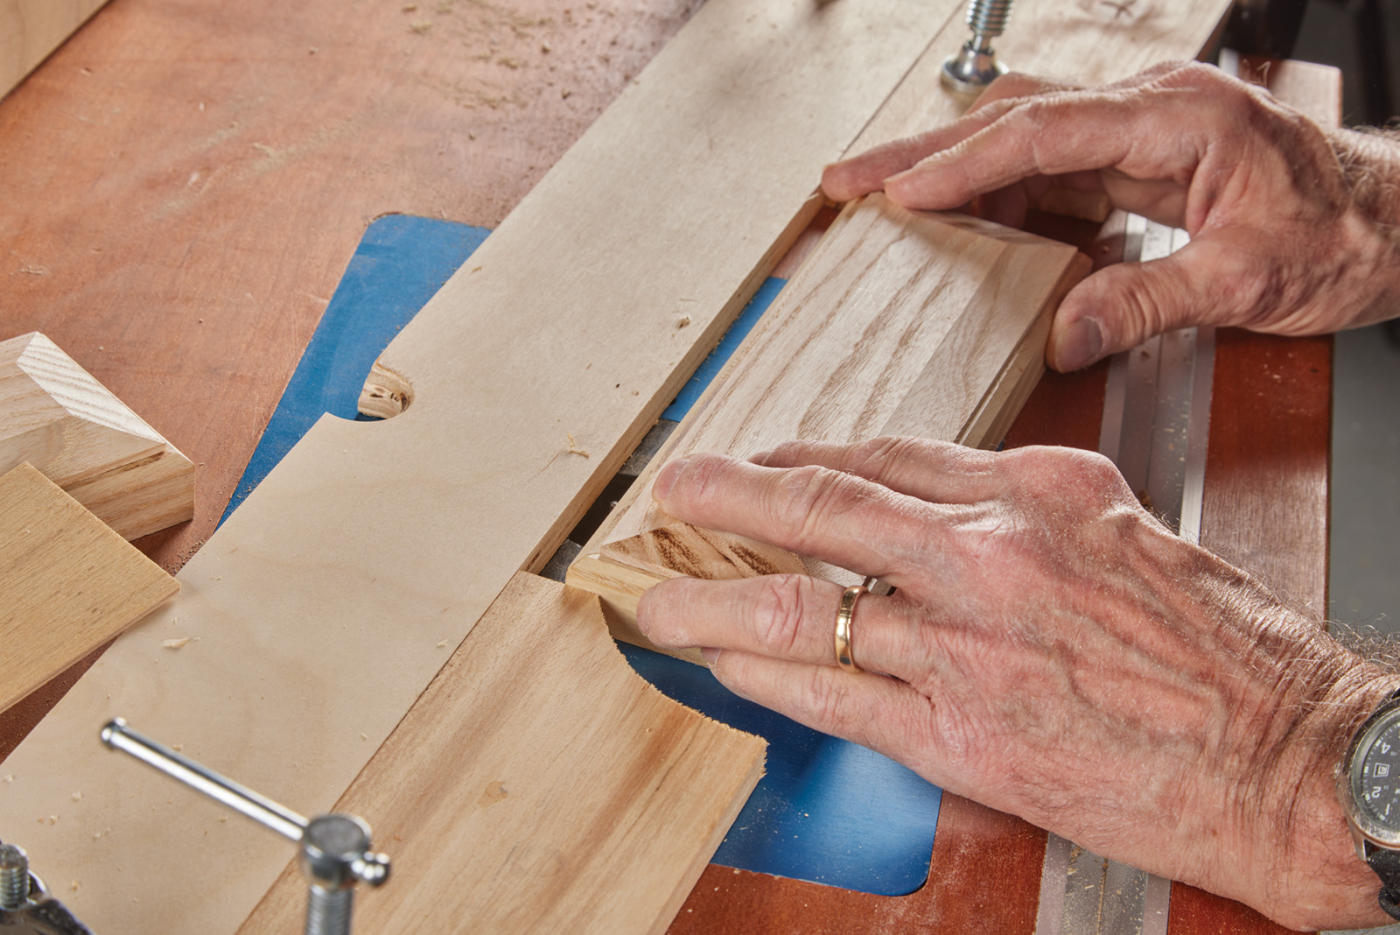
Form the tray to fit. Use a core box bit to rout for the pens to fit, then use the 1/8“ bit in the router table to rout for a lift tab to fit so that the compartment underneath can be accessed, using the same walnut as the splines to create the lift tab. Before gluing into place, round the edges of the tab with sandpaper.
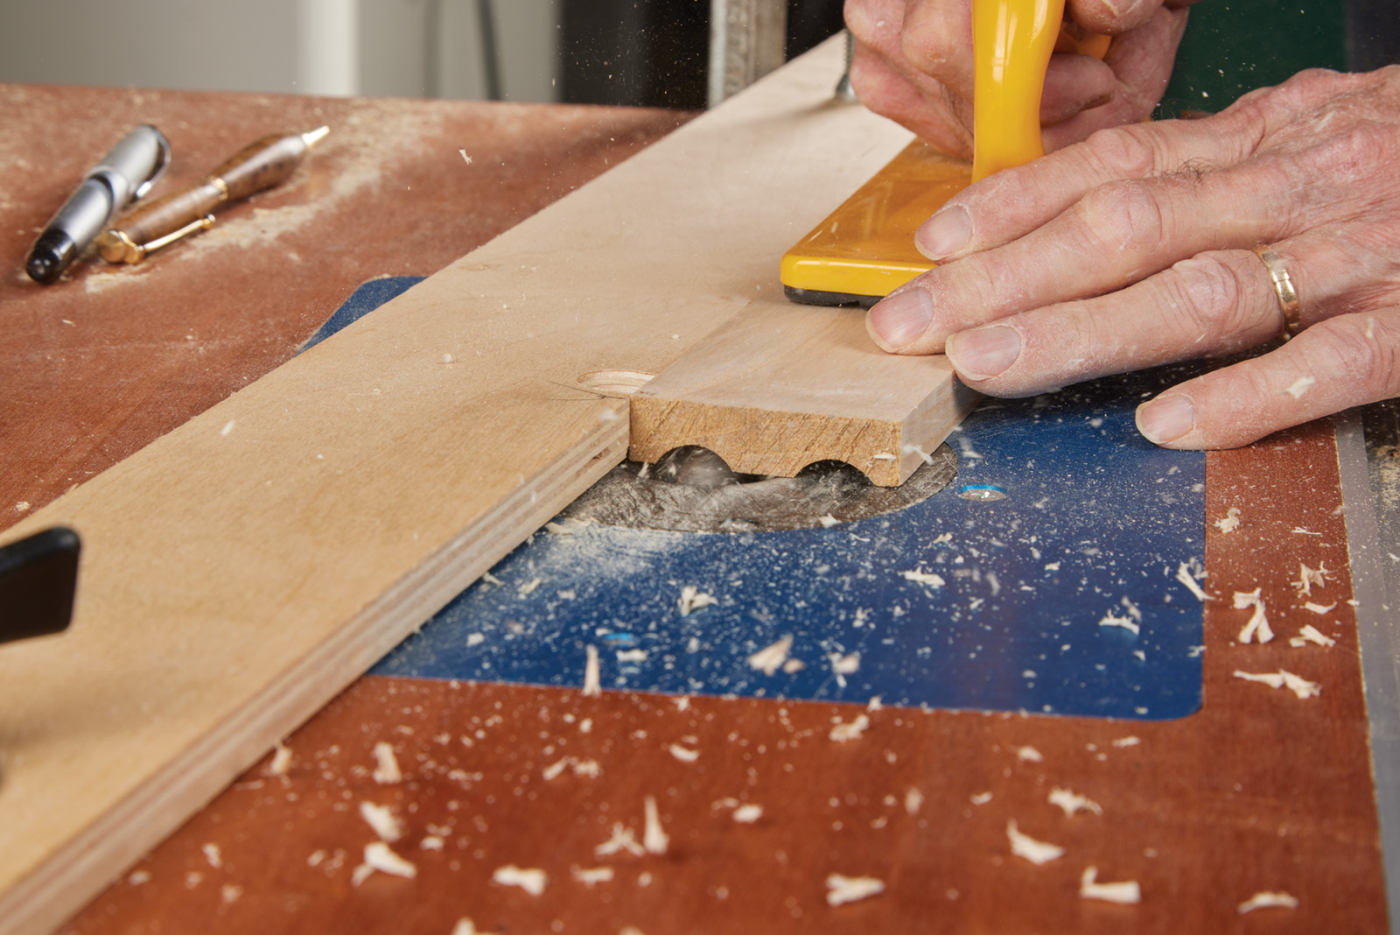
36 A core-box bit is used to create the pen tray.
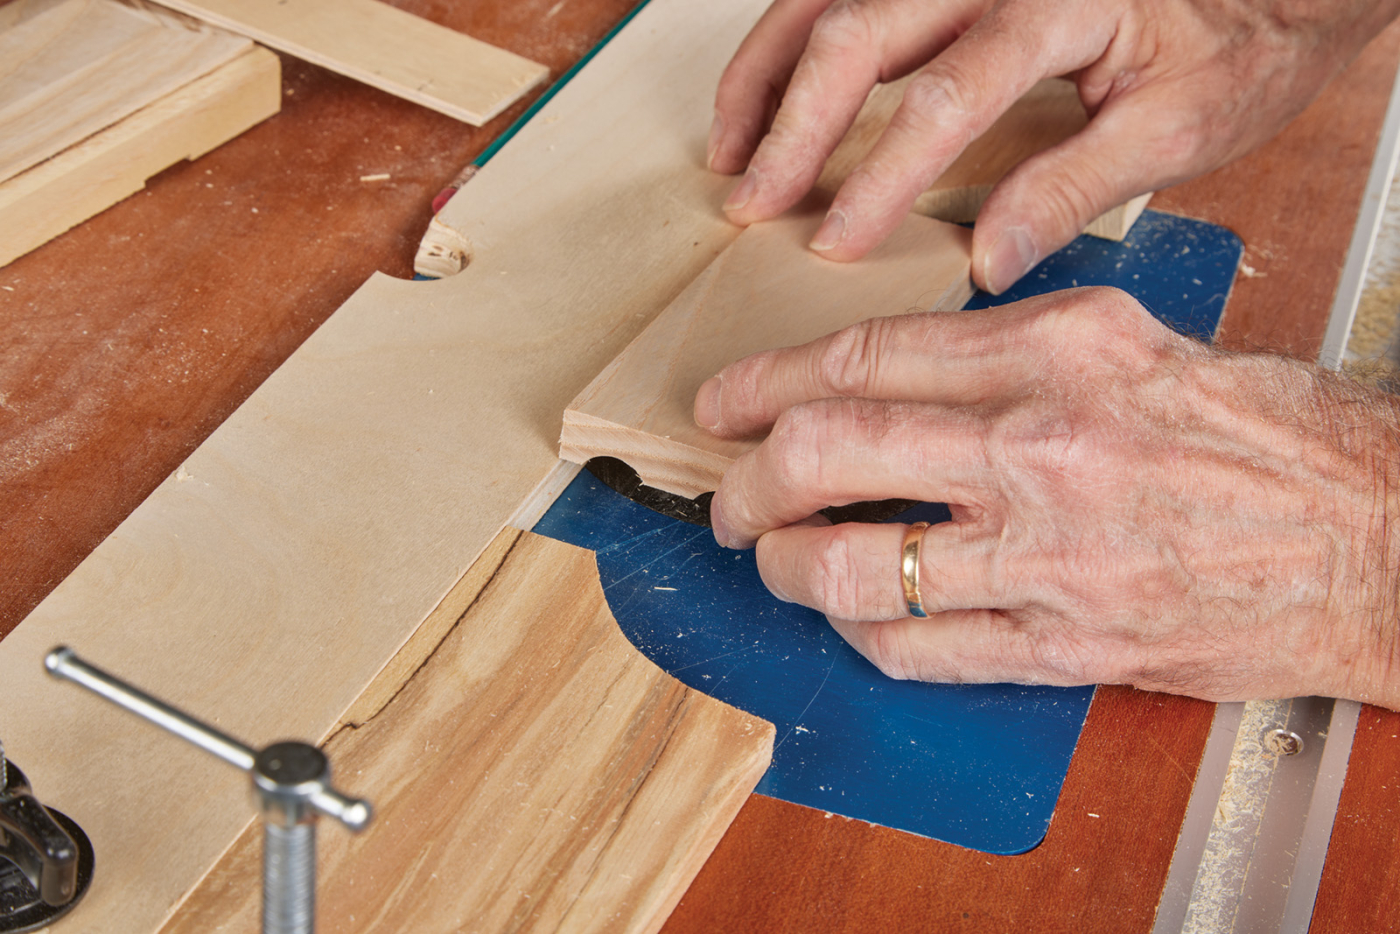
37 Plunge the tray over the bit to create a lift tab mortise.
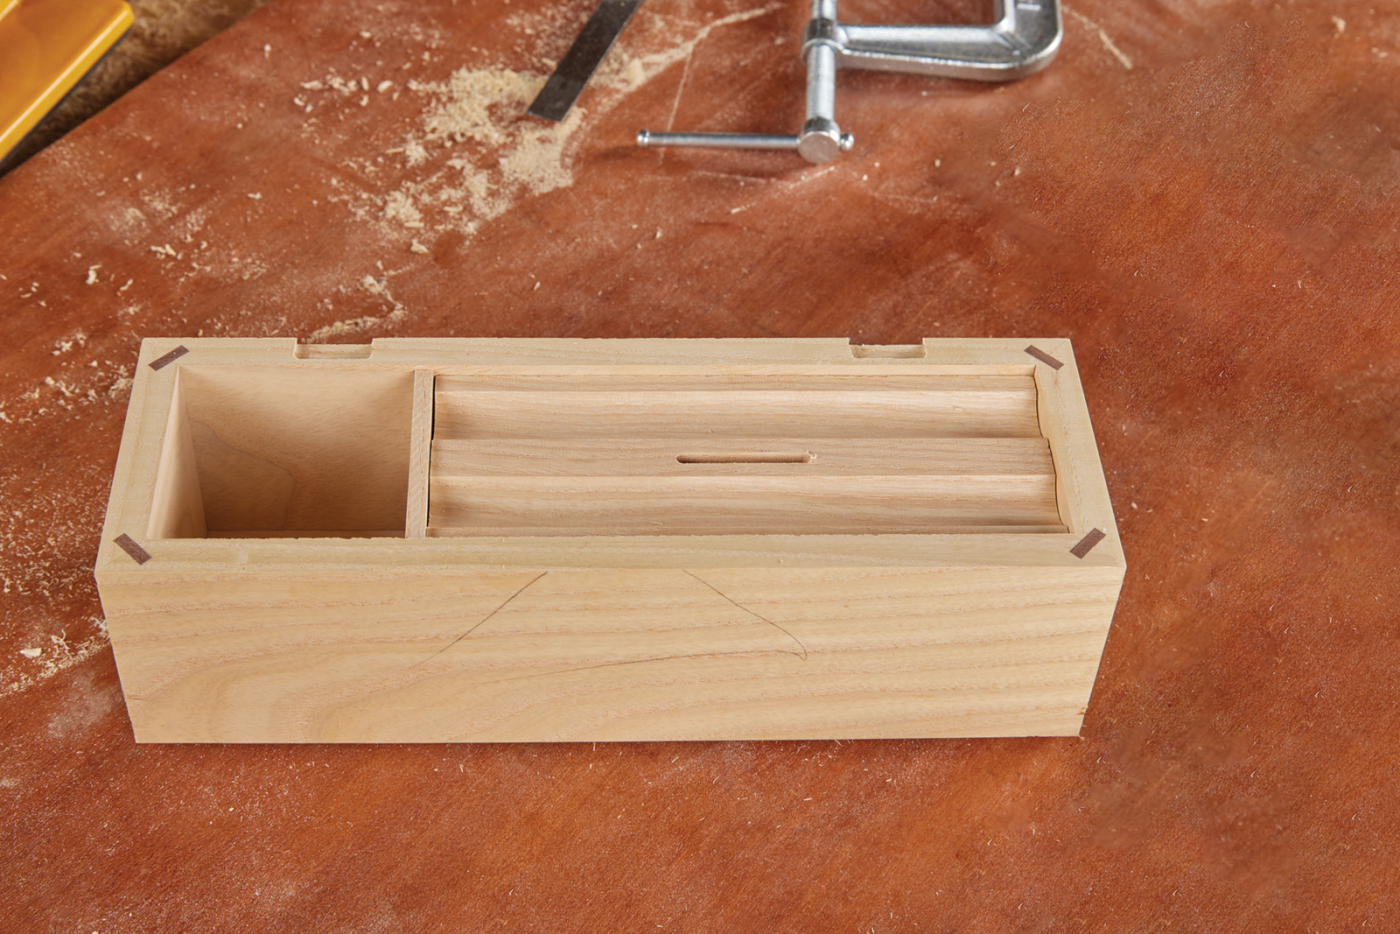
38 Check the fit of the tray in the box before gluing the liners in.
39 A walnut lift tab is cut to fit and glued in place on the pen tray.
Using these same techniques, you can make multiple styles of small boxes for a variety of small-sized objects.
Here are some supplies and tools we find essential in our everyday work around the shop. We may receive a commission from sales referred by our links; however, we have carefully selected these products for their usefulness and quality.