We may receive a commission when you use our affiliate links. However, this does not impact our recommendations.
 An easy interlocking joint begets great strength and style.
You don’t need a lot of tools or experience to make a good-looking, functional project. For these shelves, we decided to put our theory to the test, and dragged the non-woodworkers on our staff out to the shop. In an afternoon, they were nearly ready to assemble a set of egg crate shelves.
The name for these shelves comes from the simple joint that holds them together, also called a half-lap joint. Each half of the joint is a notch that fits over the other piece. When put together, the two notches interlock, making a very strong and stable structure. The good news for the beginner is that these don’t have to fit perfectly to work effectively.
While this isn’t the fanciest joint in woodworking, it’s strong and forgiving, and a good opportunity to learn about laying out and cutting joints. But before we get to cutting the joints, let’s look at the design.
The material is 1 x 6 poplar, which actually measures 3⁄4” x 51⁄4“. All of the parts for a set of shelves as shown can be cut from two 8′-long pieces. This width of material is good for holding CDs, DVDs, paperback books or small objets d’art. Some of our staff members chose to use wider 1 x 8 material to better hold larger books. In either case, using the width as it comes from the home center or lumberyard greatly simplifies the work.
The shelves can be adapted in size for different purposes. A simple version with just two uprights and two shelves works well in the bathroom or as a desk accessory, while a larger version can be hung on a wall. You can tailor the depth, height and width to suit your needs or sense of style.
Leave at least 2″ of board length past any joints; there is a chance that the wood beyond the joint can split when put together. To make assembly easier and prevent sagging, keep the space between joints less than 24″.
The two key elements for success in this project are getting the notches in the proper place, and making them the correct size. We have a trick to make each of those easier, and there are enough joints to give you plenty of practice. Our beginners struggled with the first few cuts, but by the end of the day they were getting good results quickly.
Keeping the Layout Simple
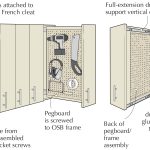
After cutting all the parts to length, the first step is to mark the boards for the locations of the joints. The easiest way to do this is to clamp similar parts together, and mark them all at once. This guarantees that all the joints will be in exactly the same places, even if your measurements are slightly off. Use your combination square to carry the line across the face and mark the ends of the notches.
Plenty of Practice
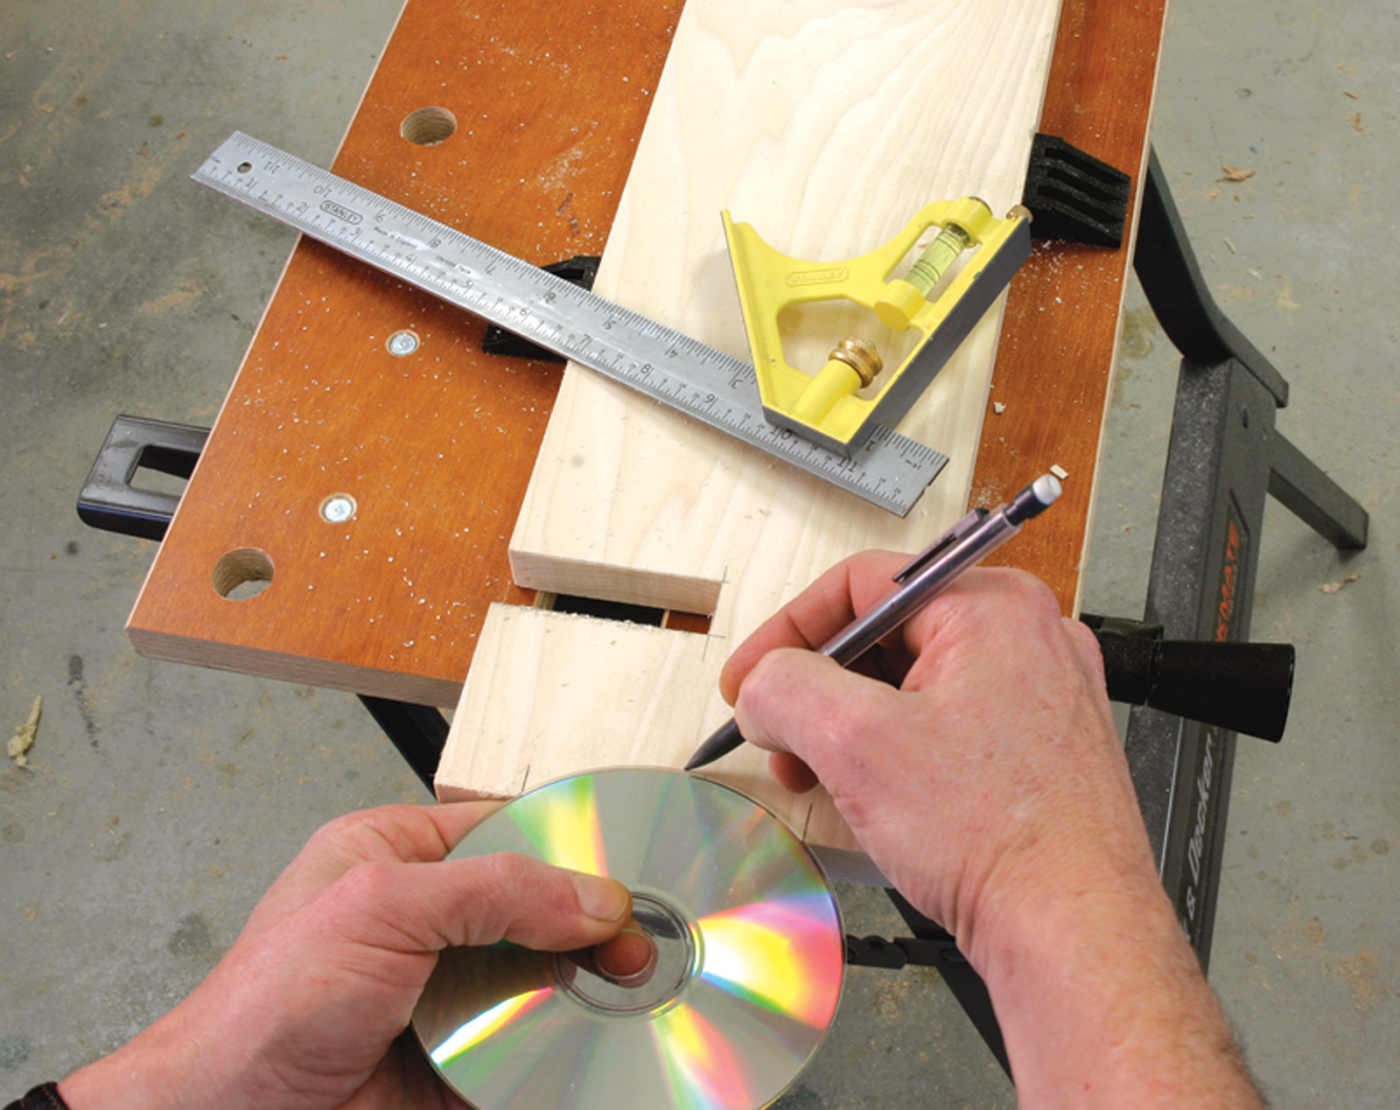
One simple joint is all it takes to build these shelves. The decorative cut is laid out by tracing the edge of a CD.
After you have all the ends of your joints marked, you’re ready to cut the notches. We found that using the combination square to guide the jigsaw when cutting was a great method to get a straight, even result.
We used a rasp to clean up the lines on the notches, checking the fit of each one with a piece of scrap. Doing this one notch at a time helps you improve your cutting and fitting techniques. Aim for progress rather than perfection, and start cutting the joints on the least visible pieces.
When you have all the notches ready, make sure the two long shelves are oriented the same way and slide on the uprights. You should be able to push the pieces together with firm hand pressure. If you force them together, the wood might split and break at the notch. If this happens, don’t panic. Simply glue and clamp the split piece back on. After the glue dries, a few strokes of the rasp should allow the joint to slide together.
The arched cutouts at the top and bottom of the upright pieces were marked, then cut with the jigsaw. Make a pencil mark 1″ in from each edge, line a CD up to the pencil marks, and draw the curved line. (If you’re building wider shelves, choose an item with a larger radius, such as a gallon-paint can, to guide your line.) Cut just shy of the line, and use a rasp and sandpaper to smooth the curve.
When all the notches are cut, sand the wide surfaces of the parts, and make a test fit of the entire assembly. The pieces should slide together by pushing them by hand. If they stick somewhere, take a close look at the location and make a pencil mark along the intersection. Take it apart, and with the rasp trim down to your pencil marks.
These shelves will hold together mechanically, but some glue in the joints will make the connection permanent. If any of the joints are sloppy enough to wiggle, you can drive a nail in at an angle to hold the pieces together.
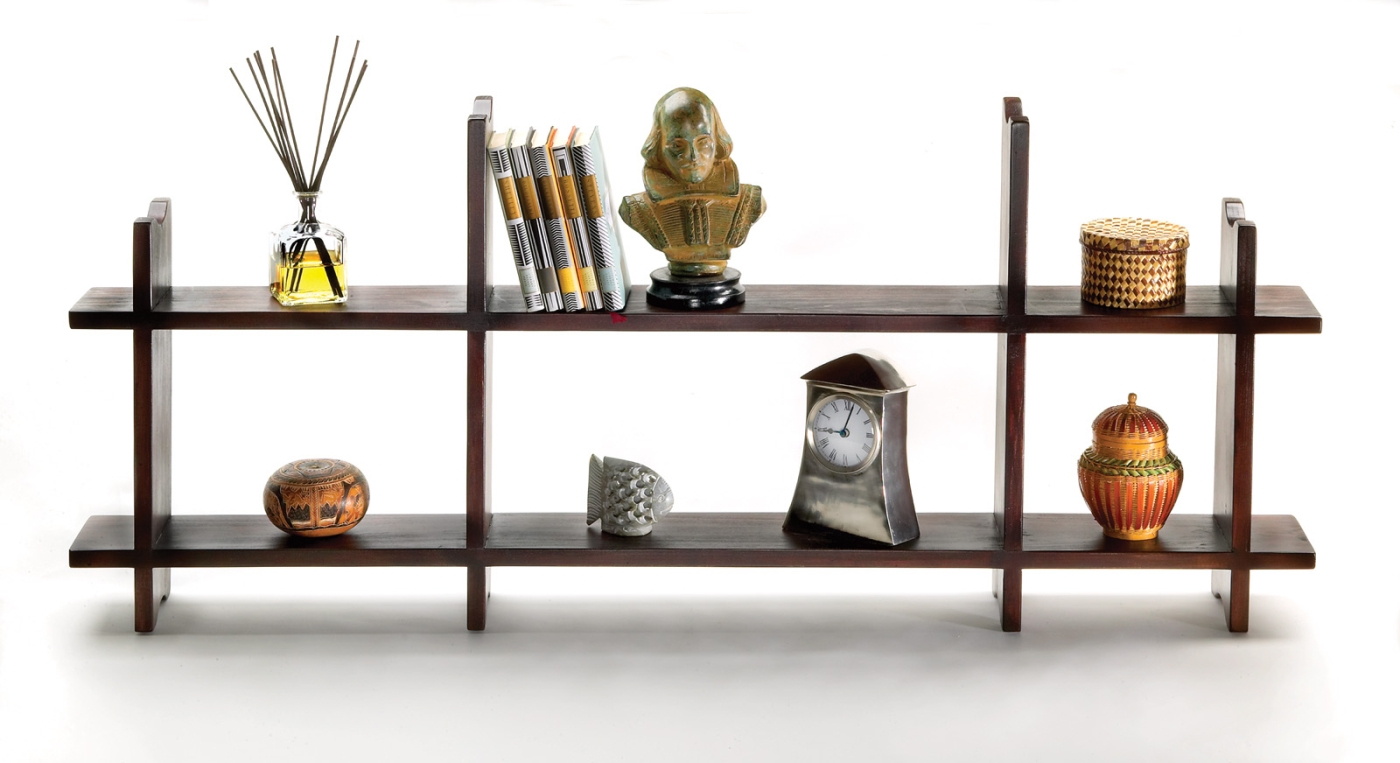
The shelves shown in the photo were stained with gel stain then sprayed with lacquer from an aerosol can. Some of our staff opted to paint their shelves. Like the layout, the finish is up to you. pw
Egg crate shelves cut list


Here are some supplies and tools we find essential in our everyday work around the shop. We may receive a commission from sales referred by our links; however, we have carefully selected these products for their usefulness and quality.