We may receive a commission when you use our affiliate links. However, this does not impact our recommendations.
|
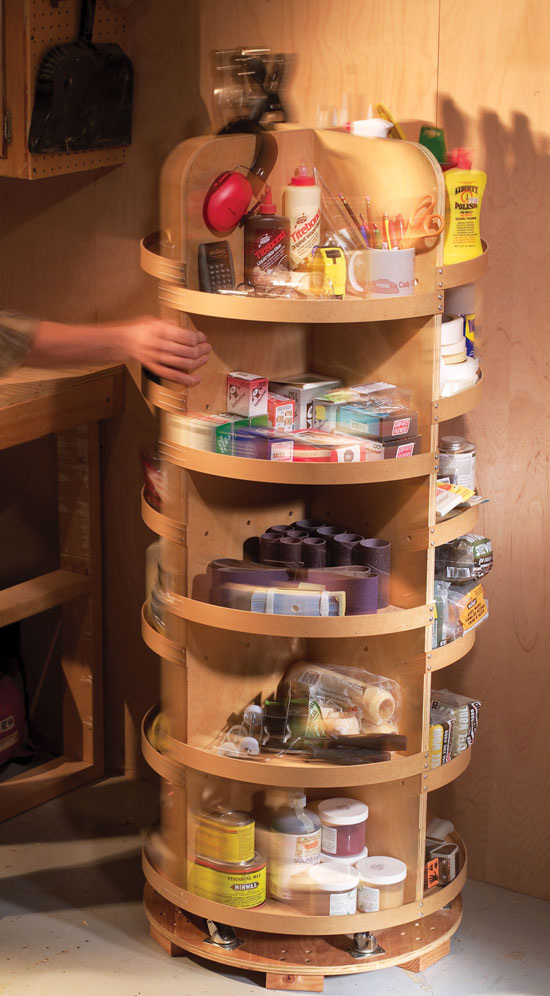
Small Parts Carousel
While visiting an antique shop, I discovered a way to store all that indispensible small stuff that used to clutter my workshop. On display was a rotating bolt cabinet from an old-fashioned hardware store. When I got home, I design-ed this carousel that rotates on inverted swivel casters. It’s easy to build, because there’s no complicated joinery. All the parts are cut to size and assembled with glue and screws.
My design requires 1-1/2 sheets of plywood, a quarter sheet of 1/8-in. hardboard, six swiveling casters, a 1-1/4-in.-dia. hardwood dowel and a 3-ft.-long 2×4. I used Tapcon cement anchors to bolt this baby to the floor. I got everything I needed at my local home center for about $140.
Build It
1. Cut and smooth the round carousel bottom (A) and base (B).
2. Drill 1-1/4-in.-dia. holes through the centers of both pieces.
3. Cut out the shelves (C). Use the round carousel bottom as a template for the curved edges.
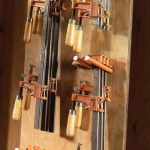
4. Mark the locations of the shelves on the two narrow uprights (D) and fasten them. Space the shelves to suit your needs, but be sure to stagger them, so they’re easy to fasten (photo at right).
5. Attach the two shelf/upright assemblies to the wide upright (E). Note: These assemblies must not be mirror images!
6. Fasten the carousel bottom to the completed shelf assembly.
7. Fasten the casters to the base(photo at right).
8. Attach the six feet (F). If your bin is going on an unfinished cement floor, use pressure-treated 2×4 stock for the feet.
9. Attach the center foot (H) to the base and glue in the dowel (G).
10. Position the base and level it with shims.
11. Anchor the base to the floor.
12. Drill a 1-1/4-in. hole in the glued-up mounting block (J) and fasten it to the carousel bottom.
13. Mount the carousel on the base.
14. Glue and screw the shelf edges (K). Cut them to length after installation.
|
Assembly is easy, because everything is screwed and glued. Stagger the shelves and fasten them to the two narrow uprights. Then fasten these assemblies to the wide upright.
The carousel rides on casters and rotates on a large wooden pin. |


Here are some supplies and tools we find essential in our everyday work around the shop. We may receive a commission from sales referred by our links; however, we have carefully selected these products for their usefulness and quality.