We may receive a commission when you use our affiliate links. However, this does not impact our recommendations.
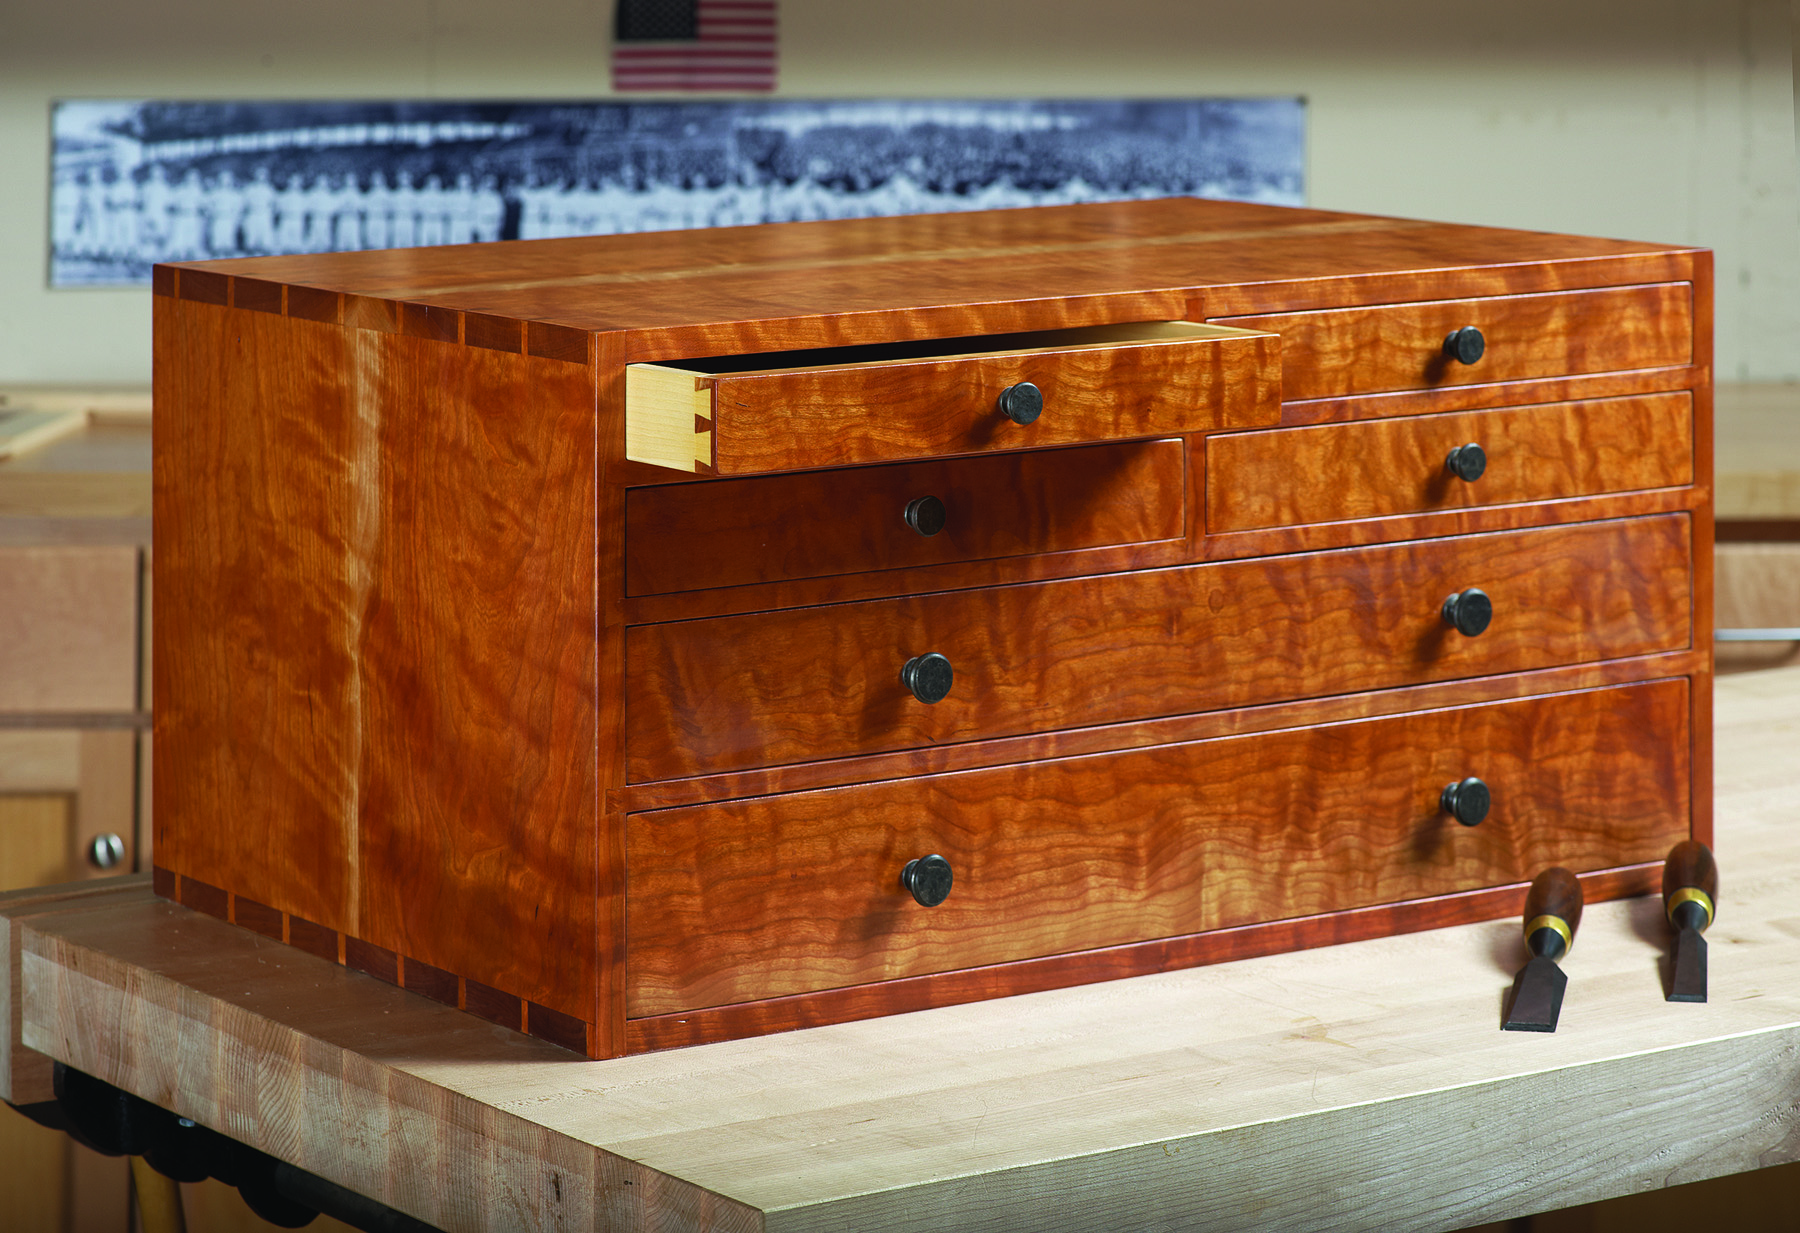
Heirloom toolbox. This handsome chest will be a pleasure to use and be treasured for generations to come – plus it’s a great introduction to blending hand and power tools in the shop.
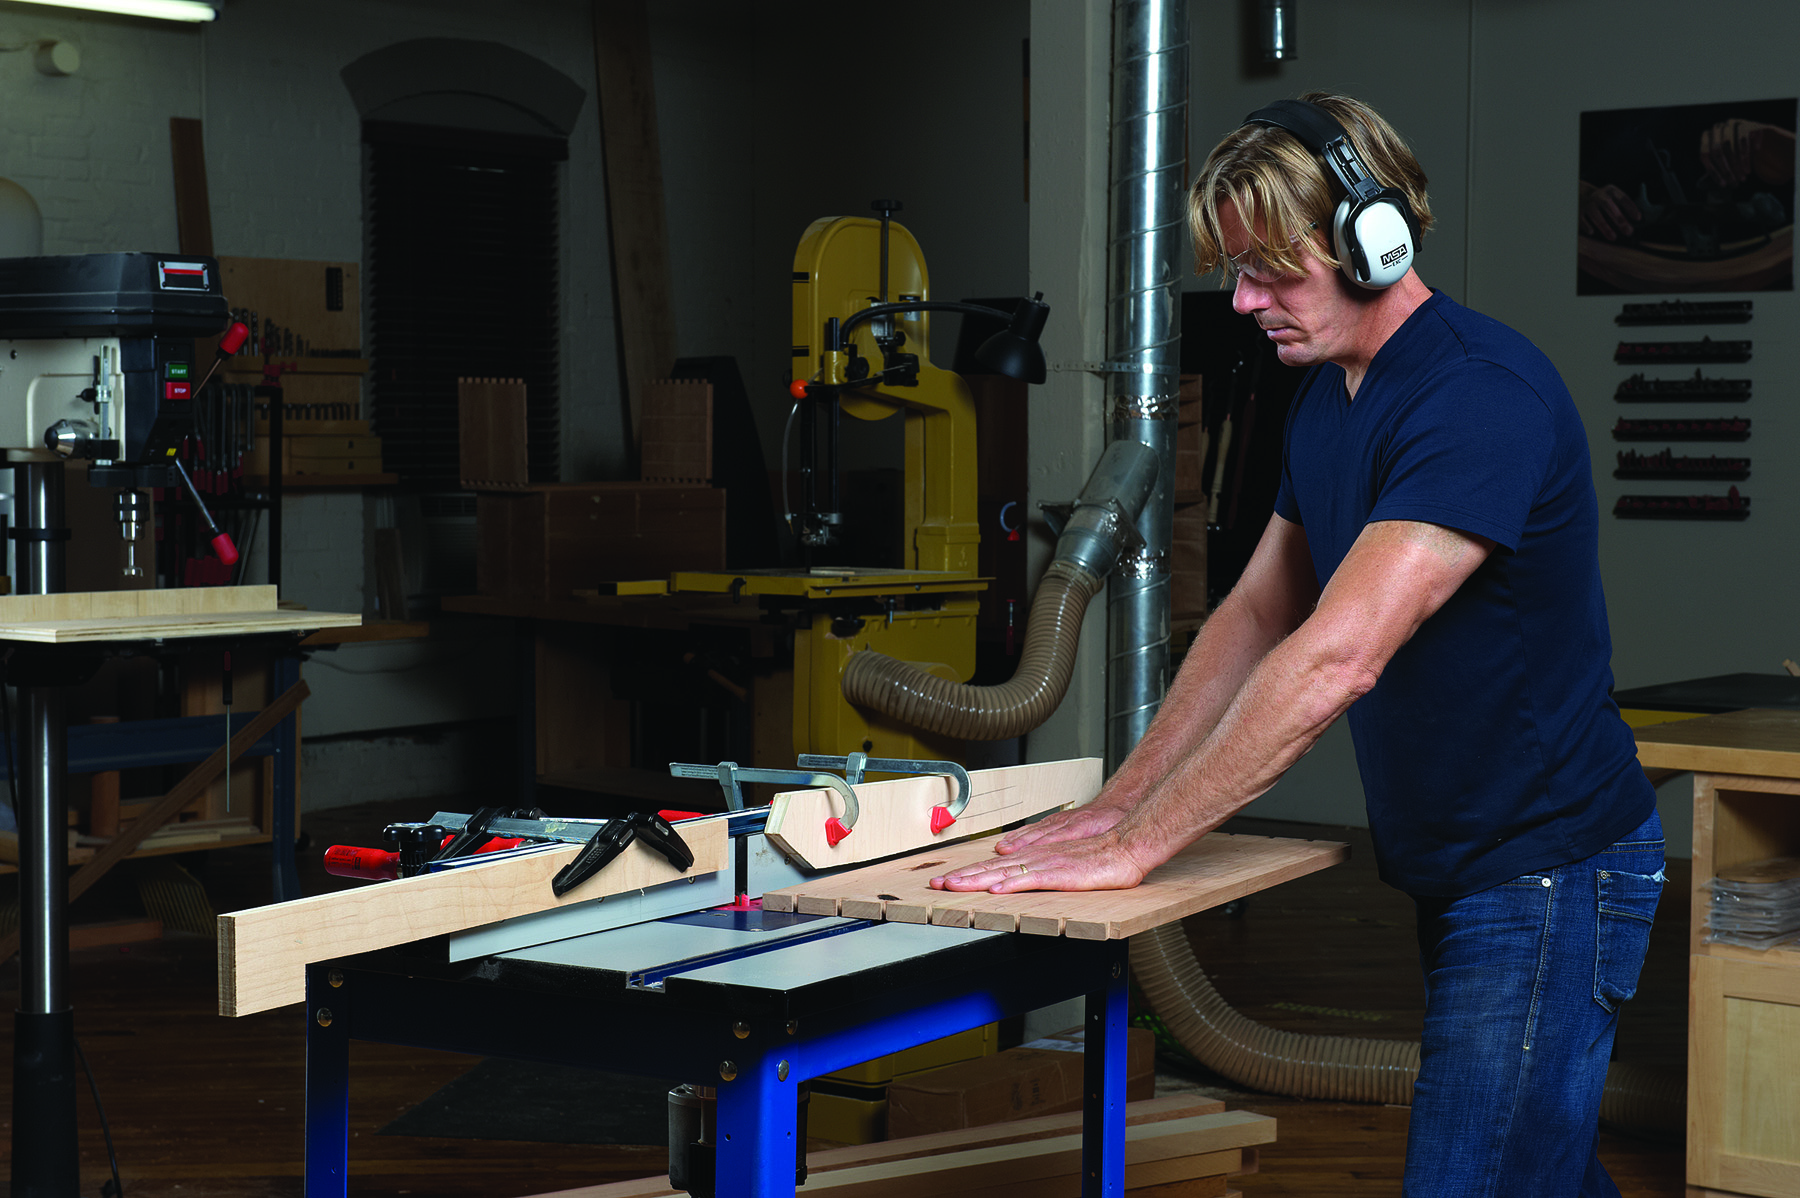
Combine power and hand tools to improve your joinery skills
Building a toolbox much like this one was a real turning point in my woodworking career. It was 1999 and I had begun classes at Boston’s North Bennet Street School’s Cabinet and Furniture Making program. At the time, I was a pretty good carpenter and could build plywood cabinets using power tools, but I was pretty inexperienced when it came to crafting fine furniture. Designing and building a toolbox was one of our first project assignments at school.
The experience was for me way more than a project; it was my introduction to hand tools and more advanced joinery. Years later, I realize just how much this project influenced my woodworking. While building it, I was learning the harmony of using both power and hand tools.
Now, it’s one of my favorite projects – and it’s featured in season three of my PBS television show, “Rough Cut – Woodworking with Tommy Mac.”
If you’re new to woodworking, or haven’t learned basic hand-tool skills, this project could have a similar influence on you. Don’t worry about the joints being a perfect fit. It’s a shop project after all.
Mill Your Lumber in Stages
Spring joint. A slight concave shape planed onto mating surfaces of an edge joint allows you to clamp up with a single clamp across the center of the panel glue-up. Aim for a center that’s recessed about 1⁄64″.
I prepare stock in a couple sessions at least a day apart. This is meant to minimize wood movement while also allowing for it. As a rule of thumb, avoid taking more than 1⁄4” of wood off of the thickness of a board in one milling. I call the first session “rough mill” because I cut the parts out of the rough board leaving about 1″ over in length, 1⁄2” over in width and 1⁄8” over in thickness.
First, flatten one face on the jointer. Check the grain direction of the wood and watch for tear-out. Take off about 1⁄16” with each pass until the face is flat. Next, straighten one edge with the jointed face against the fence. Make sure the fence is 90º to the bed of the jointer.
When the jointer work is done, move to the planer and make the opposite face parallel (to avoid tear-out, whichever end trailed over the jointer should lead over the planer). Run each part through the planer with the jointed face down. Mill the boards to the sizes in the cutlist plus the overage described above.
Stack the parts with stickers between and align them vertically so each board is supported by the one below it. Leave the boards overnight then repeat the milling process to bring the boards to final dimensions. Note that some parts, such as the case divider fronts, must be fitted to the box rather than cut to dimensions now. After the second milling, remove any mill marks by skimming all surfaces with a handplane. Take light cuts to avoid changing the thickness or taking it out of square.
Spring Joints for Glue-ups
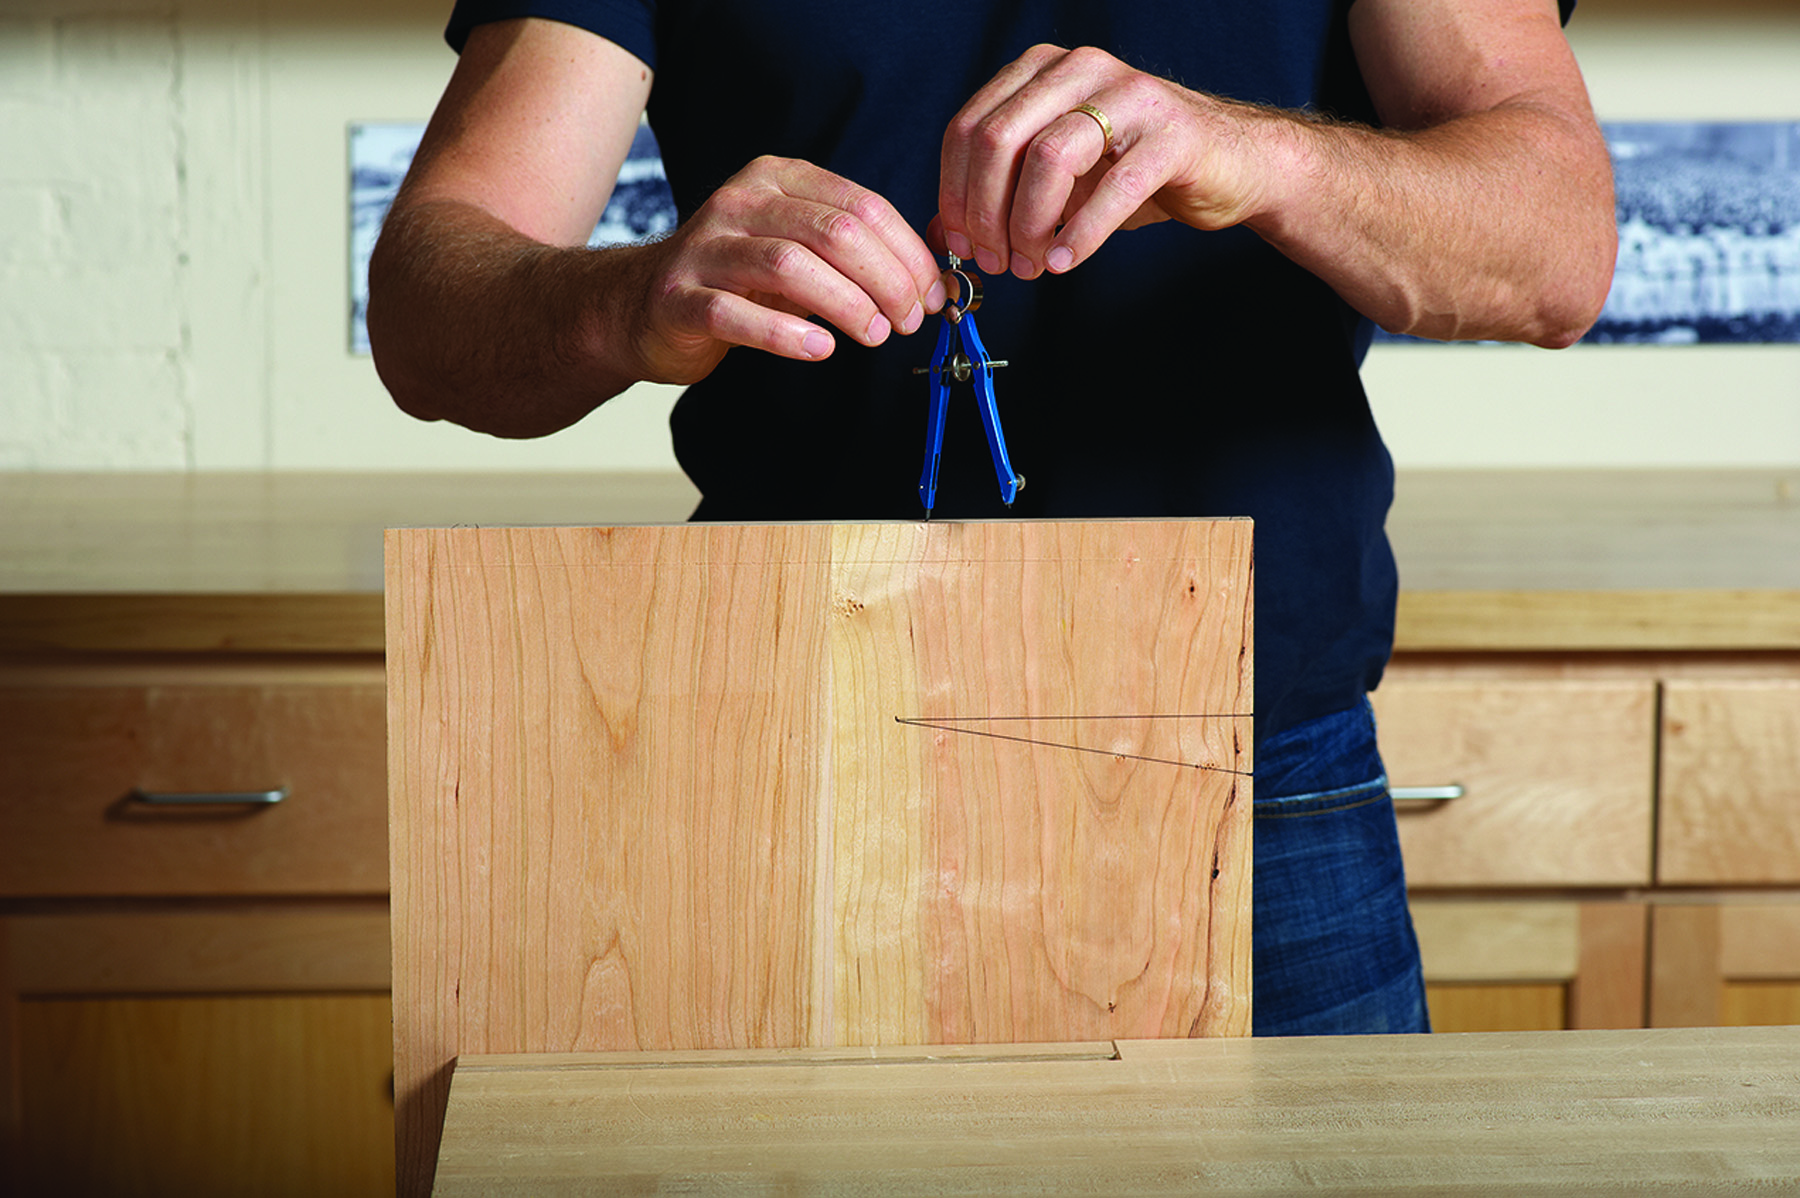
Pin spacing. To get dovetail pins spaced equally, walk the compass across the work and make adjustments until the spacing is just right.
The wider outside case parts should be glued up from narrower boards; a full-width board may cup over time. Before edge-gluing, clamp each mating pair of boards face to face and handplane the edges to “spring” the joint. Take a short pass along the middle of the edges, then another along more of the length and a final pass along the full length. The boards’ jointed edges should touch at both ends with a tiny gap in the middle, about 1⁄64“.
Glue up the boards starting with a single clamp in the middle. Add more clamps if necessary. After the glue has dried, clean up any excess and trim the parts to final width and length.
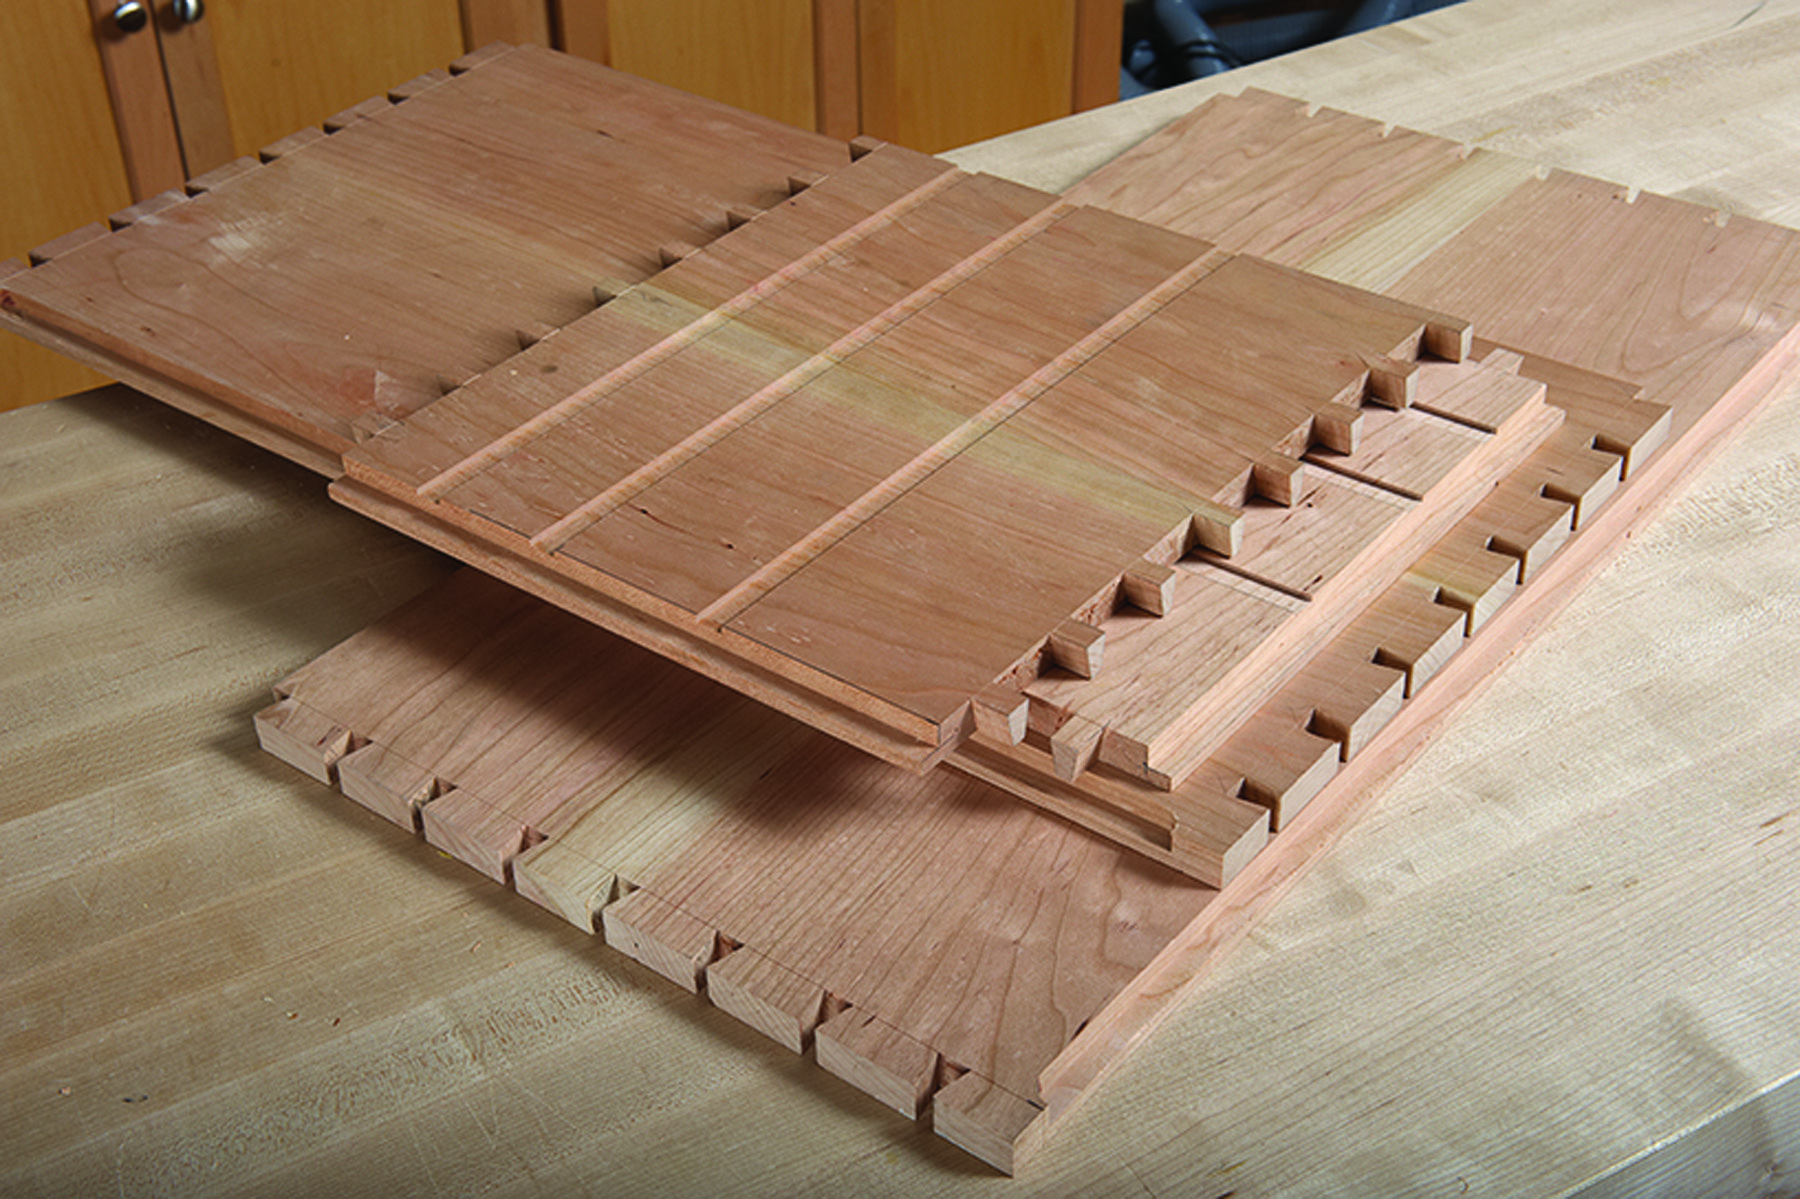
Through-Dovetails
Start by laying out the pins on the ends of the case side boards. Set a marking gauge to the thickness of the case parts and mark around the faces and edges at both ends of each board. Then, lay out the pins on the ends of a side board. Start by measuring and marking 3⁄16“ from each edge. Then use a compass or dividers to make seven equal divisions between the 3⁄16“ marks you just made (above). Start on one line and walk the dividers along to the other line. When they land directly on the line, the space is evenly divided. The points where the dividers hit are the center points of the pins. Transfer the divider marks to the outside face. Measure 3⁄16” on either side of the marks and, from that point, draw the dovetail angle across the end grain to the inside face. Square the lines down the inside and outside faces to the marking-gauge line.
Now you can cut the pins. Carefully saw on the waste side of each pencil line, then use a coping saw to cut out the bulk of the waste. Use a chisel to chop to the marking gauge line. Chop halfway in, then flip the board and come in from the opposite face to finish the waste removal. Check the surfaces with a square and pare each cheek and shoulder until they are true.
When the pins are finished, scribe the tails. Stand each end of the pin board on its corresponding tail board. Align the inside face of the pins with the marking gauge line on the inside face of the top or bottom board. Trace the pins using a sharp pencil.
Square the tail lines across the ends of the boards then cut carefully on the waste side of all of the lines. Saw out the bulk of the waste and chop to the marking-gauge lines. Lightly test-fit each corner and mark where the joints are too tight to close. Use a chisel to pare the tails to fit. Do not adjust the pins.
Dados & Rabbets
Stop that rabbet. Set up stop-blocks on your router table’s fence to register the front and back as you mill the rabbets in the back inside edges of the case sides.
First lay out the dados for the case dividers on the inside faces of the sides. The top one starts 23⁄8” from the top edge; the second dado is 47⁄8” from the top; the third is 81⁄4” from the top. The dados are all 1⁄2” wide x 1⁄8” deep and are cut across the entire face.
To cut the dados mount a 1⁄2” dado stack on the table saw to cut 1⁄8” deep. Make sure to cut the dados on the inside faces. Run the top edge of each side against the fence on all of the cuts. Once all of the dados are cut, use a router plane to clean up the dado bottoms.
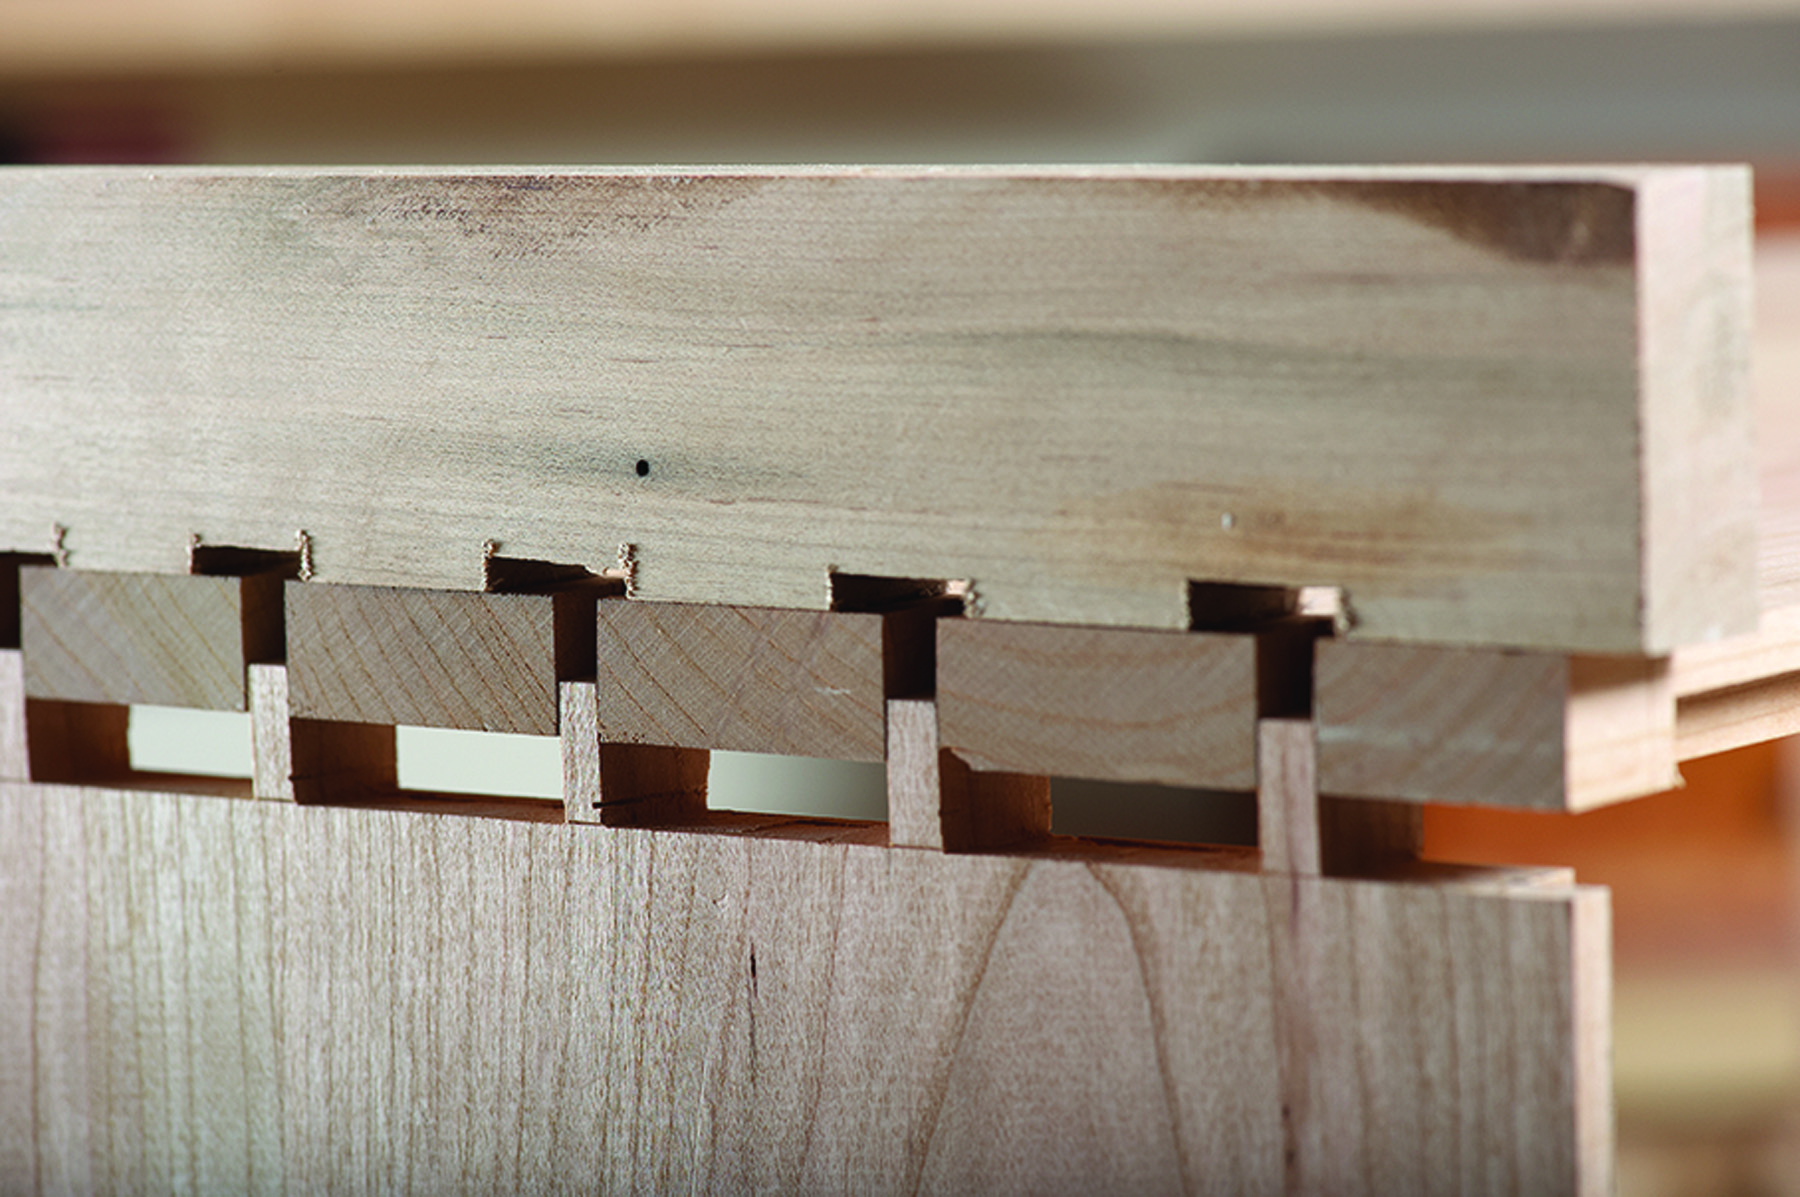
Ready, set, assemble. When all the case joinery, including dovetails, dados and rabbets, is completed, the toolbox is ready for glue-up.
Now lay out and cut the 3⁄8” x 3⁄8” rabbets on the back inside corner of the case sides, top and bottom. The rabbets in the top and bottom run the full length of the edge. The rabbets on the sides stop 3⁄8” from each end.
Cut the rabbets at the router table. Set a straight bit to cut 3⁄8” from the tabletop and the fence. Run both the top and bottom all the way through. Now set up to make the stopped cuts. With the router off, mark the front and back edges of the bit on the fence. Clamp front and back stops on the fence so that the bit will not cut past either end of the layout lines.
Custom caul. To make sure the dovetail joints seat completely, make a clamping caul that applies pressure on only the tails.
To make the cuts, set the back corner of the side against the rear stop and slowly move the piece toward the fence and into the cutter. Once it is against the fence, push the piece to the front stop then slowly swing the back of the piece away from the cutter.
Glue up the Case
Notch your clamping cauls around the pins so they press only on the tails. Glue and clamp the bottom corners first. Once the glue starts to set, remove the clamps and glue the top corners, checking for square. Now leave the clamps on until the glue has fully cured.
Make the Case Dividers
Frames divide the case and act as drawer supports. The outside corners of the frames are joined with bridle or slip joints. The two upper dividers have a middle rail with stub tenons.
Begin by cutting the slots in the long stiles. The slots are 1⁄4” thick x 13⁄4” long, and go through the full width of the front and back frame parts, centered in the thickness of the parts. Put a 1⁄4“- thick dado stack on your table saw set to cut 13⁄4” high. Cut the slots with the parts on end using a backer board, such as tenoning jig, to support the piece. When done, cut grooves for the stub tenons in the front and back pieces. Without moving the fence, lower the dado stack to 1⁄4” and cut grooves on the inside edges of the top two frames.
Now cut and fit the frame tenons using your dado stack and table saw. Run the stock flat on the saw table guided with the miter gauge. The dado stack should be set to cut just 1⁄8” high. Cut the top face of the tenons first, then fit the joint by trimming the bottom face. For the top two center rails, cut the tenons at the same time as the rest. After all of the joints are fit, trim the tenons on the center runners to 1⁄4” long.
With the frame joinery complete, glue up the frames and fit them to the case. Make sure the frames are square. If necessary, clamp the slip joints closed so the joints don’t flare out. Once the glue dries, flush the top surfaces at the joints with a handplane. Fit the frames to the dados in the case sides by planing the bottom surfaces.
When the frames are done, glue on the cherry divider faces. Mill them just thicker than the frames. Glue on the faces, allowing additional length on each end for the dovetails. Once the glue dries, handplane them flush to the frames. Lay out the length of the dovetails on the case sides. Now slide each frame into place and mark the dovetail length and the bottom of the dovetail dado on the face piece. When done, cut each end of the cherry faces to length.
Tommy Mac’s Toolbox Cut List
No.ItemDimensions (inches)MaterialComments
t w l
Case
❏ 2 Top & bottom 5⁄8 x 14 1⁄2 x 28 Cherry
❏ 2 Sides 5⁄8 x 14 1⁄2 x 13 1⁄4 Cherry
❏ 3 Divider fronts 1⁄2 x 1 3⁄4 x 27 Cherry
❏ 3 Divider backs 1⁄2 x 1 3⁄4 x 27 Secondary
❏ 6 Divider sides 1⁄2 x 1 3⁄4 x 13 3⁄8 Secondary
❏ 2 Center runners 1⁄2 x 1 3⁄4 x 13 3⁄8 Secondary Trim to fit
❏ 3 Divider faces 1⁄2 x 3⁄4 x 27 5⁄8 Cherry Leave long
❏ 1 Vertical partition 1⁄2 3⁄4 5 Cherry Leave long
❏ 2 Center drawer guides 1⁄2 x 1⁄2 x 13 Secondary
❏ 4 Backs 3⁄8 x 4 x 27 1⁄2 Secondary Shiplap
Drawers
❏ 2 Fronts (upper) 3⁄4 x 1 3⁄4 x 13 1⁄8 Cherry
❏ 4 Sides (upper) 3⁄8 x 1 3⁄4 x 13 1⁄2 Secondary
❏ 2 Backs (upper) 3⁄8 x 1 1⁄4 x 13 1⁄8 Secondary
❏ 2 Fronts (narrow mid.) 3⁄4 x 2 x 13 1⁄8 Cherry
❏ 4 Sides (narrow mid.) 3⁄8 x 2 x 13 1⁄2 Secondary
❏ 2 Backs (narrow mid.) 3⁄8 x 1 1⁄2 x 13 1⁄8 Secondary
❏ 1 Front (wide mid.) 3⁄4 x 2 7⁄8 x 26 3⁄4 Cherry
❏ 2 Sides (wide mid.) 3⁄8 x 2 7⁄8 x 13 1⁄2 Secondary
❏ 1 Back (wide mid.) 3⁄8 x 2 3⁄8 x 26 3⁄4 Secondary
❏ 1 Front (lower) 3⁄4 x 3 7⁄8 x 26 3⁄4 Cherry
❏ 2 Sides (lower) 3⁄8 x 3 7⁄8 x 13 1⁄2 Secondary
❏ 1 Back (lower) 3⁄8 x 3 3⁄8 x 26 3⁄4 Secondary
❏ 4 Narrow bottoms 3⁄8 x 14 5⁄8 x 12 3⁄4 Secondary
❏ 2 Wide bottoms 3⁄8 x 14 5⁄8 x 26 3⁄8 Secondary
❏ 12 Drawer stops 1⁄8 x 1⁄2 x 5⁄8 Secondary

 Drawer Divider Front
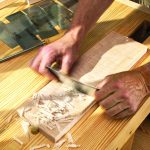
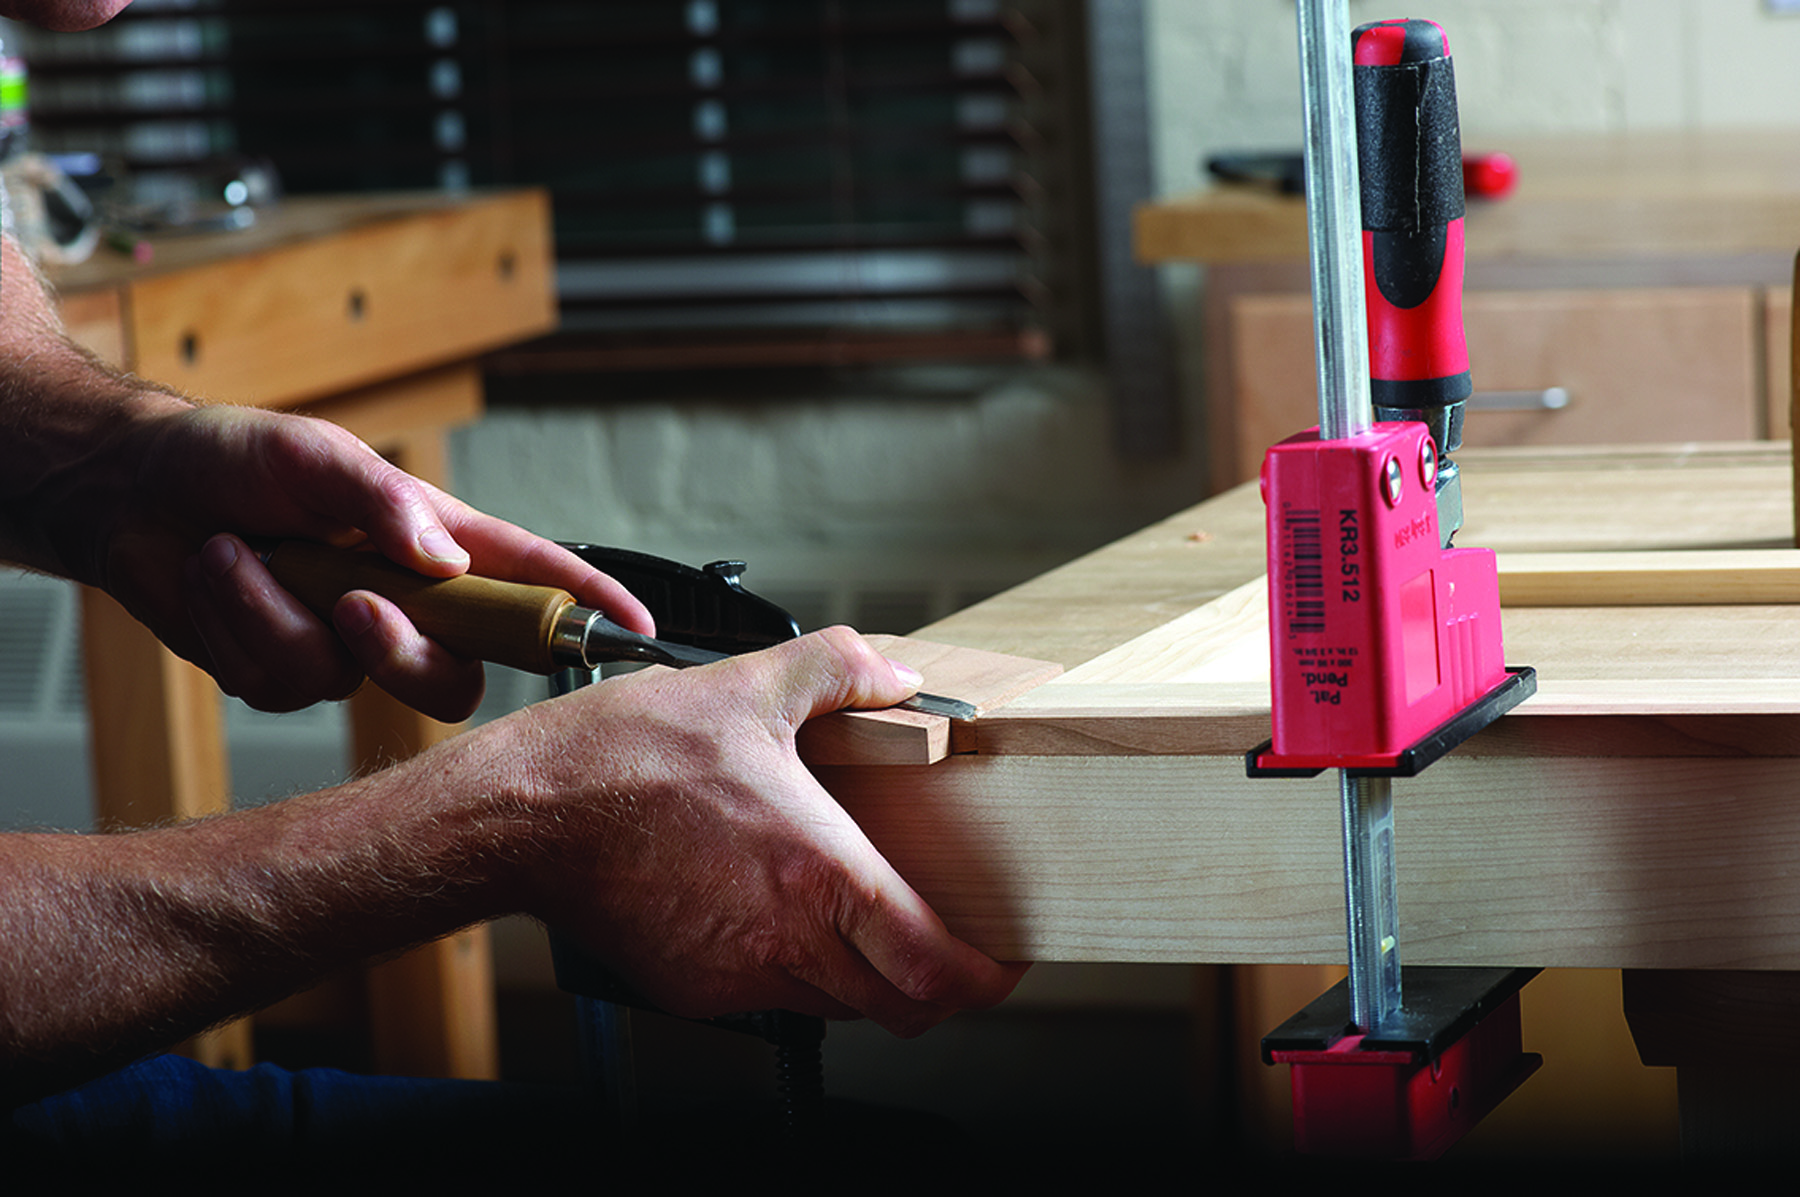
I use a “ramp block” that helps me make the dovetails for the drawer divider front. To make it, mill a piece of scrap to 3⁄4” thick x 4″ wide (and make sure it’s a scrap that allows you to work a safe distance from the blade). On the edge, mark 1⁄2” from one face. Tilt the table saw blade to 10º and set the fence just over 5⁄8” from the bottom of the blade. With the scrap on edge, rip the angle into the piece. Skim off any saw marks with a handplane.
Clamp the ramp block and divider as shown below. The block should be perpendicular to the face piece and tight against its end. Chop down on the dado mark and remove chips until the chisel rides flat on the ramp block. Repeat this on the top and bottom of both ends of all of the dividers.
When done, fit the dividers to the case. Slide each divider in place then use a sharp pencil to trace the dovetails onto the front edges of the case. Remove the dividers, square the lines down the inside face and mark the 3⁄4” depth of the sockets. Saw, chop and pare the sockets until the dividers fit snugly.
Partition & Guides
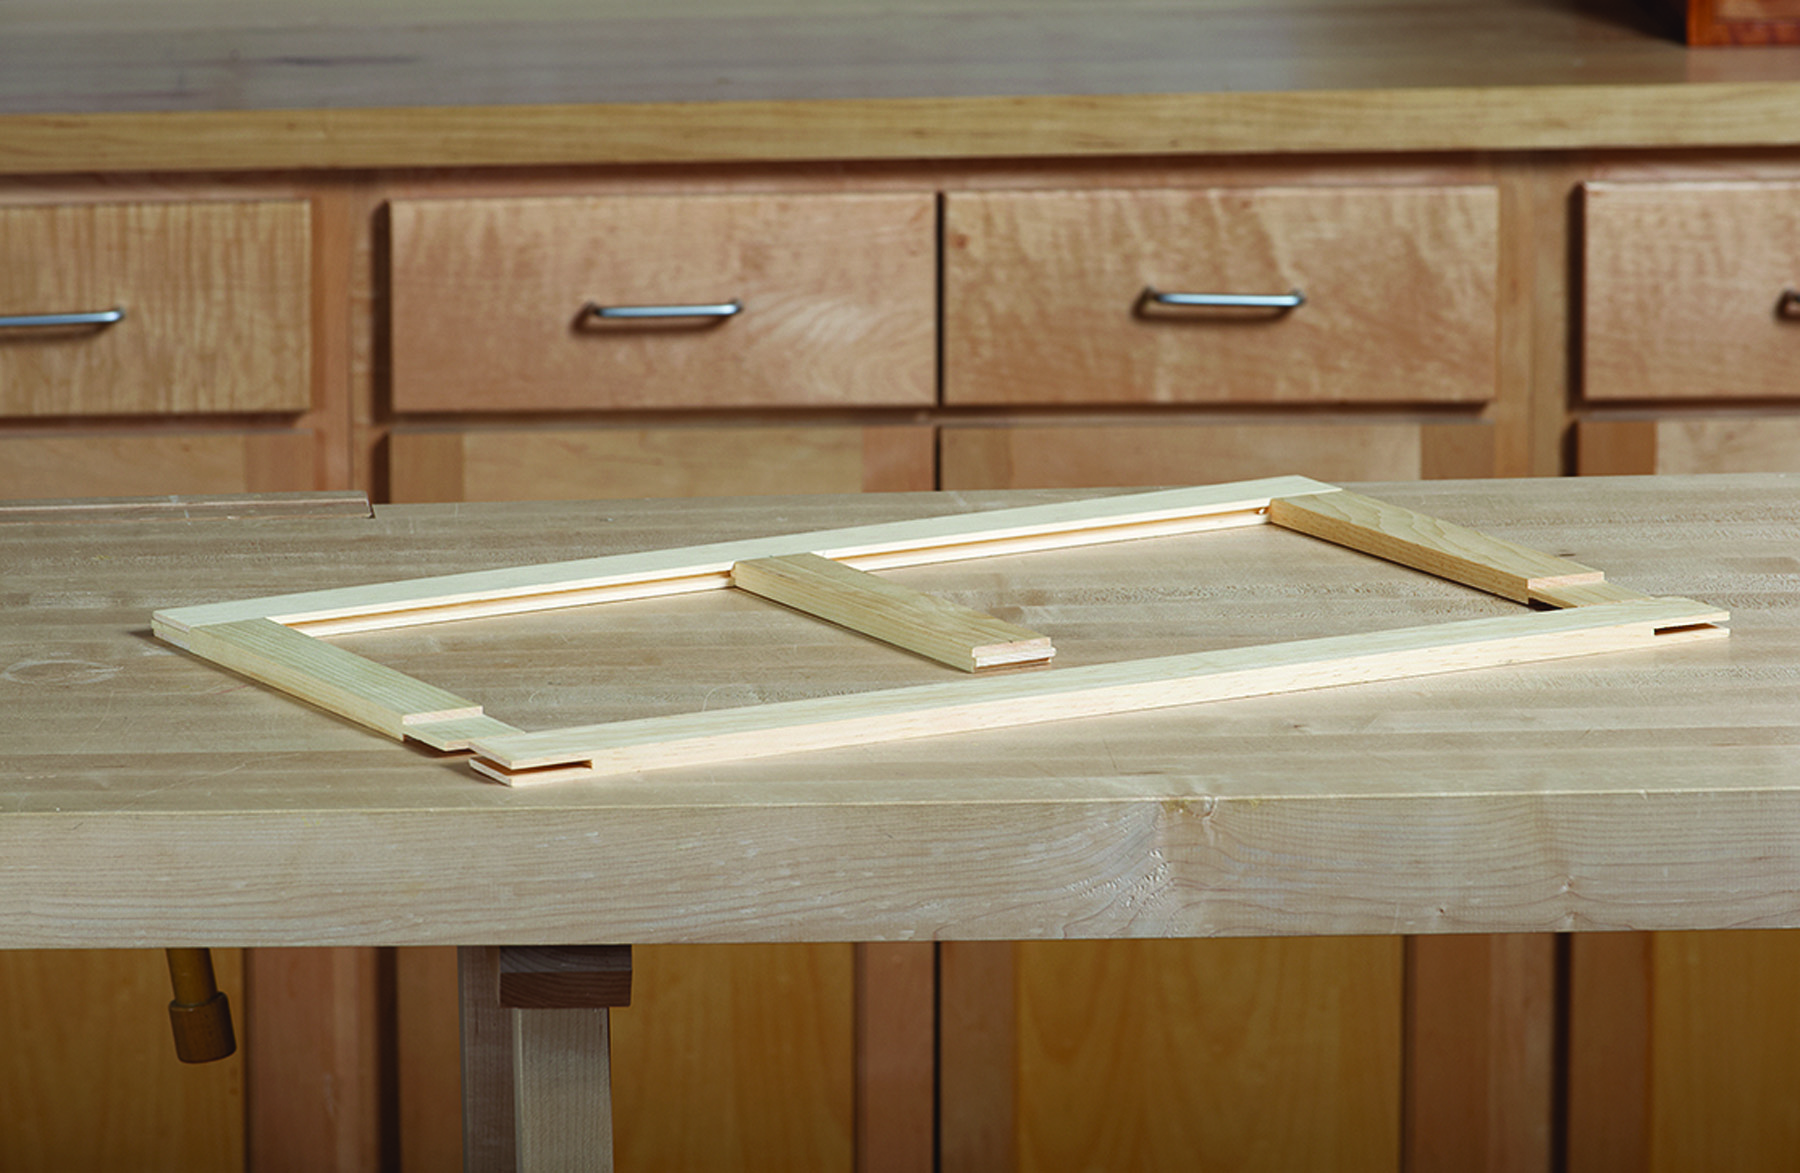
Frame-up. The case is divided using frames with slip joints at the ends and stub tenons where needed for a center divider. These frames support the drawers and fit in dados.
Mark the length of the dovetails and dados on the case top and second frame. The tails are 5⁄16” from the inside edges of the top and frame. The dados are 1⁄8” deep x 1⁄2” wide, and centered in the case. Use a square, knife and chisel to clear out the 3⁄4“-long dados. Make sure the partition fits tightly in the dados. If not, either widen the dados or handplane the partition to fit. Once the partition fits, clamp the top divider to the second with the shoulders aligned on the ends, and scribe the dado across the face of the top divider. Cut the 1⁄2“-deep x 3⁄4“-wide notch in the top divider and fit it to the partition.
Now cut the partitions to length. First, dry-fit the frames in the case and measure the length of the partition. Dovetail the ends using the ramp block that you used for the dividers. Mark the 1⁄4” dovetail length on the ends of the partitions. Set in the shoulders on the back and remove about 1⁄8” of the back of the tails. Use these notches to test the partition in the dados. Once the shoulders fit, cut the tails with the ramp block as before.
Guided chisel. As an aid to cutting the dovetails on the divider fronts, use a shop-made “ramp block” to guide the chisel and help achieve consistent sizes and angles.
Fit the partition to the case. With the dividers in place, slide the partition into the dados and scribe the tails on the case and second divider. Mark the 5⁄8” depth of the tails as well. Remove the partition and divider to cut and fit the sockets. When done, glue in the dividers and partition. Start by sliding the dividers in almost completely then apply glue to the front 2″ and the dovetail. With the dividers in place, glue in the partition. Glue the center drawer runners on the top two dividers directly behind the partition. Use a square to make sure they are flush to the width of the partition and square to the front of the case.
Make the Drawers
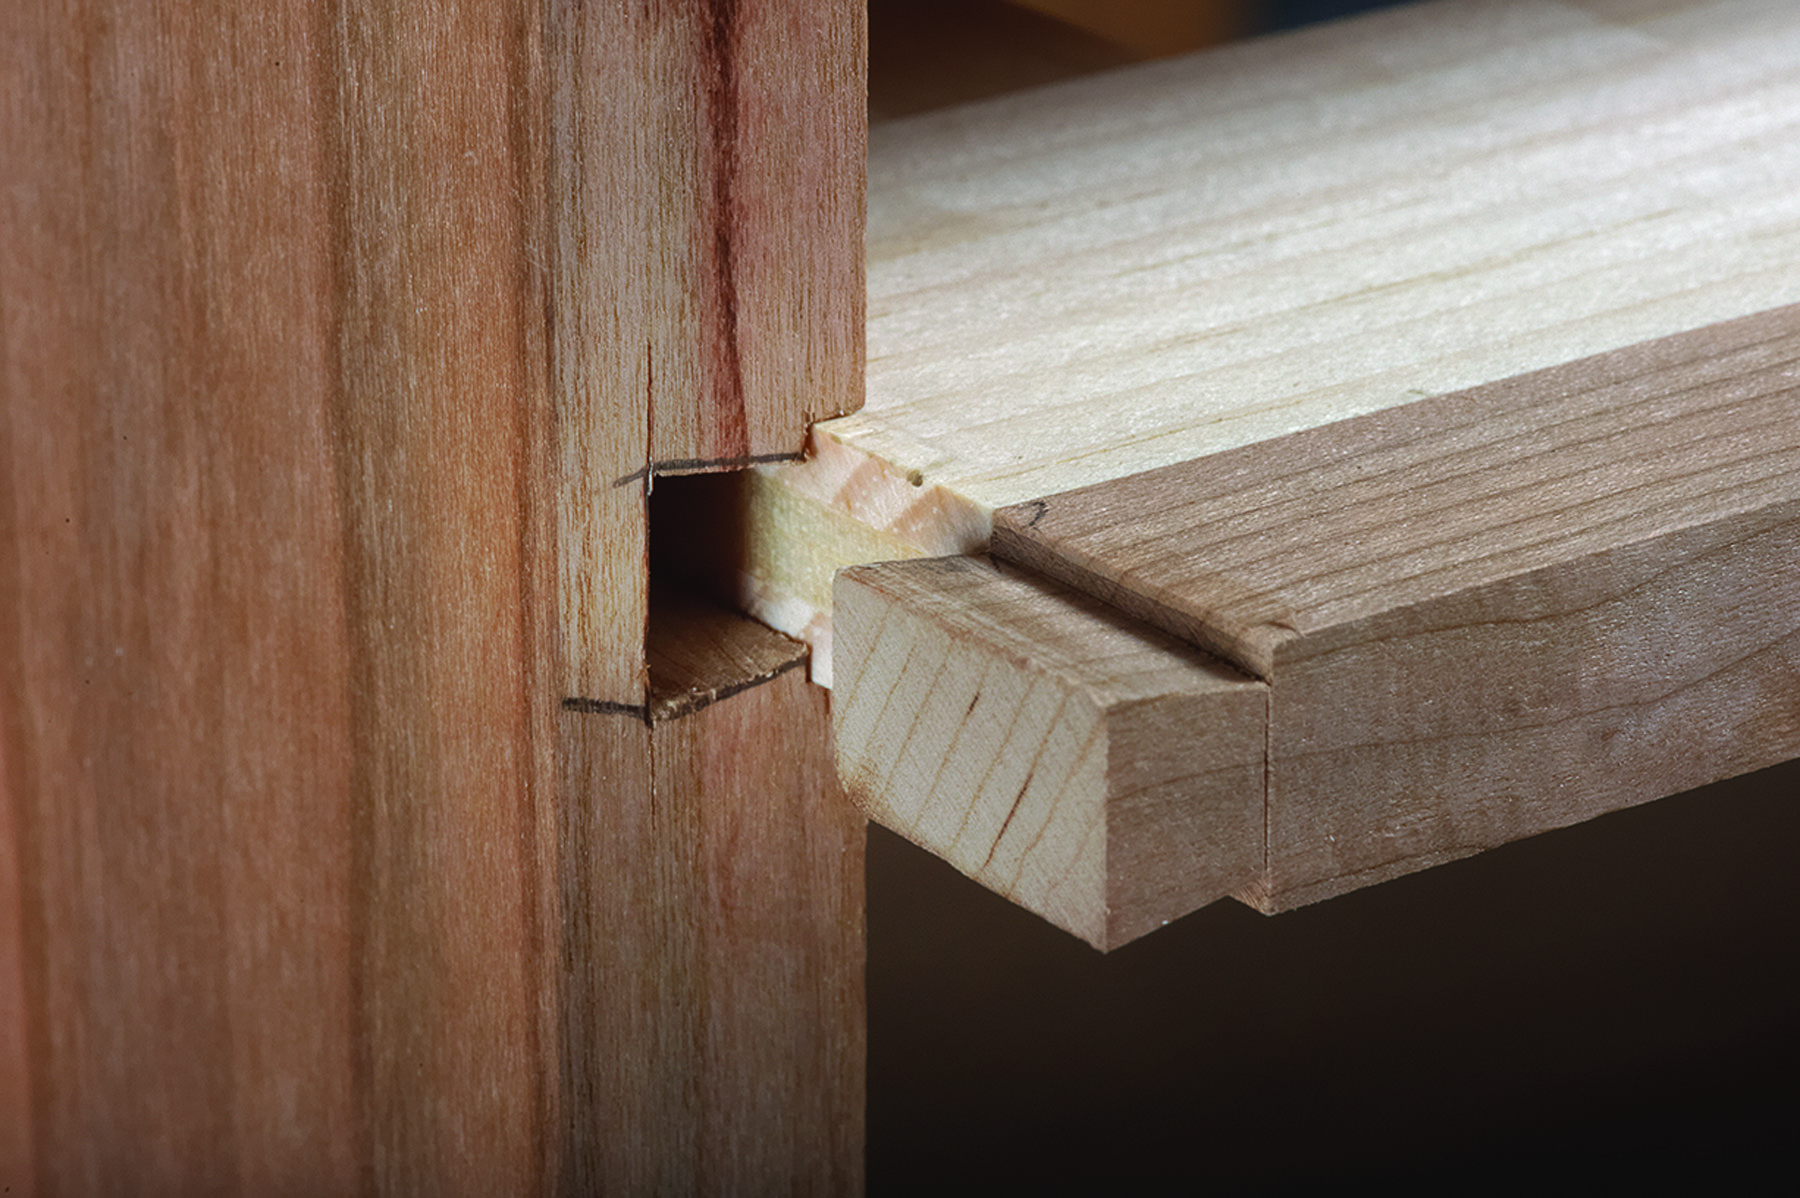
Dovetail socket. The socket for the case dovetail is located at the end of a shallow dado that houses the drawer divider.
On the inside face of each drawer part cut a 1⁄4“-wide x 3⁄16“-deep groove 1⁄4” up from the bottom edge. Once the grooves are cut, rip the backs to width, cutting them flush to the top of the groove. Next, dovetail the drawers. Lay out the half pins on the drawer fronts. Set a marking gauge to 9⁄16” and, from the inside face, mark the end grain on both ends of each drawer front.
Use the same setting to mark around the front of the drawer sides. Reset the marking gauge to the 3⁄8” thickness of the drawer sides and mark the inside face on both ends of each front. With the same setting, also mark around the back of each side and around both ends of each drawer back. Lay out a 1⁄4” half pin on the top and bottom of the drawer front and back. Also mark a 3⁄8“-wide pin in the center. Mark the dovetail angle on the end grain and square the lines down the inside faces.
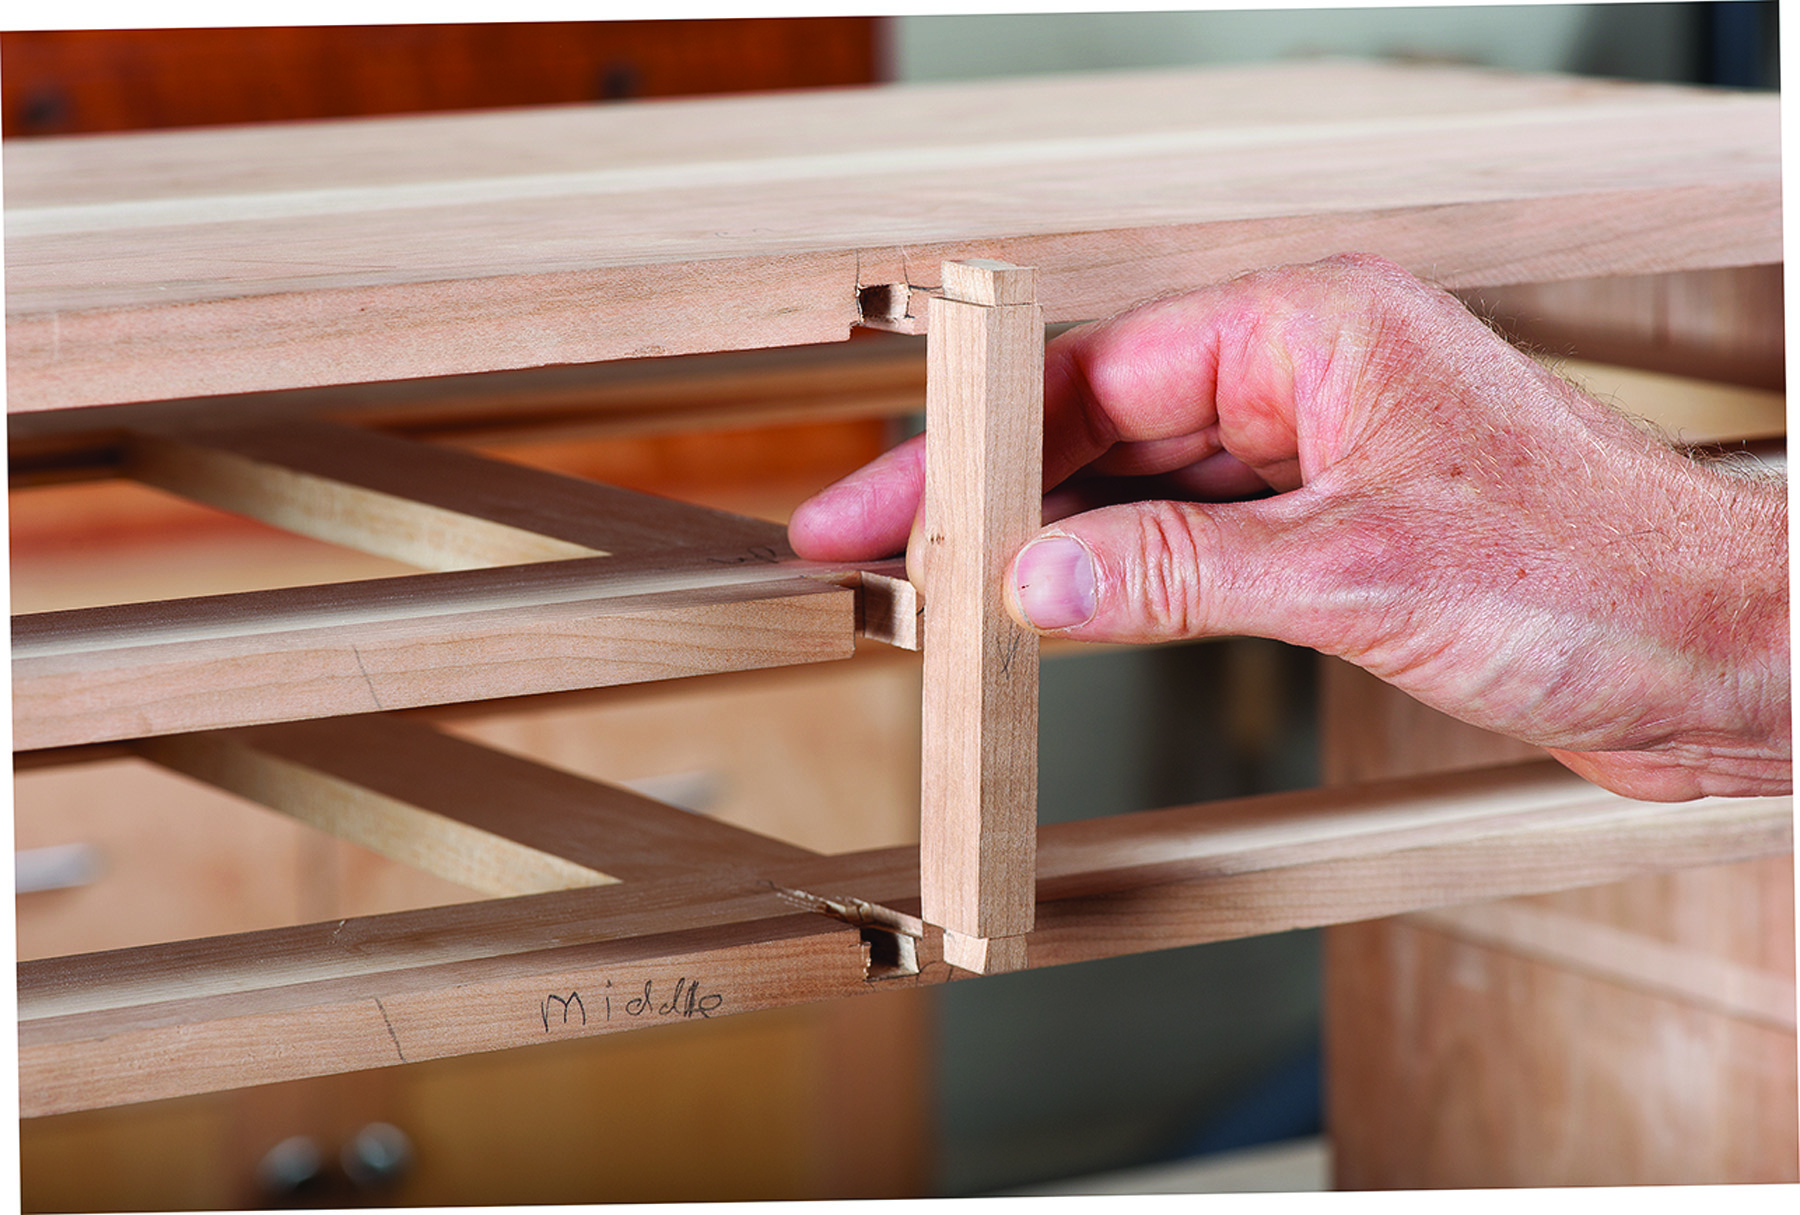
Upper drawers divided. A vertical partition divides the case for the four narrower upper drawers. It is dovetailed like the divider fronts at the ends, and it is let into the middle of the top drawer divider with a simple notch.
On the drawer fronts, saw at an angle taking care not to cut through either marking gauge line, then chop out the waste, working down to the lap line on the fronts. Pare the pins until the cheeks are flat and perpendicular to the ends. Mark, cut and fit the tails just as you did on the case.
Glue up the drawers making sure they are square. Clean off all of the glue and flush all of the surfaces with a handplane. Make sure the drawers sit flat on a flat surface. Test the drawer in its opening. Plane the top edges of the sides until the drawers move easily in their pockets.
Glue the Drawer Stops
With the drawers fit, align the drawer fronts flush with the case and dividers. Apply a small amount of glue to each stop. Reach through the back of the case and position the stops on the tops of the dividers. Make sure the stop is tight to the back of the drawer front. Once the glue sets, test the drawer and trim the stop if necessary.
Cut the bottoms to fit in the grooves. Set the table saw to 6º with a zero-clearance insert and a featherboard in front of the blade. Set the fence to just under 1⁄4” from the blade. Bevel both sides and the front of the bottom. Adjust the fence until the bottom just starts to slide into the drawer. Cut all of the bottoms and fine-tune the fit with a plane. When the bottoms fit, trim them flush to the back of the drawer. Cut a 1⁄2“-long x 1⁄8“-wide notch in the center of the back edge of each drawer bottom. Insert a screw through the notch into the drawer back to pinch and hold the bottom in place.
Shiplap the Back
Rip the backboards to 4″ wide. On one edge of each cut a 3⁄16“-deep x 3⁄8“-wide rabbet. On two of the boards, cut the same rabbet on the opposite face of the opposite edge. Fit a single-rabbet board on the bottom of the case in the back rabbet and screw it along the bottom edge. Lay the double-rabbet boards in next so the rabbets overlap, leaving a 1⁄8” reveal in each joint. Screw these boards in at the ends, near where they overlap the board below. Trim the unrabbeted end of the final board until it fits in place with the same 1⁄8” reveal and screw it in place.
Sand & Finish
Make sure all the glue has been cleaned off of the surfaces. Address any tear-out, dents or gouges before you start to sand. Then thoroughly sand beginning with #120-grit paper and progress through finer grits stopping at #180 or #220 grit. Then ease all the sharp edges. Apply the finish you prefer following the manufacturer’s instructions. When it’s dry, install drawer pulls of your choice (mine are iron; 3⁄4” for the top drawers, 11⁄8” for the bottom drawers).
When your toolbox is completed you will have learned many of the essential woodworking skills. And if you’re like me, your joinery tolerances will have tightened up a lot just learning the ins and outs of dovetailing.
Extra: SketchUp model
Here are some supplies and tools we find essential in our everyday work around the shop. We may receive a commission from sales referred by our links; however, we have carefully selected these products for their usefulness and quality.