We may receive a commission when you use our affiliate links. However, this does not impact our recommendations.
Appearance. When the edge is profiled, either with a moulding plane or a router, the checkerboard pattern appears within the edge of the bead.
Decorative banding within moulding adds a distinctive detail.
For my very first veneer project, I decided to make a curved-top jewelry box. I knew I would need to use solid wood on the edges to protect the fragile veneer and I also wanted to embellish the box with some geometric inlay bands. At the same time I was drawing up some inlay ideas, I was staring at a new moulding plane that was on my bench. A light bulb went off in my head and I thought, “why not make my edgebanding from my inlay blank?”
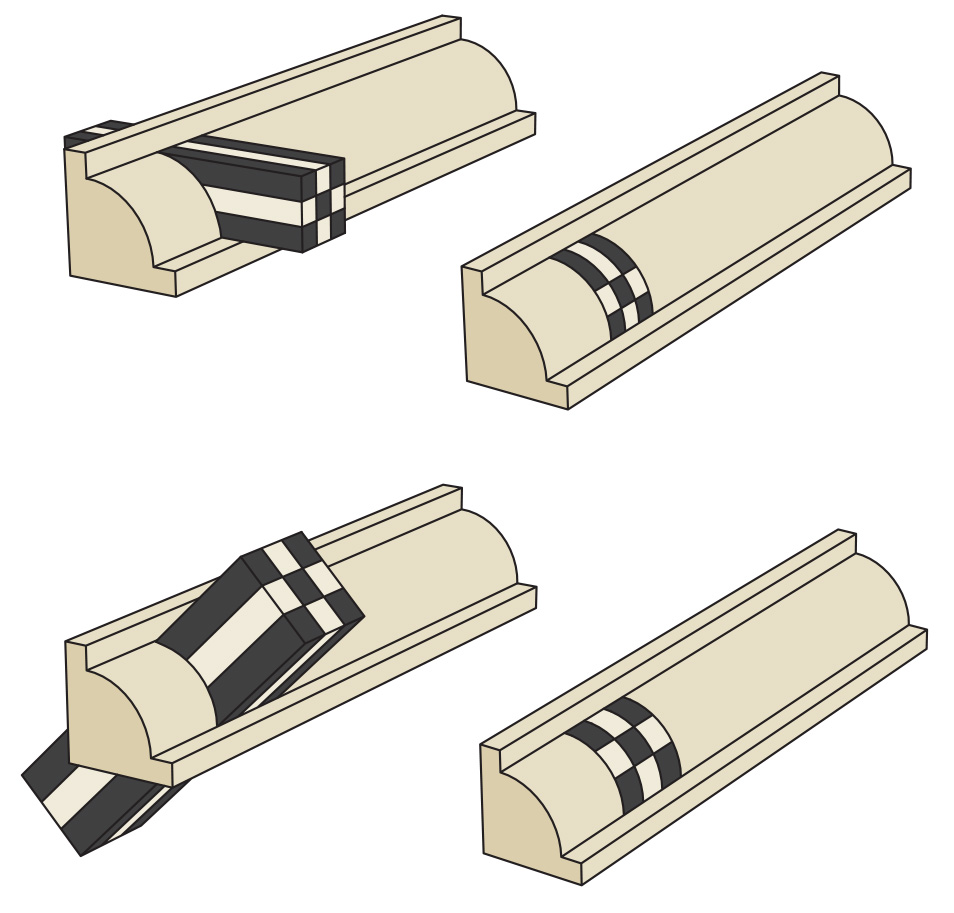
Orientation. If the inlay banding is placed at a right angle to the edge moulding, the pattern would be skewed when the moulding is cut (top). Tilting the banding to a 45° angle eliminates that distortion (bottom).
The process seemed easy enough: Cut a rabbet in the corner and fill it with a thick slice from my inlay packet then run the profile with my new plane or a router bit. Well, I did a bit more thinking and realized that many if not most profile bits and planes cut at 45˚ degrees, so just placing the banding in the rabbet at 90˚ and cutting a profile that slants at 45˚ would skew the inlay detail – it would be longer on the side.
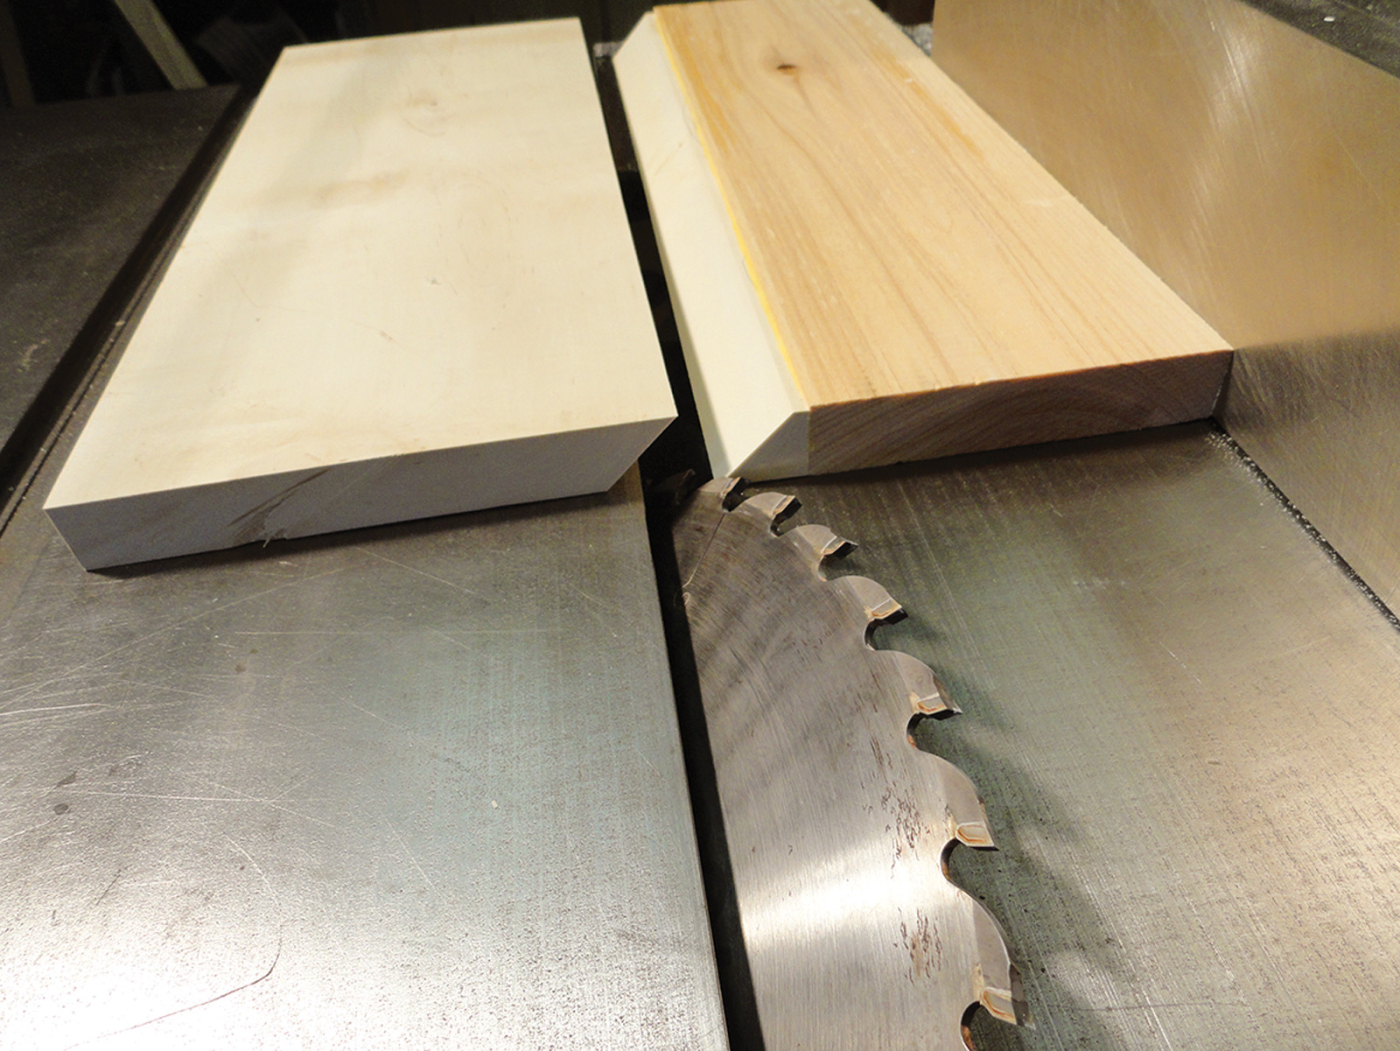
I determined that in order to work, the inlay would have to be presented at 45˚ too. Easier said than done. After several attempts (all successful – some difficult and others wasteful), I have settled on the following method: Rip a board at 45˚ and insert the inlay strip in the cut.
In this example, I’m starting out with a holly and ebony checkerboard inlay packet (instructions at bottom of article) no thicker than the middle section of a 3⁄16“-radius corner bead profile my plane or router bit could cut. I wanted the rest of the profile to be filled in with holly, so the board I ripped at 45˚ was holly.
1. Good insurance. Rather than work with small pieces close to sharp blades, the inlay is glued between wide pieces of scrap material.
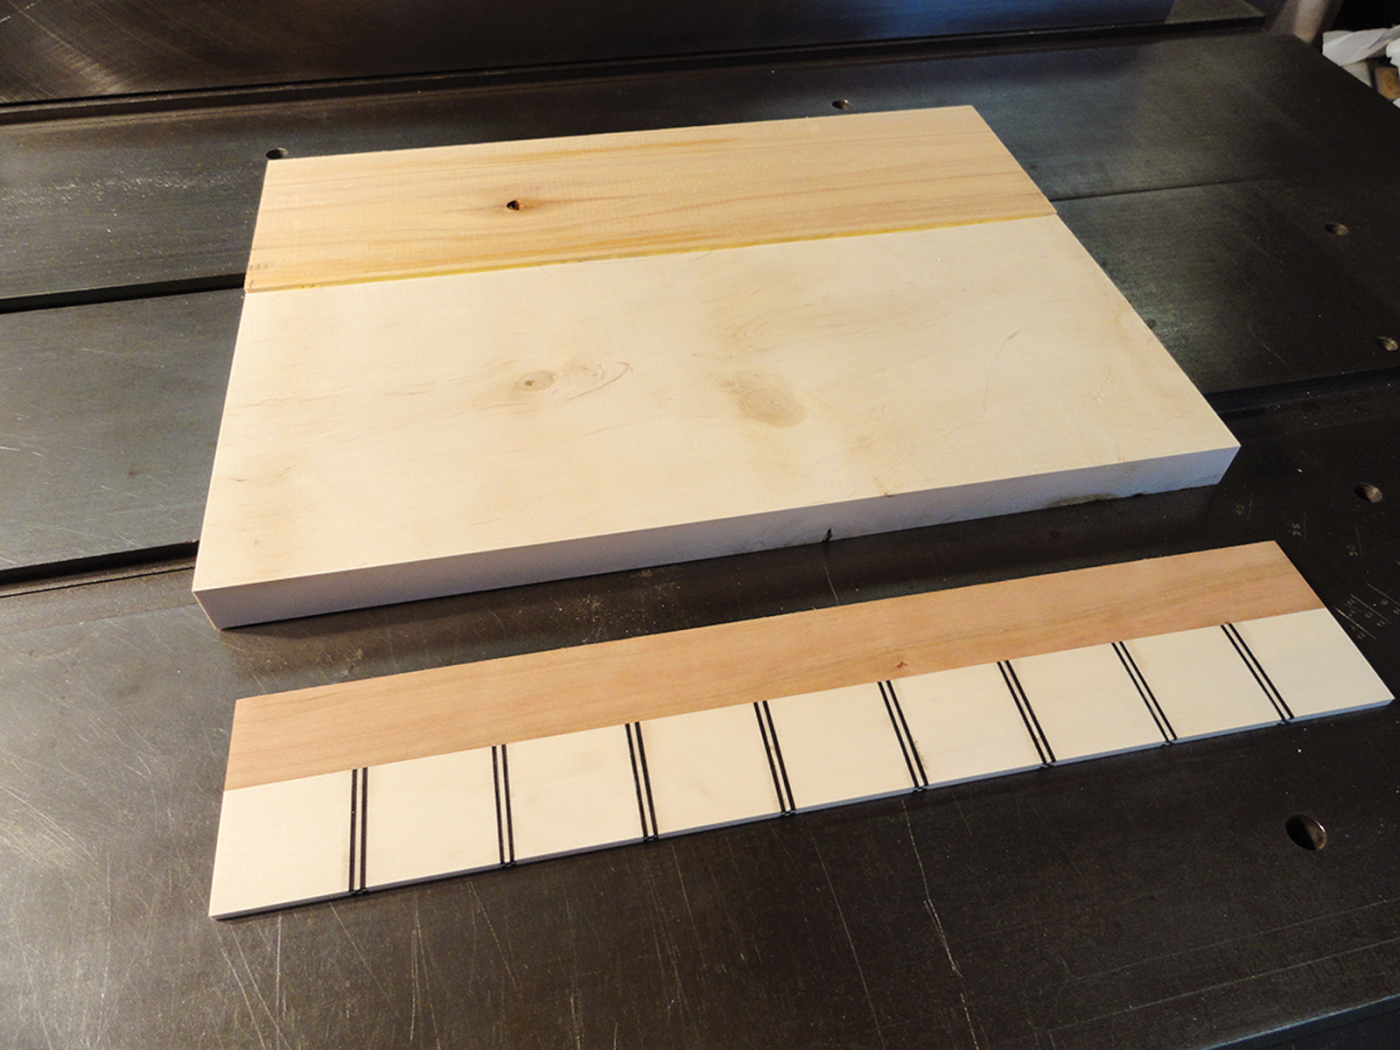
2. Conservative approach. The checkerboard inlay blank is glued to a thin scrap and ripped to make the most of the inlay blank.
3. Margin of safety. Scrap is glued to the blank to conserve material and keep the tilted blade away from the fence.
Because both holly and ebony are expensive and sometimes hard to find, I wanted to conserve my stock. I did so by attaching scrap stock to the edge of the inlay packet and the edge of the holly. Edge-gluing the scrap to the holly also adds a safety margin for the rip by moving the work away from the tilted table saw blade, which makes the offcut safer to handle. Adding the scrap to the inlay maximizes the yield of the packet since you need a large width to fill the rip cut but only really need about a 1⁄4” of the inlay for the profile.
The next step is to glue the inlay into the 45˚ rip cut. I like to use a white glue that dries with a clear glue line, such as Elmer’s. You’ll need to clamp the boards together both edge to edge and top to bottom to stop the boards from just ramping off each other.
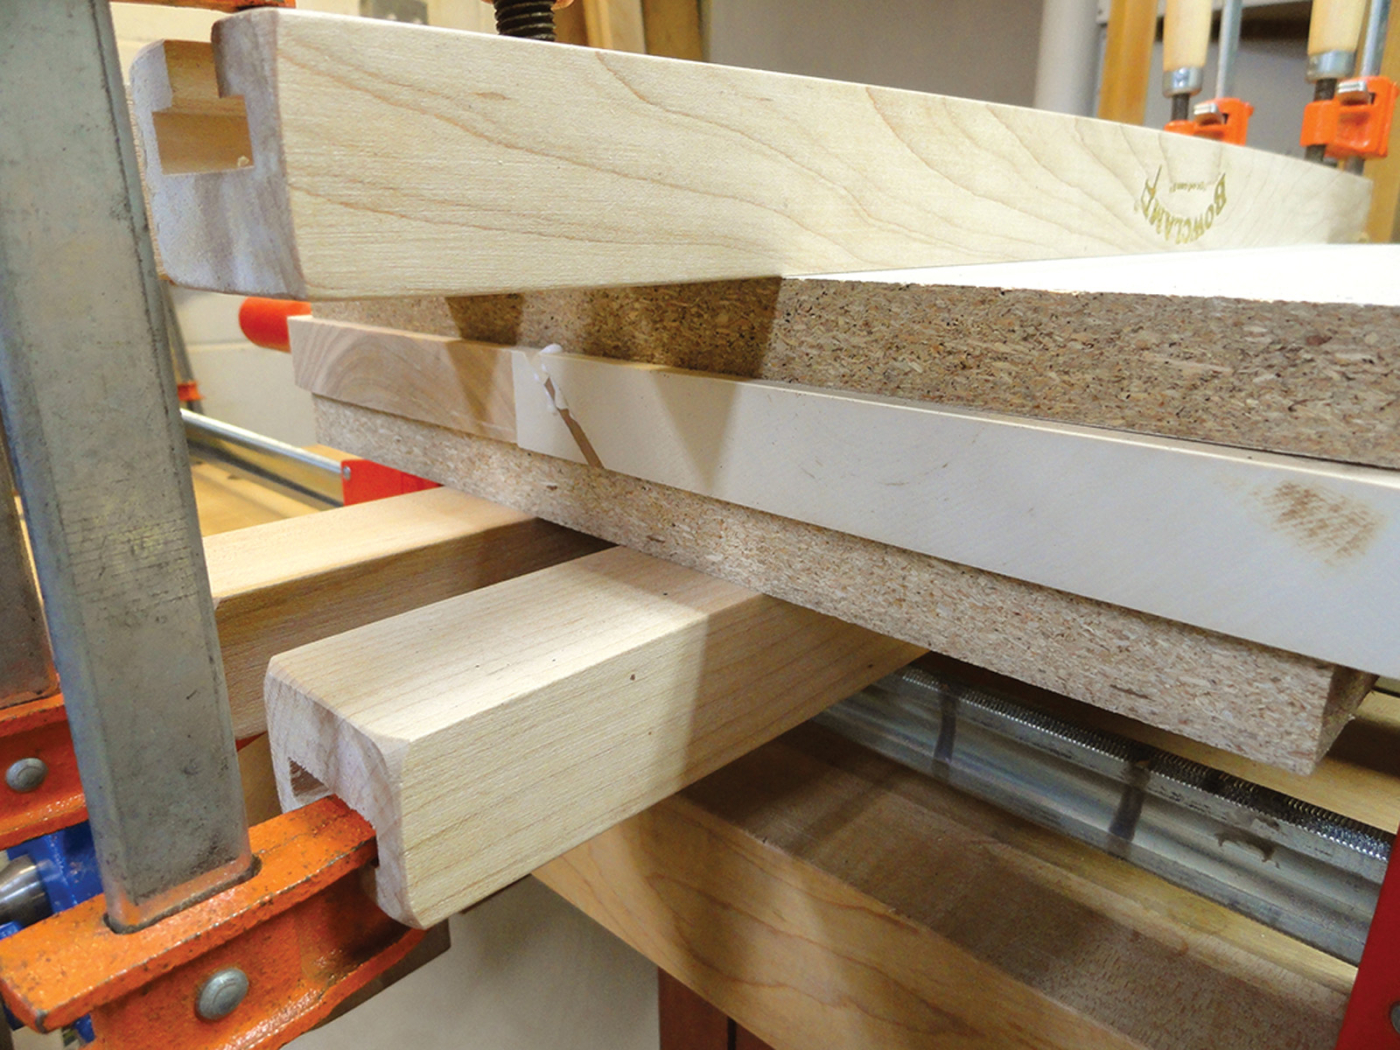
4. Tight squeeze. Cauls above and below the joint prevent the bevels from sliding apart as clamps are tightened.
My method is to use several clamps for the edge and then sandwich them with two pieces of melamine board (so the glue doesn’t stick,) with Bowclamp cauls. I tighten the cauls about 75 percent and then start alternating edge clamps and cauls until the boards are flat and the glue starts squeezing out. I leave the clamps on overnight.
5. Orientation. With the clamps removed, the blank is ready to be turned into moulding.
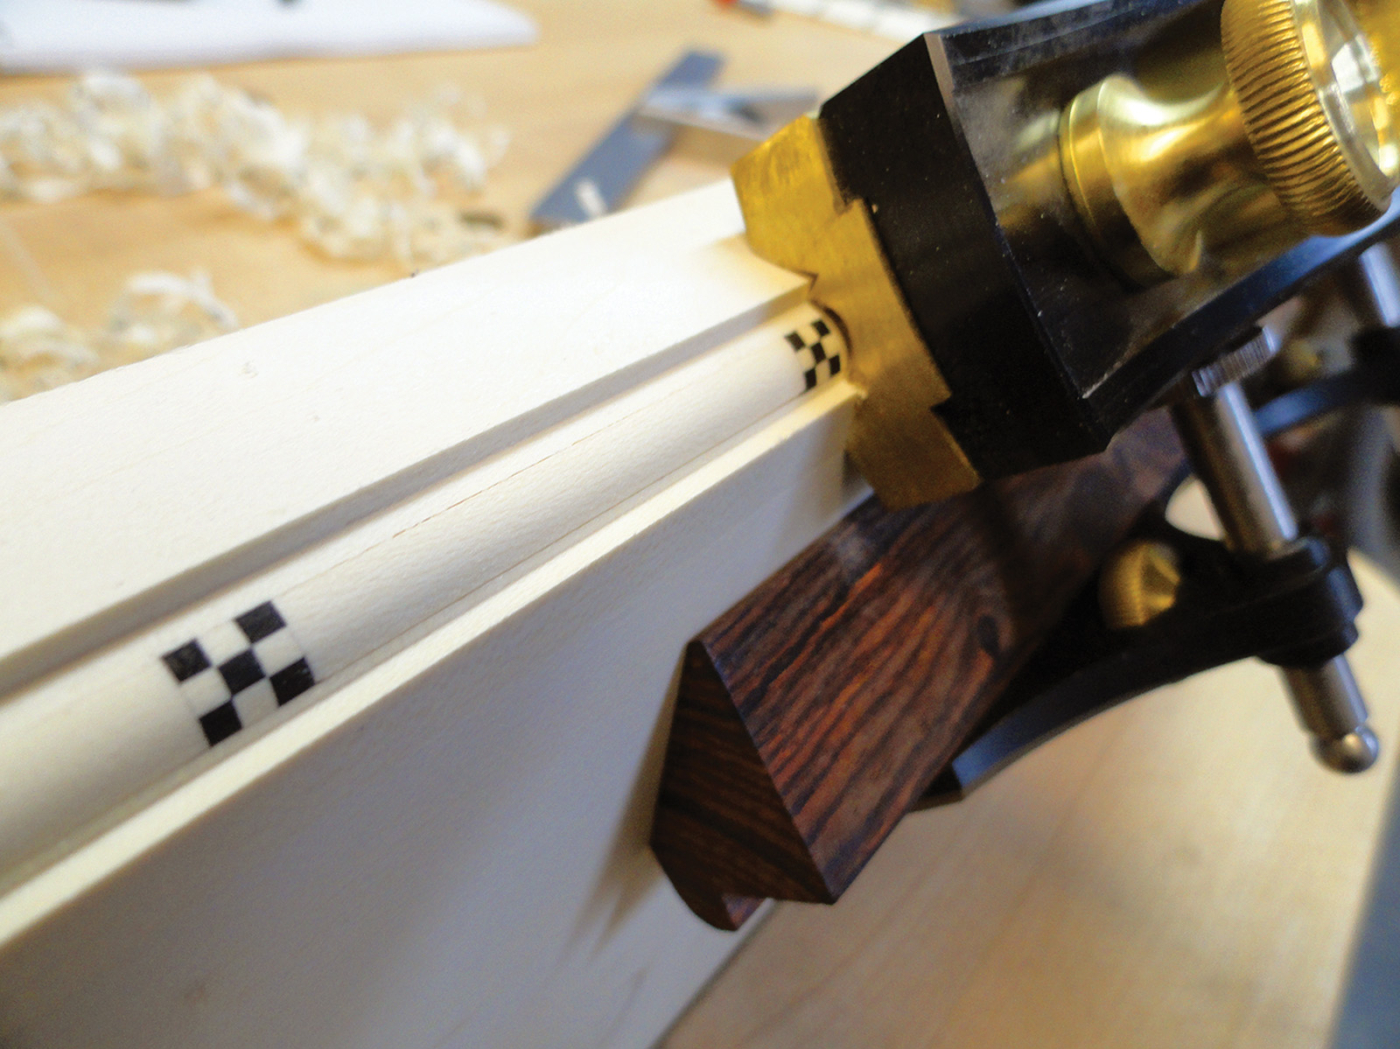
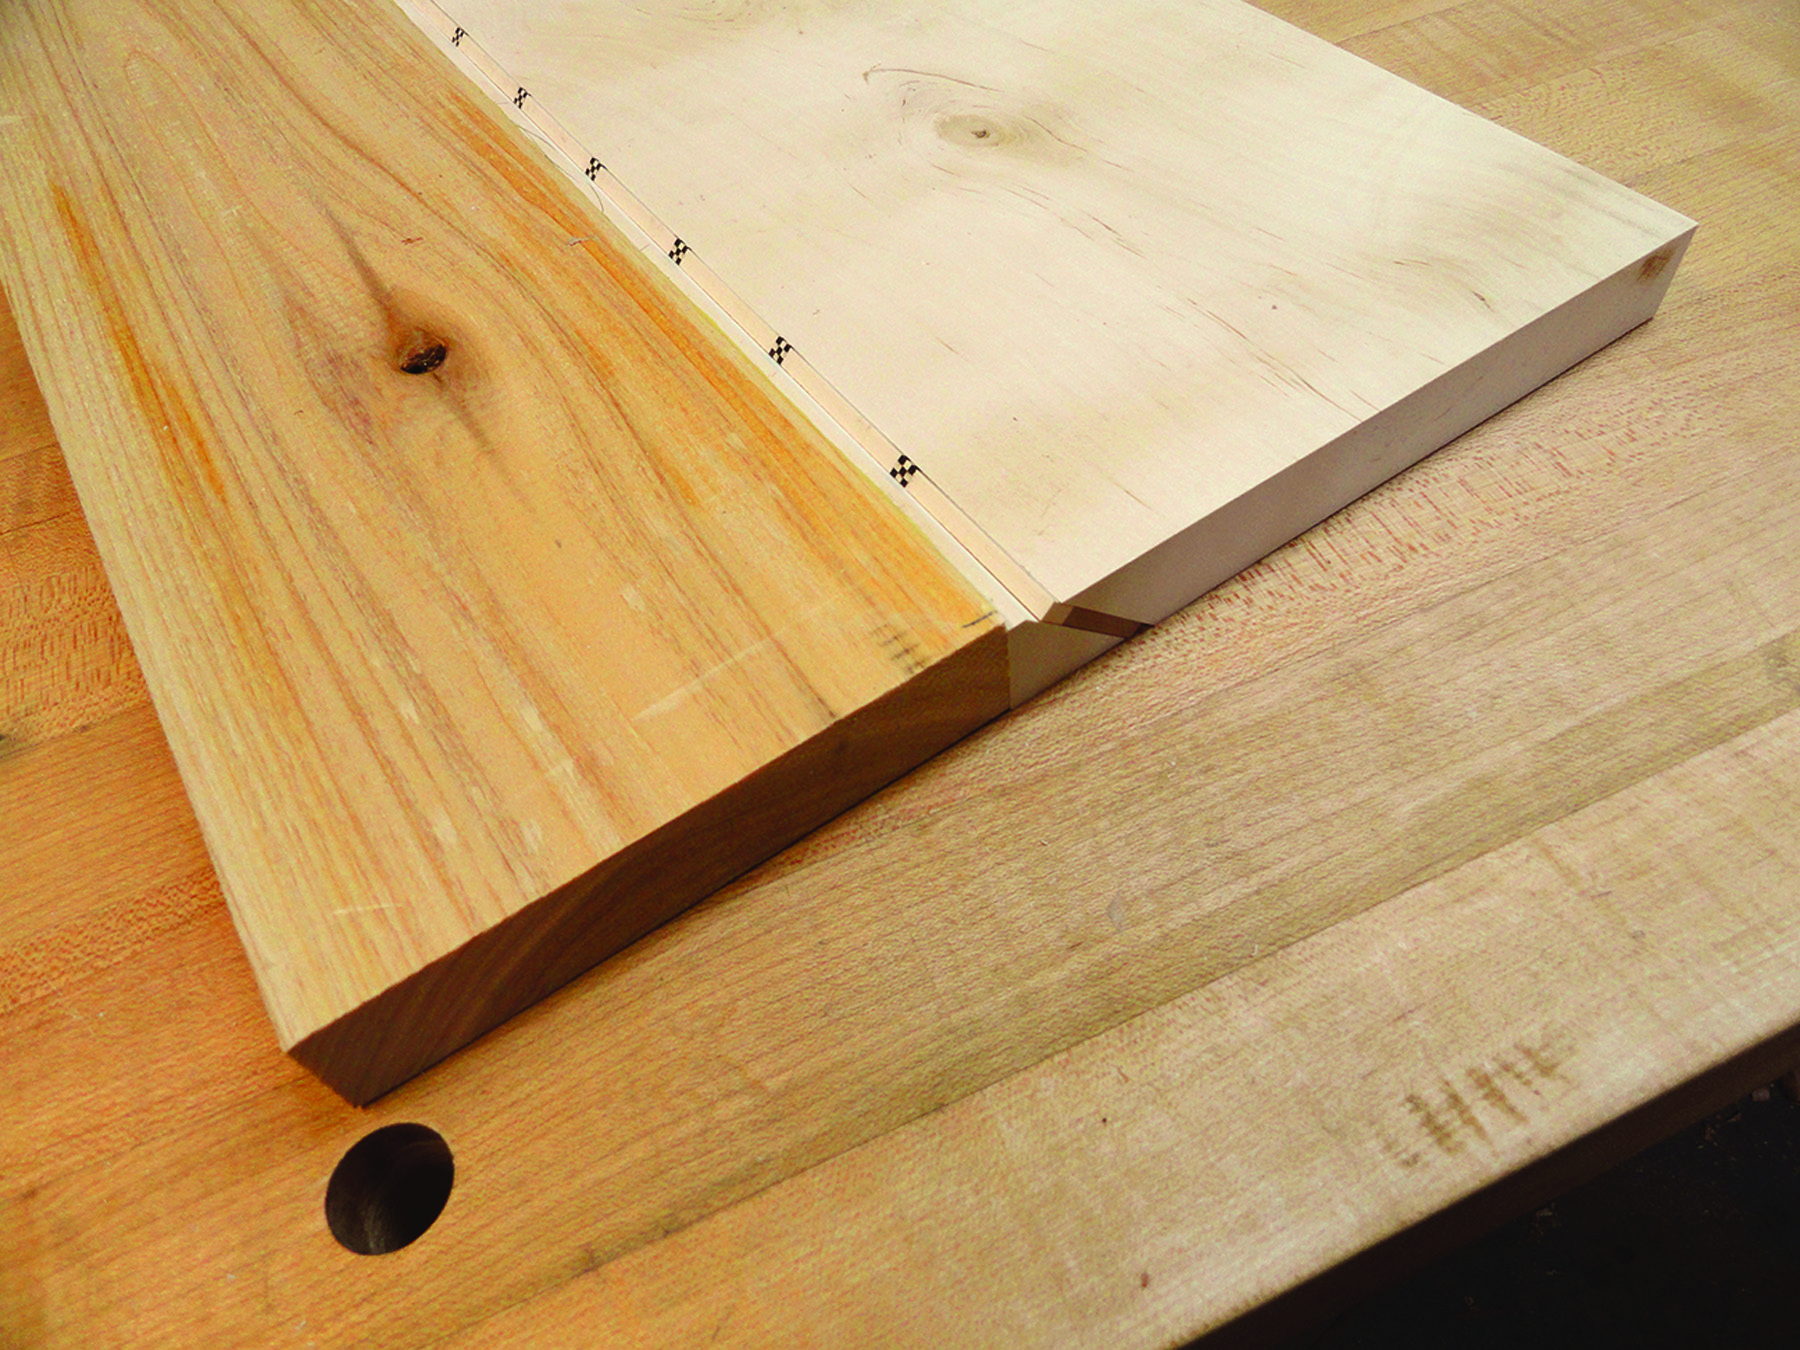
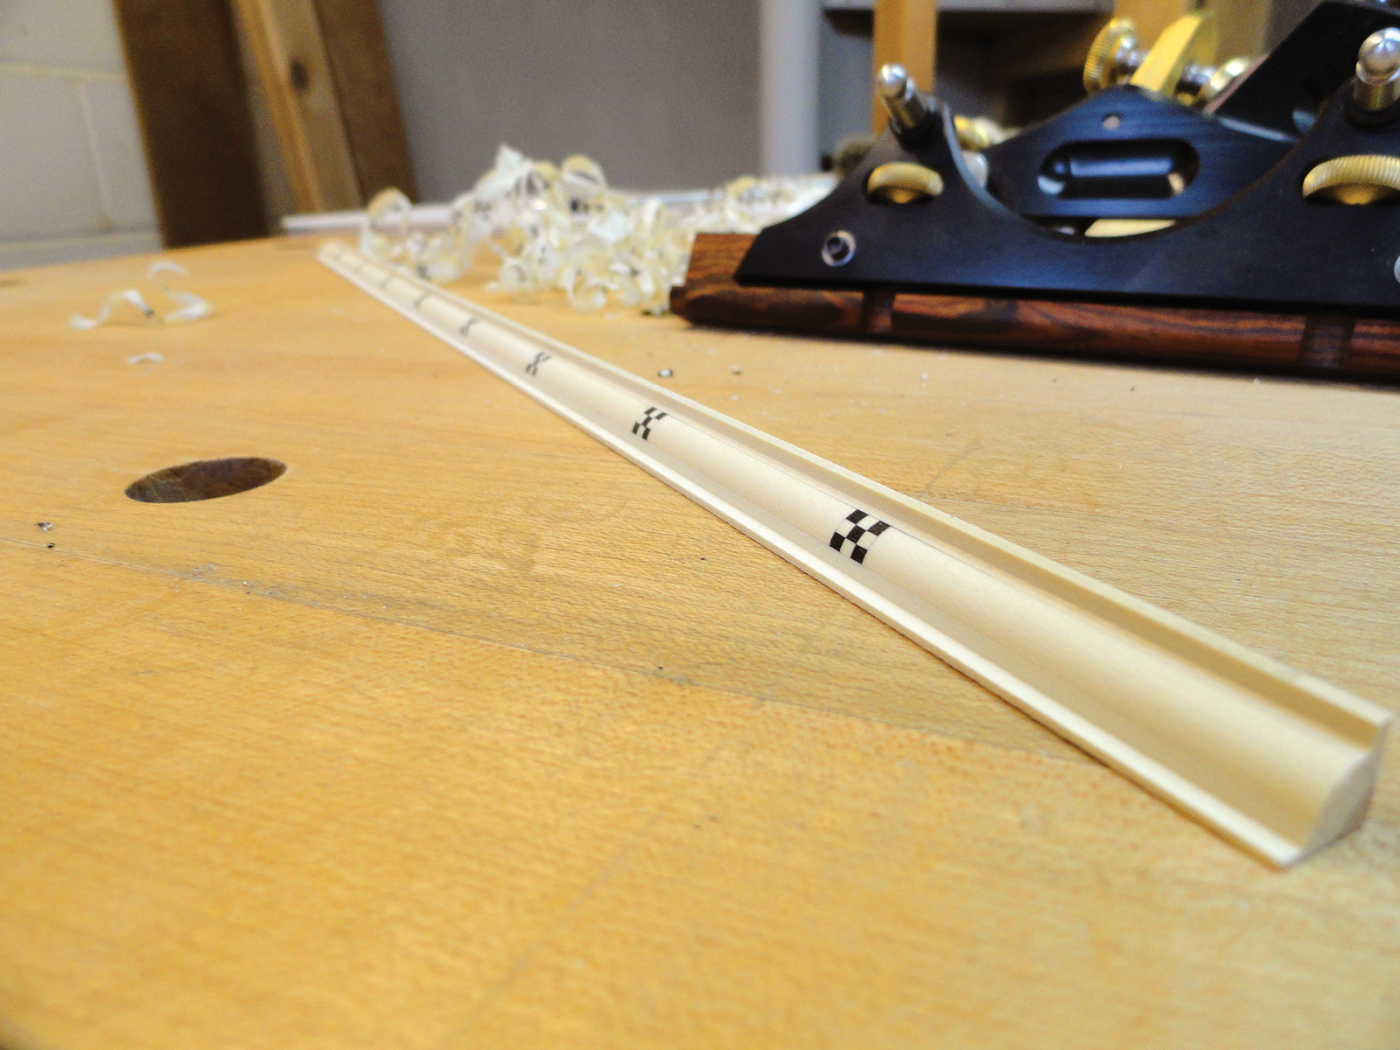
After the glue dries and the clamps are removed, I rip off the edge side at 90˚ even with the edge of the inlay then plane the profile with a Bridge City HP-6 handplane. The profile can also be cut with a hand-held router or on a router table.
5. Orientation. With the clamps removed, the blank is ready to be turned into moulding.

6. Router ready. The edge is trimmed at a right angle and the blank is ready to be profiled.
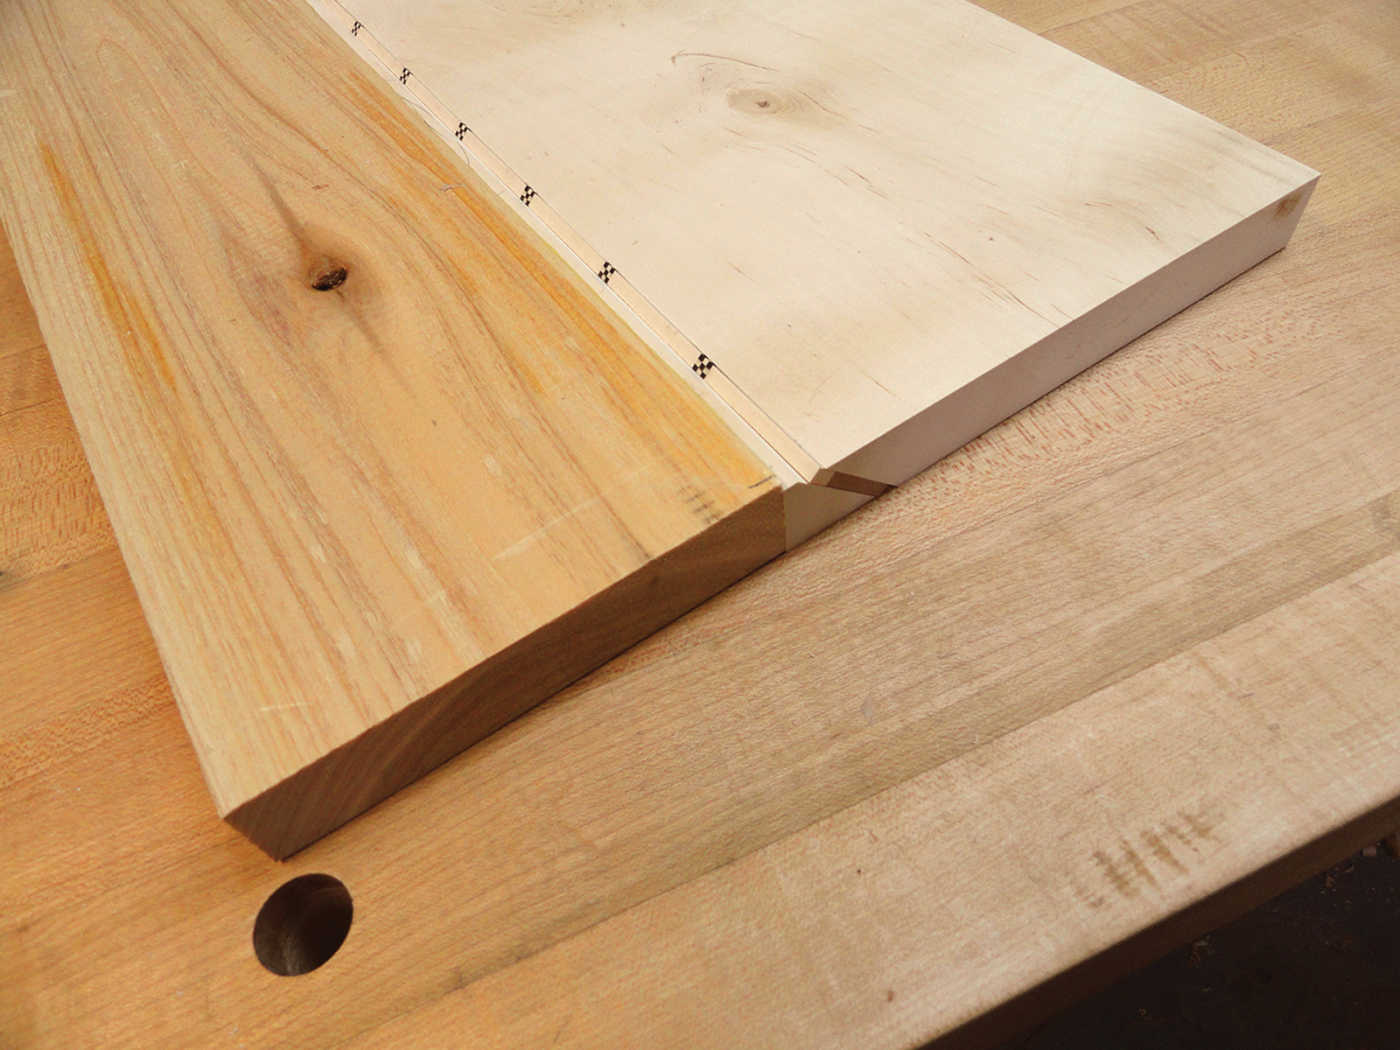
The last step is to cut the inlay free from the board at the table saw leaving a 1⁄16” step of holly, making the total width 5⁄16“. The profiled inlay can now be glued into a 5⁄16” rabbet – or make the rabbet 1⁄16” wider and add two 1⁄32” stripes of contrasting wood for a more dramatic look.
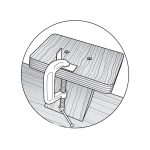
Sitting pretty. The completed moulding is ready to be set in a rabbet.
Profiled inlays are a great way to add a decorative touch to your next project.They can be used in a rabbet on the edge or can be put into a V-groove most anywhere in the field of your project. You can use lots of different profiles and wood species to make your next box, picture frame or piece of furniture really stand out.
Making the Moulded Inlay Blank
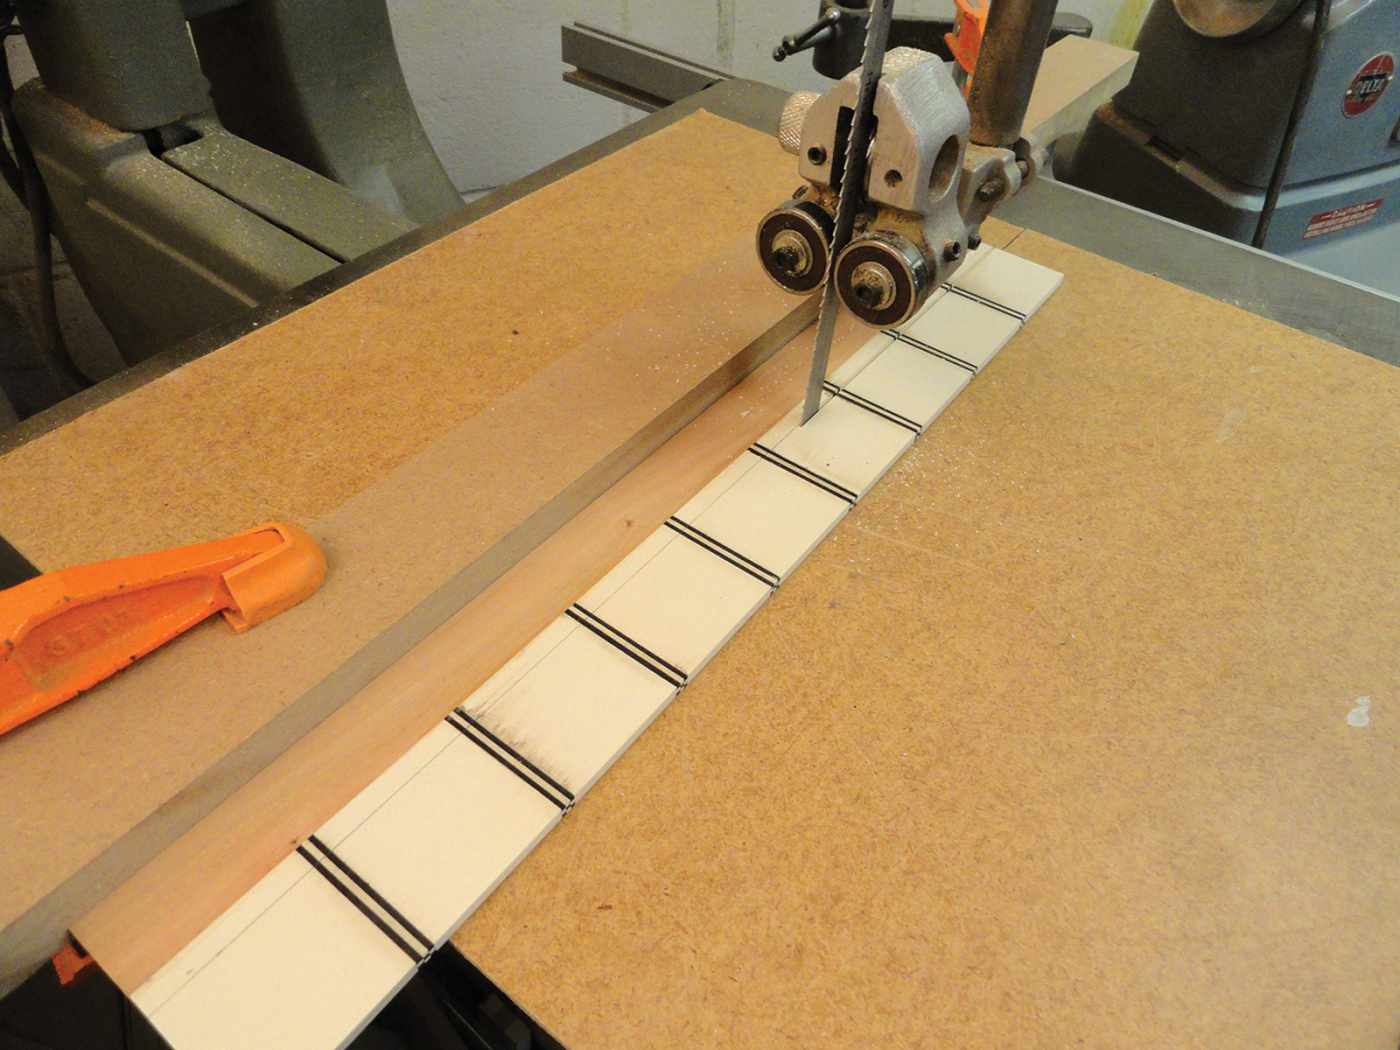
The checkerboard blank is made by gluing square strips of contrasting wood into a long block. This block is cut into short lengths that are then glued between blocks of light-colored wood. When the glue has thoroughly dried, square lengths are ripped at the band saw.
 To form the tilted edge inlay, these squares are glued between the angled edges of other pieces of wood. The extra width of all these pieces provides a margin of safety for forming the small moulding. After the beaded edge is created, the small moulding is ripped from the wider piece and glued into a rabbet.

Here are some supplies and tools we find essential in our everyday work around the shop. We may receive a commission from sales referred by our links; however, we have carefully selected these products for their usefulness and quality.