We may receive a commission when you use our affiliate links. However, this does not impact our recommendations.
To true your wood with machines, the steps you follow are critical. This time-tested procedure is the best way we know of.
I get to meet many woodworkers around the country at woodworking schools, seminars and while answering e-mail messages. I find that one issue pops up repeatedly: “What is the correct method for milling lumber?” You might be familiar with the basic steps that are required to bring the lumber to working order. But what you do, how you do it, and in what order you do it will influence the project from start to finish, and will make your projects run smoother.
To properly mill your stock using machines you will need to have a jointer, a thickness planer and a table saw. In my opinion, these are the three most important tools in your shop. They don’t need to be the “Cadillac” examples. I have been able to work with a number of benchtop models that perform extremely well. Just having and using them correctly will put you light years ahead in building your projects.
Do you look back fondly at the many articles in the woodworking magazines on how to “tune up” your tools? Probably not. You may have even tired of these articles, but they are important. The accurate milling of your lumber is partially dependent on the accuracy of your machines. If your planer and jointer knives aren’t level with one another, your cuts will not be level. Having the tools set properly is half the battle. The correct procedure is the other half.
You may be tempted to bypass a few of these steps and purchase lumber that has some of the milling complete. I’m not a fan of buying lumber that is S2S (surfaced two sides). This wood, for the most part, comes through a double-sided thickness planer to the selected thickness. These machines exert so much pressure on the board that they flatten the stock as it enters the cutters. After it passes the knives, the board springs back to the original shape. This machine does a good job with flat boards, which we seldom see. However, if your pieces are cupped, warped or twisted they will be that way as they exit the machine – even though they are now a consistent thickness throughout. I suggest buying rough lumber and milling the stock yourself.
Start With Smaller Pieces
Some woodworkers start milling the lumber in its full length and width as it is pulled rough from the rack. If you work this way you are trying to flatten a 6′ to 8′ length of wood that may be 9″ or more wide. As you may have experienced, this can turn a large portion of your lumber into shavings.
For example, if you have a bow over the length of the board, by the time you flatten one face at the jointer you might reduce the board below your target thickness. The same holds true with wide boards that are cupped.
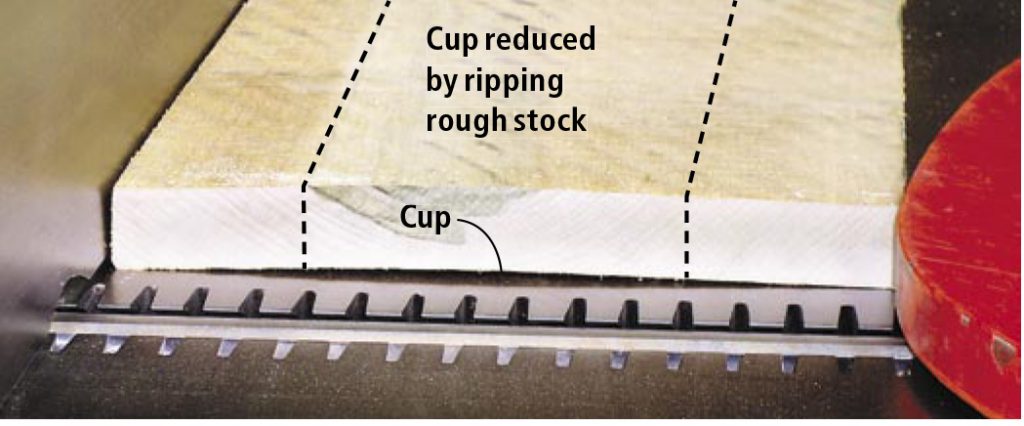
Rough cutting the width of any cupped board closer to the size needed will eliminate unnecessary milling and produce less wasted stock.
Also, it’s not possible to accurately flatten a wide piece of lumber by running half the width on the jointer and then reversing the piece to complete the milling on the remaining half of the same face. I’ve seen many woodworkers attempt this feat.
The correct procedure is to first cut your pieces into a rough size that is slightly longer and wider than their required finished dimensions. Cut the boards to where they are about 1″ longer and at least 1⁄4” wider than the finished sizes. As you rough-size the boards, cut off checks on the ends.
Begin by crosscutting the rough pieces to size. I do most of my rough crosscutting with a chop saw. If you have a large shop, a chop saw with an oversized support table works well. However, you also can use a jigsaw and make the cuts on your bench. Just lay out the lengths, slide the section to be cut off the end of your bench, and cut the pieces you need.
One True Edge for Ripping
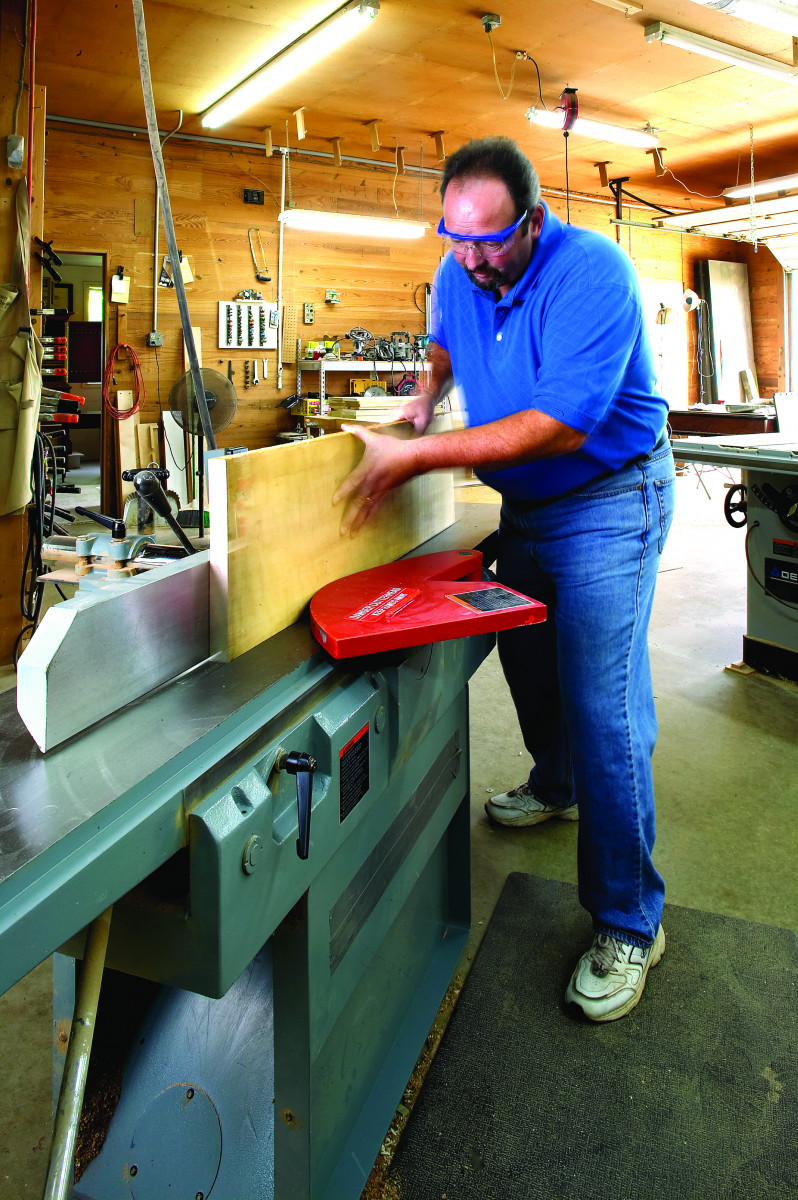
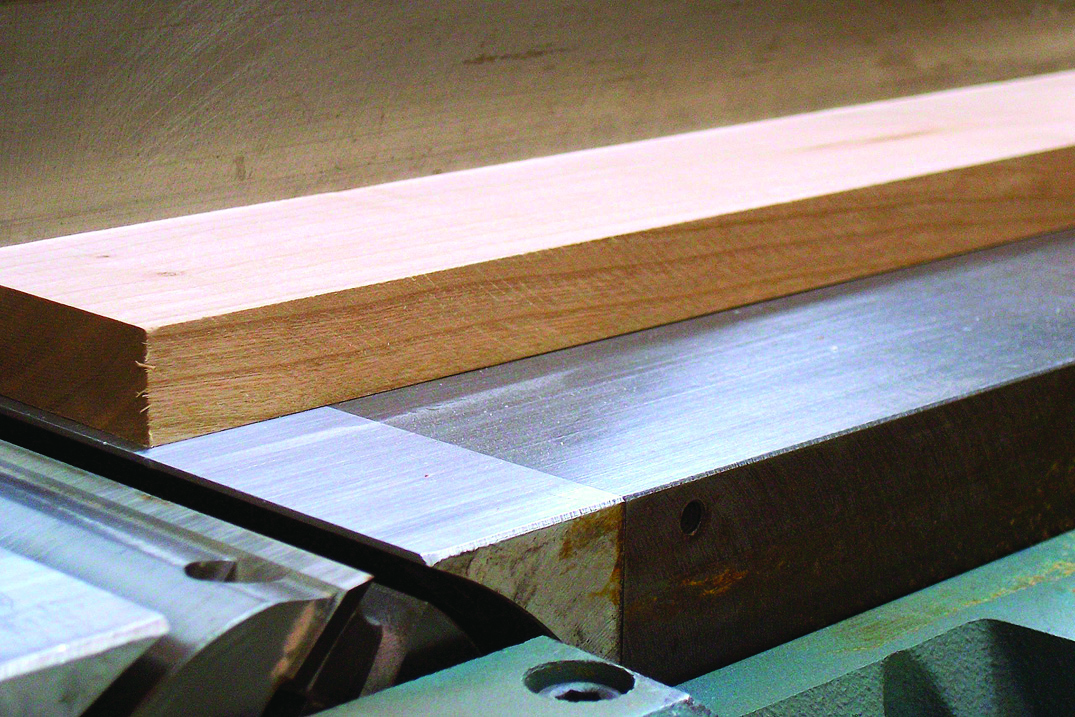
With the rough pieces crosscut, you will want to rip them to width. However, you shouldn’t run a rough edge against the fence of your table saw. It’s too dangerous. So the jointer is our next stop. We are interested in obtaining one true edge that will run against our table saw’s fence. Here, we can deal with the variations in our stock, such as a bow over the length of our stock (this is a common problem that appears in a good portion of our rough lumber).
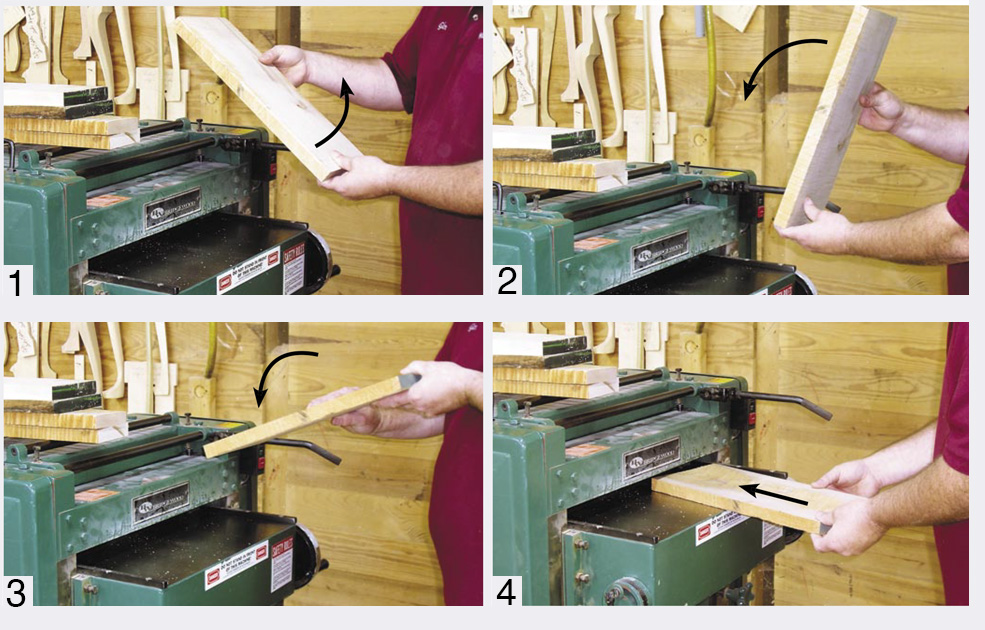
I begin working with any crook in the boards by placing the convex crooked edge up as shown in the opening photo for this article. Work the two ends that will touch your jointer’s bed, leaving the center above the bed. If you experience a large crook as you begin to push the stock into the blades, the board might ram the edge of the outfeed table and come to a stop. Do not force the piece of wood forward. Simply pull the stock back from the blades and make a second attempt at jointing the edge. You may have to run the piece a few times if the crook is extraordinary.
Once the lead end of the board clears the edge of the outfeed table you will probably find that the piece will not hit the jointer knives again until you approach the trailing end of the board’s edge. This is the time to study your board to determine the best path to take.
You have three choices. First, you can run the lead edge repeatedly over the knives until the board’s edge touches the blades over the entire length. This will result in the front portion of your board being narrower than the rear area of the board.
I would select this option if I had a problem area on my stock, either at the bottom corner of the board’s leading edge or at the upper corner of the board’s trailing edge. If it’s a problem at the leading corner, I remove that area at the jointer. If it’s on the trailing edge, I cut it away as I rip the board parallel at the saw.
Another option is to take the majority of the cuts at the trailing end of the board’s edge. This would be accomplished by placing the lead end past the jointer knives and onto the outfeed table, then running the remainder of the board – cutting only the trailing end of the edge.
Working in this manner would help remove defects at the lead end’s upper corner, or the trailing end’s bottom corner when the board is ripped to final width at the table saw.
Third, if there was no problem area or blemish to cut away, you would take equal amounts of material off of each end by running the piece completely over the knives with each pass. If the crook is excessive you may find it helpful to remove a few passes of material at the leading edge and then a few passes at the trailing edge just to keep from running the entire length over the knives with each pass. This will keep the stock equally wide at the ends while removing the crook.
Next turn to the table saw. Place that jointed edge against the fence and rip the pieces to width, cutting them 1⁄4” oversize. Some woodworking schools require that you rip all rough boards at the band saw to eliminate any chances of kickback. This is a good idea if your lumber is especially bowed or twisted. Leave yourself even more width if you are roughing your piece using this method – say about a 1⁄2” – unless you are confident on the band saw.
Now Flatten One Face
With the pieces cut to rough size, the next step is to flatten one face of each board. While it’s best to surface a board that is equal to or less than the width of your jointer knives, there are tricks that will help to expand that limit somewhat. But we’ll start with the standard method.
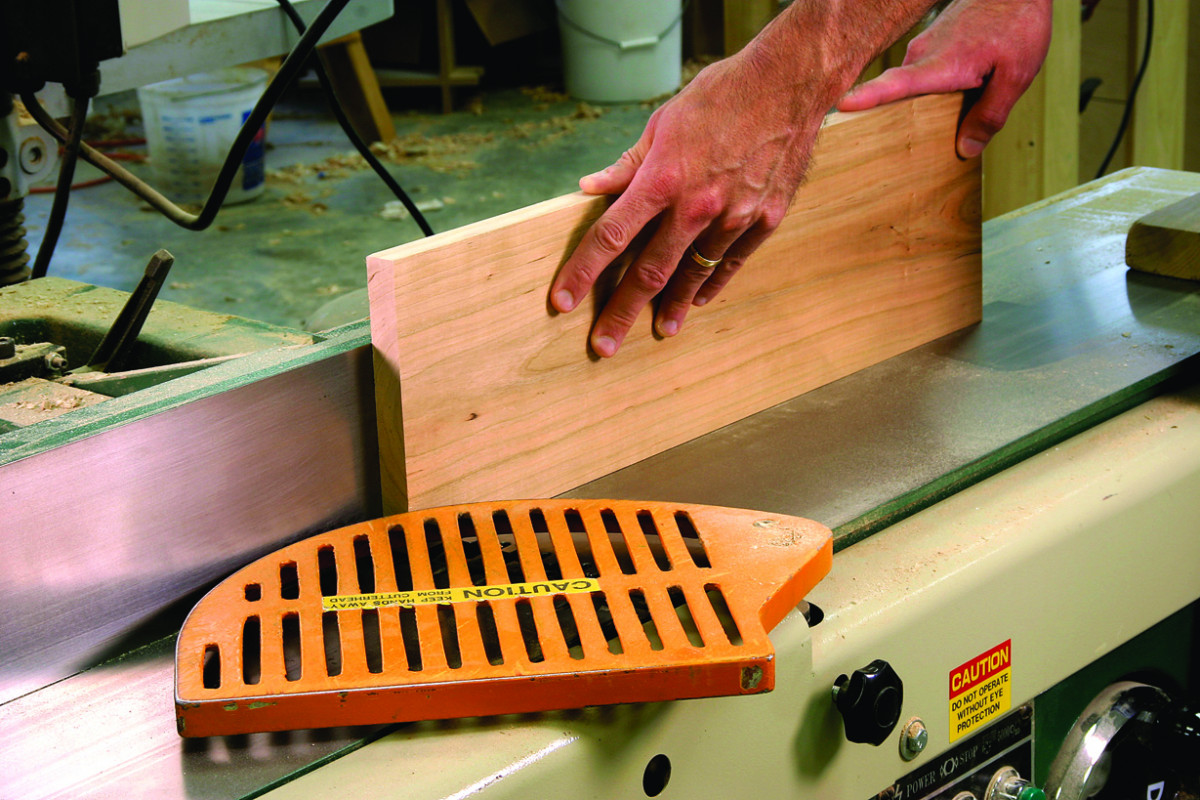
First hold the piece on the bed so that the convex face is up. You should have two points of your piece resting on the jointer’s bed. This will keep your stock from shifting around as much as you push it over the knives. If you were to place the convex face down on the jointer bed, you could rock the piece from side to side as you make a pass over the knives, spoiling your accuracy.
You need to look at the grain in order to determine the correct direction to run the stock before making a pass over the knives. To determine the grain direction of a board’s face, you need to examine the grain along the board’s edge or the area that is at 90° to the working face of the board.
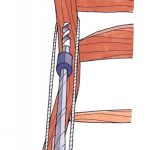
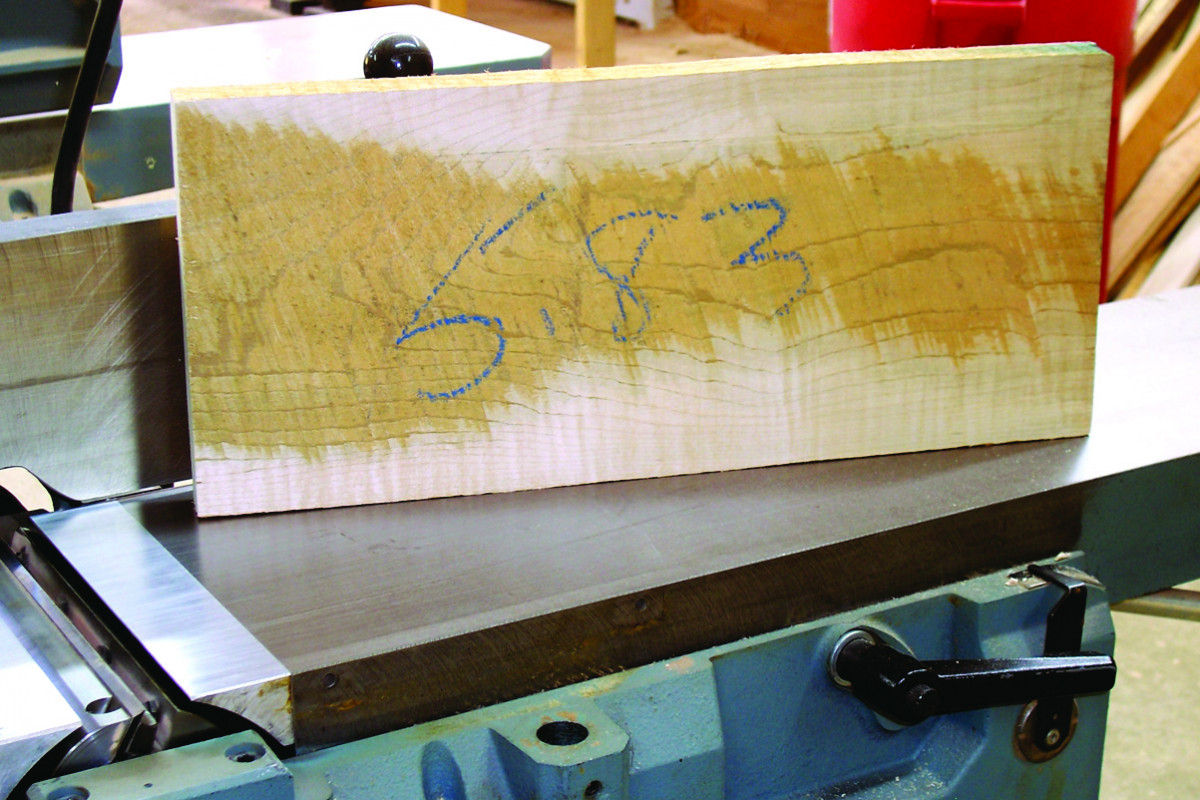
You will get a smoother cut if you start the piece with the “fat” end leading into the knives. Some say the grain is running “downhill.”
Generally, the piece will have grain lines that begin somewhere up the end cut of the lumber and run downhill (I call this the “fat” end) to the bottom face or the “thin” end. (See picture at far left.) Using this terminology, you should run the board from “fat to thin” as you make the cut.
Set the depth of cut of your jointer to 1⁄16” and run the piece over the jointer knives so that one face is flat or surfaced. If you were to run the piece in the opposite orientation you might see areas that are being torn from the stock because the knives pick up the thin, tailing-off edges of the grain that have a tendency to tear.
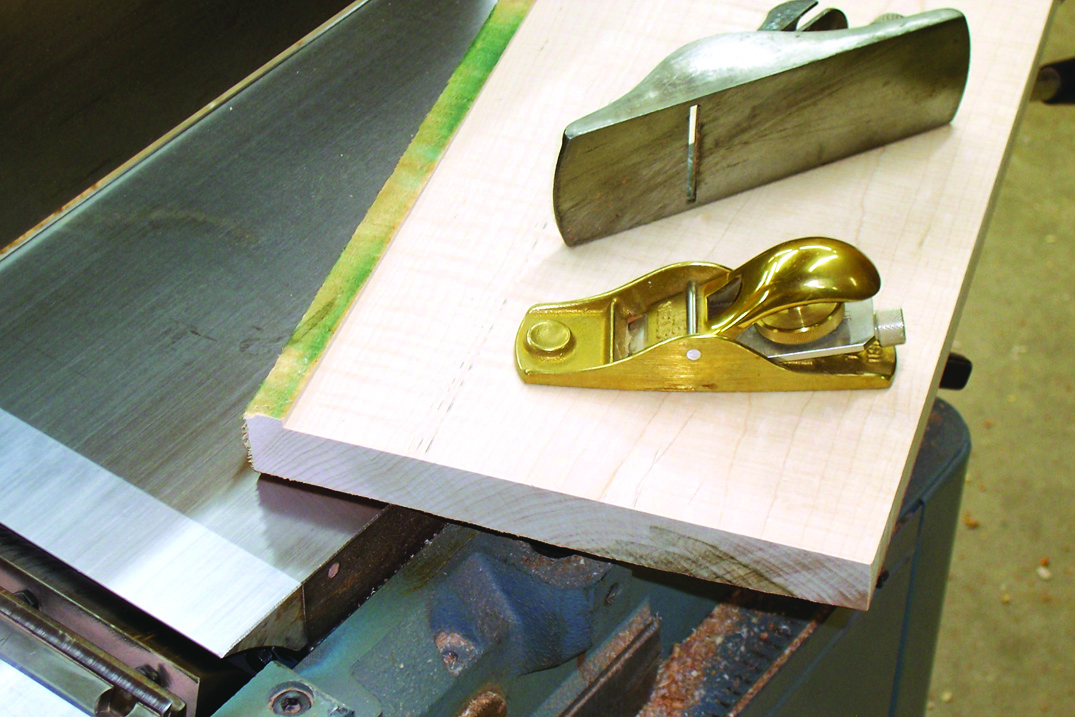
Squeeze an extra inch or two from your jointer by using it as you would to create a rabbet, then remove the unsurfaced area with a plane.
If you have material that is slightly wider than your jointer, you do not need to rip the piece in half in order to complete the milling. See your owner’s manual on how to remove the blade guard on your jointer. Make a pass over the knives. There will be a rough area left along the edge that the knives didn’t hit. This can be easily removed with a handplane before going to the thickness planer. Be sure to then replace the guard according to your manual.
Flattening stock at the jointer does not mean to completely surface the face. This piece will sit flat and stable when it is sent to the planer.
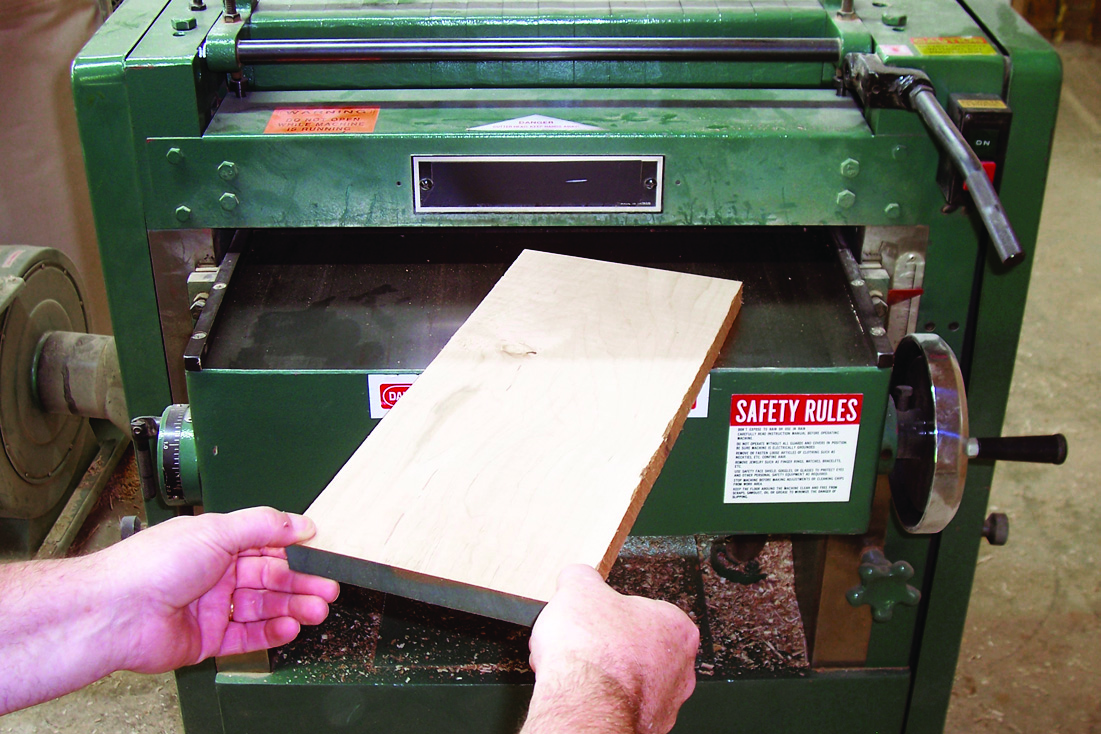
Plane to Thickness
The planer is the next stop and it will bring all the stock to the same thickness, essentially smoothing the opposite face from that surfaced at the jointer. The knives on the planer are above the table and your stock, so you will need to orient your piece to again run from “fat to thin” by looking at the edge grain in relation to the top face. Here is the trick: Keep your pieces in the same orientation as they were run over the jointer knives, because generally the last end over the jointer is the first end into the thickness planer.
Angling your stock to the blades at either the jointer or planer will provide a smoother cut and lessen the wear on your knives by starting the cut at the point of the corner instead of the blunt end of the board.
Adjust the cut by 1⁄16” with each pass through the planer. When you get the second face surfaced nearly flat (it will not wiggle if placed on a tabletop) you need to begin to flip the board so that passes are taken from each face. This should be done while maintaining the appropriate orientation to the knives, meaning to keep cutting with the “fat-to-thin” technique. To accomplish this, the boards need to flip end over end after each pass.
The reason that this is so important is because as you remove material from your stock, you are exposing areas that have more moisture than the outermost surfaces of the rough boards. If you take more material from one face than the other, the board will tend to dry unevenly and is more apt to cup or warp. Run the pieces while incrementally adjusting the planer cut to the desired thickness.
The Fat-To-Thin Technique: Flipping your stock end over end works double duty. It will keep the proper milling orientation in line and keep any moisture levels consistent from face to face
Jointing an Edge (Again)
When the two faces of the board are flat and the board is the correct thickness, we need to return to the jointer to run an edge. Wait a minute! Didn’t we already do this before we cut the stock to rough sizes? You are correct, but that edge was run before we had the two faces parallel and flat. If you decide to use that edge, I can assure you that it will not be at 90° to either face of your board. Remember that it was created when the two faces were in the rough. That will cause problems in many areas.
With the faces surfaced and parallel, a stop at the jointer ensures a 90° edge in relation to those faces – even if you cleaned that edge at the beginning.
If you decide to glue these pieces into a panel you will not get a tight, square glue joint which could cause the panel to not be flat. If this is to be part of a door frame your mortise-and-tenon joint might be problematic.
To alleviate any of these scenarios, run the edge at the jointer now. This should be done while holding a face of the stock against the jointer fence and making a pass over the knives in the same “fat to thin” grain-orientation technique. This guarantees that the edge is at 90° to both faces.
Cut to Finished Width
We now have our pieces at S3S and are ready for the next step in milling, which is at the table saw. Choosing a blade for this operation can be mind numbing. You can select a ripping blade that has 24 teeth or choose a combination blade that has 40, 50 – even 60 teeth. There are blades designed for plywood and melamine, and some blades are Teflon coated. You may decide to use a different blade for each material – but I don’t.
I don’t like to spend the time in my shop changing blades on my tools. If I am doing that I am not “making sawdust.” I also don’t use my table saw to crosscut very often.
I found that it’s best to use a 50-tooth combination blade. It will produce a nice cut when ripping, can handle crosscutting if I choose, and will not have to be changed out for most jobs.
Once you have selected a blade, set the blade’s height for ripping the stock. I bring the carbide teeth just above the thickness of my material. This allows the waste material to be cleared from the cut, helps keep the blade cool and lessens the chances of burning the stock as it is ripped.
Here is where you will find that the first step we took, cutting our pieces to slightly oversize, really helps. If you attempt to rip a wide board down the middle and it is not entirely stable, you can get movement that causes the stock to burn. This is less likely to happen with the pieces cut to just slightly over the final width.
That’s because the amount of material on the off fall side of the blade will not have enough force in movement to bind the blade.
Hand Placement and Push Sticks
Some woodworkers are fine working around the blade while others can barely place their hands flat on the table. As your experience using the table saw grows you will become more comfortable with your hand placement, as well as with the width of boards that you will cut without using any push sticks. A common rule of thumb is that stock less than 6″ wide requires a push stick.
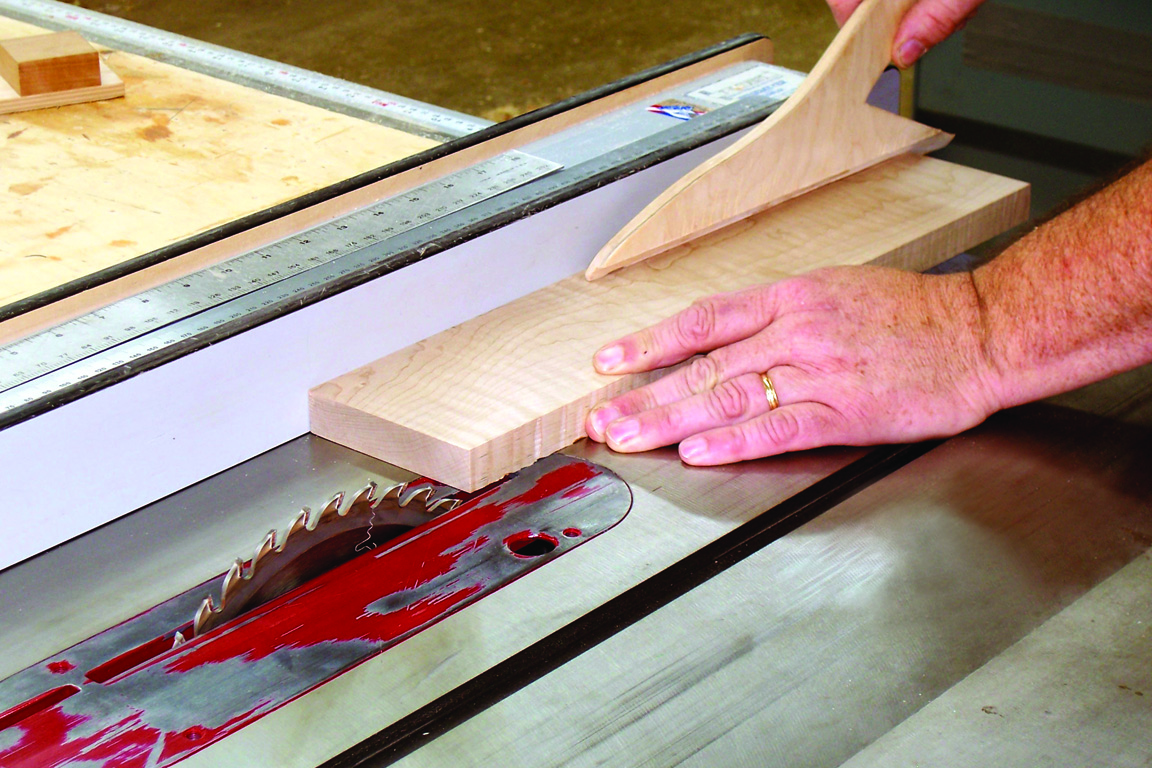
Push sticks can help guide your stock as well as hold it tight to the fence and table. They are invaluable tools in your shop.
Position your stock at the saw and let your left hand hold the piece at the edge and against the fence with light pressure. Use a push stick to guide the piece through the blade. As you move forward, allow your left hand to continue moving with the piece until you reach the edge of the table saw’s throat plate. At that point, stop the forward progress of your left hand and allow the stock to slide on as it is cut.
One thing that is important to remember is to allow the push stick to completely pass the blade prior to releasing the push stick from the stock.
The last step in milling your lumber is to crosscut the piece to its final size. The accuracy of a miter saw is certainly a good bet. But if you have the 50-tooth blade, the table saw can be used quite effectively.
From the jointer, to the thickness planer, then back to the jointer and finish at the table saw. Milling wood with the grain orientation set correctly will help to improve your woodworking abilities and your projects. You will begin to wonder why your experience with the less-than-flat panels has disappeared and has been replaced with easy glue assemblies and more completed projects coming from your shop. You know the saying: “It’s the little things that make the difference.”
Here are some supplies and tools we find essential in our everyday work around the shop. We may receive a commission from sales referred by our links; however, we have carefully selected these products for their usefulness and quality.