We may receive a commission when you use our affiliate links. However, this does not impact our recommendations.

Everything you always wanted to know about screws, but were afraid to ask.
Many of the tools and fasteners we use in woodworking have been around for thousands of years. The concept of the screw goes back to the ancient Greeks. Archimedes took a wedge, a simple but powerful device, and wrapped it around a cylinder. The helical threads allowed the leverage derived from the wedge to be delivered via a circular motion.
Until the industrial age, screws were expensive, hand-made items. Certain applications justified their use, but in most cases other methods made more sense. In the 18th and 19th centuries, machinery was developed that made the price of screws reasonable; in the 20th century, better methods of driving screws were developed.
Most woodworkers have a love/hate relationship with screws and screwdrivers. They work well, but it seems like cheating. Screws exert a lot of force, but that force is concentrated in two rather delicate areas – the tiny bit of metal where the thread extends from the shank, and the interface between the driver and the head.
When things go wrong, these weak links fail, which is usually the result of trying to force a screw to do something it wasn’t designed to do, using the wrong tool, or using the wrong technique.
A Clamp With a Twist
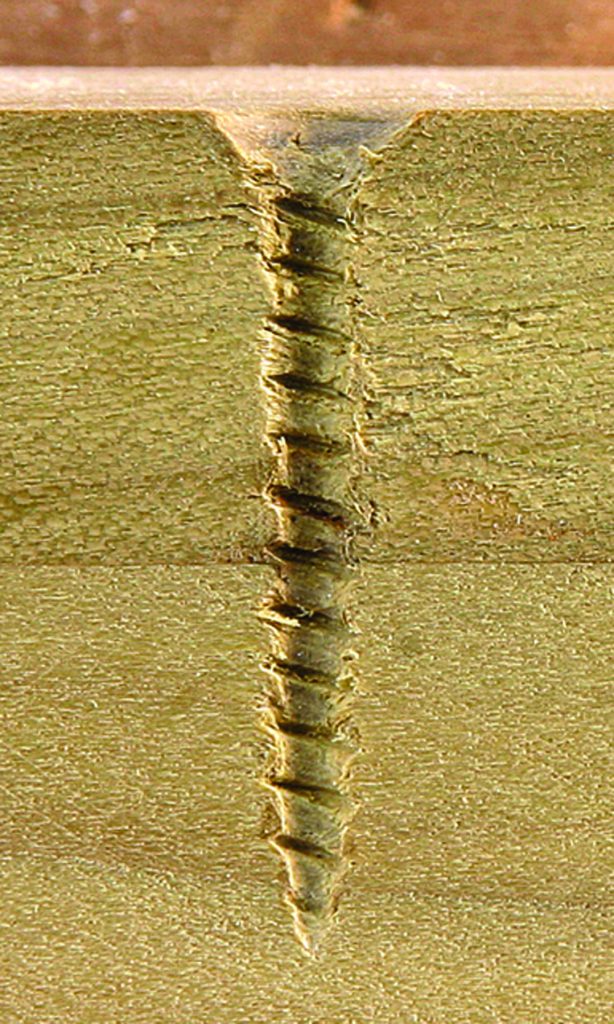
I like to think of screws as clamps. As the threads bite into one piece of wood, the head pulls the other piece tightly to it. Take a look at the cutaway picture at the bottom left of the next page, which shows two pieces that have been properly screwed together. The threads are gripping in only the lower piece. In that piece, the hole is the size of the unthreaded portion of the screw, which allows the threads to tightly grip the surrounding wood. The hole in the upper piece is slightly larger than the shank of the screw, and the head sits in a countersink.
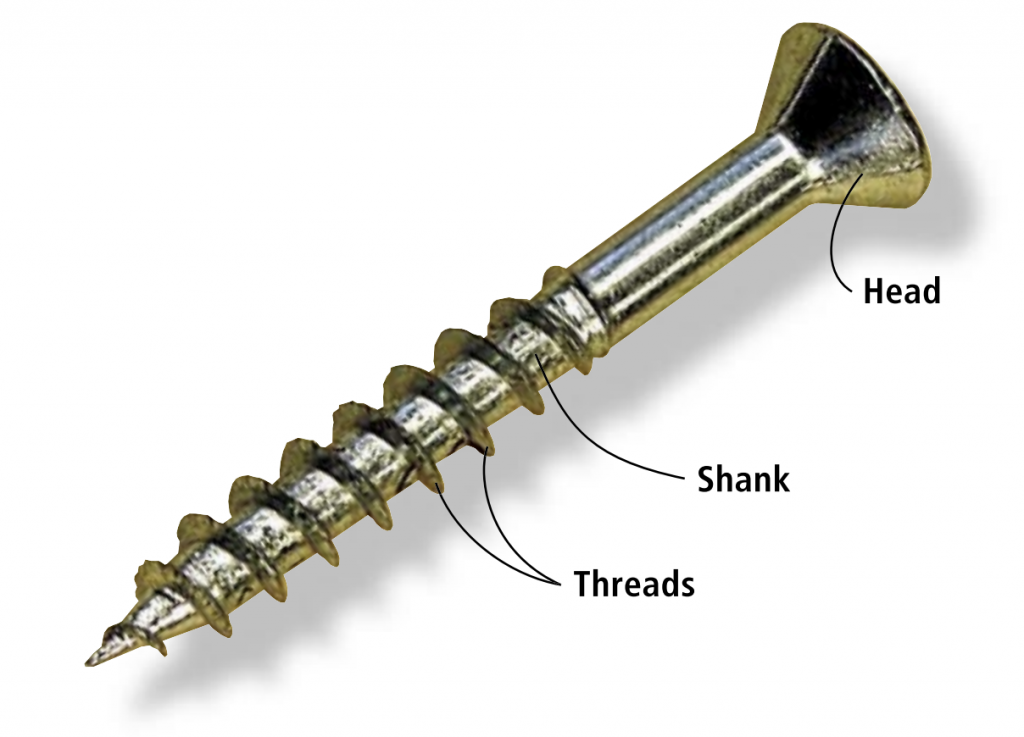 In the two pictures below, the hole on the top was made by force-feeding the screw without first drilling a pilot hole. Instead of neatly cut threads, the wood has been torn and crushed. This damage continues beyond the screw, and the surrounding wood is starting to split. The trick is to get the holes the right size so that the threads hold securely without the shank damaging the surrounding wood.
The ragged hole is the result of driving a screw without first drilling a pilot hole.
The hole was bored with a tapered bit, allowing the shank to slide in the upper piece of wood, and the threads to cut neatly in the lower piece.
There are a couple of other bad things that can happen as a result of not drilling a pilot hole, or drilling a pilot hole that’s too small. If the threads engage in the upper piece of wood, it can prevent the two pieces from pulling together, sometimes called “bridging.” When attempting to force the pieces together by applying more pressure on the driver, the threads can be stripped, or in harder woods the screw head can be damaged or the screw can snap.
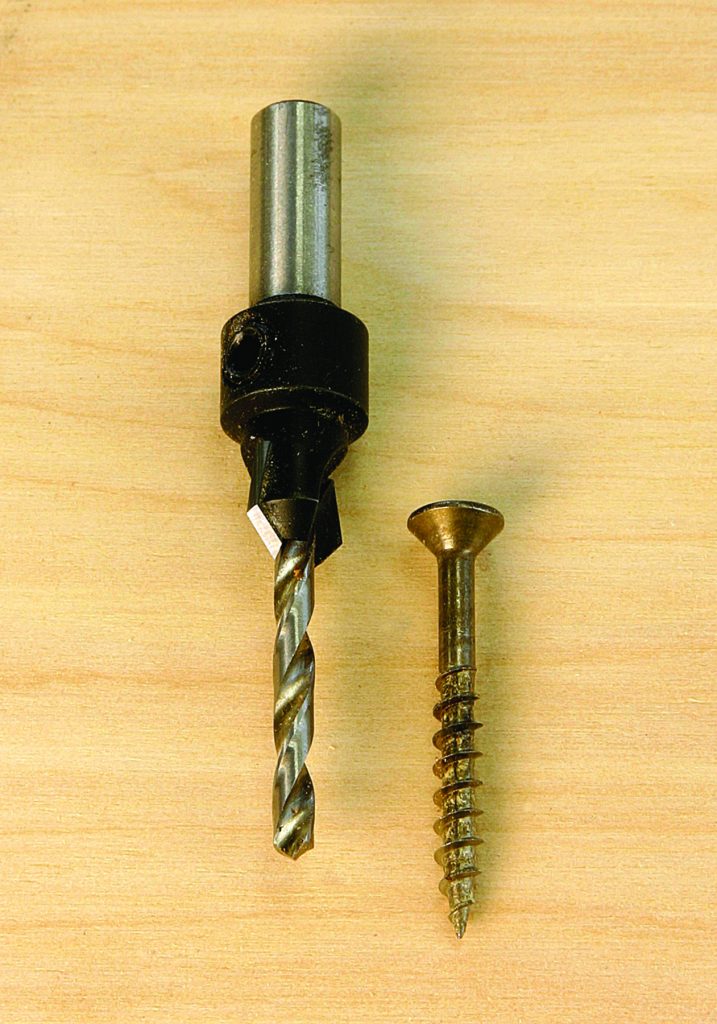
Three Bits in One
The pilot hole, the clearance hole and the countersink can be drilled in one step with a special bit, as seen below. The Fuller countersink has been the standard for years.The big advantage is the tapered bit, which ensures that the clearance hole is big enough and that the threads grip all the way to the end of the screw.

The Fuller countersink is driven by the drill bit. When the countersink
meets resistance, it tends to slip on the drill bit’s shaft
The biggest problem with the Fuller countersink is the attachment of the countersink cutter to the shaft of the bit. The small Allen head setscrews don’t hold well on the round bit. The countersink can slip on the bit when it meets resistance on the surface of the wood.
A newer style from Amana has larger set screws, and the shaft that fits in the chuck of the drill is an integral part of the countersink. In addition to being less likely to slip, the Amana countersink has a carbide tip that lasts longer, especially when drilling plywood or particle board.
The Amana countersink extends into the drill’s chuck. It is less likely to slip, and has a long-lasting carbide tip but doesn’t come with a tapered bit.
Choose the right diameter drill bit by holding the bit behind the screw. You should be able to observe that the screw threads are wider than the bit, and the bit is about the size of the shank.

For a screw to work effectively, it must fit its hole precisely.
I set the depth of the countersink by holding the bit beside the screw, and setting the end of the tapered bit just short of the point of the screw. If you’re using a straight bit, set the end of the bit to where the taper begins on the screw. Unfortunately, this may cause splitting in hardwoods. I prefer the tapered bit for solid wood, and the carbide countersink for man-made materials.
How Long a Screw
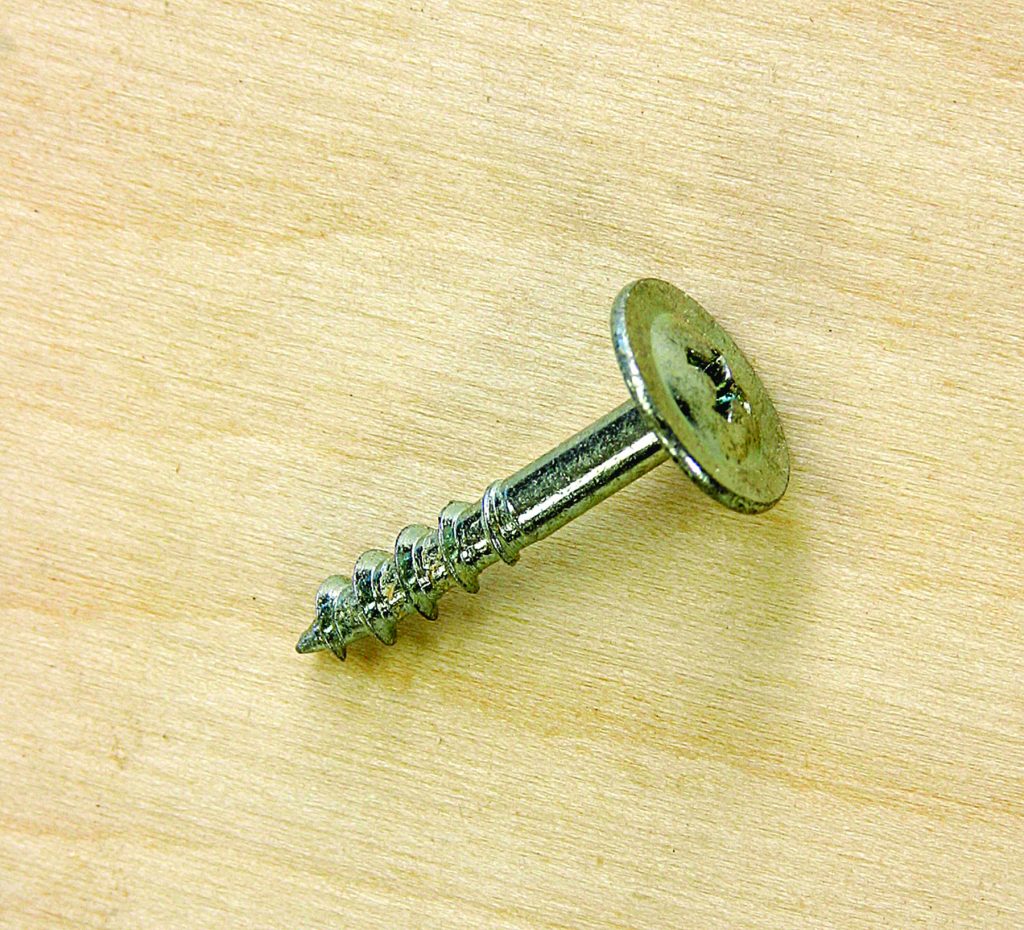
Screw diameters are specified in gauge sizes, with the higher gauge number indicating a larger diameter. For most woodworking applications, #6 is the smallest useful gauge and #12 is the largest. The best general-purpose size is probably #8 gauge. For attaching hardware to wood, smaller #4 or #5 screws are often used.
The right screw length depends on the thickness of the pieces being joined, and the orientation of the parts of the joint. Ideally, the screw should be 2 to 3 times the thickness of the piece being attached. For example, a 1⁄4″-thick drawer bottom or cabinet back should be held in place with a 3⁄4″-long screw. For thicker pieces, like 3⁄4″-cabinet parts, a 13⁄4″ long screw is sufficient.
Longer screws introduce problems of drilling the pilot hole deep enough, and of keeping the hole straight so the screw doesn’t come out the far side of the wood.
All Screws Aren’t the Same
If you’re working with softer woods, it doesn’t make much difference what type of screw you use. In harder woods, you’re better off spending a little more for screws that are designed and manufactured as wood screws. Drywall screws are rather brittle, and their small diameter gives them only marginal strength.
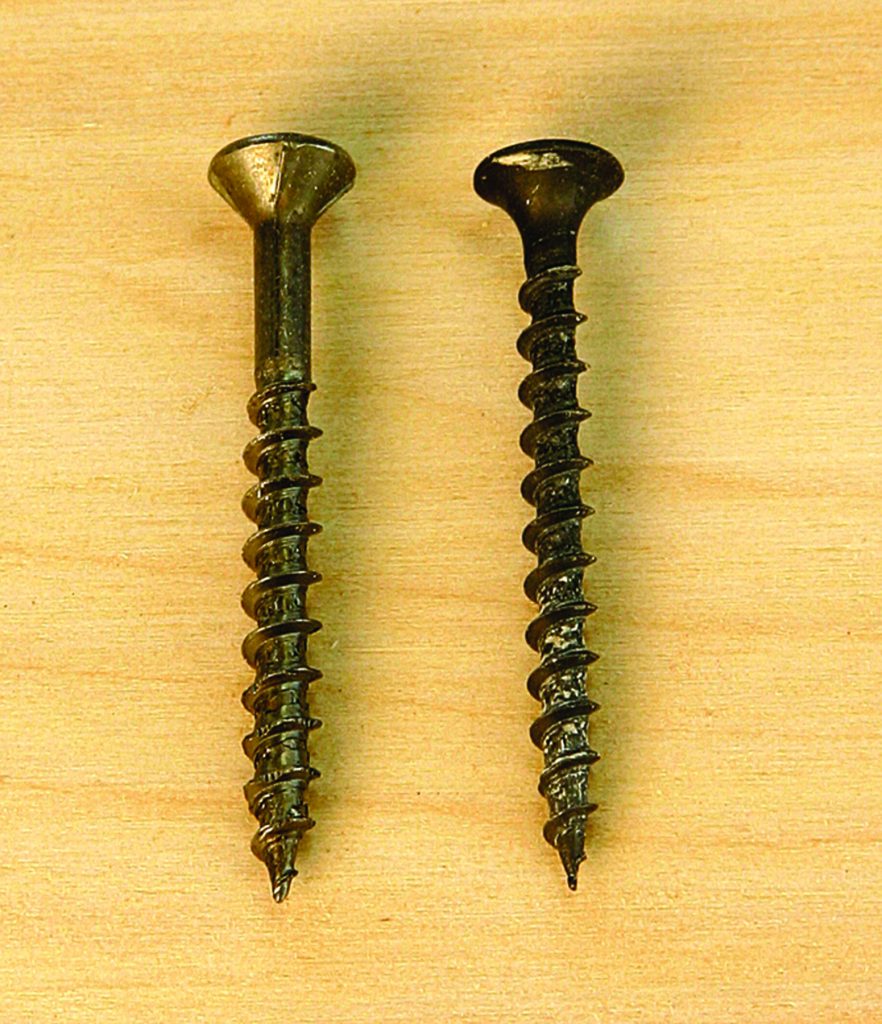
The screw on the left is made for woodworking. The drywall screw on the right is smaller in diameter, threaded the entire length of the shaft, and made of brittle metal.
In harder woods, you may need to use a lubricant to make driving easier and to prevent the screw from snapping. I use beeswax from a toilet bowl ring, an inexpensive way to obtain it. I keep it in 35mm film containers, and one ring will supply my needs for several years. Paraffin also works, but it isn’t as easy to use. Some people use soap, but soap can attract moisture, causing damage to the screw.
Different finishes, some purely decorative and some that offer corrosion resistance, are available for the metal in screws, but for most interior applications the extra expense isn’t warranted. Brass screws for hardware require special handling as the soft metal is easy to damage. Use a steel screw of the same size to cut the threads, then replace it with the brass screw, and don’t use a power driver on brass.
Driving Around in Circles
It is easy to get frustrated with any of the drivers in common use. Each has its quirks and shortcomings. The common (or slotted) screw head was the only choice until about 100 years ago when the development of automobile assembly lines created the need to drive more screws in less time.
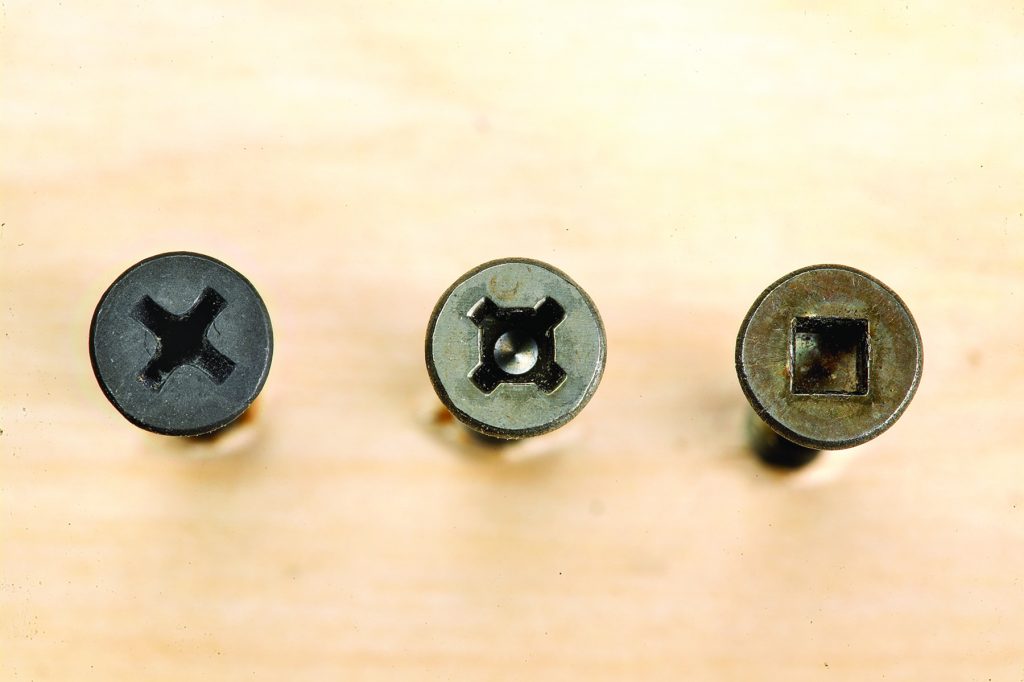
The Phillips head, Combo drive, and Robertson square drive screws (L to R).
If the tip of the screwdriver isn’t centered perfectly over the head of a slotted screw, the driver will tend to slip sideways from the slot as it turns. If you’re driving screws by hand this isn’t that big of a problem; you simply center the driver by eye or by feel as you start to turn it. With a power-driven screwdriver, however, the slightest misalignment or resistance will send the driver sideways out of the slot.
If it weren’t for a business deal that went sour and one man’s stubbornness, the Phillips-head screw might never have come into existence. In 1908, Canadian P. L. Robertson invented a tapered square recess driver and head combination. The big advantage to this is that the driver centers itself in the head, and doesn’t slip under pressure. The Robertson head holds so well, that the screw will stay with the driver even when held horizontally.
The Robertson square drive holds more securely than a Phillips , it will stay on the driver when the driver is horizontal
Robertson lost money in his first attempt to produce and distribute his design in the United States, and from then on insisted on not licensing his design to any other manufacturers. Henry Ford wanted to use these fasteners on his assembly line, but wanted to manufacture them himself. Robertson wouldn’t budge, and while long popular in Canada, square-drive screws have only recently caught on in the United States.
The Phillips head didn’t come into existence until the 1930s, and was actually invented by John P. Thompson, who couldn’t convince any screw manufacturers the cross-shaped recess could be manufactured affordably. Henry F. Phillips bought the rights from Thompson, obtained patents on the design and searched for a manufacturer.
The American Screw Co. spent half a million dollars to develop the manufacturing process only after the president of the company threatened to fire all of his engineers. General Motors was the first customer, and Phillips-head screws were first used in Cadillacs made in 1936.
Not a Flaw, That’s a Feature
What most of us consider to be the Phillips-head screw’s biggest defect was actually an advantage when it was first adopted. Because the intersection of the crossed recesses is slightly rounded, the driver will slip, or cam-out, when a Phillips-head screw becomes tight. This prevented overtightening on the assembly line, but is the bane of any woodworker who has had a screwdriver slip and go dancing across a finished surface.
In the last 25 years, cordless drills have become the preferred method of driving screws for woodworking, and the general frustration with the Phillips bit has led to an increase in popularity of the Robertson square drive, as well as other types.
The Quadrex or Combo drive is a combination of the Phillips and Robertson types. In theory, either driver may be used but they work much better with a square drive, the Phillips being relegated to emergency status when a square driver can not be found.
The Pozi-Drive was patented by the Phillips company and features the same cross-shaped recesses as the Phillips, but the intersection has an additional square recess that reduces cam out considerably. This type is commonly used in European cabinet hardware. A Phillips bit can be used, but problems of cam-out and head stripping are much worse than if the Pozi-Drive bit is used.
Numerous other drive configurations exist, but their purpose seems to be keeping the average person from taking something apart because the right driver isn’t available. None of these other drive systems offer any real advantages over the Robertson.
Whatever type of driver is used, the interface between driver and screw head should be a close fit to prevent damage to the screw head or the end of the driver. Flat-tip screw drivers can be filed back to shape if they get damaged, but other styles of bits aren’t really repairable. You might increase the life span of a rounded off Robertson bit by grinding a little off the end, but I know of no way to fix a damaged Phillips bit.
Rather than fill a drawer or two of my toolbox with various sizes and shapes of screwdrivers, I use insert tips in a driver with storage in the handle and a magnetic tip as seen at bottom left on the previous page. These tips also fit magnetic bit holders for driving with a cordless drill. Magnetism is your friend when power driving a lot of screws, or when placing a screw in a hard to reach location.
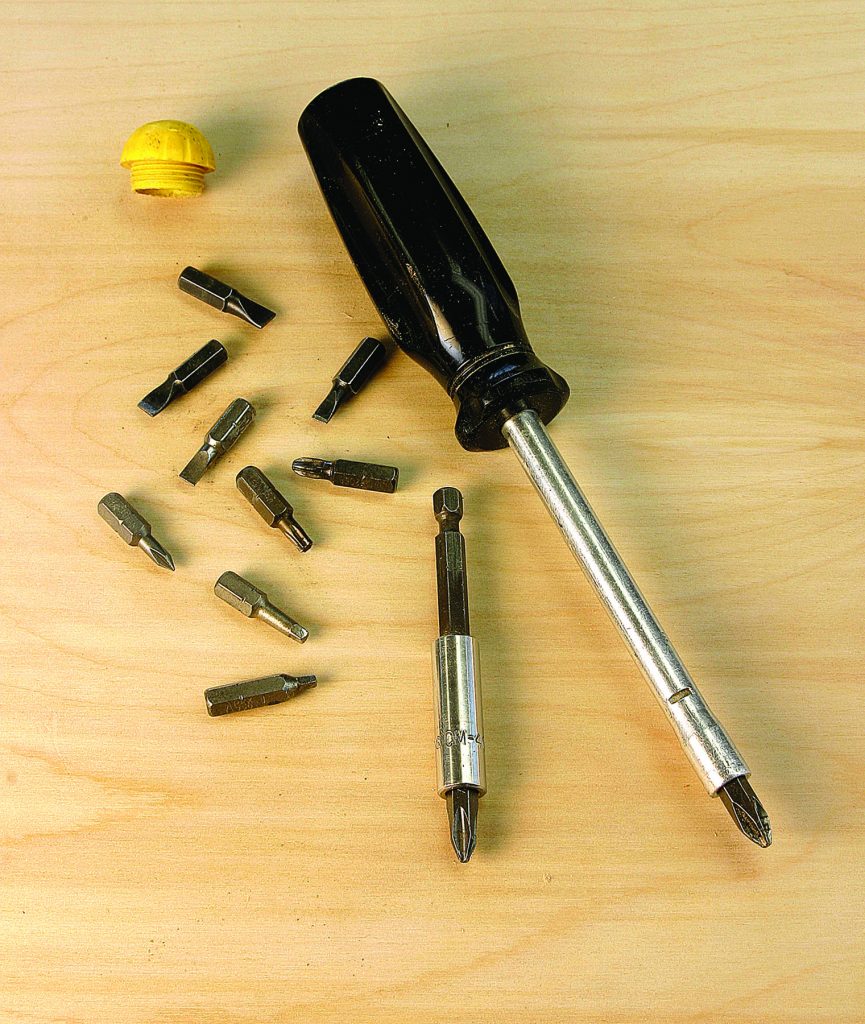
You can save a lot of room in your toolbox by using replaceable insert tips with a hand driver, or a magnetic bit holder in your cordless drill.
Head in the Right Direction
The countersink-style head is the most commonly used head in woodworking, and it has another advantage in addition to coming flush with or slightly below the surface of the wood. The wedging action of the countersink lines the parts up in the same orientation whenever you take it apart and put it back together. Most of the time this is what you want, but sometimes you need to allow for wood movement.
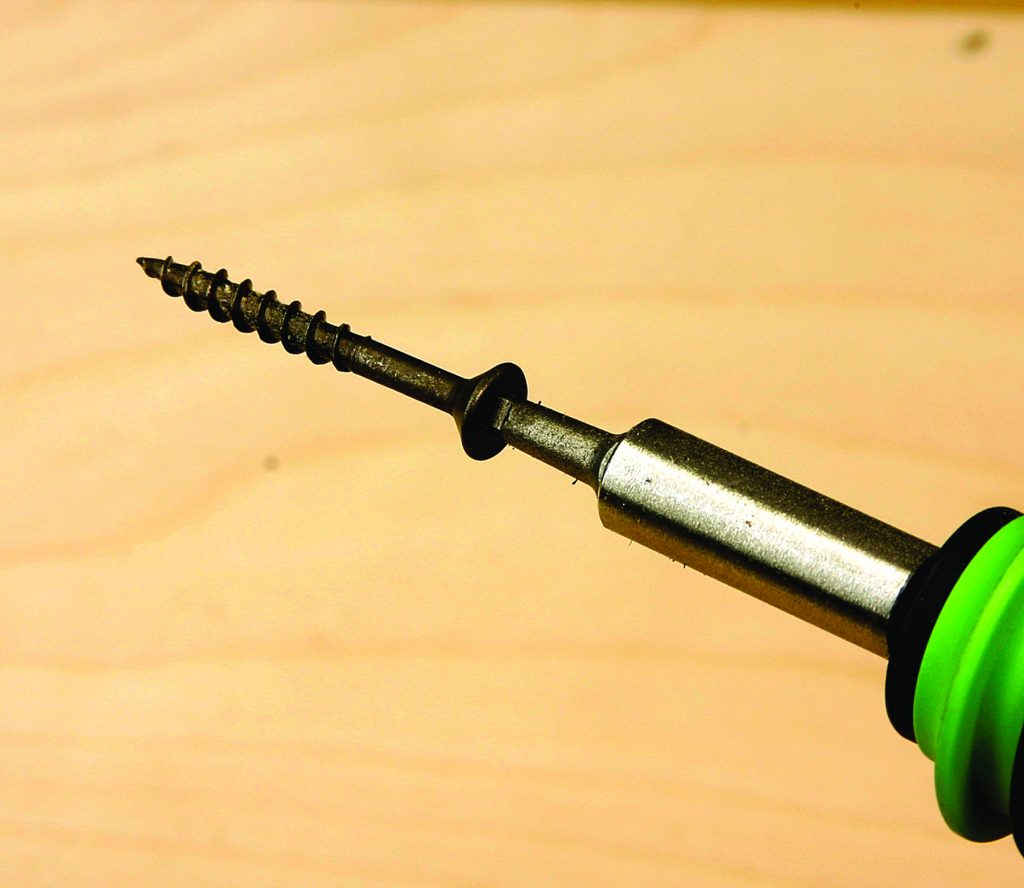
Due to this wedging action, screw holes for hardware need to be exactly in the center of the countersink in the hardware. Once again, a special drill bit comes to the rescue. The Vix bit (below) has the drill bit enclosed in a self-centering guide. A spring inside the guide keeps the drill bit out of the way until you begin to apply downward pressure.
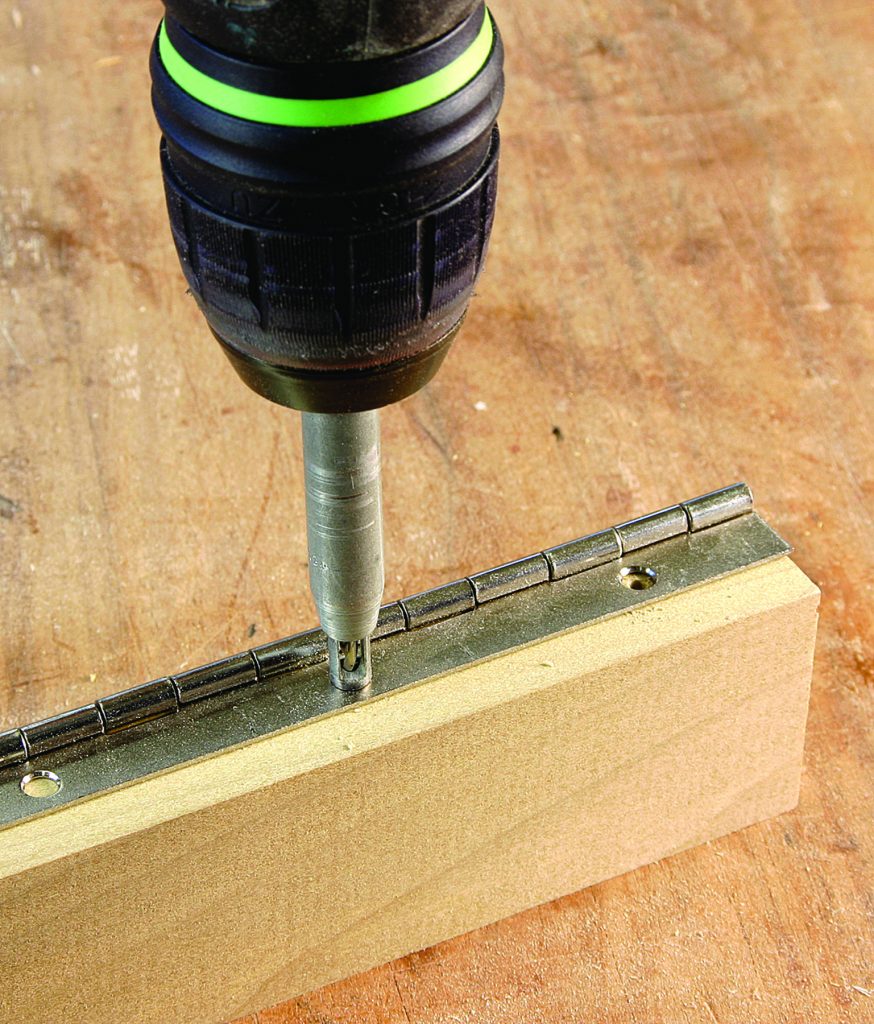
The Vix bit has a self-centering spring loaded guide that makes it invaluable when drilling holes for hardware.
If you put the pilot hole in the wrong place or strip it out, you can repair the damage with a small piece of wood glued in the hole. For stripped holes, toothpicks can be used. Glue them in and break them off flush with the surface until there is enough wood in the hole for the screw to bite. To move a hole, it’s better to whittle a small piece of wood from scrap, glue it in and make it flush with a chisel cut. This makes it easier to drill a new pilot hole.
Pan-head screws allow for the two parts to slide around below the flat head. This allows you to adjust the joint slightly as it comes together, as with a pocket screw.To attach a solid wood tabletop or cabinet top you need to allow for the wood to expand and contract. If the hole in the attached piece is elongated, the wood is free to shrink or swell while remaining firmly in place.
A variation of the pan head screw, the truss head screw has an oversized head that functions as a built-in washer. Also known as a drawer-front screw, this style allows for both minor adjustments of position, and seasonal wood movement.
The truss-head, or drawer-front screw, has a large head that allows it to be placed in an oversized shank hole. This permits slight adjustments and allows for seasonal wood movement.
Winding Up
So is it cheating to use screws? Like any method of joining wood, there are times when a screw is ideal, and times when another choice is better. When I worked on wood boats or built commercial cabinets, I used thousands of screws without a second thought. For other work, I only use them in a few specific situations.
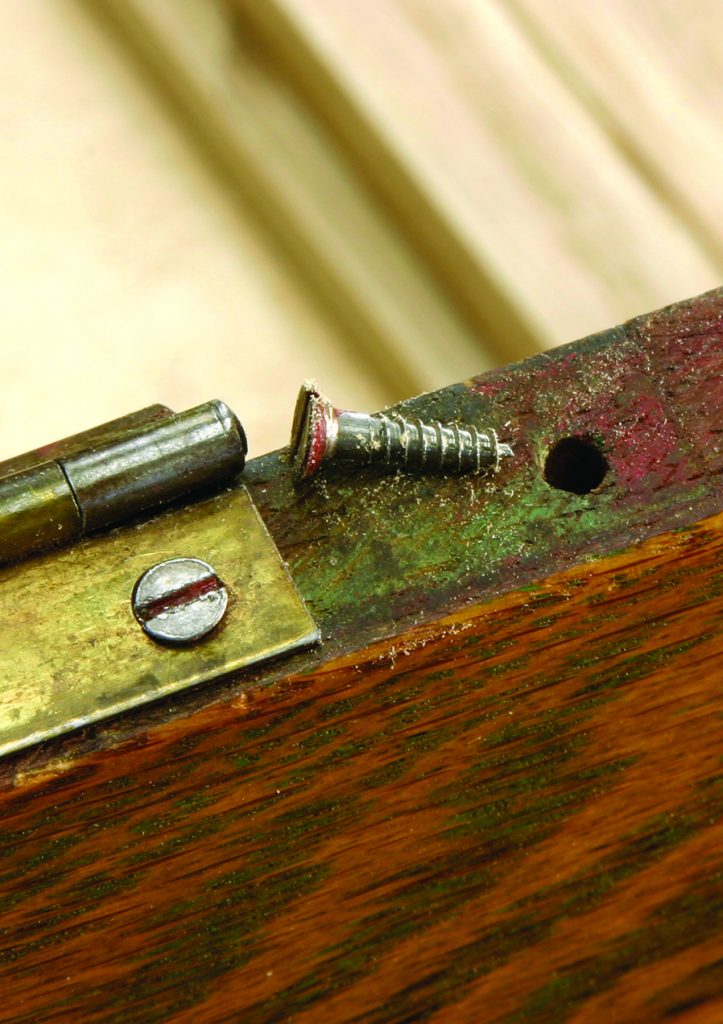
Seasonal wood movement can eventually crumble the fragile interface between the wood and the threads of the screw, enlarging the hole
Like a clamp, a screw isn’t really a permanent fastener. Over time, the fragile connection between wood and metal deteriorates as these different materials move in different ways. This may take decades, but whenever I remove a screw from an antique, I usually find crumbled bits of wood as seen above.
A screw may not last forever, but for attaching a solid wood top or hardware, or reinforcing joints in unseen places, it is the best fastener. Using it correctly will improve the odds of your work outlasting you.
Download the PDF: Successful_Screwing
Here are some supplies and tools we find essential in our everyday work around the shop. We may receive a commission from sales referred by our links; however, we have carefully selected these products for their usefulness and quality.