We may receive a commission when you use our affiliate links. However, this does not impact our recommendations.
Learn how to choose and use these versatile shaping tools.
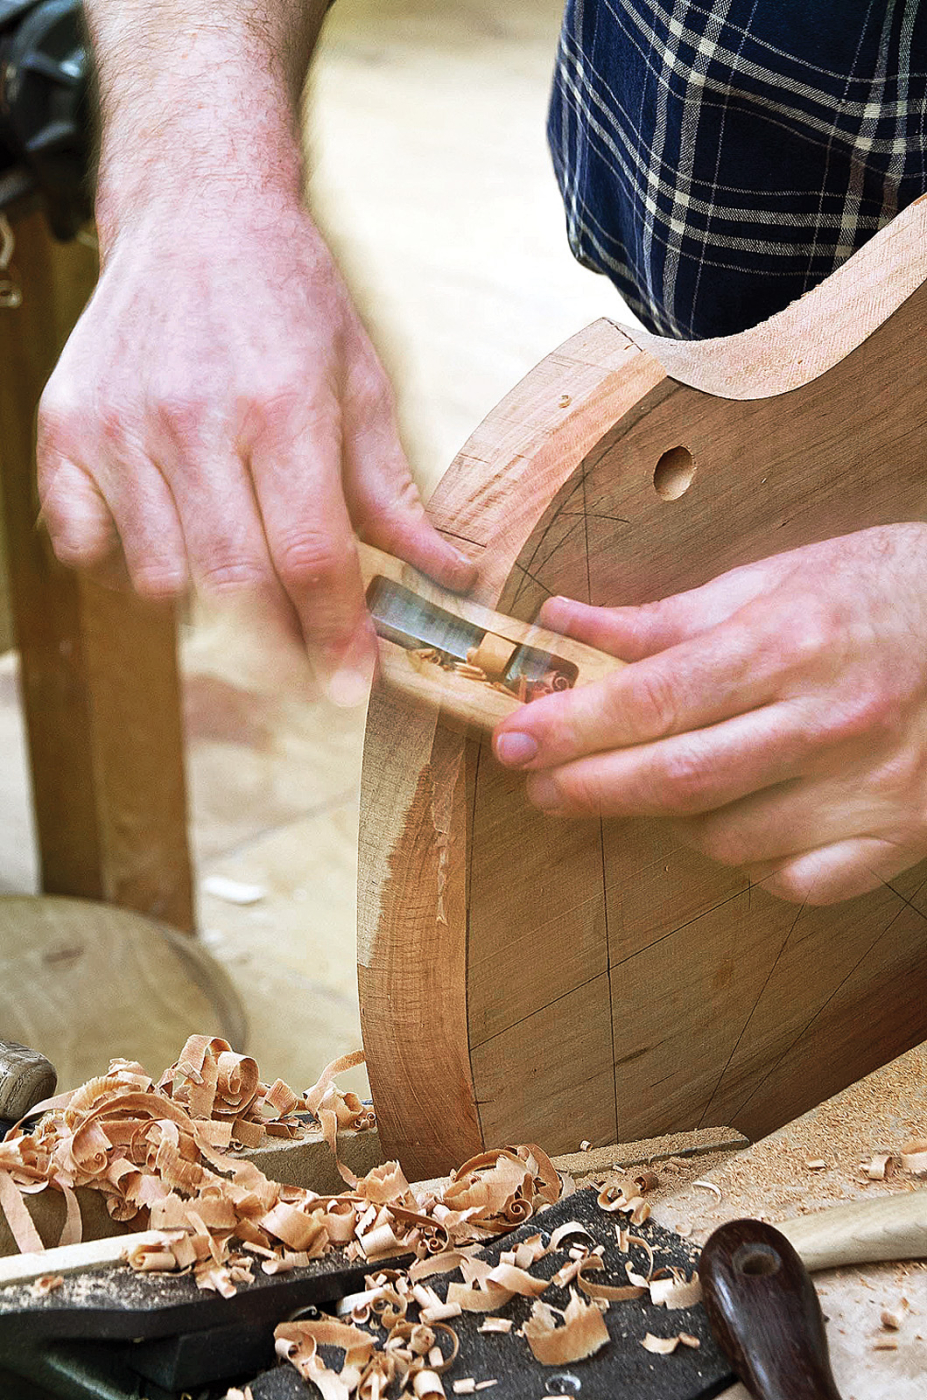
As a Windsor chairmaker and spokeshave maker, I use a spokeshave more than any other tool. I have three: two straight shaves (large and small) and, for hollowing wood, the curved specialty shave called a travisher.
My introduction to spokeshaves came at school where we had traditional wooden shaves with the blades held in place by friction. When they were sharp and set correctly they were great, but because they were old and well-used, the tangs often slipped in the body. That resulted in a sometimes unexpectedly thicker or finer shaving – not an endearing feature.
I’ve spoken with many people at woodworking shows, and I am amazed by how many still have their grandfathers’ spokeshaves, but rarely use them because of the same problems I suffered during my training. This is a shame because spokeshaves are remarkably versatile tools for shaping wood.
The first spokeshave that I bought was an inexpensive metal shave. It worked after a fashion, but it was not a pleasure to use. Years after purchasing it, I read some of David Charlesworth’s articles that explained all that should be done to make this type of shave function satisfactorily. In my opinion, tools should work “out of the box” – and that one didn’t. I am sure that similar experiences have put off so many potential spokeshave users.
I began to make and sell my own wooden spokeshaves about 15 years ago when I was unable to buy tools of the quality that I wanted.
Spokeshaves fall into two broad categories:
1. Low-angled, usually wooden-bodied
2. Higher-angled usually metal bodied
While there are today several metal-bodied shaves available that don’t suffer from the same problems as the tools that I’ve encountered, I prefer wooden spokeshaves.
Metal (High-angle) Shaves
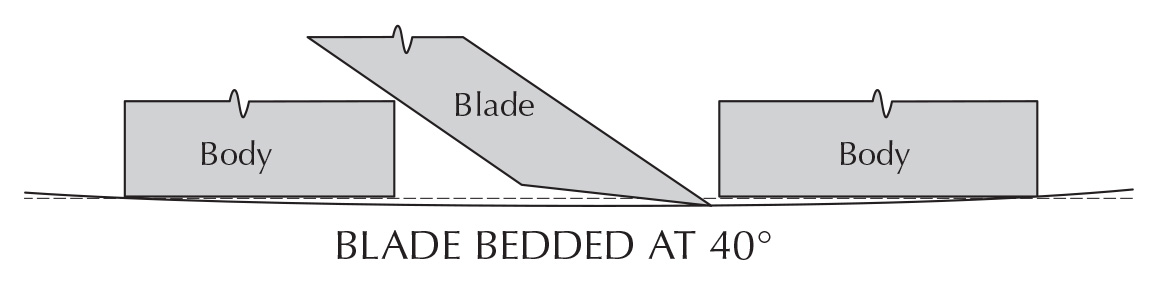
Metal spokeshave. On most metal shaves, the blade is bedded at an angle of approximately 40°, the sole of the tool is flat and the mouth is tight. This makes deep concave cuts difficult to achieve.
A fine example of a metal shave is Brian Boggs’s spokeshave, available from Lie-Nielsen Toolworks. It is a beautifully made tool with a bronze body and a blade set at 40°. The blade is made of high-quality steel that holds a fine edge. The throat, or gap between the blade and the nose of the tool, is narrow to produce very fine shavings and a perfect finish, even on difficult woods. The sole of the tool, both in front of and behind the blade, is absolutely flat (a version with a curved sole is also available).
A few years ago I had a conversation with Boggs about our respective tools and we decided that we had designed them for quite different purposes. His tool is designed for finishing cuts, particularly on challenging woods, while mine are for removing wood quickly while leaving an excellent finish for most purposes – particularly on straight-grained wood.
The flat sole of the metal shave means that it is designed as a plane with handles to either side. The tool works best when the surface being shaved is flat or convex. Concave cuts are difficult to make with a tight-mouthed tool because the blade cannot touch the surface; it’s held away from the wood by the front and back of the sole.
The alternative version with the curved sole is fine for concave work – but the curved tool is not ideal for straight or convex work. Thus, two spokeshaves are required.
Another limitation I see for most modern metal spokeshaves is the size of shaving that can be taken with the tools. If the goal is solely to produce a fine surface on wood that has already been shaped, then this is the tool for you. But if you wish to shape the wood to any extent first, I find a tight-mouthed metal shave to be problematic; with it, one just cannot remove enough wood quickly enough. This, of course, is the opinion of a professional chairmaker who operates in a world where time equals money. But even if I had all the time in the world, I would be frustrated by what I see as a limitation.
Wooden (Low-angle) Shaves
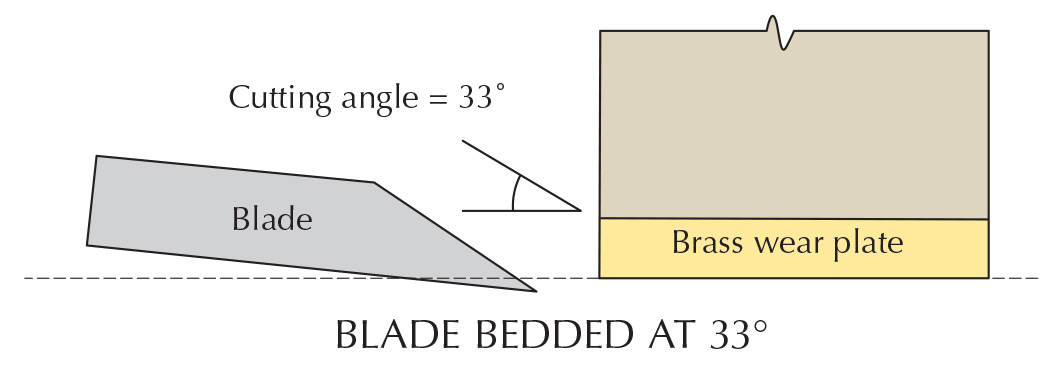
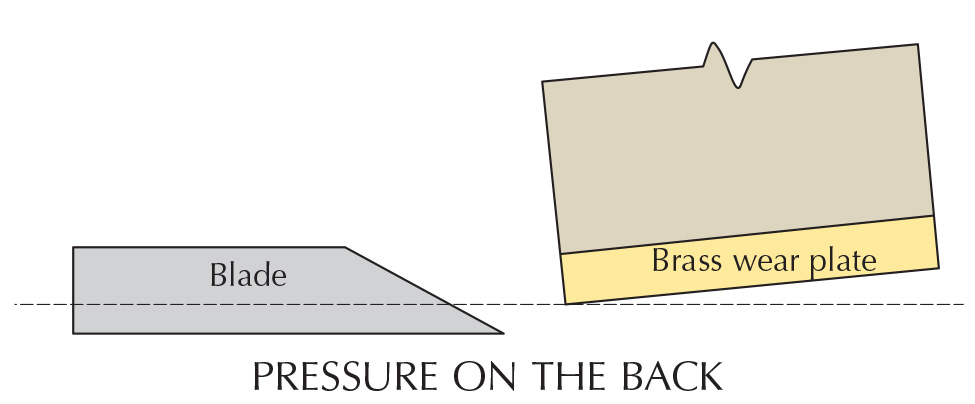
Wooden shave. In a low-angle spokeshave, the blade is set at approximately 33° to the wear plate.
As I’ve inferred, low-angle spokeshaves are quite different from their (usually) metal, high-angle cousins. The biggest difference is in the geometry of their design. Unlike the metal shave, on the wooden shave there is nothing behind the blade to interfere with the workpiece; the blade is set bevel-up and the base of the blade is set at an angle to the wear plate (6° in my shaves), and the resulting cutting angle, between the blade and wear plate is around 33°.
The bodies of the low-angle tools are typically made of wood (though Veritas makes a metal-bodied low-angle version). As a result, they are warm to the touch and many experienced woodworkers consider them more comfortable to use.
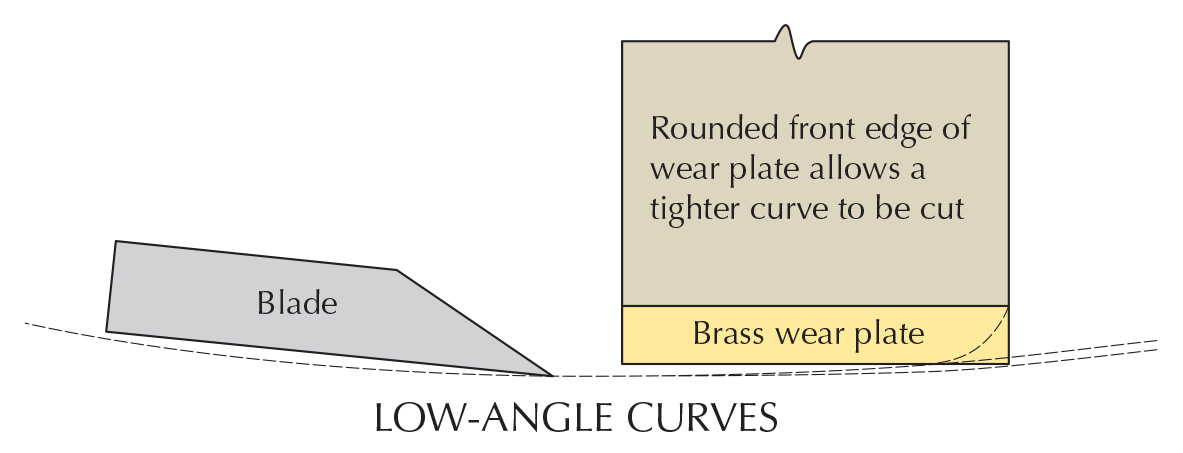
Concave cuts. Shallow concave cuts can be made with a low-angle spokeshave due to the angle between the base of the blade and the wear plate. Make the wear plate narrower, and a tighter curve can be cut.
The spokeshaves I make have a solid wooden surface directly behind the blade (it does not project below the bottom of the blade and therefore doesn’t interfere with concave cuts) and this allows the fingers or thumbs, depending on whether the tool is being pulled or pushed, to be directly behind the cutting edge. Apart from being comfortable, this minimizes any tendency for the tool to rotate in the hand as it is being used.
These tools are for removing wood quickly. On straight-grained wood and end grain they will leave an excellent quality surface. If, however, you are mainly working with wild-grained woods such as curly maple, then a fine-throated high-angle shave would be the better choice.
Adjusting the Cut
The position in which the blade is set relative to the wear plate is the first means of setting the depth of cut on both a wooden and metal spokeshave. Many woodworkers set the edge of the blade so that it is not parallel to the wear plate (when seen from the front). This means that there is a continuous range of cutting depths from fine to coarse across the blade. If a tool is used like this for even a short time, one gets used to the variation and can take advantage of it, depending on how much wood needs to be removed at that particular point.
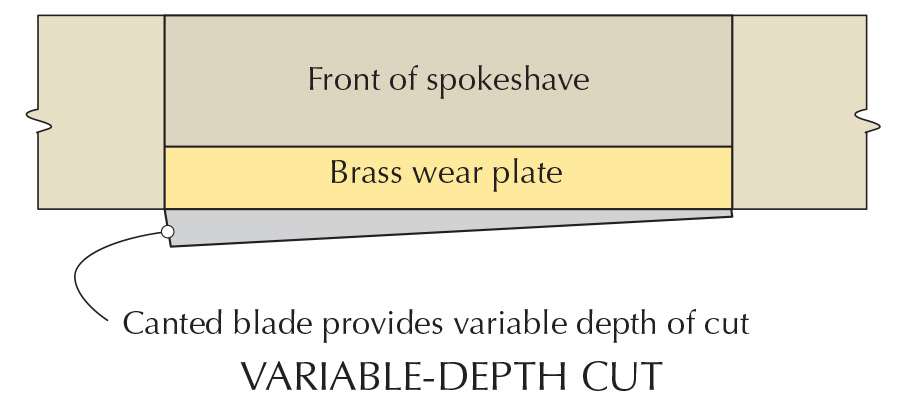
Out of parallel. Set the blade at an angle to the tool’s sole and one shave can make a variety of cuts.
I find this technique more effective with wooden shaves because the blades are usually longer. In my experience, the comparatively shorter blade of a metal shave means it can handle only a small variation in set. Setting a metal shave is more like setting a plane.
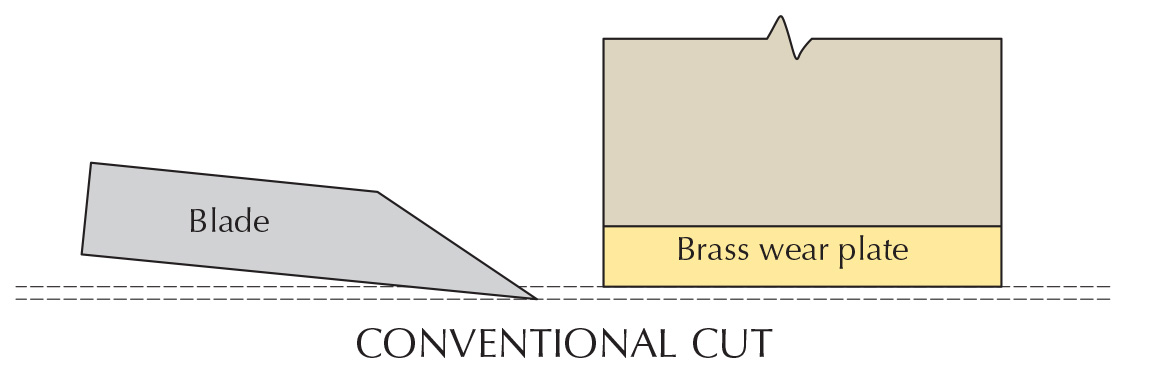
Typical low-angle cut. The conventional cut with a low-angle shave has the tool running on the wear plate; the depth of cut is set by adjusting the height of the blade.
Anyone using a low-angled spokeshave for the first time may initially have trouble with the blade digging into the wood, especially if the blade is set coarsely, as I prefer. However, once the user learns to maintain contact between the wear plate and the workpiece, all problems evaporate.
Conventional cutting with both metal and wooden spokeshaves requires good contact between the surface of the wear plate and the wood being shaved. In this situation, the position of the blade sets the depth of cut. For cutting end grain, for example, set the blade finely and make sure the wear plate achieves good contact with the workpiece for long, continuous shavings.
I find that low-angle (typically wooden) spokeshaves come into their own when one gets away from this conventional mode of working – but too few people use them enough to develop a knack for the following techniques and to appreciate the flexibility the tools provide.
I mentioned that I favor a coarse setting for my shaves – not because I am always taking heavy cuts, but so that I can take the greatest range of cuts from very fine to coarse, without ever having to reset the tool.
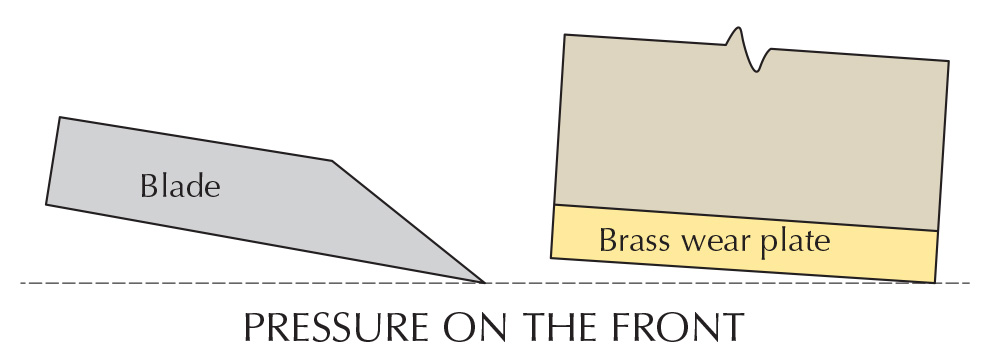
Fine cuts. To achieve the finest cut, run only the leading edge of the wear plate on the workpiece and trail the blade behind. Virtually all the downward pressure should be exerted on the front of the tool.
To achieve a very fine cut (as I use to finish a shaved spindle in a Windsor chair), the contact with the wood is at only the leading edge of the wear plate. The blade skims over the wood taking the lightest possible cuts. When working in this manner, concentrate entirely on maintaining very light contact at the front of the tool and let the blade follow on behind. If you try to push or pull the blade it will begin to dig in and take more than desired.
I frequently demonstrate this technique using just two fingertips to hold the tool. While this is not a realistic way of handling the tool for real work, it serves to illustrate just how lightly one should hold it.
Deep cuts. Achieve the greatest possible depth of cut by running the back of the wear plate and the base of the blade on the workpiece, by applying pressure on the trailing edge of the tool.
In order to take a slightly deeper cut when working in this way, simply add a little more pressure on the back of the tool.
But this is not the end of the tool’s flexibility. Continue to apply more pressure to the back of the spokeshave until the sole of the blade runs on the wood, with the wear plate up in the air and touching the workpiece only at the very back. At this point you will be taking the maximum thickness of cut that is possible with that blade setting.
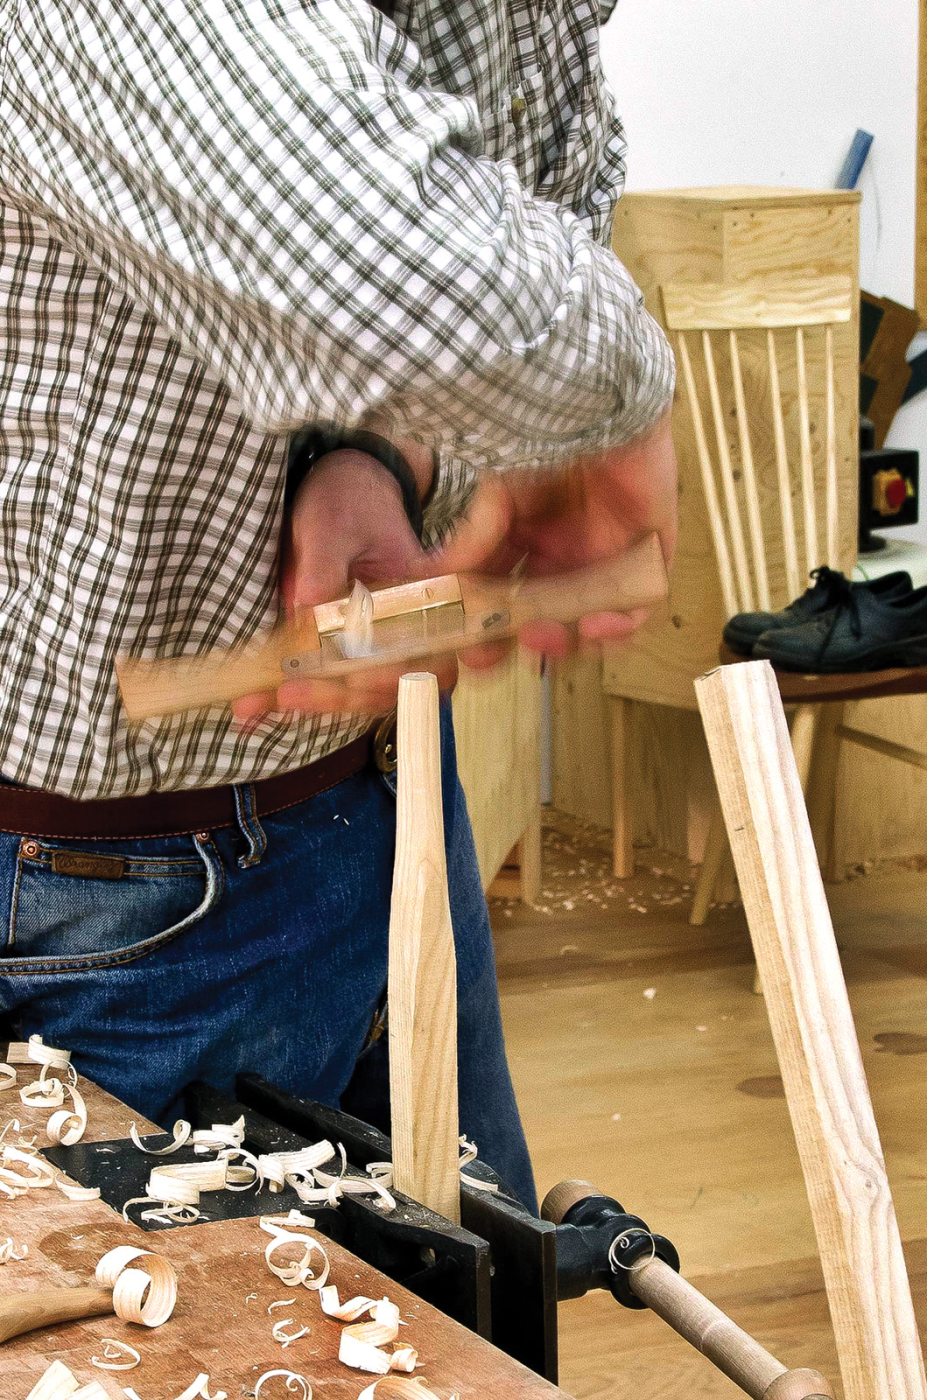
Although a little extreme, this is a useful technique when wood needs to be removed quickly. I use it, for example, when shaving spindles from green wood and when shaping seats along the grain in soft wood, such as tulip poplar.
Get a Grip
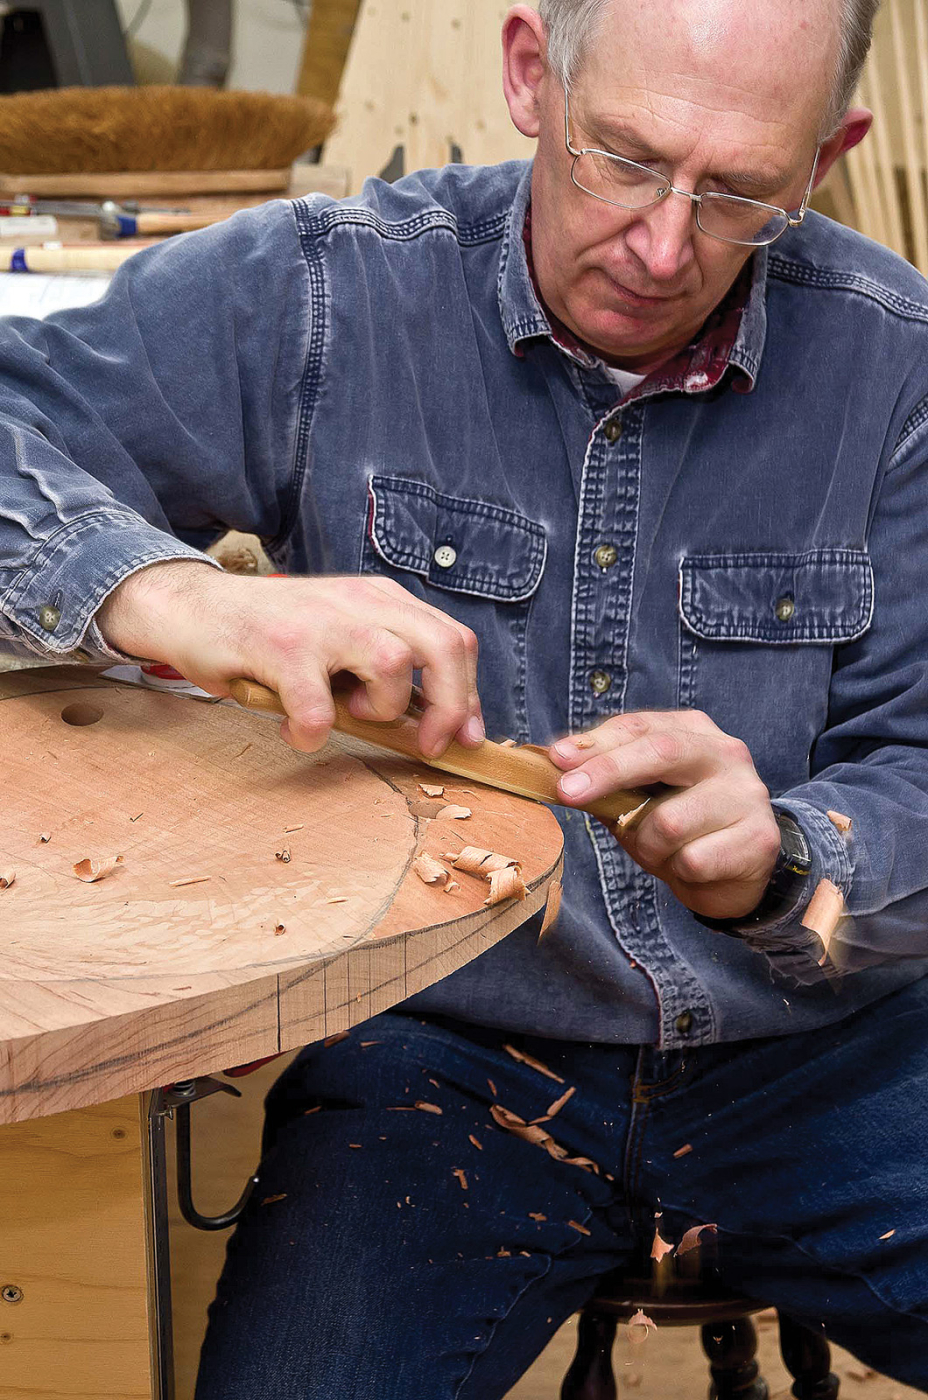
Thumb grip. The sole on this shave allows you to put your thumbs directly behind the blade for excellent tool control, without causing interference with the cuts.
I have always emphasized that a spokeshave should be gripped with the fingertips directly in front of and behind the blade. Only this grip will provide the sensitivity of feel that is necessary to set the wear plate rubbing on either the front (minimum cut) or back (maximum cut) and anywhere in between.
Reverse grip. A spokeshave can be used effectively with both a push and pull stroke. This is particularly useful when working on pieces such as spindles, where the grain often reverses. Notice the fingertip grip.
Most people who are new to using spokeshaves grip the handles firmly with their fists. This usually leads to the tool running on the sole of the blade rather than on the wear plate, and results in an unexpectedly thick and uncontrollable cut. Control comes only when the tool is rotated forward onto the wear plate.
Rotating a tool with your fists is not as controllable as applying pressure with the fingers directly to the wear plate (front) or blade (back) to control the cut. This is the reason I emphasise the fingertip grip so continuously.
Parting Thoughts
Two other tips apply to all shaves: Keep the blade sharp; and skew the blade across the direction of travel. This lowers the blade angle, giving a slicing cut and producing a better finish on harder woods. Skewing also reduces the thickness of cut, giving yet another method for changing the cutting depth without changing the setting of the blade.
Rapid removal. To remove a lot of stock quickly, ride on the base of the blade with the nose of the tool up in the air. Notice my grip on the tool: My fingers are pinching in front of and behind the blade
Finally, a plea to all woodworkers who don’t currently use spokeshaves: Spokeshaves can do so much more than round over an edge or cut a bevel. They can create complex shapes that would be virtually impossible with a machine. So the next time you design a piece, why not shape the wood the way that you want, rather than be limited to the shapes a machine can achieve?
One last thought: Spokeshaves and rasps as a combination are absolutely unbeatable for shaping wood.
Here are some supplies and tools we find essential in our everyday work around the shop. We may receive a commission from sales referred by our links; however, we have carefully selected these products for their usefulness and quality.