We may receive a commission when you use our affiliate links. However, this does not impact our recommendations.
We may receive a commission when you use our affiliate links. However, this does not impact our recommendations.
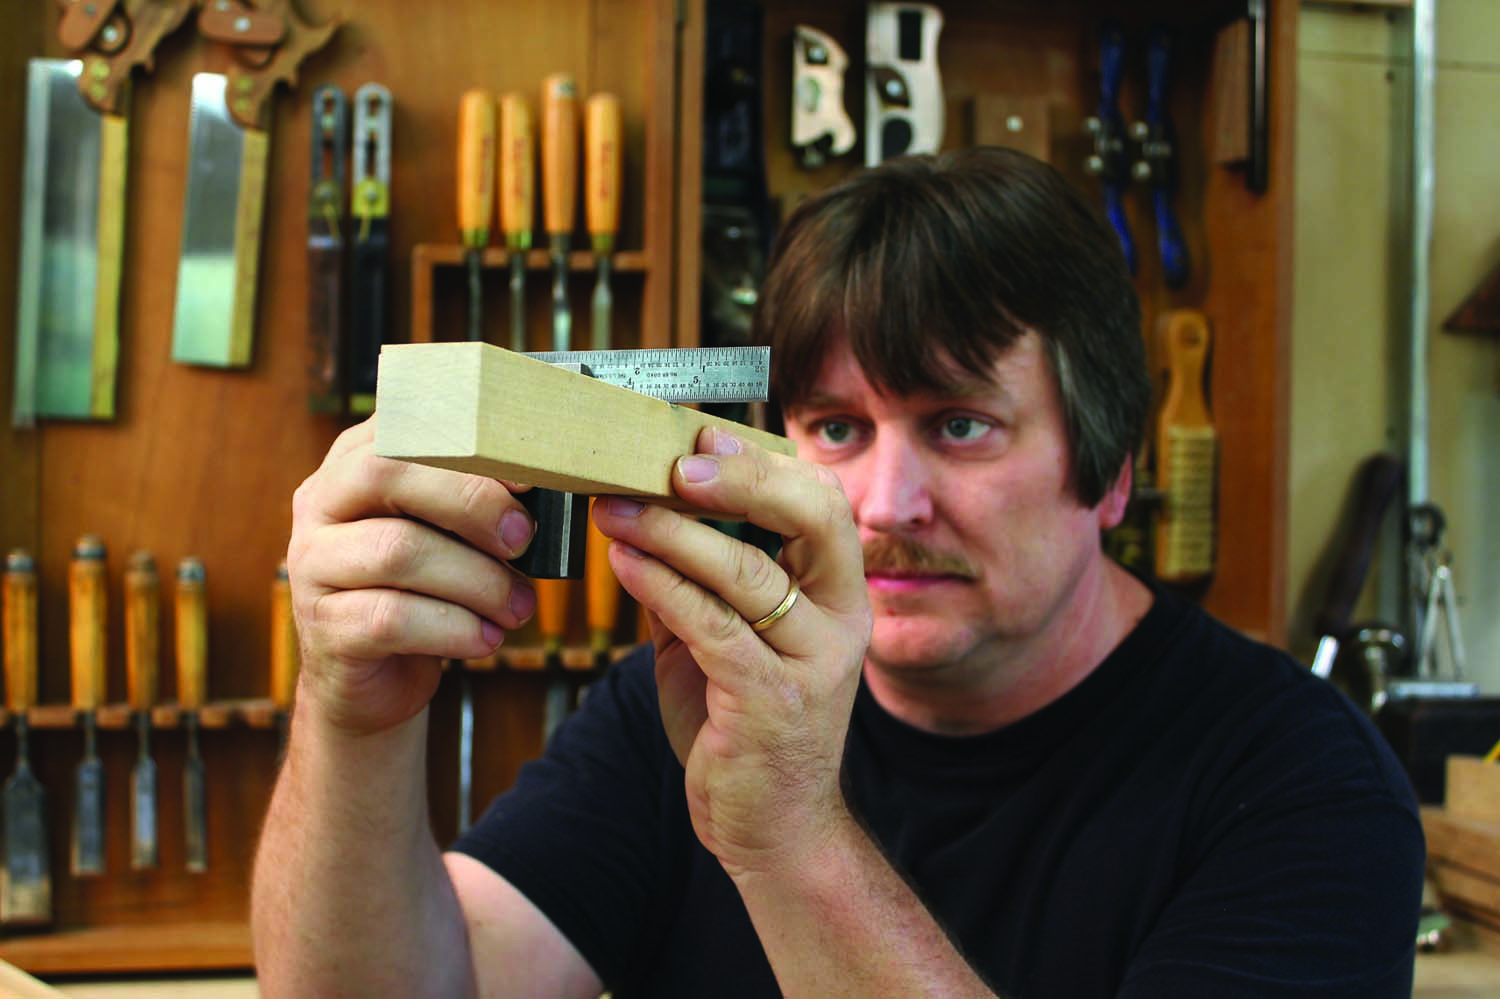
16 sides. This dowel blank started as a 1″ square. With 16 sides planed, it’s almost halfway to round.
An exercise in dowel-making without a lathe
During my formative years as a woodworker my instructor, Werner Duerr, taught many lessons both subtle and gross. Sometimes it wasn’t until years later that I learned the benefit. Toward the end of the first year, students were required to make a box with different compartments to hold nails. The project was timed and had to be completed using both hand and power tools but the bulk of the work had to be done by hand. The handle, in particular, was allowed to be made only by hand. To make a wooden cylinder without the aid of a lathe was one of the subtler lessons in planecraft Werner taught me.
In my classes, I impart many of the same techniques. One of them, make a dowel at the bench, teaches how to work to close tolerances with a handplane – no lathes allowed.
Getting Started
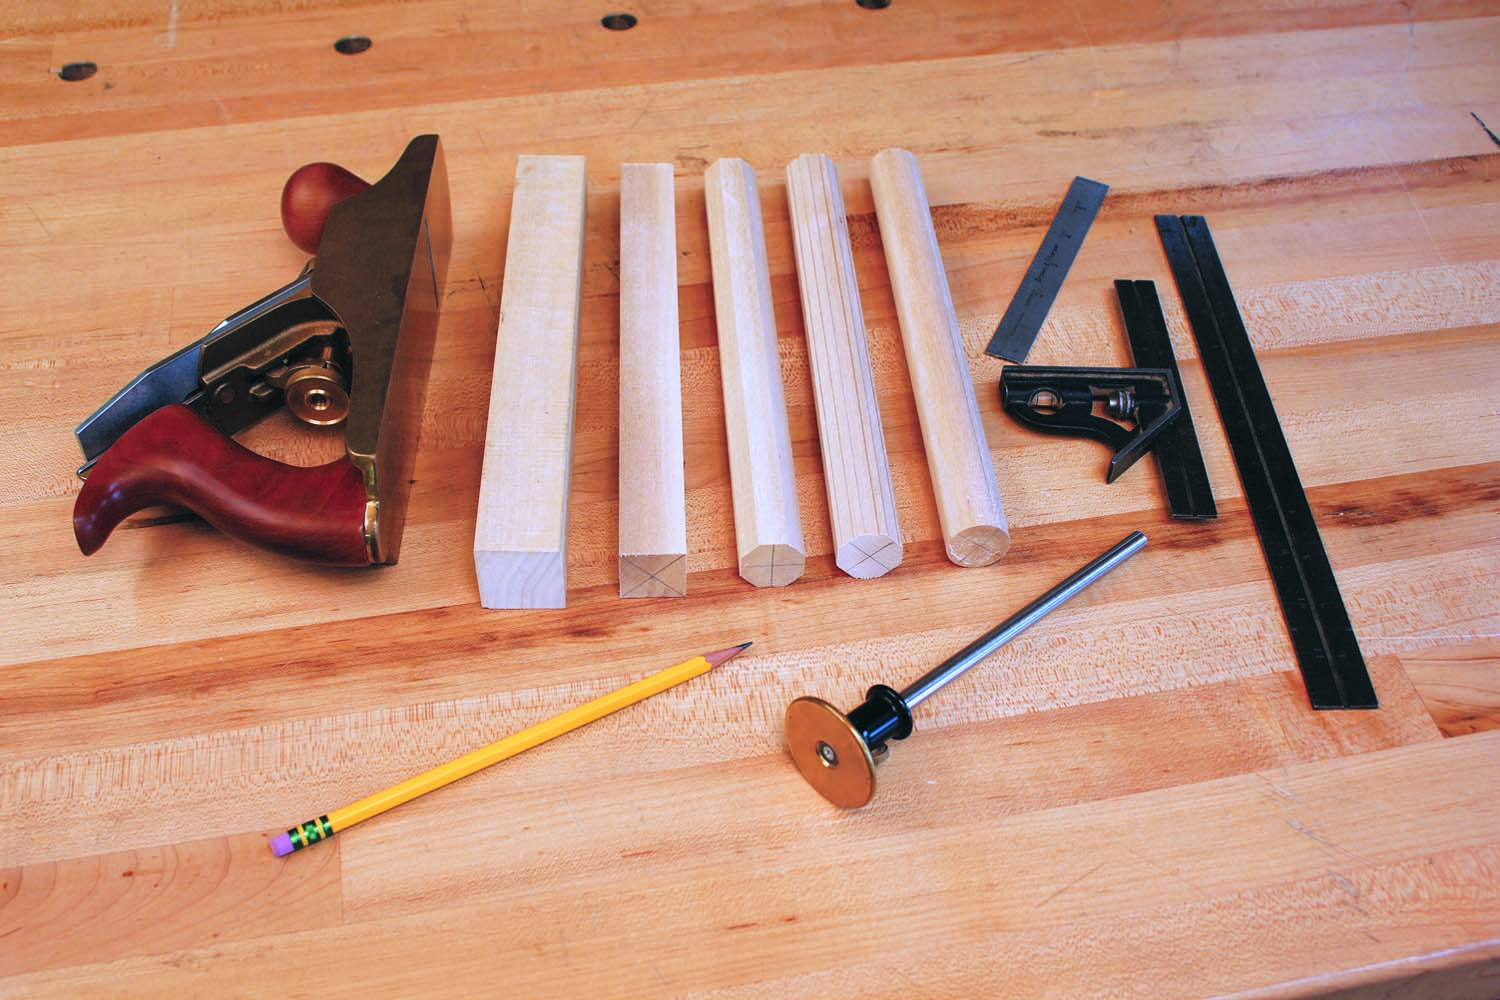
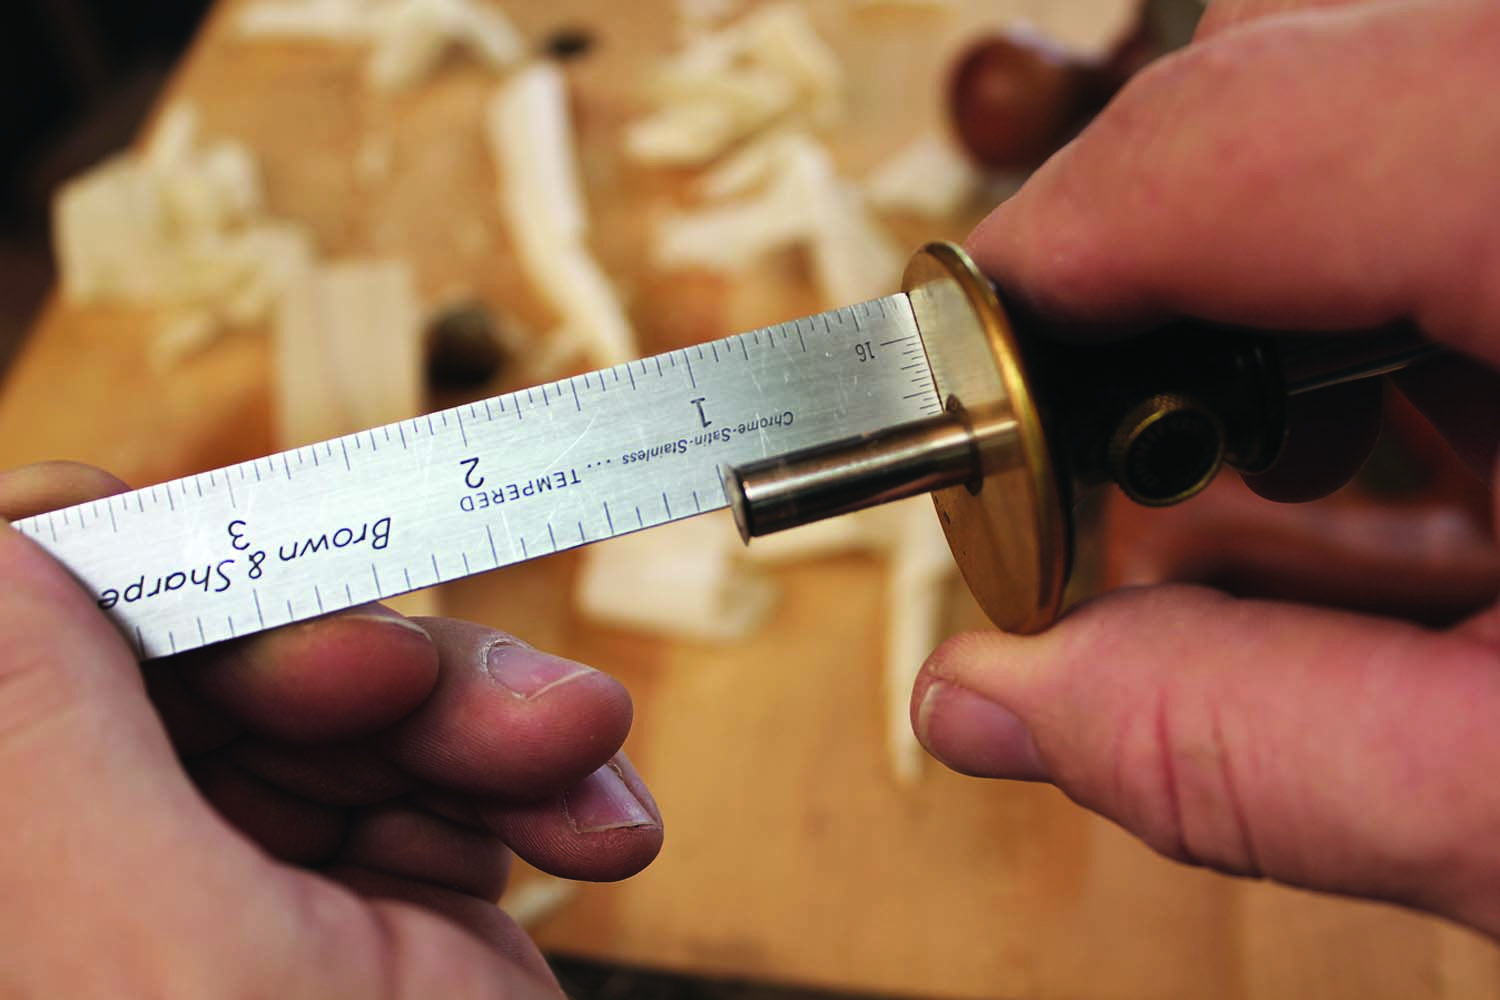
No lathe required. Here’s everything a woodworker needs to make a dowel.
The first step in making a dowel at the bench is to determine the size of the dowel you’ll make. I always begin the exercise with rough-cut blanks that will yield a 1″ diameter dowel that is 10″ in length – but you can make your dowel any size you desire. With that in mind, my blanks begin as a block that is somewhere around 11⁄16” to 11⁄8” thick and wide, by approximately 10″ long.
As with any dimensioning exercise, you need to plane a single flat surface to use as a reference for all the other surfaces. So, take out your sharpened, tuned smoothing plane and head to the bench with your blank.
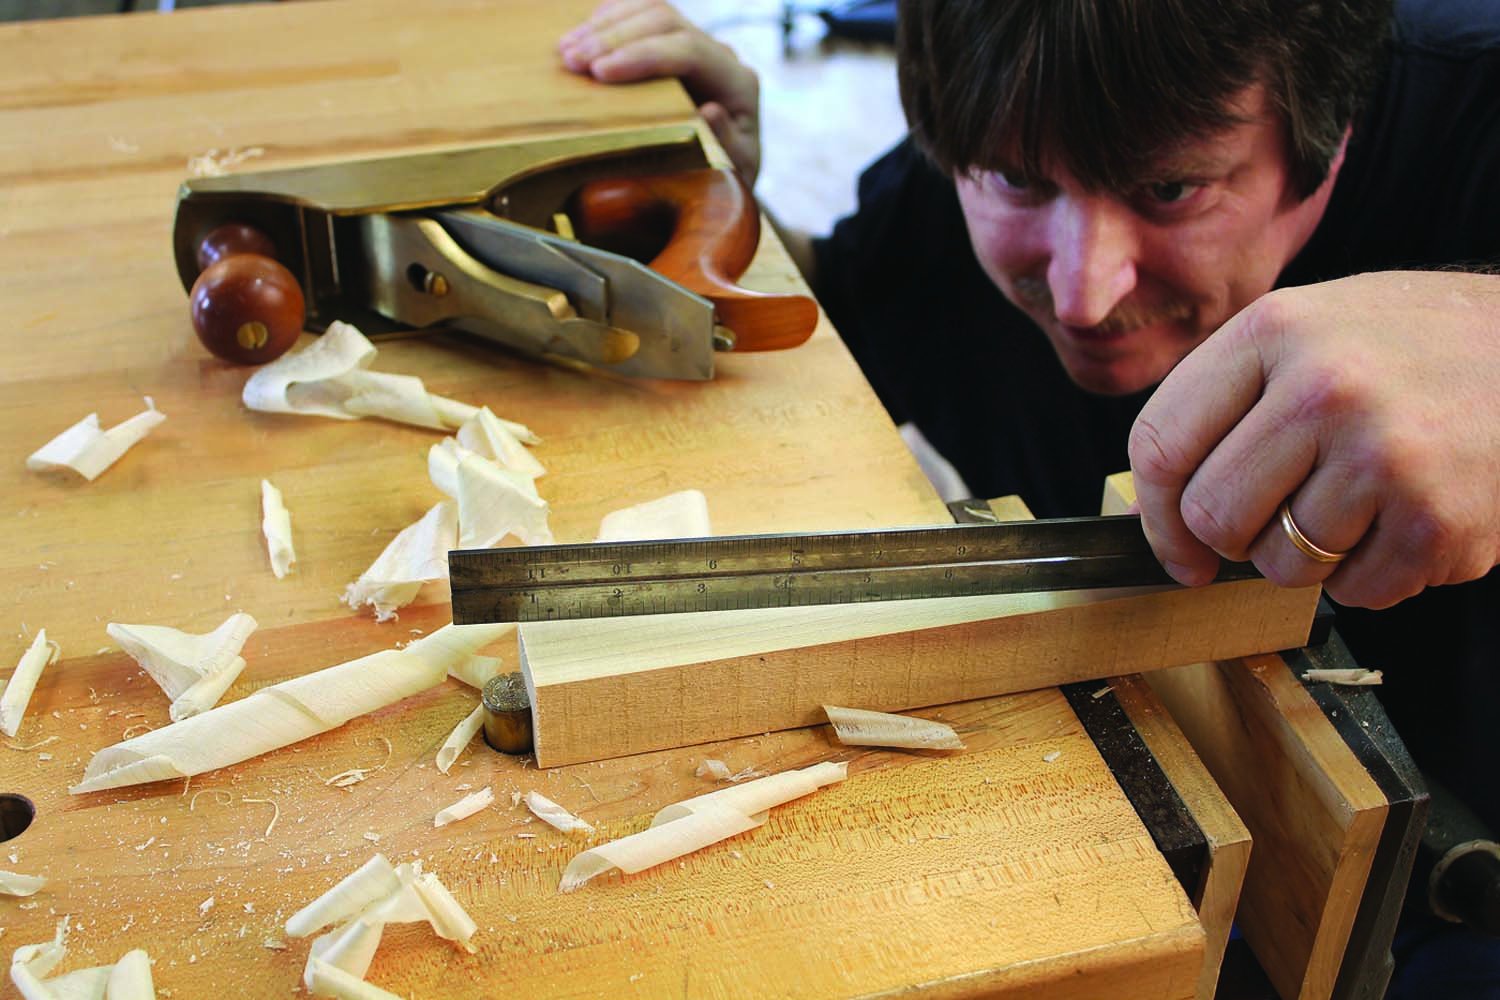
Reference surface. Handplane one side of the rough blank perfectly straight and flat. Use a straightedge to check it from side to side, over the length and from corner to corner to ensure your surface is perfectly flat.
All the planing techniques I teach in my fundamentals classes are freehand planing. In other words, we don’t use shooting boards. In order to learn how to make a plane do what you want, you need to remain jig-and-fixture free as long as possible. This teaches muscle memory and how to apply gentle pressure to different parts of the plane in order to make the plane cut only in certain areas on the board. Planing surfaces flat and square to one another is the perfect exercise for this training.
Once you have your reference surface true, it’s time to start truing and squaring the second side of your dowel blank to the first, then move on to the third and eventually the fourth side of the blank. For this exercise we need to end up with a perfectly square blank that is 1″ in width and thickness over its entire length – otherwise you won’t end up with a perfect cylinder.
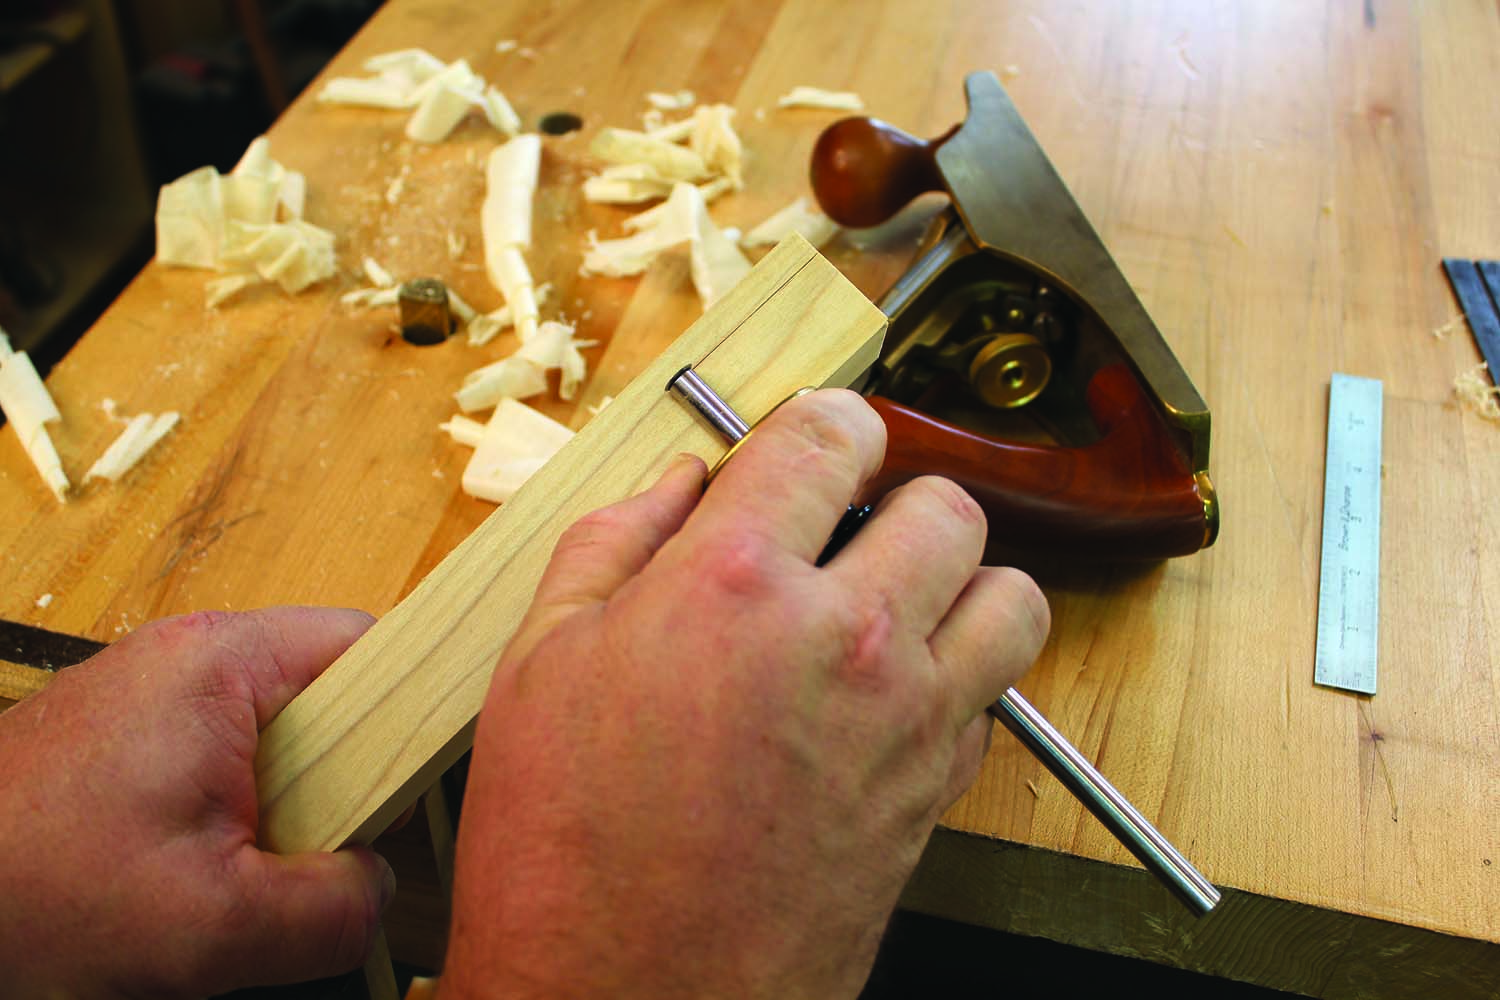
Adjacent flat. Handplane an adjacent surface flat, straight and square to the first. These two surfaces become your index surfaces from which the other two sides are squared and made parallel.
If you’ve never planed a surface flat, the easiest way to check it for perfection is to use a good straightedge. You’ll use that to check from corner to corner in both directions and across the width, and to check the length over the entire surface. If you hold the blank horizontally with a light source behind, you’ll be able to see even the slightest variation in the surface.
Every Circle Begins with a Bevel
 Once the blank is squared and ready to go, the first thing you need to do to get started making it into a perfect cylinder is to mark the centers on both ends of the blank. This is easily done with a combination square and a pencil or marking knife. Connect the opposing corners on each end to find the center.
An inch square. To end up with a 1″ dowel, you need a 1″-square blank. Set your marking gauge to 1″ and, referencing off the two index surfaces, scribe that measurement on the other two faces of the blank. Plane down to those scribe lines. (If you have a great deal of waste to remove, saw the bulk of it off first.)
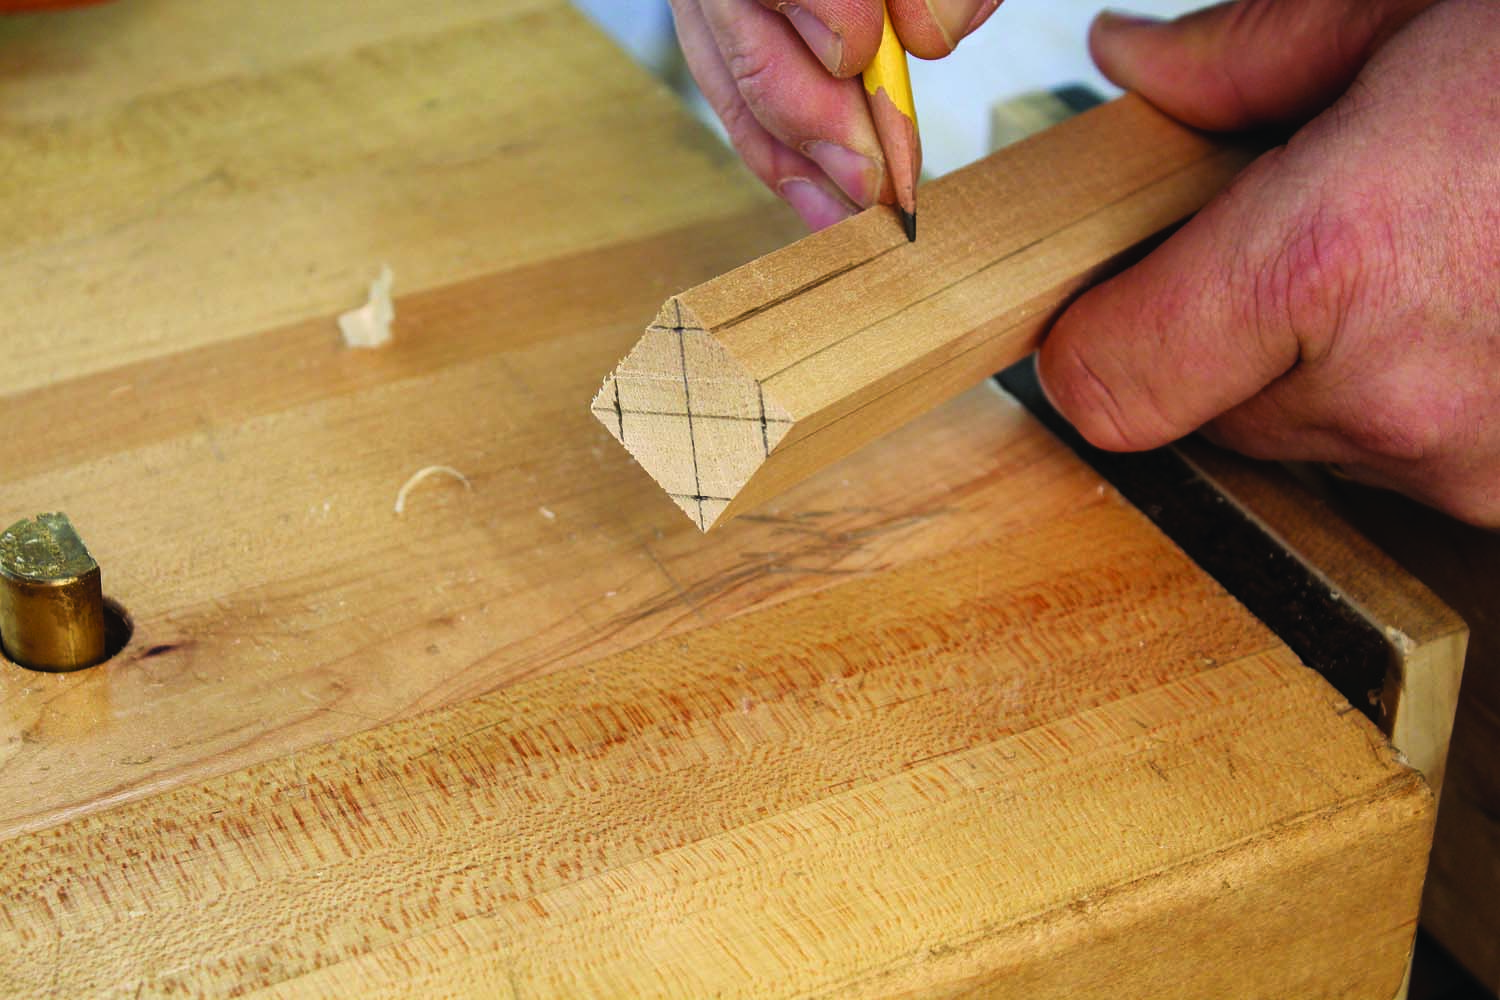
Once you’ve got your center marked divide the thickness of your blank in half; in our case that would be 1⁄2“. Measure along the diagonal lines you used to find the center and mark off this measurement. This will give you four marks along the two diagonal lines that are equidistant from the center. They should also be exactly the same dimension as it is from the center to any of the four faces of your block. In other words, we’ve laid out radius marks for our dowel. Use a combination square and draw a line at a 45° angle through the radius marks perpendicular to the diagonal centerlines. This will give you a perfect octagon laid out on the end of your blank. Now repeat these layout steps on the other end of your dowel blank.
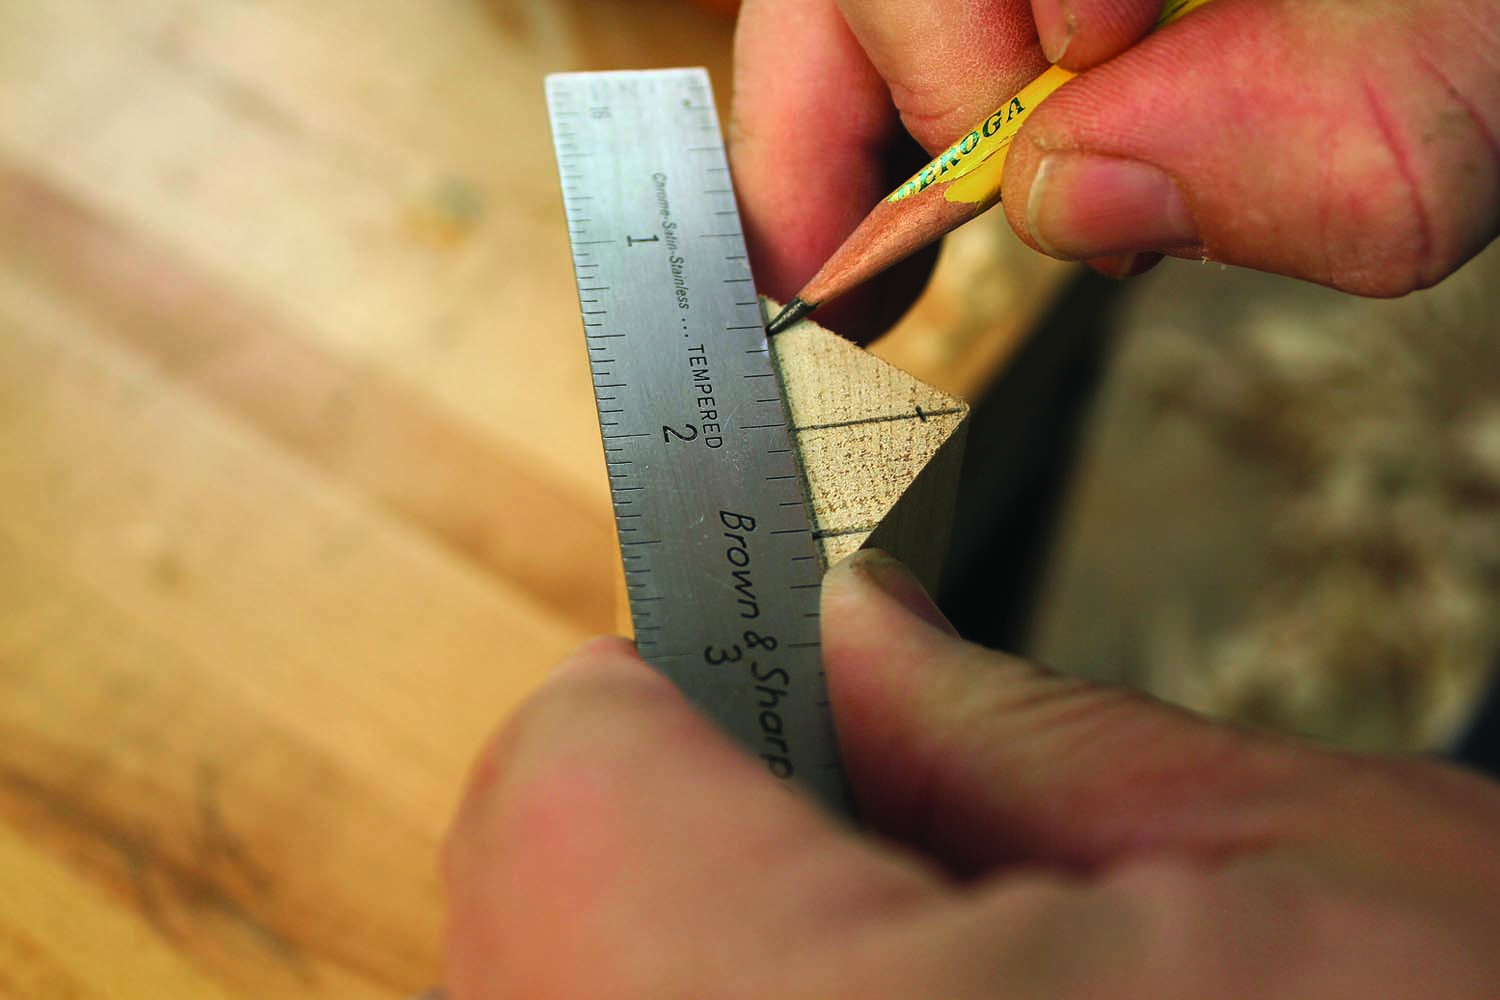
Get centered. Mark the ends of the blank from corner to corner to find the center. Once you have the centers marked, measure out 1⁄2″ in each direction from the centerpoint and place a mark on the blank.
Set a combination square or marking gauge to where your 45° angle marks meet the faces of your blank. The purpose of this is to extend the lines from end to end on the blank. These will be your guidelines to which you will plane your dowel blank into an octagon. Clamp the block in a vise and begin planing. Each new surface must be flat and square to every other new surface. They must also be exactly 45° degrees to the original flat surfaces of your blank.
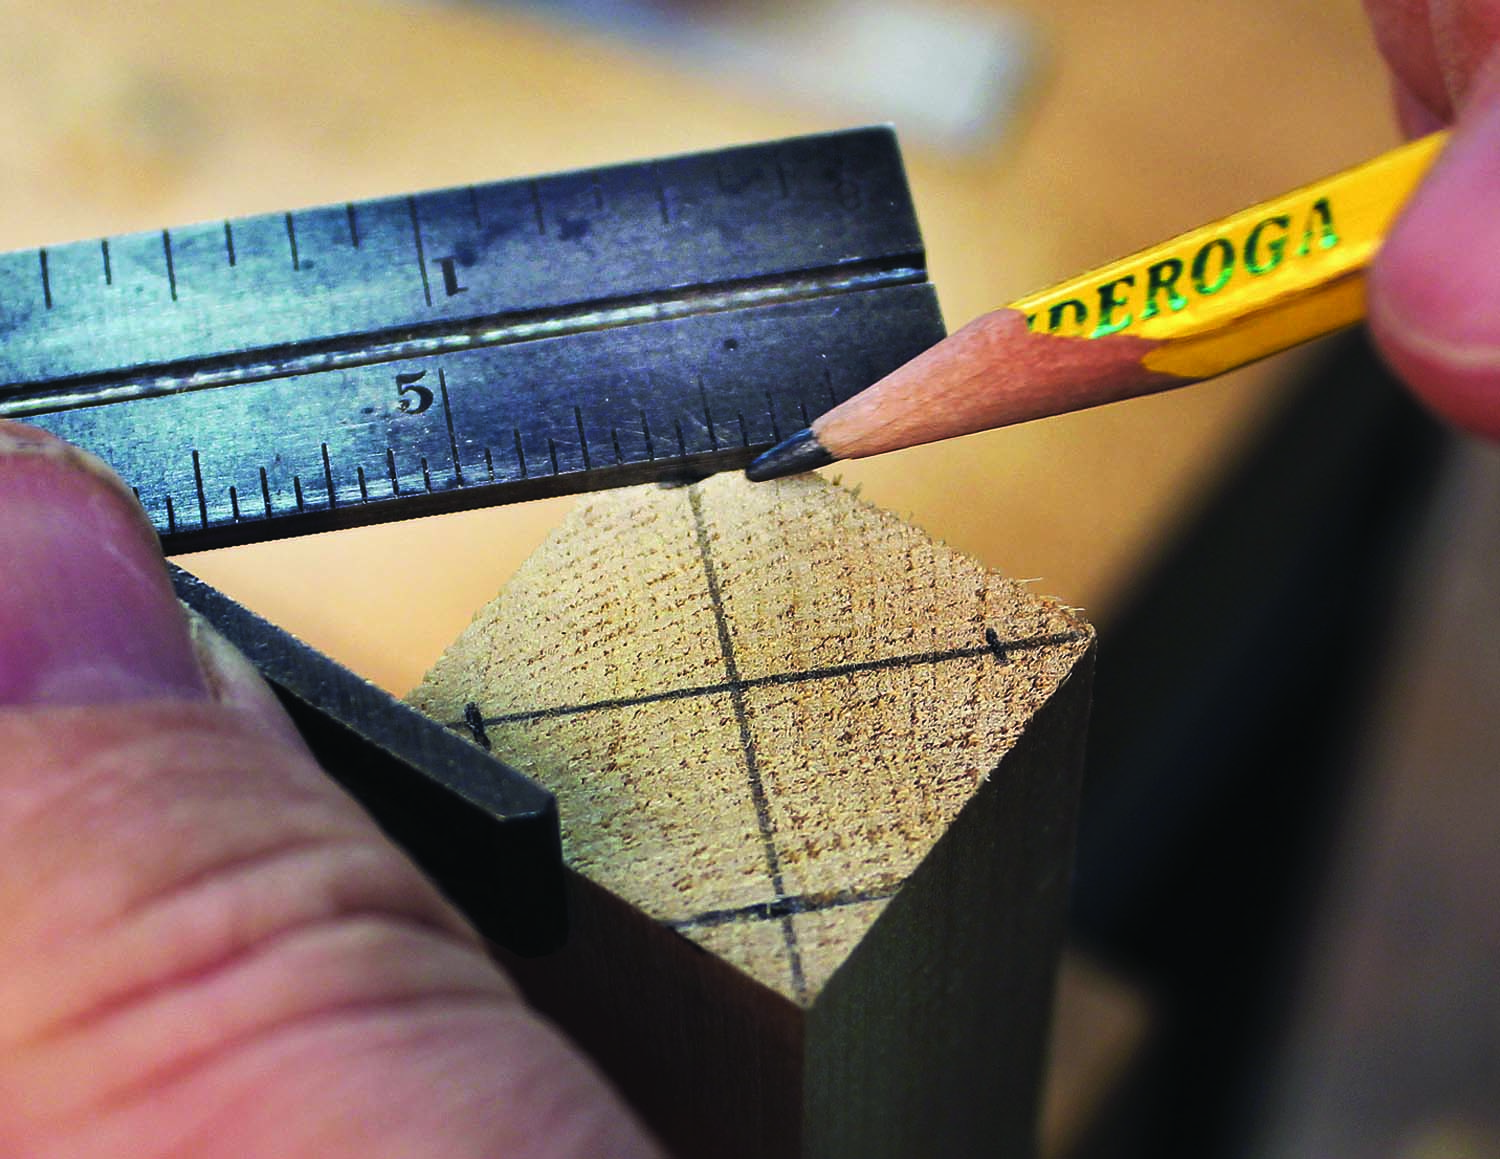
Bevels. Use a combination square to mark the 45° bevels that will form a perfect octagon on both ends of the blank.
The fastest way to reach this is by using a light setting on your handplane. There’s a real tendency to set your plane deep and open the throat so you can hog off the waste. Throughout this entire exercise, the best advice I can offer is to keep your plane settings small. It gives you much more control over the tool.
More Angles Means a Better Circle
Once you have a perfect octagon it’s time to start getting really small. I don’t mean adjust your plane; I mean we need to lay out a hexadecagon. In other words, we need to turn our eight-sided block into a 16-sided block. At this point I don’t bother to try to lay out the polygon mathematically. There comes a point there it just isn’t practical. If the dowel were 3″ in diameter, I’d give it a try – but with my big hands, it simply isn’t possible on a 1″ piece.
Down the faces. Use your finger and a pencil (or guide the pencil with a combination square) to extend the lines marked on the ends of the blank the full length of the blank. These will be your guidelines for planing an octagon.
Working on the ends of the dowel blank, I mark off the width of each of the 16 sides. Using my finger as a guide, I connect the marks from end to end of the blank. Time to head back to the vise with the blank.
Even though I have guidelines drawn, I take a few strokes with the handplane on each of the eight corners; then I measure each flat surface to make sure they are all equal. If I get a few that are small, I hit them with the plane until I get 16 equal sides. Make sure you adjust the flats by planing only the areas where the eight points of the octagon were. Do not plane the flats of the original square or the flats of the octagon. These surfaces are already at their final dimension.
Now that you are at 16 sides I’ll bet you can guess what’s next: 32 sides. This step becomes both visually and mentally confusing to lay out so I just take one or two passes on each corner with my plane. If any of the flat surfaces seems way out of whack, adjust it with an extra stroke of your plane.
Time to go Round
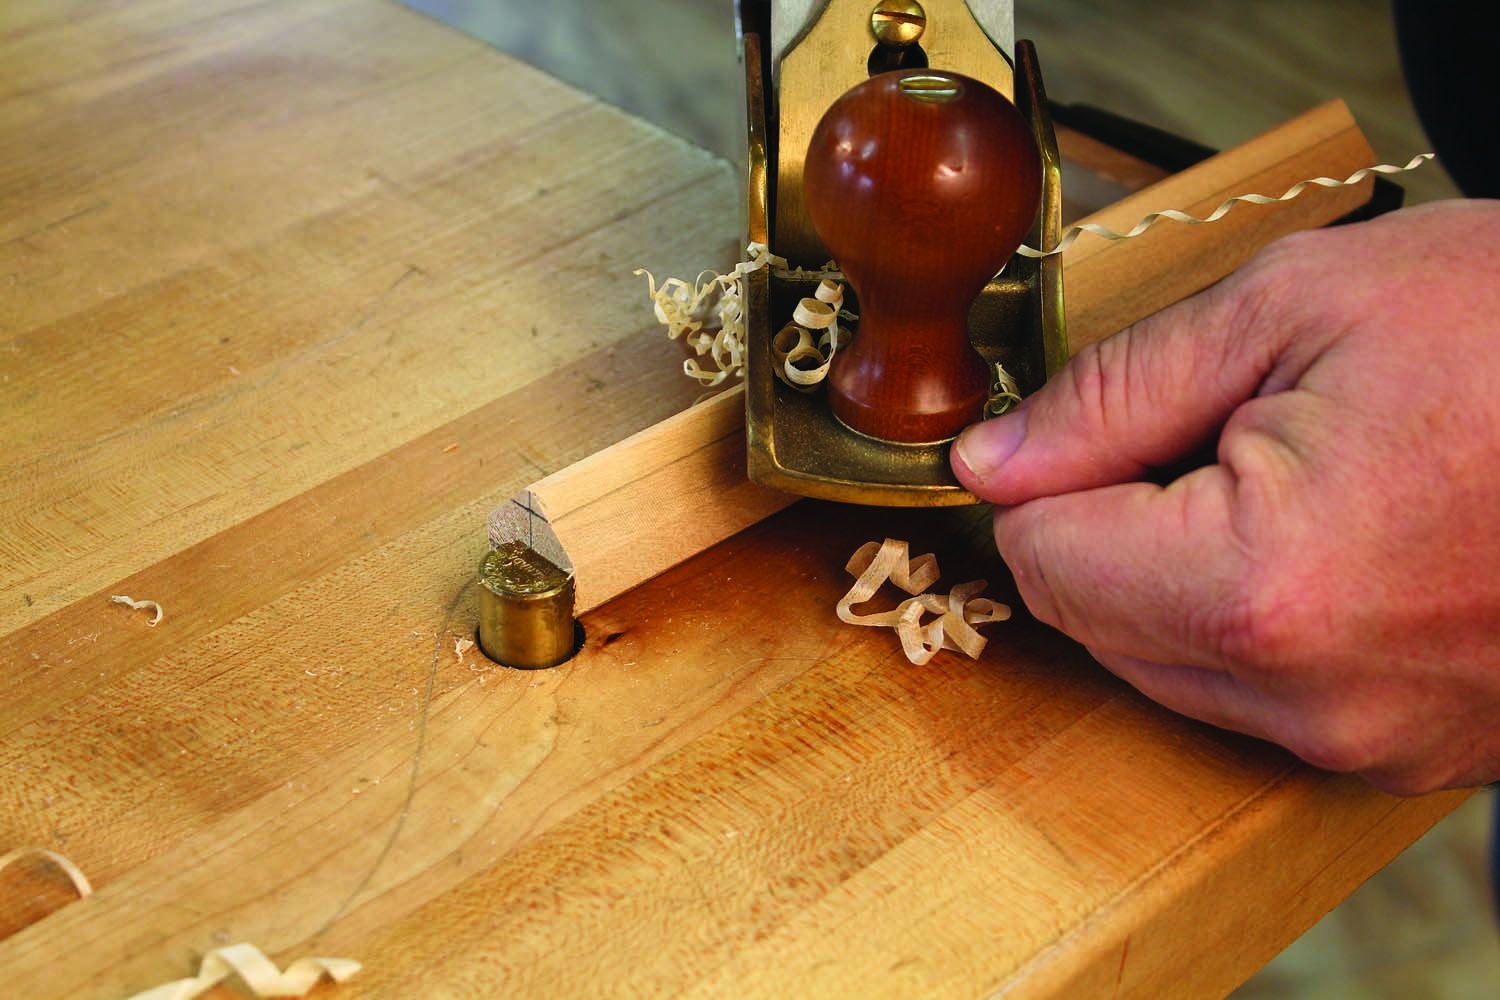
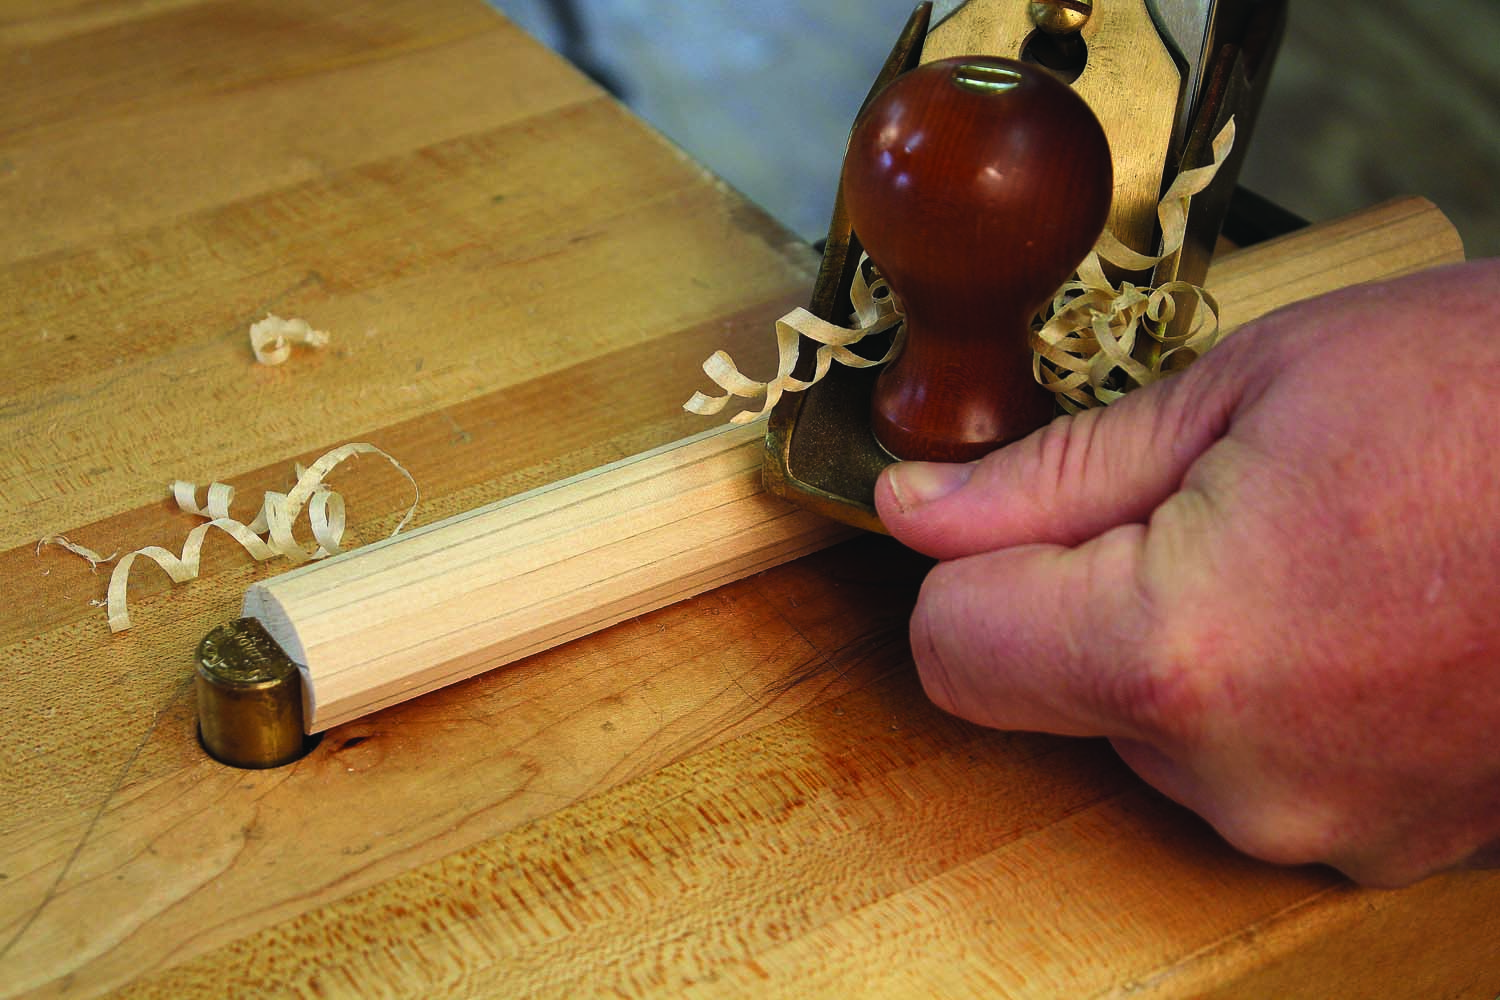
Chamfers. Clamp the blank back into your tail vise and plane the chamfers. You can confirm that they are perfectly square to one another with a combination square. I usually measure the blank in all directions to make sure it is 1″ across all the faces.
You can keep going, if you like, continually doubling the number of flats on the blank – but I usually just head to round at this point. One or two strokes with the plane on each corner gets you pretty close. Reset the plane to an even lighter shaving and round off the rest of the cylinder.
From the description I’ve just given, this exercise might seem easy. And once you’ve tried it a few times, it is. Your first few dowels may look perfectly round but the real test comes when you try to roll them across your bench. If they hop and wobble all over the place, you need more practice.
Charles is a renowned period furniture maker and the lead instructor at Acanthus Workshop in Pottstown, Penn. (acanthus.com).
Here are some supplies and tools we find essential in our everyday work around the shop. We may receive a commission from sales referred by our links; however, we have carefully selected these products for their usefulness and quality.