We may receive a commission when you use our affiliate links. However, this does not impact our recommendations.
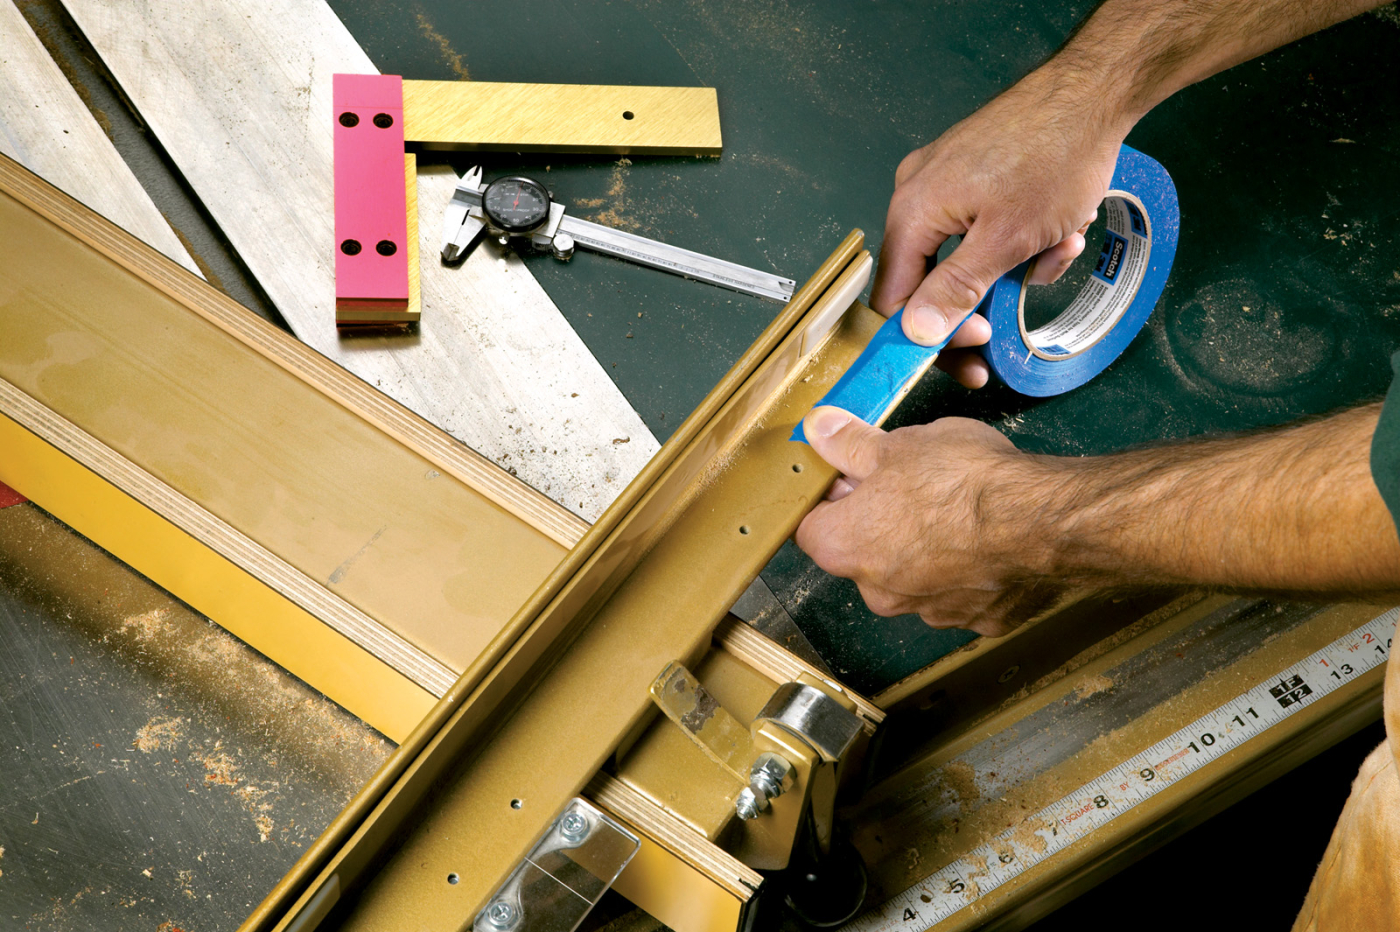
The face of your table saw’s fence must be 90° to the saw’s tabletop. Otherwise your joinery and rip cuts will be inaccurate. On some fences, the only way to fix the problem is with some well-placed masking tape.
There are many things we do wrong but we don’t know they’re wrong.
In woodworking there are two kinds of mistakes: There’s the garden-variety gaffe where we simply cut a board too short or botch a dimension, and the kind of mistake that we make over and over again because we don’t even know we have a problem.
This second kind of mistake is usually the result of having to teach yourself some operation or skill. When you don’t get the desired result shown in the book, magazine or video, it’s easy to blame the equipment or your lack of skill. But usually there’s something else going on that may be difficult or impossible for you to detect.
Mistakes are the best way to learn something because you remember that knowledge better. One mistake realized will stay with you forever. So the trick is to figure out what went wrong, and do it another way the next time.
After years of observing beginners, we’ve come up with the following list of subtle but critical mistakes that we see all the time. Be forewarned that some of our solutions or fixes may contradict what you’ve seen or read elsewhere. But do give them a try because they work for us and give us accurate results.
Mistakes in Work Habits
No matter how complex or simple your project, make a construction drawing that agrees with a cutting list.
■ You rush the work. We all know that it’s unsafe to work in a hurry, but rushing also hurts the quality of your work. Rushing a machine setup, skipping a trial fitting of a joint or just moving too quickly through a step causes many mistakes. When you make your first error because you acted without thinking it through, stop. Sometimes the fast fix will make the situation worse, and things will spiral out of control. A short (or lengthy) pause to think things through always helps.
■ You work without a shop drawing. Don’t start cutting wood until you have a drawing (even a cartoon), and a cutting list that agrees with the drawing (even with simple jigs). Failing to do this is guaranteed to produce lots of firewood.
■ You don’t listen to the voice in your head. There’s a wise saying: “If you have to ask the question, then you already know the answer.” Whenever you approach a machine operation and you ask yourself: “Hmmm. Is this really safe?” The answer is probably, “no.” Or if you see a mistake on your project and you think: “Should I fix that?” The answer is almost always “yes.”
Sharpening Mistakes
Flatten your sharpening stones after each session. We prefer a DMT extra-coarse diamond stone and do the procedure under running water.
■ You don’t flatten your stones enough. If you own any brand of waterstone, here’s our best advice: Flatten your stones after every sharpening session. Waterstones will quickly dish in the middle when honing and they will wear at the edges when you’re flattening the backs of tools. Even subtle amounts of wear will wreak havoc with your sharpening efforts. Certain parts of a bevel will never get sharp or polished, for example. Flattening your stones takes only a few minutes if you keep up with your efforts.
■ You use too many strokes. Whether you use waterstones, fresh sandpaper or diamond stones, you’re probably working too hard at getting a keen edge. Properly maintained sharpening mediums cut fast. Next time you’re honing an edge, try taking only four to six strokes and observing your progress under a 30x jeweler’s loupe. That should be all you need for each grit. Making dozens of strokes increases the likelihood that you’ll apply pressure in the wrong place, messing up your edge. It also wears your stone and tool faster than necessary. And it shortens the number of times you can hone an edge before having to grind it again.
■ You don’t true a chisel side that’s unbeveled. The backs (sometimes called the “face”) of your chisels must be flat – end of story. Otherwise your efforts to steer the tool through the wood will be stymied by the knife-like shape of your cutting bevel. You will not be able to cut straight consistently and the tool will wander as its pushed by hand or by mallet. Flatten the backs on a coarse diamond stone, then polish them up to as high as you can.
■ You use many sharpening systems. Learn one method of sharpening and stick with it. Each system has nuances. Learn them and your edges will improve.
Machinery Mistakes
Outfeed support is critical to safe and accurate work. If your work cantilevers off the side, support it there, too.
■ You trust your machines too much. We’re always amazed at how many people don’t check their work once it comes off the machine. They trust that it will be flat, true and the correct width. Sometimes it’s not. Machines go out of adjustment, and so you can save yourself grief by confirming that the machine is indeed set to 90° or 8″, or is making your boards’ faces parallel. Finding out this problem before you push 100 board feet of wood through a machine is a good habit. When your first board comes off the table saw, jointer, planer, belt sander or whatever, quickly confirm that it’s doing what it’s supposed to.
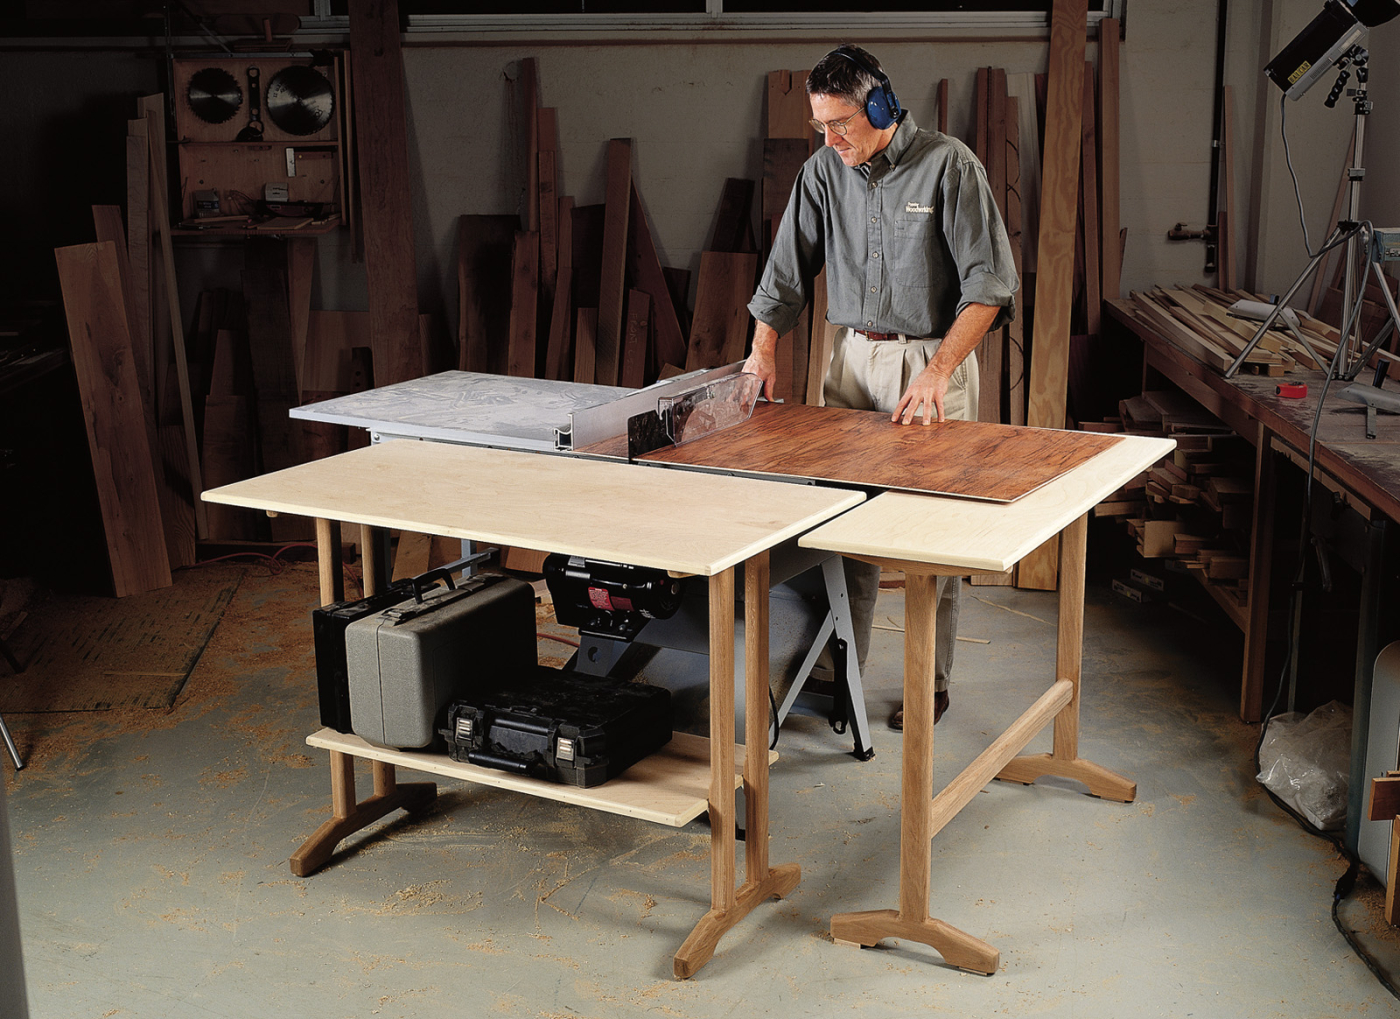
■ You make it easy for your work to tip. Outfeed and infeed support is critical on the table saw, miter saw, band saw and drill press. Accurate and safe work is impossible with your workpiece tipping at a slight angle.
Table Saw Mistakes
■ You don’t joint before a rip cut. If you want to rip boards to a consistent width, then the long edge that rides against your rip fence should be an edge you’ve jointed. This is especially important when you rip several narrow boards from one wide one. We frequently see woodworkers cut corners by making a first cut with the jointed edge against the fence, but then they use a sawn edge against the fence for subsequent rips. Boards can be loaded with tension that’s released during ripping. Your sawn edge can be made convex or concave during ripping as a result. Running a bowed edge against your rip fence (as shown above) can result in a cut that is inaccurate or even a bit unsafe. It’s always better to joint and then rip.
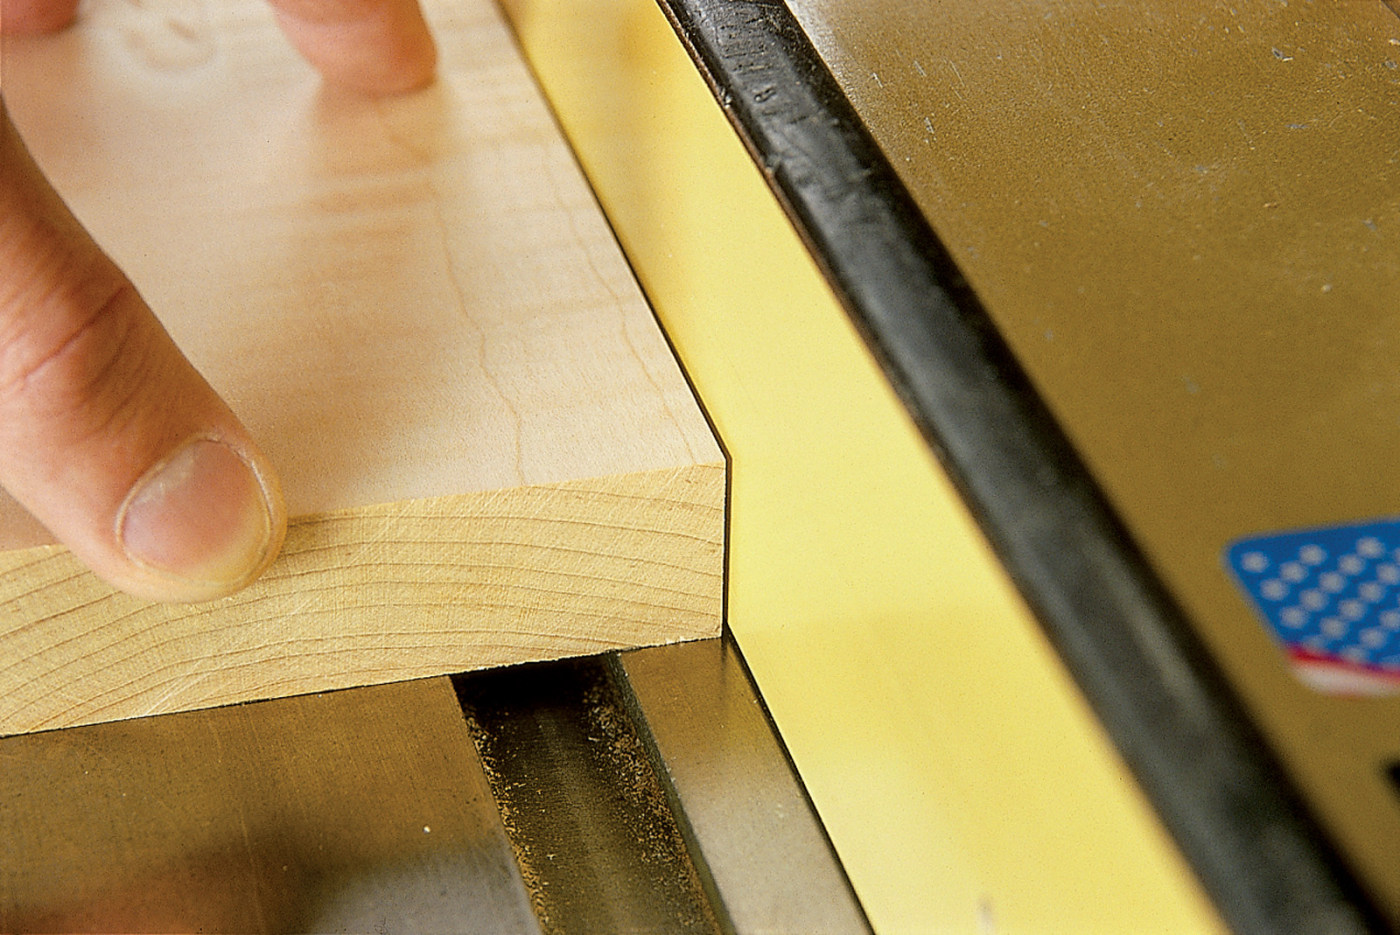
See the gap between the work and the fence? This board bowed as it was being ripped and then the sawn edge was run against the rip fence. You should joint this edge before ripping it.
■ You don’t square the face of your rip fence to the saw’s tabletop. If you cut joinery with your table saw (and who doesn’t) then your saw’s fence must be perpendicular to the saw’s tabletop. We’re amazed at how many saws are out of whack in this area. If your fence isn’t 90° to the top, then your joints will have a slight but sometimes fatal angle. Plus, when you rip thin or thick stock, your rip fence’s scale will be inaccurate because the top edge of the fence will be closer (or farther away) to the blade than the bottom edge of the fence. Figure out how to adjust your fence. Sometimes it’s a matter of turning a screw; sometimes it’s a matter of shimming the interface between the rip fence and its rails.
■ You don’t respect the machine. Saw’s with a spinning blade are the No. 1 cause of workshop injuries. Stop and count your fingers before you start. Keep in mind the damage that can be done before you turn on the saw.
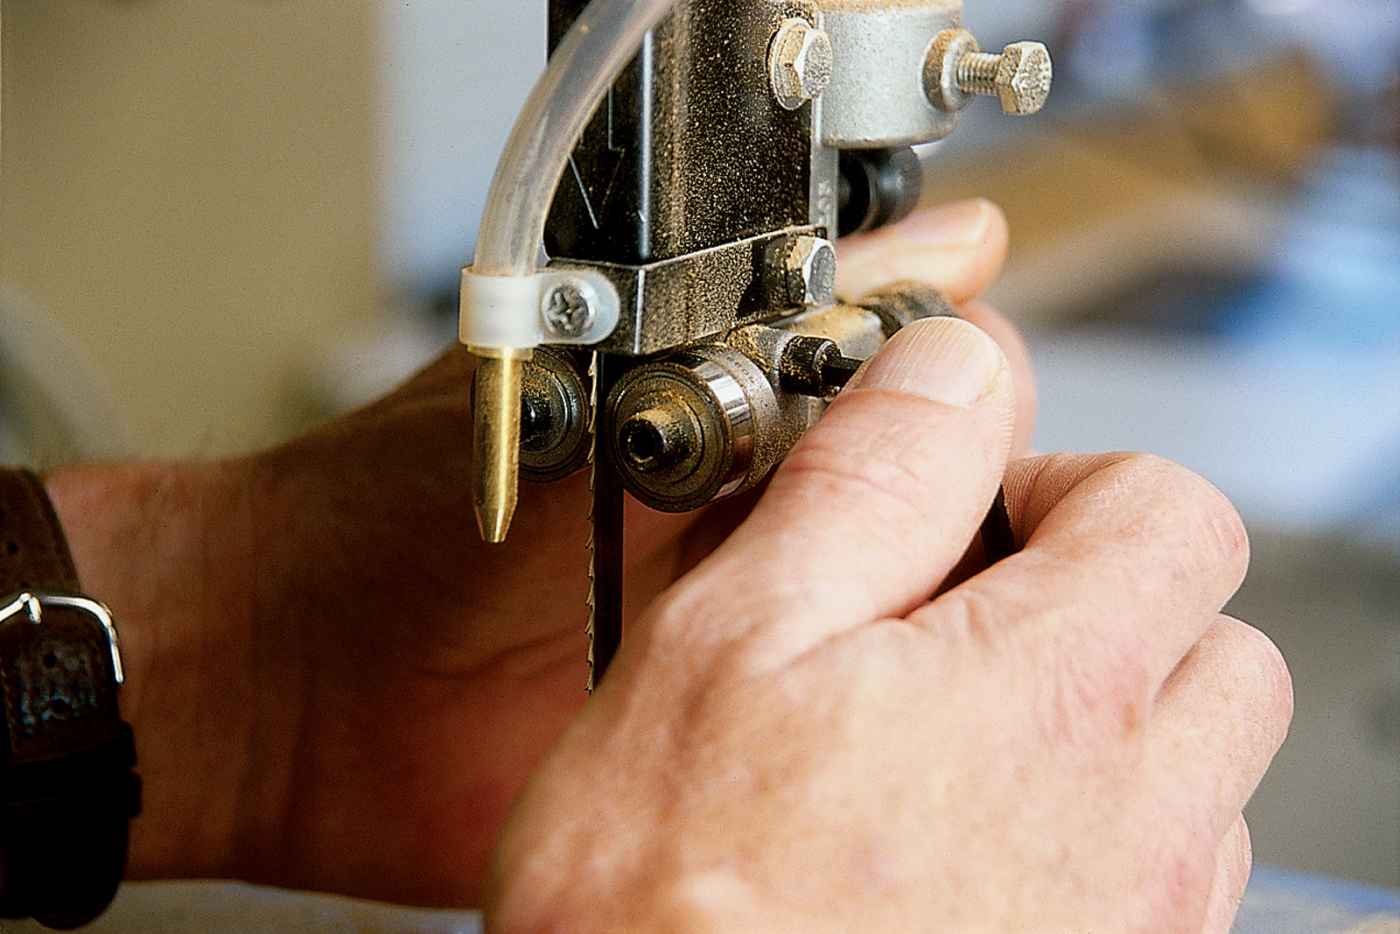
Setting up your band saw involves the careful placement of the saw’s guides above and below the table. A bit of misalignment will produce inaccurate results.
Band Saw Mistakes
■ You work with a saw that is poorly tuned. Despite their simplicity, band saws are fussy. Even the best one won’t perform well if the blade tension and the guides aren’t quite right. There are entire books written about tuning your band saw. Get one and read it.
■ Your blade is too wide or too narrow. One blade is rarely enough. You need at least one blade for resawing and another for general curve-cutting.
■ You don’t mark your waste. It’s easy to get turned around on the band saw and cut on the wrong side of your guide line. Take the time to mark an “X” on the waste side so you won’t get confused while making your cut.
Router Mistakes
■ You ask too much of your router. Many people bite off more than the router can chew. You’ll get better results if you don’t push your router and bits to their limits. Most routers and bits are designed to remove about 1⁄8” of material in one pass. Asking for any more than that can snap your bits, overheat your tool or result in a poorly machined surface.
Layout Mistakes
■ You trust your layout tools too much. Try squares aren’t always square. Straightedges aren’t always straight. Even a combination square will go out of true after being dropped or heavily used. Your layout tools are the truth sayers in a project. Make sure they’ve got the straight story before you change machinery setups based on their readings. Errors from layout tools will snowball.
■ You don’t do the math. Double- or triple-check all of the numbers. Don’t trust a cutting list (even your own) without checking the math or doing a full-size layout. The time it takes to do this will be more than made up when things go together right the first time versus redoing your work.
■ Your lines are too coarse. Making a mark you can see and follow saves lots of frustration. A mechanical pencil will give you a sharp line, but if the lead is too hard your line may not be dark enough to see. If using a regular pencil, don’t let it get dull during layout or you’ll be trying to decide where on that 1⁄16“-wide line you’re supposed to cut. If a mechanical pencil line is giving you problems, switch to a marking knife.
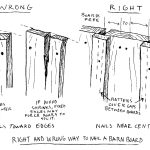
■ You always assume the largest dimension number is the length. Dimension numbers refer to grain direction and should always be listed like this: thickness x width x length. So if you want grain-matched drawer fronts on a desk with the grain running vertically, a narrow upper drawer would be properly written as 3/4″ x 12″ x 4″ – with 4″ being the length of the drawer because the grain is running vertically.
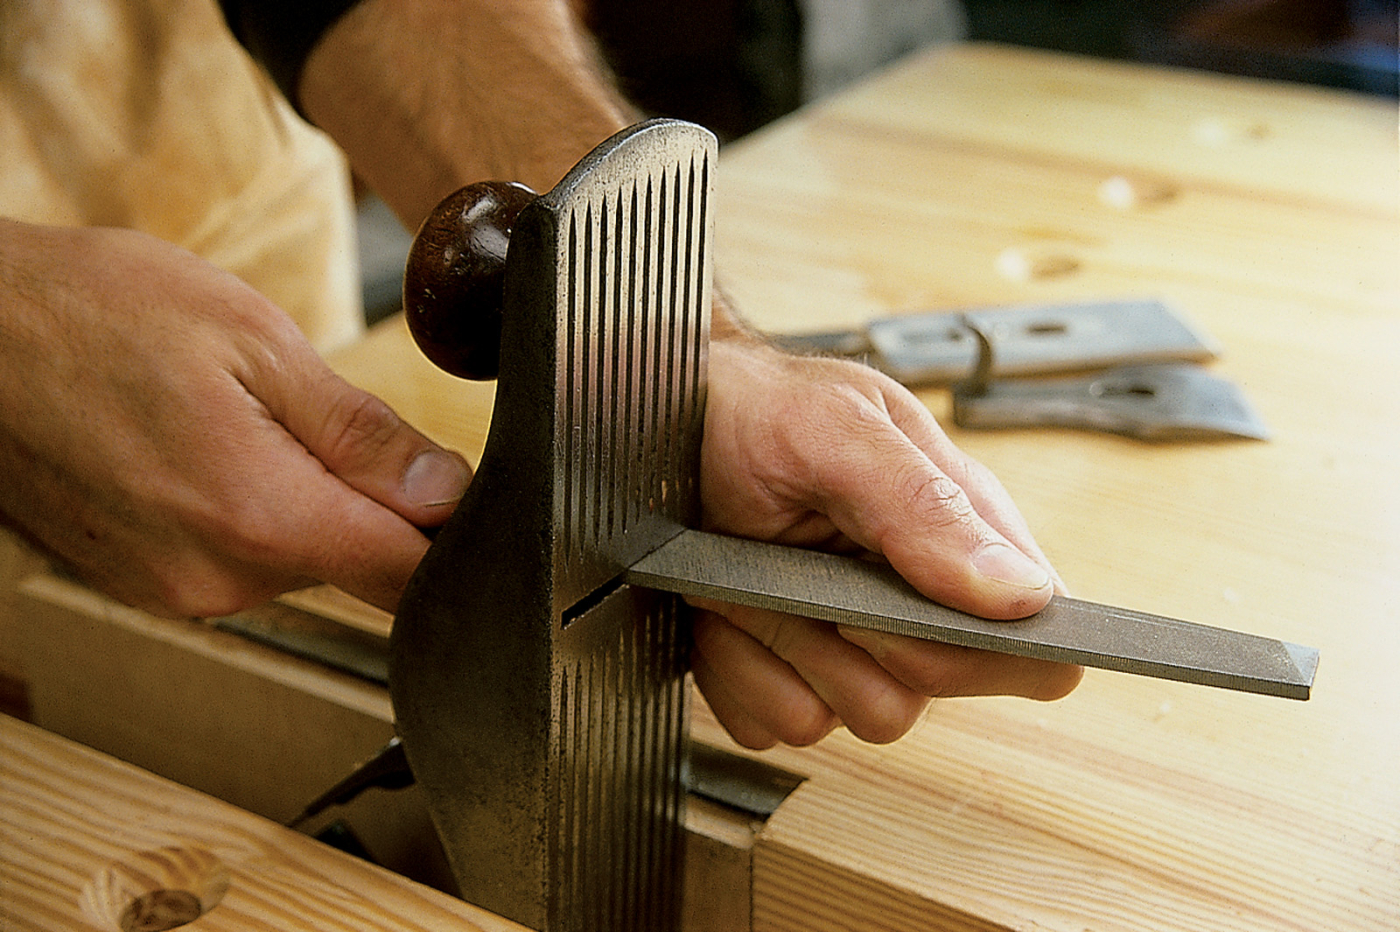
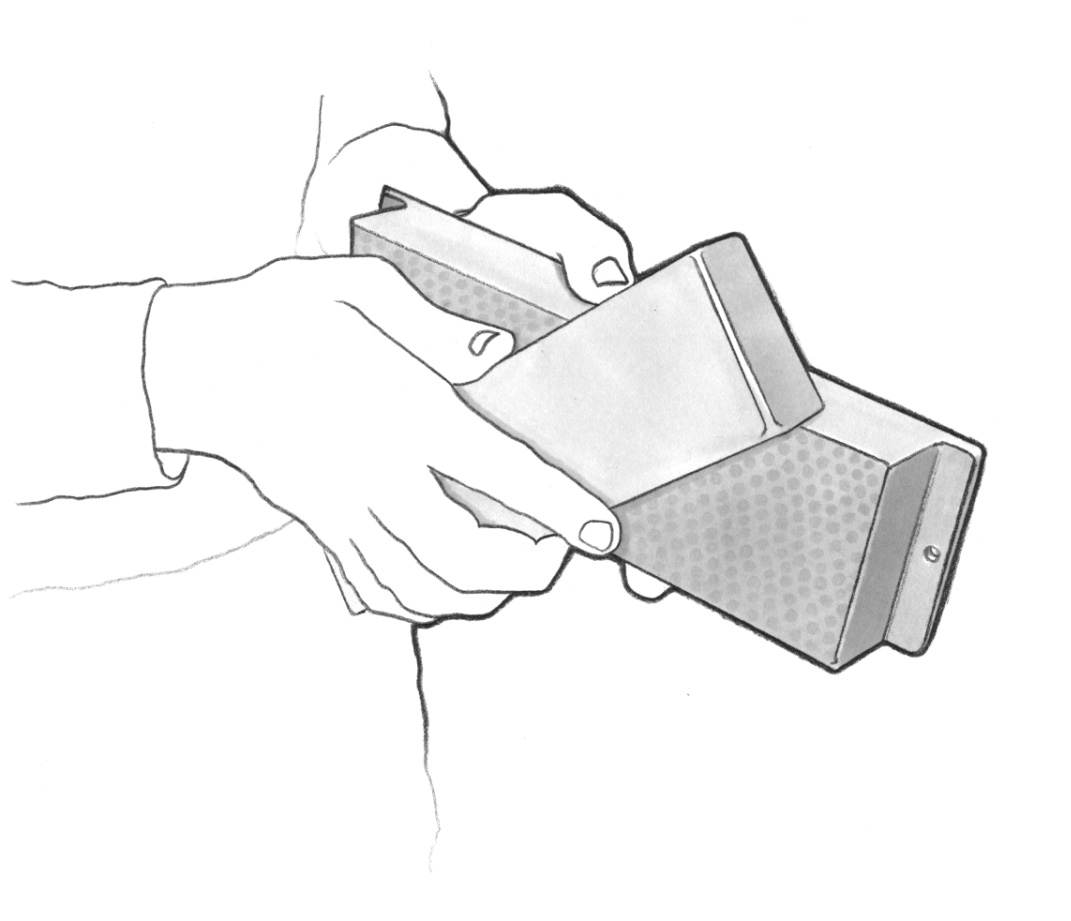
Filing the mouth of a plane is a good skill to learn, especially if you want to use a thick aftermarket blade in your tool. Take your time, check your work and you won’t have problems.
Hand Tool Mistakes
■ You work with tools that are uncomfortable. There are good reasons that tool handles are made of wood. One important reason is that you can modify the handle to suit your grip. Strip the awful dipped-in-lacquer finish from your chisels and give them a decent sanding and finish. And if the handles are uncomfortable, whip out your rasps and files and fix that. Modify (or at least refinish) the handles of your planes, saws, awls, mallets and try squares to suit you. Finish your tools by sanding the wood up to #400 grit and buff them out with a few coats of paste wax. It’s a quick fix and makes the tools much more pleasurable to use.
■ You work with tools that don’t work. Don’t be afraid to modify your hand tools. In many cases you can improve their performance with a file. It’s perfectly fine to file the mouth of a plane or spokeshave to accommodate an aftermarket iron (a common practice) or to correct a mouth that is badly out of square. Performance is only going to improve. Don’t be afraid to file off burrs or bumps from the plane’s frog. Or to remove flashing from any hand tool. Files remove metal slowly, so if you check your work as you go, you’re unlikely to damage the tool. If you lack confidence, try working on a cheap flea-market special first to get the hang of it.
■ You use the wrong tool for the job. Contrary to popular opinion, hand tools are not slow. Some are designed for hogging wood (cabinet rasps, drawknives and axes) and others are designed to produce a finished surface (scrapers, smoothing planes). Don’t do one job with a tool designed for the other job.
Assembly Mistakes
With any assembly you should put it together without glue and under clamping pressure to check the fit. Small fixes here can save big headaches later.
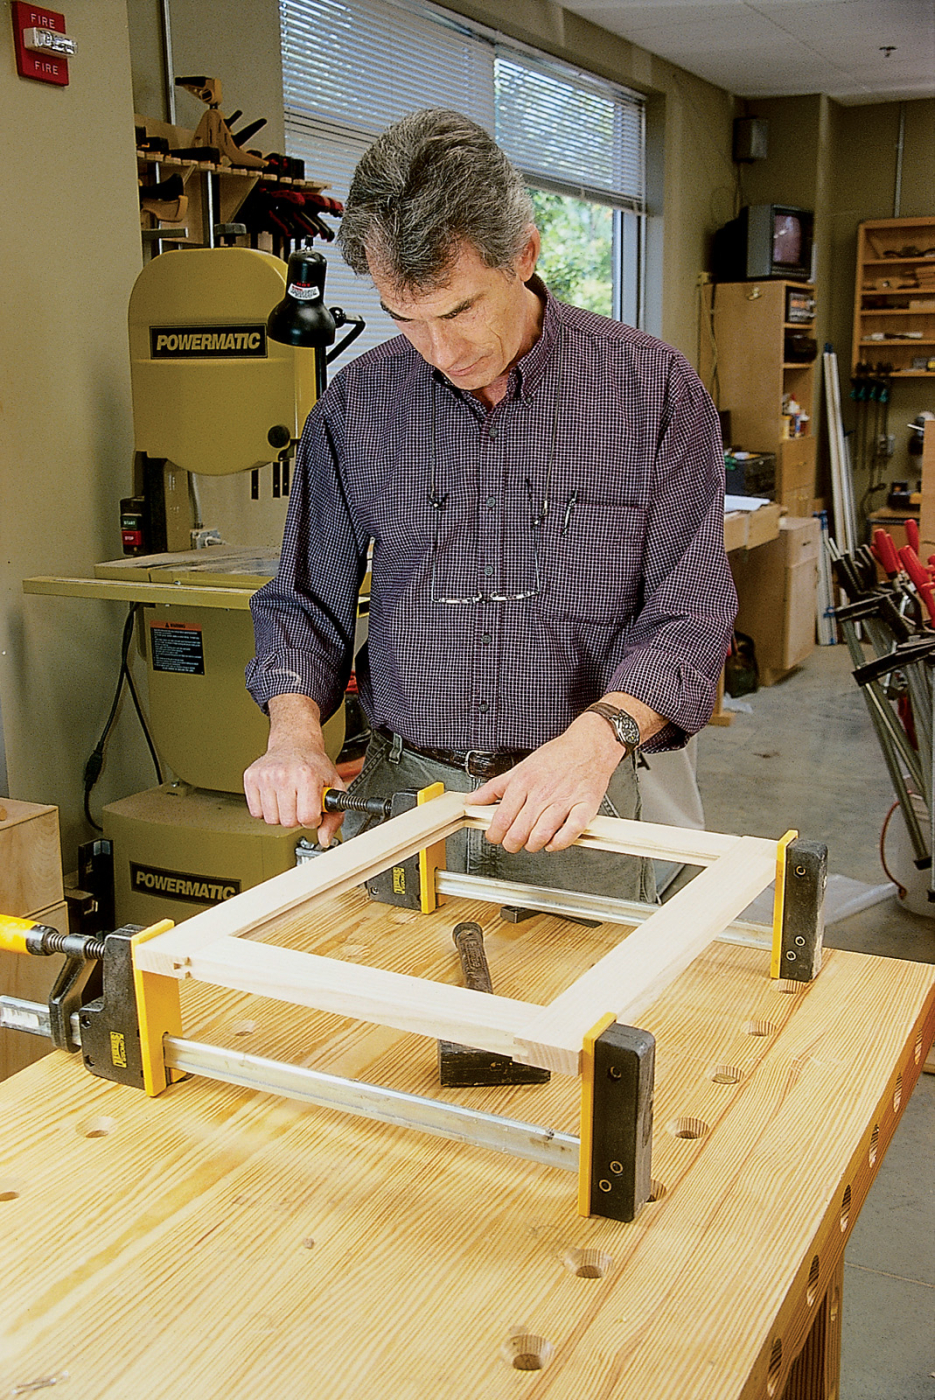
■ You don’t do a dry run. Before you glue anything up, you should always assemble it first and put it under clamp pressure. Then check for gaps and make sure the assembly can be easily squared. This takes just a few minutes for most assemblies, but it saves endless frustration.
■ You assemble too many parts. Don’t try to assemble an entire project at once. If you do a dry run you should discover when you’re trying to do too much in one chunk. Assemble in stages to save frustration. It will improve your accuracy and (on more than one occasion) save your back.
■ You don’t square your assemblies or panels. After your door or panel is out of the clamps, you may need to square the assembly, usually with a saw or a plane. Parts that are square may not create a square assembly. Plan on making your doors a little oversized and then square them up after assembly.
When Finishing
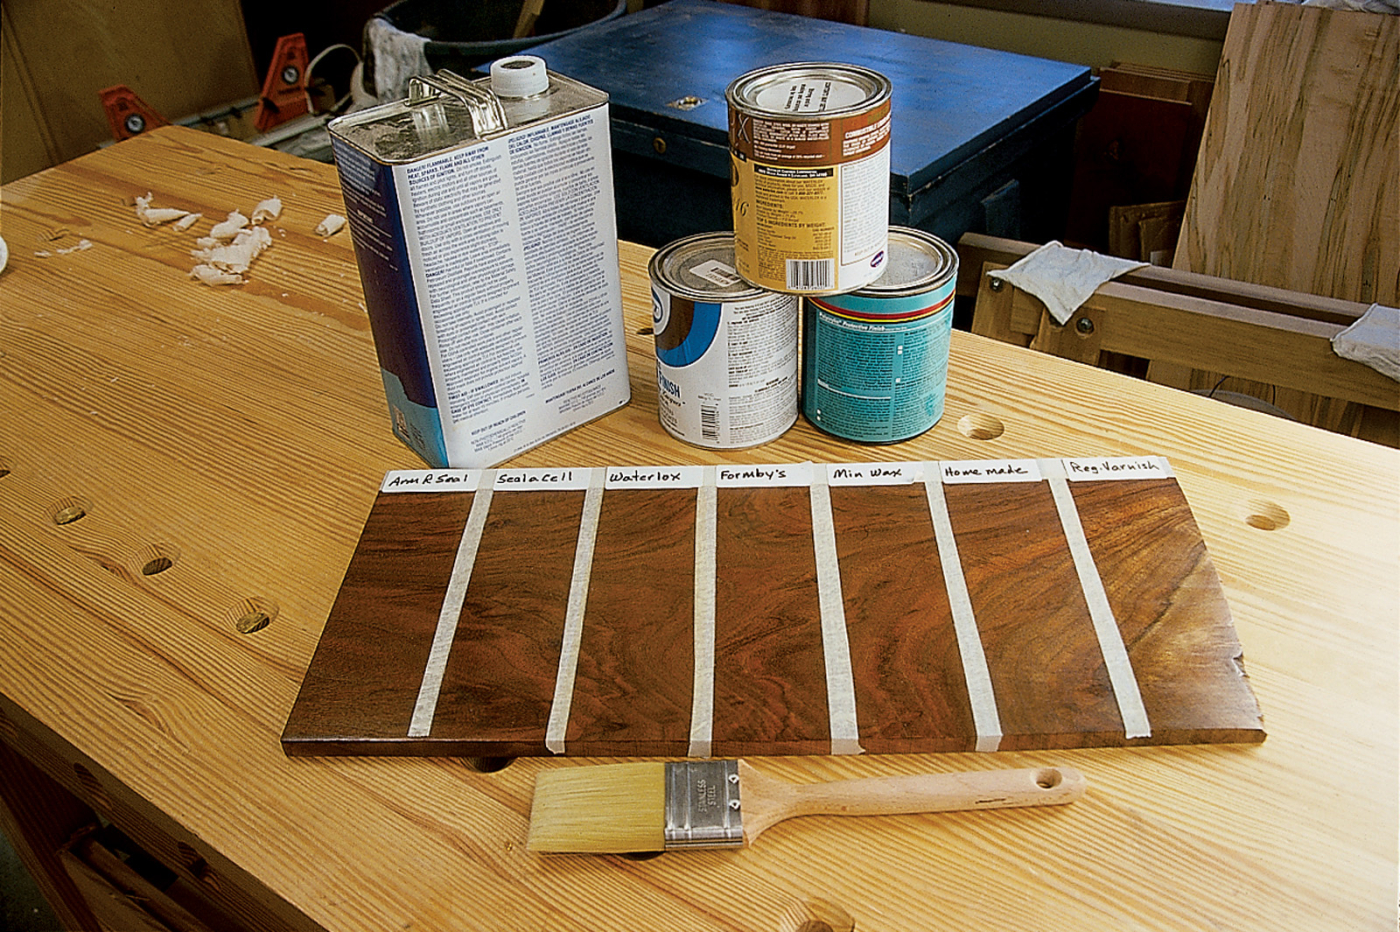
A sample board is like a construction drawing: it’s your road map for good results.
■ You don’t make a sample board. If you are working with a finish and/or wood that are unfamiliar you must make a sample board. Sand or plane your sample board just like you did every other surface of the project. Then finish the board using the procedure you’ve settled on. Finally, before you finish the project, try looking at the finish under florescent, incandescent and daylight. Finishes can change color under different lights.
■ You rush the drying time. If you don’t let the first coat dry, or otherwise get ahead of yourself, you won’t save any time. In fact, you’ll spend more time undoing the damage from your “Christmas Eve” finish.
When Buying Hand Tools
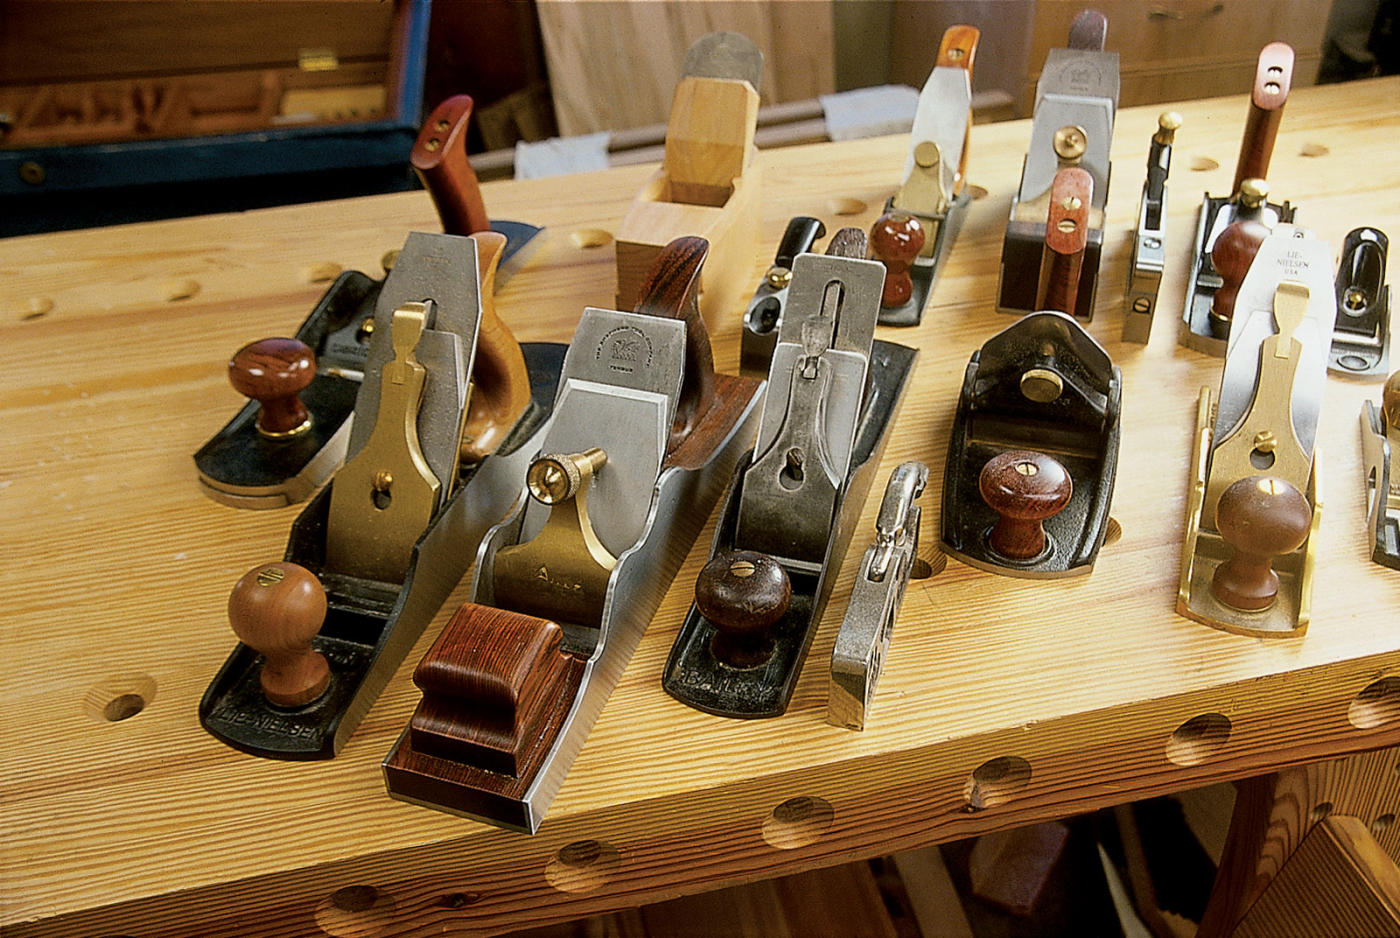
Planes and other hand tools can be addicting. Before you buy “one of each,” get the four most essential ones (smoother, jointer, block and shoulder) and learn those. Your work will guide your future purchases.
■ You buy too many planes. When many woodworkers first get into hand tools, they tend to buy way too many planes (or chisels or saws) before they even know what each one of them really does. As a result, they end up with tools that are redundant or useless for their work.
To get started we recommend woodworkers buy a smoothing plane (a No. 4), a jointer plane (a No. 7), a low-angle block plane and a shoulder plane. These four planes are the most common ones used in a shop that works with both power and hand tools. After you get comfortable with these tools, start looking around at the other planes. Your work and your experience will lead you to the next tool you need. Don’t buy a plane until you have a specific and repeated need for it. If you’re on a budget, you don’t want to buy something you won’t use.
When Buying Power Tools
■ You buy the wrong machine. It’s easy to buy too small or too big a machine for your needs. You can either blow your budget or end up with an inadequate tool if you don’t honestly assess your needs before you buy.
Power tools and machines are where we spend much of our money when woodworking. It’s a capital investment, so take the time to physically evaluate (and use whenever possible) the tool or machine you’re thinking of buying. What looks good in a picture may feel completely different in your hands. Recommendations are helpful, but don’t give in to the allure of catalog and internet prices unless you know the tool you’re buying.
■ You expect a tool to make you a better woodworker. Time – not technology – will make you a better woodworker. Spend less time looking at catalogs and more time in the shop.
■ You don’t know the limits of your machine. A planer won’t make bowed, twisted or warped boards straight – it will make a smooth surface parallel to an existing surface. A table saw will make a cut parallel to the edge against the fence – it won’t make a straight cut, unless you have a straight edge for a reference. Expecting one machine to do the job of many is folly.
When Deciding to Go Pro
■ You decide to go pro. Of course, some woodworkers do, and they work very hard at it. A few are actually successful. But don’t lose sight of the fact that to be successful, it must first be a business. That fact can take all the joy out of the hobby you love so much. So when you ask yourself “Can I make a living woodworking?” ask this important follow-up question: “Do you call making $40,000 a year a ‘good living’”?
Here are some supplies and tools we find essential in our everyday work around the shop. We may receive a commission from sales referred by our links; however, we have carefully selected these products for their usefulness and quality.