We may receive a commission when you use our affiliate links. However, this does not impact our recommendations.
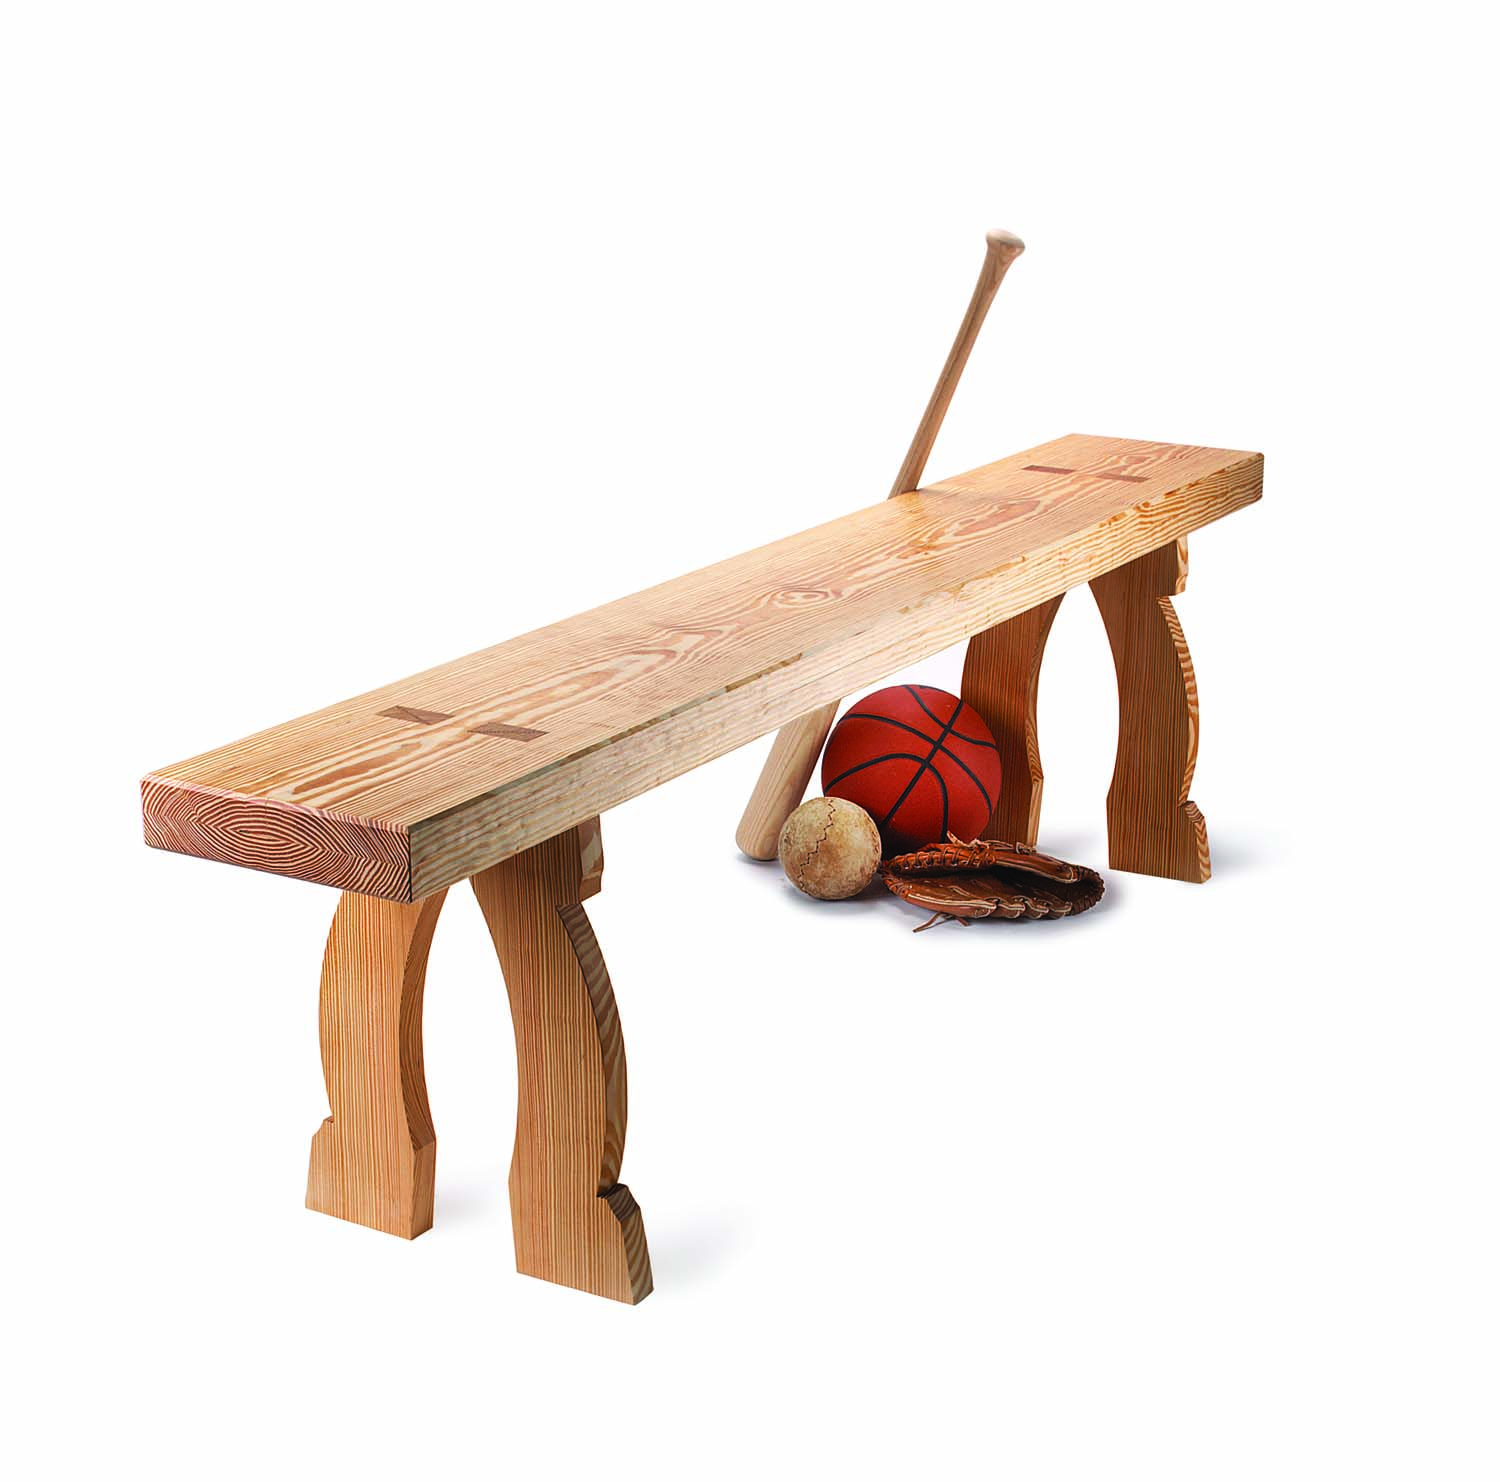
Jah, it’s solid. Thanks to massive tenons and a thick seat, this bench will withstand both children and time.
* Read a tutorial on leveling Skansen Bench feet.
* Visit Skansen’s web site.
I’ve always liked things that are Swedish, impossibly overbuilt and yet somehow graceful. For example: my beloved Volvo 240DL, a certain foreign exchange student in high school, and this bench from the Skansen living history museum in Stockholm.
This bench is from the Älvros Farmstead, a group of buildings from the 16th and 17th centuries that were moved to Skansen. I first spied this bench in the book “Making Swedish Country Furniture & Household Things” (Hartley & Marks). For this version I proportioned the parts so it could be built with dimensional pine – one 12′-long 2×12 and one 8′-long 2×8. Total cost: About $22.
At first glance, this might not look like an “I Can Do That” project, with its laminated top and wedged through-tenons in the seat. But I assure you, it can be built with basic tools.
How the Joinery Works

No mortiser required. With large through-tenons you can simply drill a starter hole for your jigsaw’s blade then square things up. Don’t rush the cut or the blade will deflect.
The heart of the bench is the four through-tenons that connect the legs to the seat. The tenons are cut while you’re shaping the legs. They don’t have face shoulders, so they’re cut easily with a jigsaw. The mortises are also easy. You just drill a hole for each mortise, then shape the mortise with a jigsaw.
Of course, it’s the details that determine how easy all this will be, especially with the mortises. Let’s begin there.
The seat is made of two 2x12s glued face to face. But it’s best to cut the mortises before gluing up the seat plank – you’ll get less deflection of your jigsaw’s blade. Lay out the locations of the mortises on the two boards and drill a 3⁄4“-diameter hole at each mortise location.
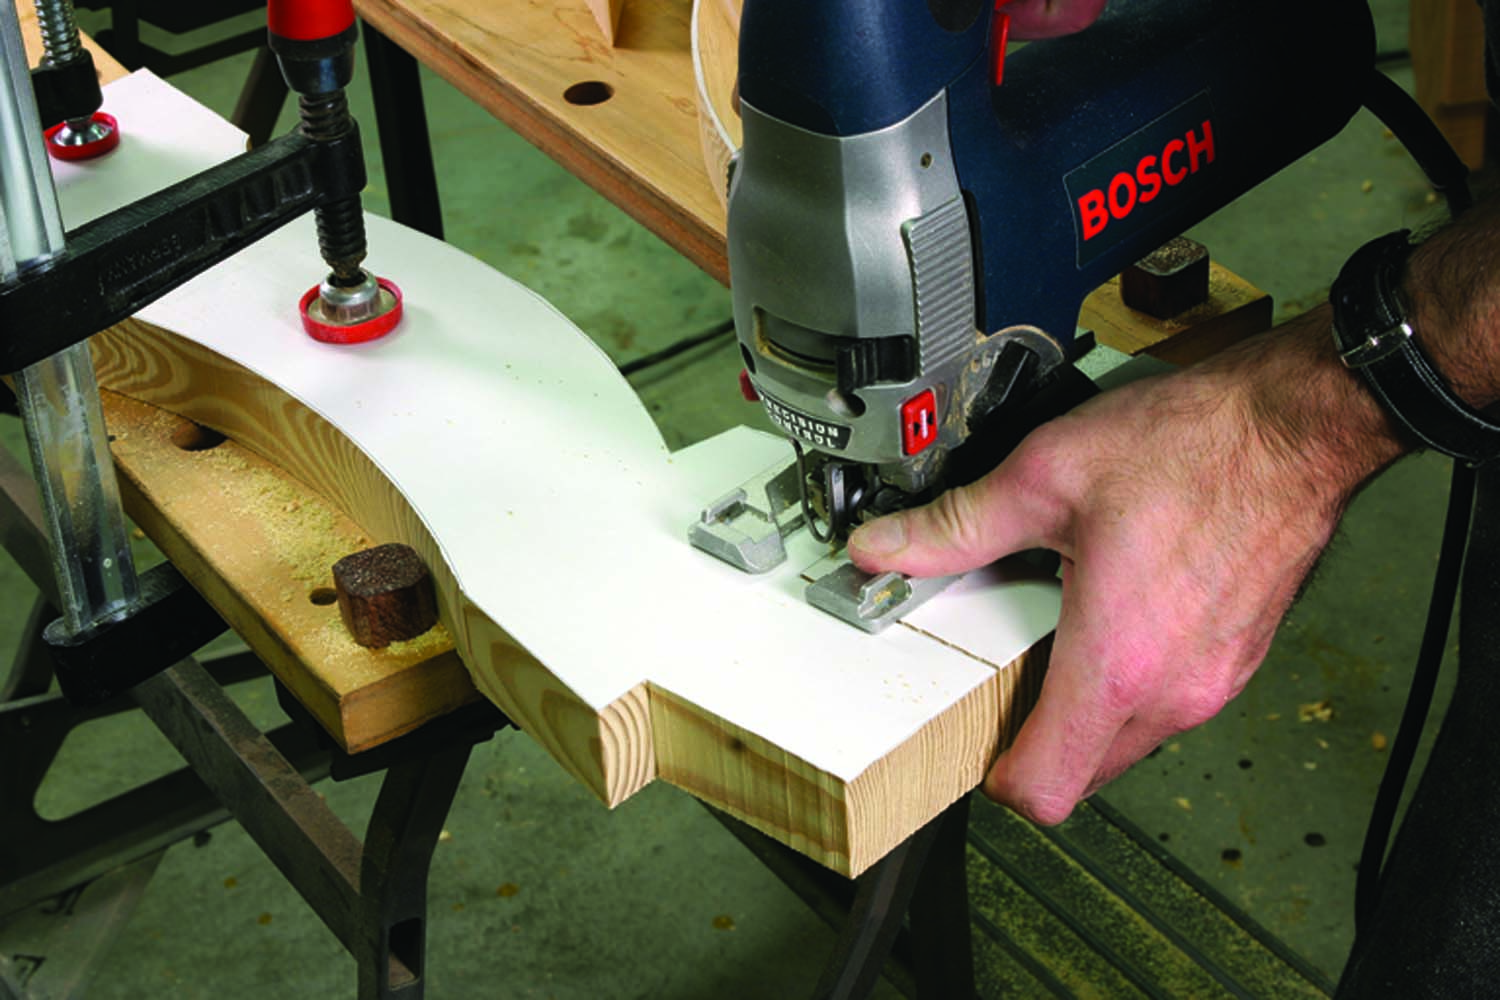
All in the jigsaw. The shape of and joinery on the legs is made entirely with a jigsaw. Follow close to the line and you won’t have much cleanup work to do here.
With your jigsaw, square up the mortises. After experimenting with several blades, I got the best results from a Bosch T744D blade, a 7″-long blade designed for cutting wood rapidly. It is a shade thicker than typical blades and has deep gullets. This helped prevent the blade from deflecting.
The only downside to this blade is that it will tear up the surface of your wood. Set the jigsaw’s orbital action to “0” and take your time. When the jigsawing is complete, straighten up the mortises with a coarse rasp.
Don’t glue up the seat yet – we’ll do that after everything is dry-fit.


 Cutting List

Get Those Legs in Shape
The legs are shaped with a jigsaw and a rasp. Lay out the pattern on one leg (you can download a SketchUp drawing of this bench from our web site). Then jigsaw the shape and clean up your cuts with a rasp and sandpaper. Use that leg as a template for the other three.
After you have the four legs in shape, fit them to the mortises. Use a block plane to thin the faces of the tenons; use a rasp to thin the edges. Go for a tight fit, though the wedges will help fill little gaps. Fit the bottom seat plank over the tenons. Then fit the top seat plank on that.
Now you can glue up the seat plank using the tenons to keep the mortises aligned. Remove the top seat plank and coat the bottom seat plank with glue (avoid the tenons). Drive the top seat plank onto the tenons.
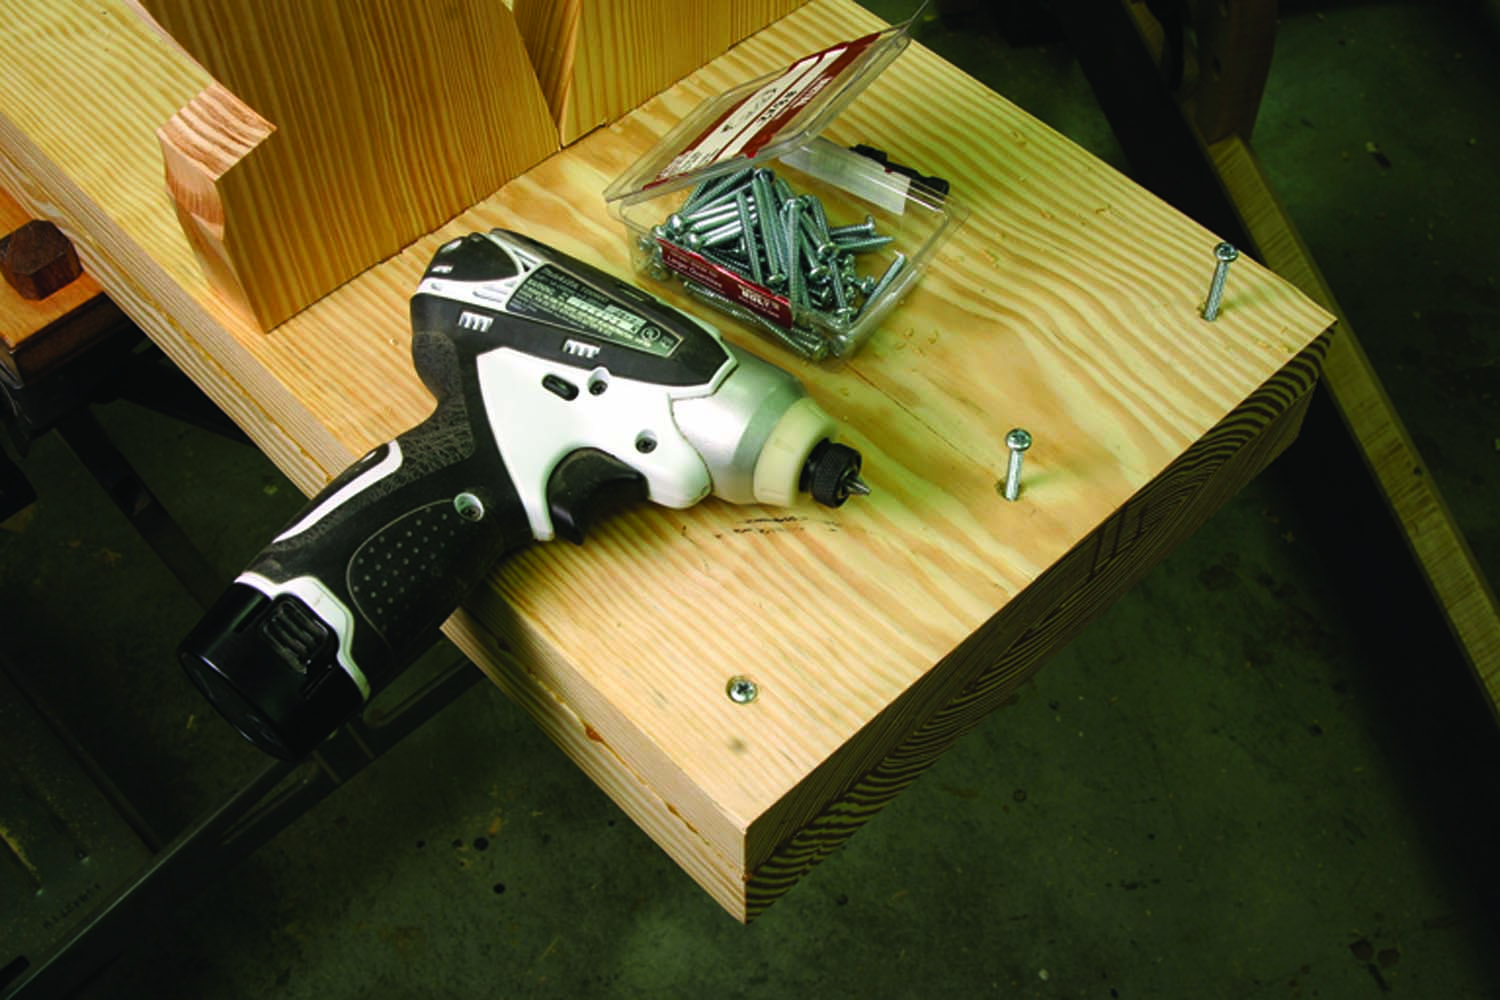
Cheap clamps. With the seat planks glued together, drive 2″ screws through the underside to clamp things up. Place a screw wherever you see a gap between the planks.
To clamp the two planks together, I recommend using 2″-long screws that you drive through the underside of the bench through clearance holes. Screws cinch the planks together without clamps. After the two planks are screwed together, knock the legs out of their tenons. After the glue dries, you can remove the screws if you’re a cheapskate.
A Self-Made Wedgie
Wedging the tenons is simple. You’re going to wedge them diagonally, from corner to corner. This will expand each tenon in four directions. The first step is to cut a kerf in the tenons to receive the wedges. I used a handsaw. Any saw will do. Saw from the top to the shoulder of the tenon.
For the wedges, you can use builder’s shims or make your own. I made mine from leftover oak. I split out the wedges using a pocketknife and a hammer. The wedges are 3⁄16” thick at the top, 23⁄4” wide, 21⁄2” long and taper to a point.
To assemble the bench, brush glue on the mortises and tenons and drive the legs home. Paint glue on the wedges and drive them into the kerfs in the tenons. Wait for the glue to dry, then trim the wedges.
To lighten the look of the top I chamfered all the edges with a block plane. The finish is a few coats of an oil/varnish blend. You could use paint – red is a traditional Swedish color.
When the bench was complete, I jumped up and down on it – it’s solid. Heck, I think I could have parked my 240DL on it.
Here are some supplies and tools we find essential in our everyday work around the shop. We may receive a commission from sales referred by our links; however, we have carefully selected these products for their usefulness and quality.