


We may receive a commission when you use our affiliate links. However, this does not impact our recommendations.
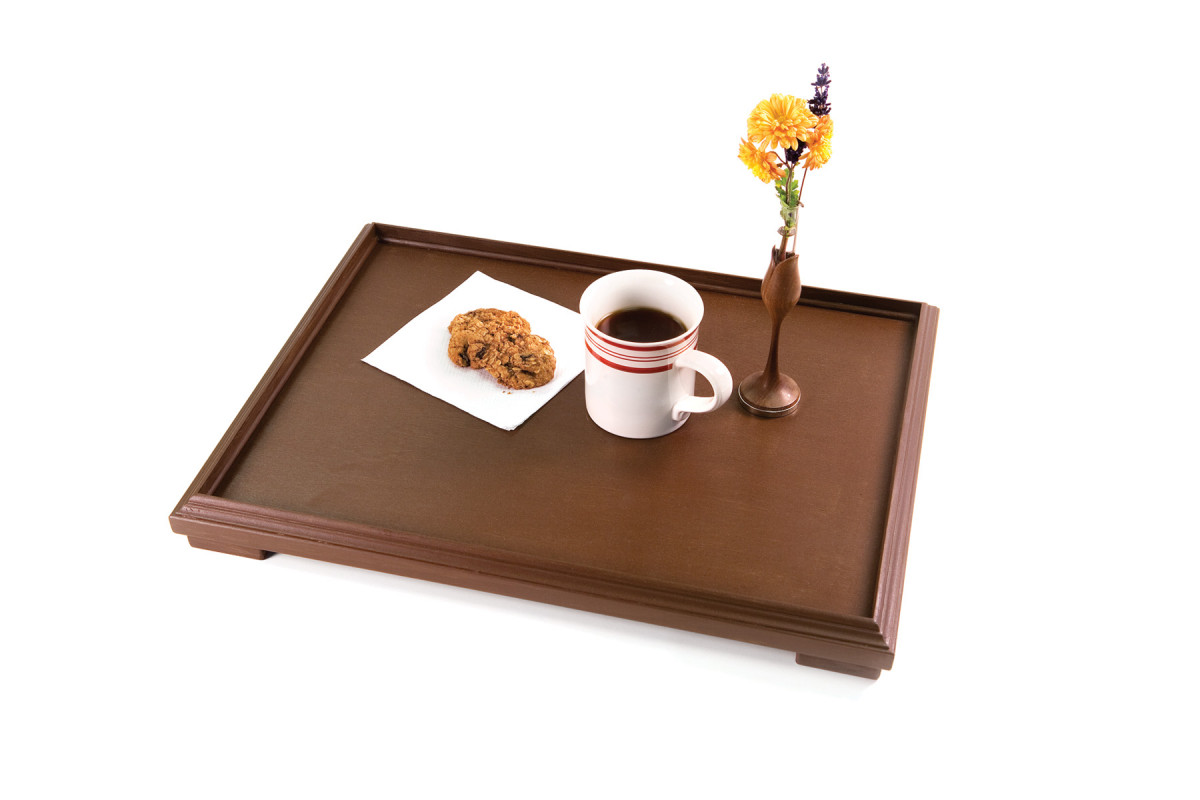
Moulding and miters. This combination produced an elegant tray that was fairly easy to make, and involved only two power tools.
Off-the-rack moulding and packing tape make this project easy.
A shopping trip to the pre-cut moulding section at Lowe’s was the beginning of my tray design. I had a general idea of what I wanted to make – a shallow tray without handles to transform my ottoman into a once-in-a-while coffee table. There were extra pieces of 1⁄2” plywood in the shop that would make a great tray base. All I needed was a way to cover the edges and a fancy profile to top it off. When I saw the corner moulding, I knew that the edge problem was solved. The corner moulding profile would wrap around the top and side of the plywood perfectly, providing a base for fancier trim. I found the bead, cove and steps of the glass bead moulding to my liking for the top.
Making the Tray
Cut the tray bottom from 1⁄2” Baltic birch plywood to size with a circular saw or jigsaw (a straightedge clamped in place will help guide a square cut). The finished size of the tray is 15″ x 20″. The corner moulding adds 1⁄4” on each side, so the bottom is cut to 141⁄2” x 191⁄2“.
Choose which side will be the top of the tray, and write “bottom” on the bottom side in pencil so there’ll be no doubt about which side goes up.
Mystifying Miters
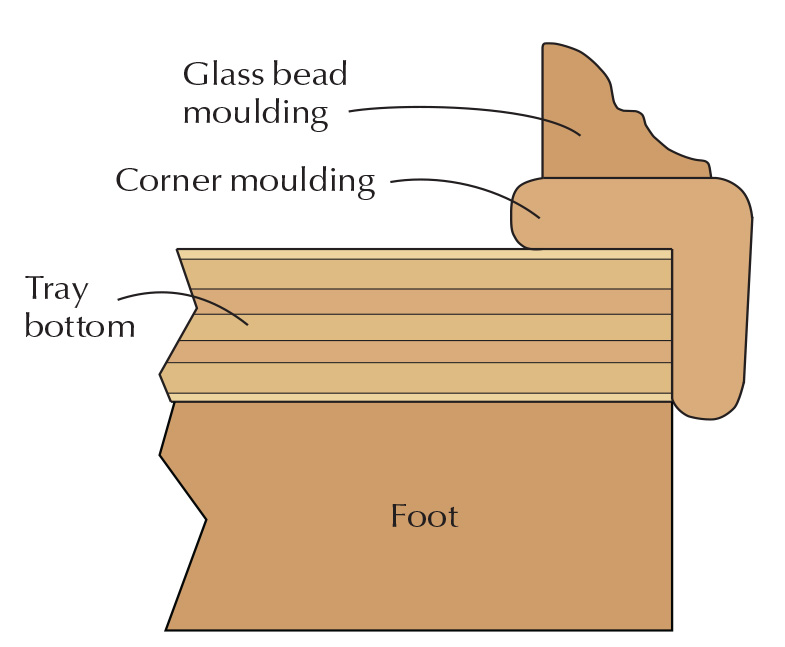
Moulding detail
Start with the corner moulding. With the miter saw, cut the pieces about 4″ longer than you’ll need – long sides about 24″, and short sides about 19″.
Fit one long side piece against the tray bottom with an inch or so extending beyond the corner, and mark the inside of the moulding at the corner. Mark the direction for the miter on the top of the moulding.
At the miter saw, set the angle at 45° and make the cut at one end. Hold the corner moulding tight to the fence so your miter cut will be accurate. To avoid tear-out when the cut is made, release the handle switch as the cut is finished but leave the blade in place until it has stopped. Repeat this step for the other long side piece.
Take the moulding piece back to the tray bottom and fit it against the corner, leaving it just a little proud, and mark the other corner location on the moulding. Also make a mark on top to indicate the direction for the miter.
Back at the miter saw, move the blade to 45° in the other direction, and make the cut.
Cut a miter on a piece of scrap wood, and clamp it to the fence and table (long side against the fence) with the finished side moulding in place tight against the miter. This will ensure that the next side’s end cut will be exactly the same as the first. Make the miter cut on the other long side piece.
Now make the miter cut on one of the short side pieces, following the same procedure.
With a long side piece in position against the tray side and corner, fit the mitered corner together and mark the inside of the short side at the other end. Again, mark the top direction for the miter cut. It’s easy to get confused with the direction for the cut.
Make the cut at the miter saw on the other end of the short piece.
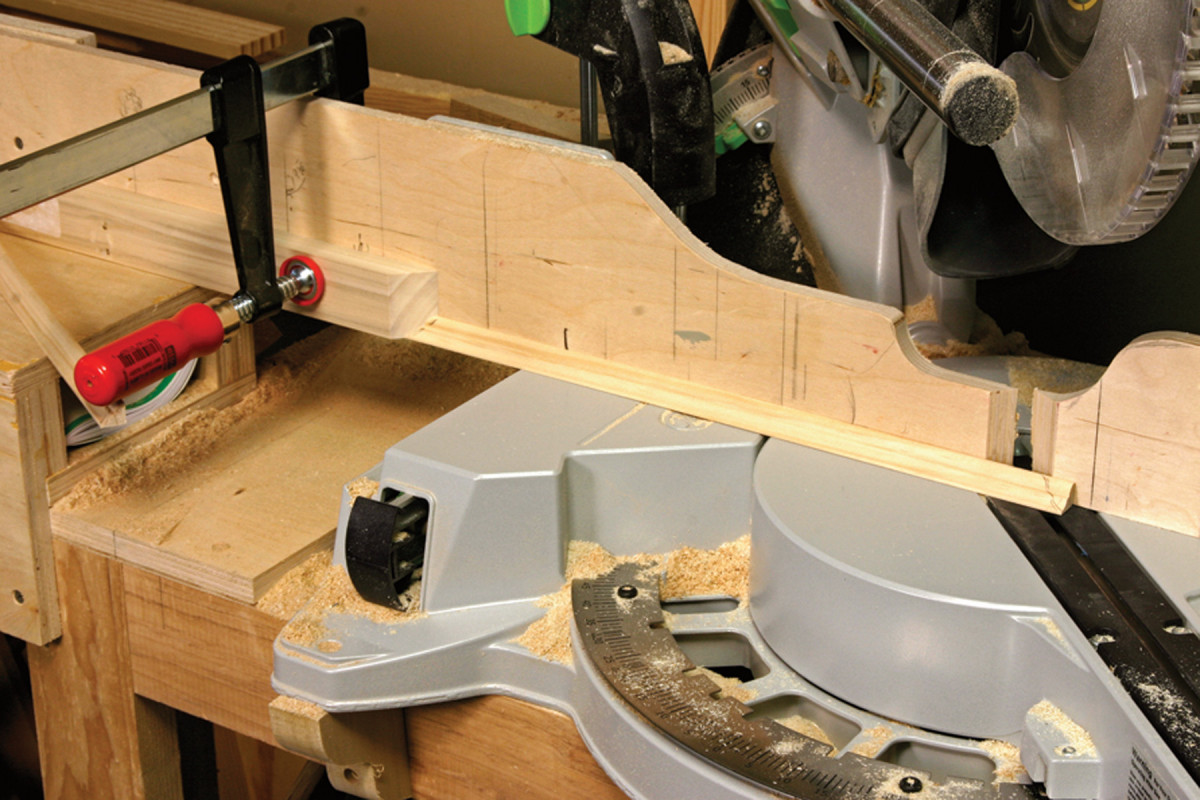
Hold it right there. Make a 45° cut in a thick scrap to use as a stop. This will hold the moulding securely as you make the miter cuts.
Take it back to the tray bottom and check your corners. If there’s a little room for movement, that’s OK. When you’re satisfied with the fit, take the short piece back to the miter saw and adjust the stop to the short piece length. Make the cut to finish the second short side piece.
Now place all four sides of the moulding against the tray bottom and check the fit. Tape each corner (except one) tightly around the edge with packing tape to form the four-sided moulding frame. Then open the corners and lay the taped side down. It will be a long strip of wood with open taped joints.
Put a thin coat of glue on each of the miters and let it dry for about 10 minutes. The glue will soak into the short grain and form a slight coating. Add another thin coat of glue to the miters and press the first joint together, making sure it fits together as it should. If there’s any squeeze-out, wipe it away with a wet rag.
Work your way around each joint, and when you’ve glued the last one, add tape to that joint as well.
Check for squareness, and when you’re sure the joints are square, add another piece of tape across each corner to hold it square as it dries. Let it dry for a few hours. Remove the tape from the corners and clean up any squeeze-out on the bottom side of the frame so it will lay perfectly flat on the tray.
Do It Again
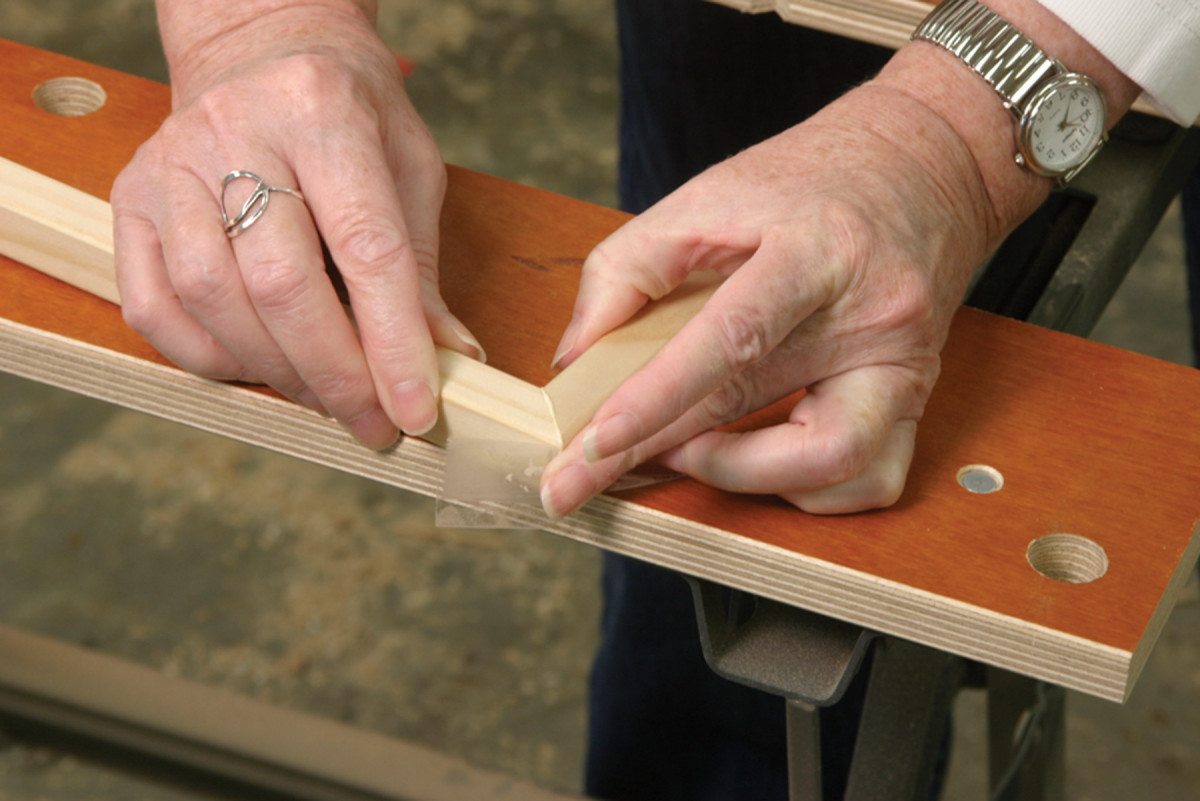
I can see clearly now. Use clear packing tape to hold the glued mitered corners together. One piece of tape around the corner will hold the edges, then place another piece of tape underneath and pull the ends together above the joint to hold the corner in place.
This process is repeated for making the top moulding frame from the glass bead moulding. I chose the beaded edge to serve as the top edge, thinking that it would stand up to use better than the thinner coved edge. Again, cut the side pieces longer than needed, and cut the miter on one end of each of the long sides.
Line up the miter of the top moulding (with the beaded edge up) with the mitered corner of the corner moulding frame. The bead will be the top edge of the tray. It’s important to remember that the bead is the top when making the miter cuts. It’s easy to get confident about the cuts and forget which edge is up.
With the miters matched on the cut end, shift the bead moulding until its bottom edges are centered on the frame and make a pencil mark on both edges of the uncut end of the side piece to align it with the mitered corner. This will show you where to make the miter cut.
Make the cut (remember to keep the bead side up), and clamp the stop in position for the next side piece to be cut exactly the same size as the first.
Repeat the process for the short sides.
Now dry-fit the glass bead frame on top of the corner moulding frame. Hopefully it’s a good fit and close to being centered.
Take the loose frame pieces and lay them on a flat surface in position for gluing. Put a light coating of glue on the miters and let them sit for 10 minutes. Then glue the joints together at opposite corners of the frame and tape the joints to hold them in place to dry for an hour or so.
Repeat the gluing process for the other two corners when the first two are dry, forming the completed frame.
Build Up and Glue Up
Using a #120-grit sanding block and then #180 grit, sand all the surfaces smooth. Pay close attention to the mitered corners. They should be perfectly level. Always sand with the grain direction.
Place a couple thick scraps of wood under the tray bottom to raise it up enough to allow access. Run a small bead of glue near the inside corner of the corner moulding frame and put the frame in place on the tray bottom.
Run a small bead of glue centered on the bottom of the glass bead moulding and position it on top of the corner moulding frame. Use clear packing tape to hold it in place, then use small clamps on the corners and centers of the frame edges. Make sure there are no gaps between the mouldings and the tray bottom. Clean up any glue squeeze-out with a wet rag.
When the glue is dry, remove the clamps and tape.
Finish Up
Using 3⁄4“-thick scrap wood, cut four 21⁄2” squares for the tray feet. Sand them smooth and round the corners with a rasp and sandpaper.
Glue and clamp the feet to the bottom of the tray, flush with the inside moulding corners. After a final once-over with a sanding block, paint or stain the tray, and apply a coat of spray lacquer to protect the surface.
Low-profile Serving Tray Cut List

Here are some supplies and tools we find essential in our everyday work around the shop. We may receive a commission from sales referred by our links; however, we have carefully selected these products for their usefulness and quality.


