


We may receive a commission when you use our affiliate links. However, this does not impact our recommendations.
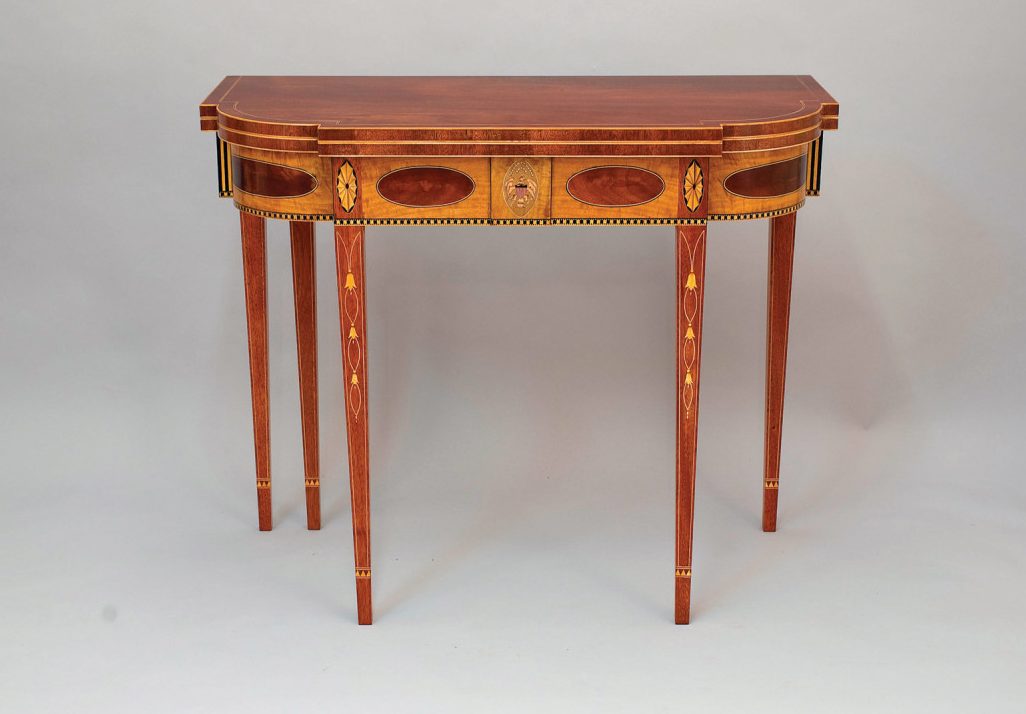
Small pieces transform your work from austere to awesome.
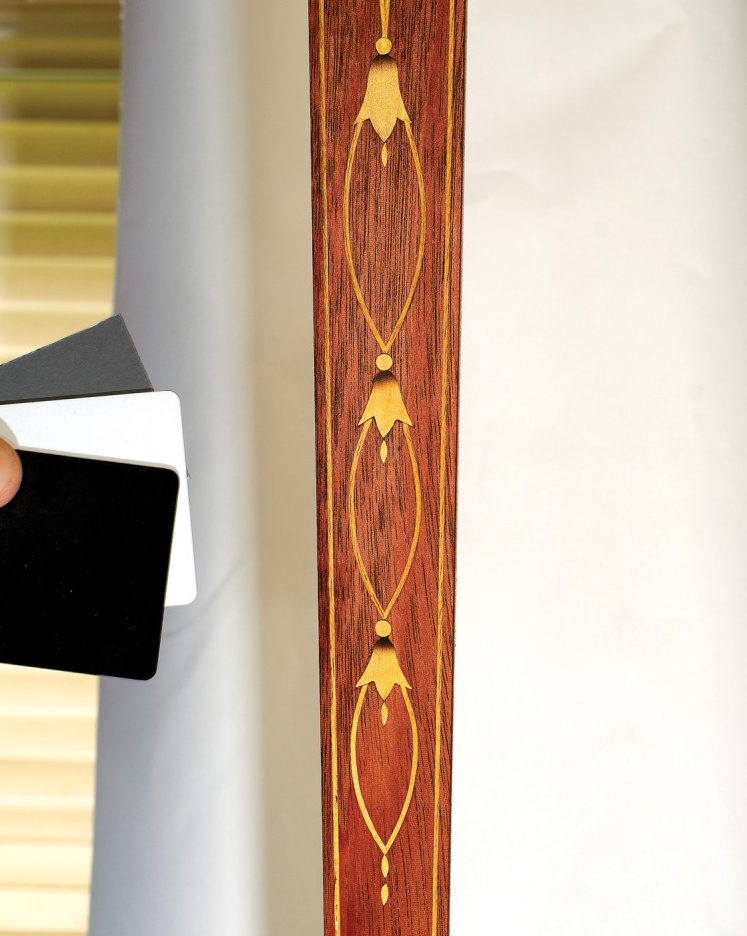
Signature features of Federal-style furniture include bellflowers and stringing that often adorn furniture legs, but are also found on table aprons and tambour doors.
Bellflowers have regional characteristics. There are Baltimore examples with three- or five-part petals, Boston examples with the flowers in three parts, and one-piece bellflowers associated with New York furniture. It’s the New York design that is the focus of this article.
Show and tell. Inlay on a furniture leg, specifically the bellflower design, is a simple method used to ascertain a piece’s regional origin.
Despite being made in one piece, the combined effect of the sand shading, connecting loops, and the teardrop pendants adds a stately look to the completed project.
Where to Begin
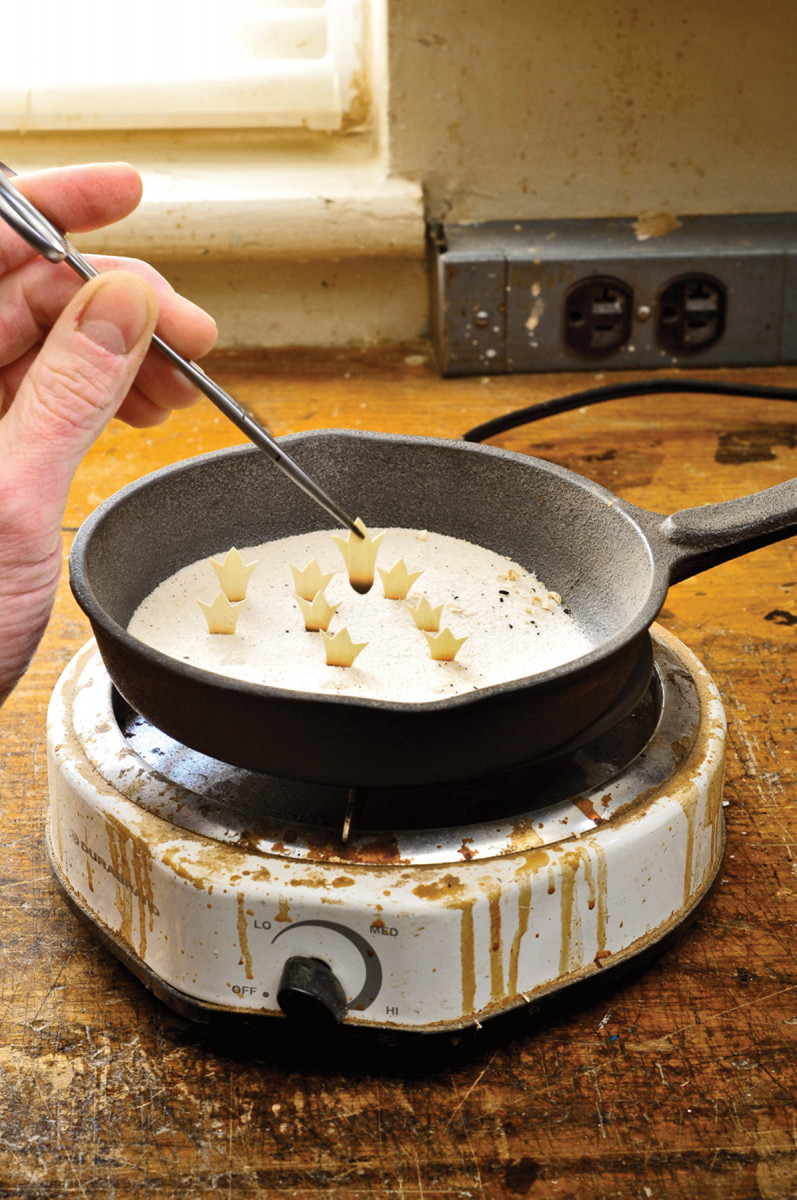
Trompe l’oeil. A quick dip in hot sand shades the base of the bellflowers and convinces your eye there’s added depth.
The first step is to draw the stringing, bellflowers and connecting loops at full size. A drawing shows the locations of the individual elements of the bellflowers and stringing, but it can’t always convey how the finished inlays look.
On my first such leg I used 1⁄16” stringing, which looked fine until I applied the finish, where the resulting contrast made the stringing look heavy. Make the stringing 3⁄64” wide – just 1⁄64” less in width – and the appearance is greatly improved.
The outside stringing runs from the cuffbanding up to a mitered intersection with the curved stringing that then extends downward to the first inlaid dot. These curved sections are not a segment of a circle, but a segment of an ellipse. Where these two sections come together they merge into one. The bellflowers and the connecting loops are graduated in size.
From your drawing, make simple templates and a story stick; these are at the heart of inlaying the patterns. The story stick is made from a piece of scrap wood and the curved templates are made from thin plywood. I make one template with two radii on a single template, marking them so I don’t get confused. The template for the ellipse is marked for use in making both the left- and right-side inlays.
Bellflowers
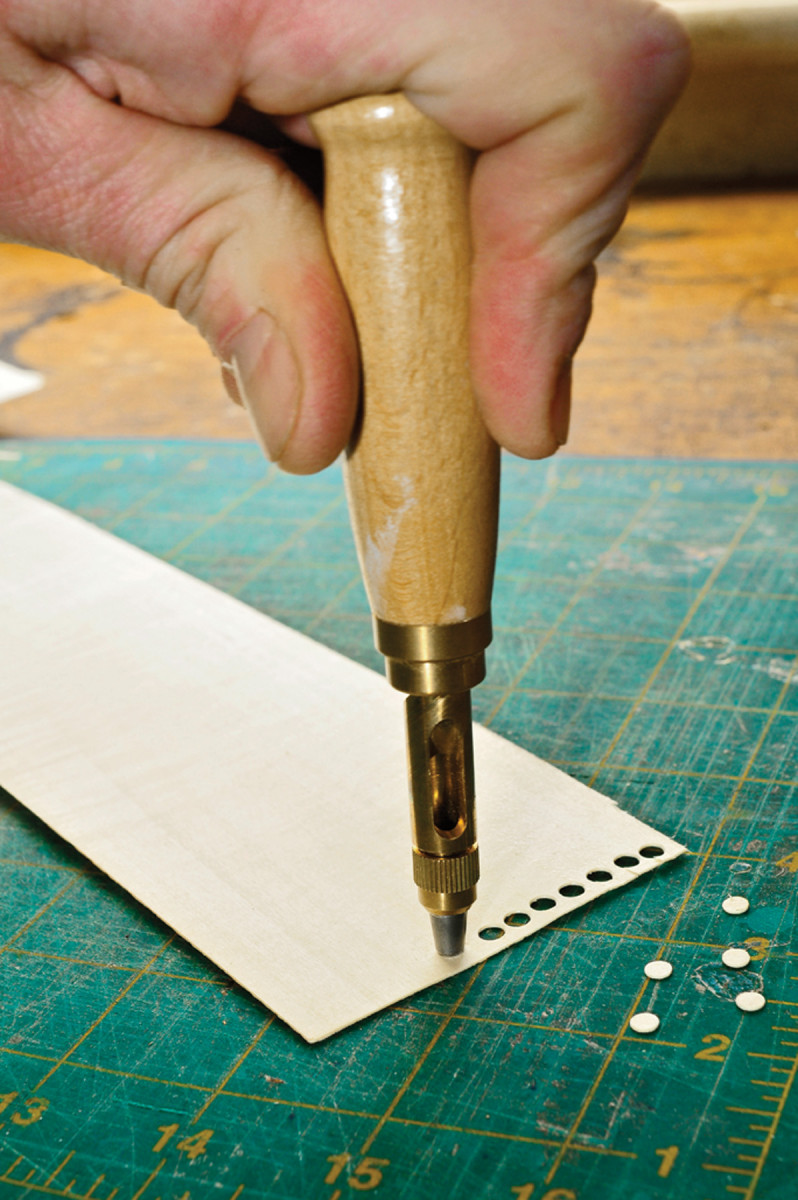
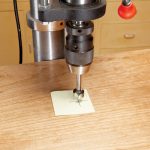
Repetition. A rotating punch quickly produces uniform dots ready for inlaying.
Bellflowers are sawn to shape at a scrollsaw. Begin with a stack of five sheets of holly veneer sandwiched between two sheets of 1⁄8” plywood. Five sheets allow an extra bellflower of each size in the case of a mishap. The profile should flow with even curves, but often my sawing is not up to par. Occasionally I have to refine the shapes with gouges of various sweeps – symmetry is important, but period examples are not always perfect.
The top of each bellflower is sand shaded. To accomplish this, pour about 1⁄4” of sand into an iron skillet that’s placed on a heating element (I use an electric hot plate, but a propane camp stove is another choice). The grain size of the sand has considerable influence on the outcome of the shading; very fine sand results in more controlled, uniform shading.
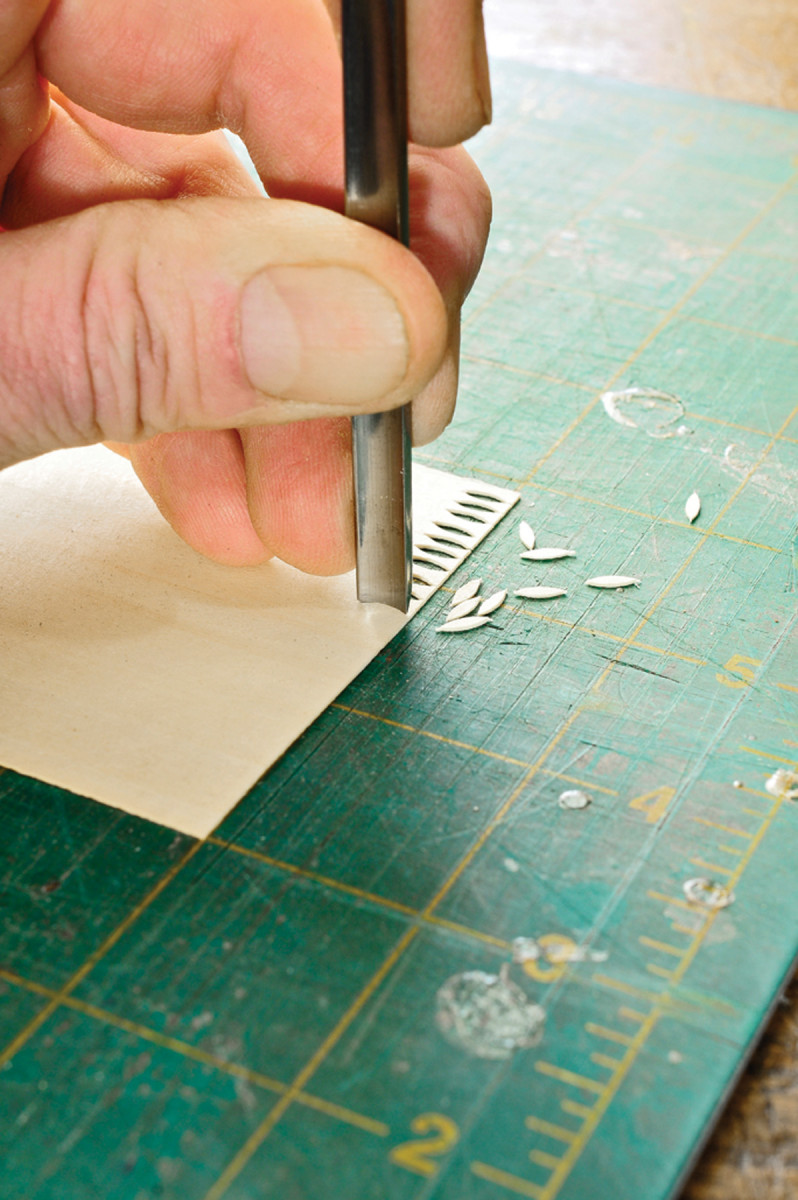
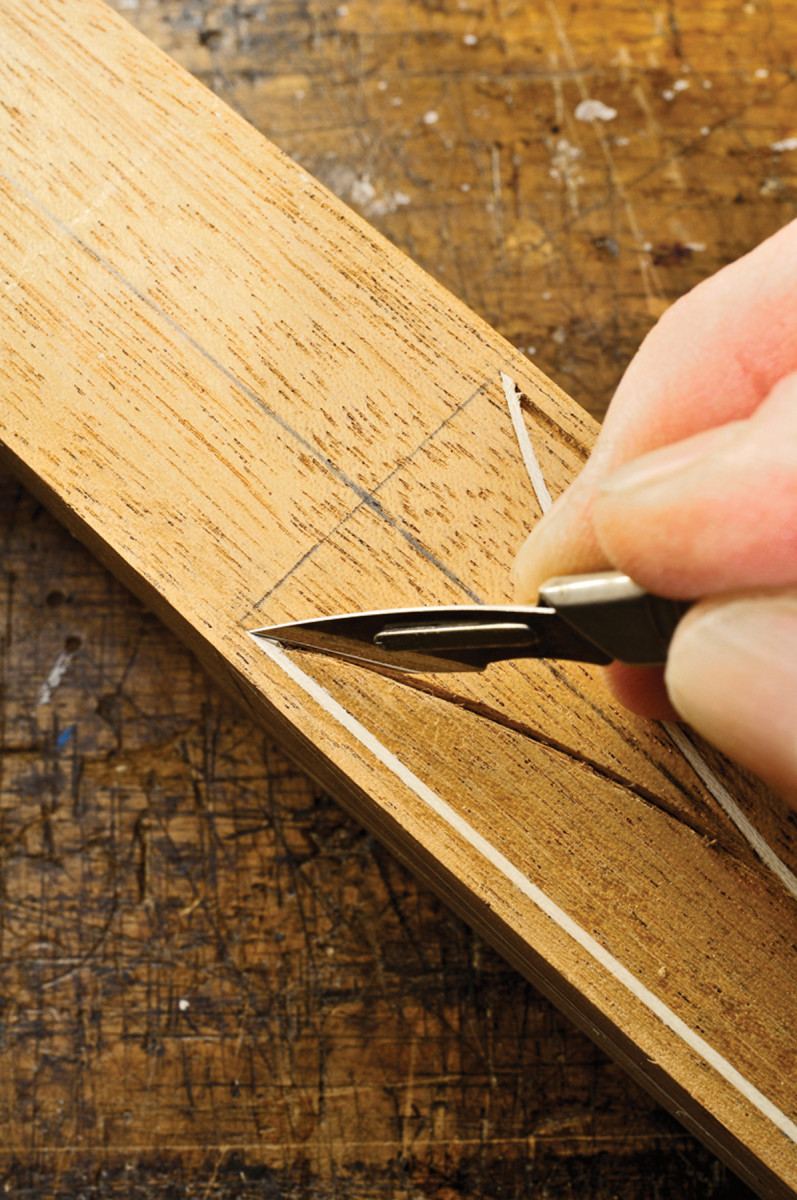
Keep the edge. A quilt cutting mat underneath your work helps to keep a sharp edge on your tools.
The goal is to have a uniformly graduated shaded area, with no hint of charring. Aim for a slightly darker “burn” than you want to end up with, because the scraping and sanding will lighten the shading. After the inlaying is complete and the finish is applied, the effect of shading results in a convincing three-dimensional look.
Above each bellflower is a “dot” of holly. I once cut these dots on the scroll saw – as you can imagine that isn’t easy or consistent – I now work with a rotating punch, which cuts cleanly and consistently. Oddly, these dots are typically not graduated in size on New York pieces.
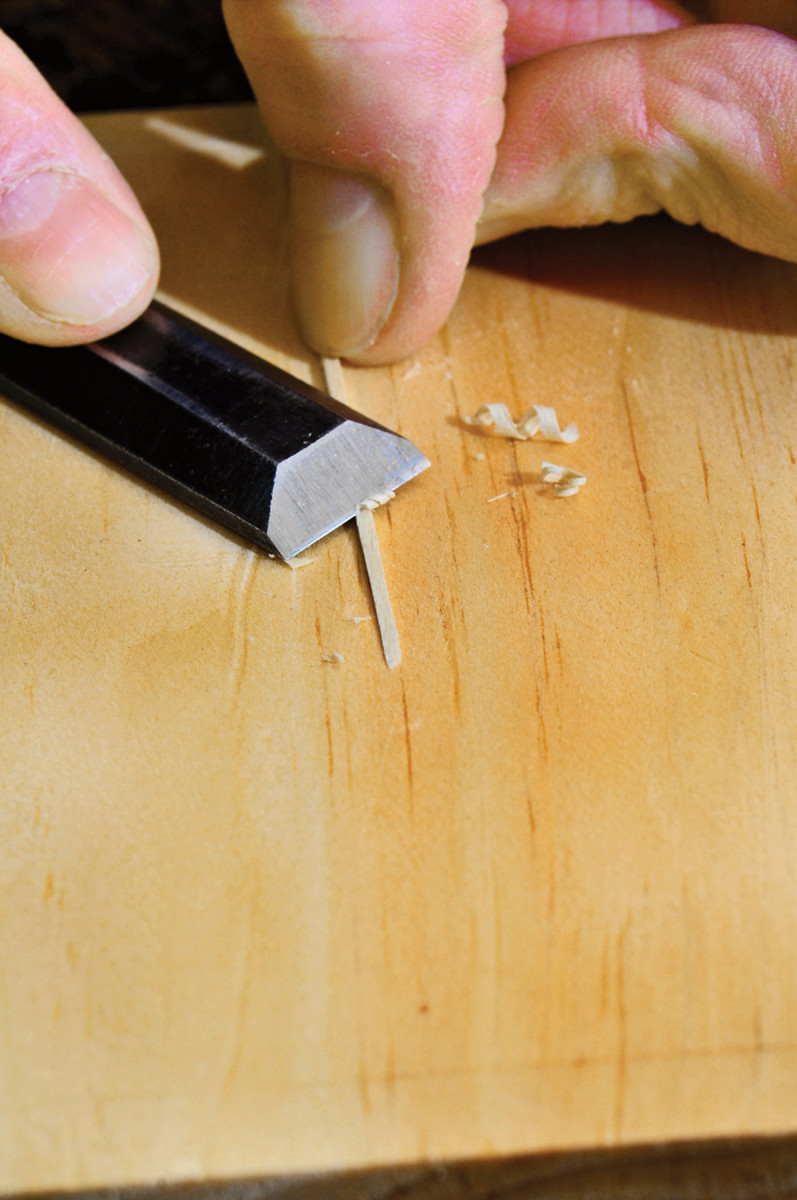
Below each bellflower is a teardrop-shaped piece of holly. These are quickly and easily cut with a 6mm, No. 7 gouge. Using a cutting mat (the type made for quilting) will preserve the cutting edge of the gouge and the rotating punch.
Layout

Keep your story straight. A story stick ensures layout uniformity from leg to leg.
Certain parts of the drawing have to be transferred to the actual leg. This is where the story stick comes in. It will accurately position the bellflowers, and that determines the locations of all the other elements of the inlay. The story stick also keeps the inlays consistent from leg to leg, which is critically important for appearance sake, especially on legs with inlay on adjacent faces. A vertical centerline also needs to be established on the leg.
Stringing
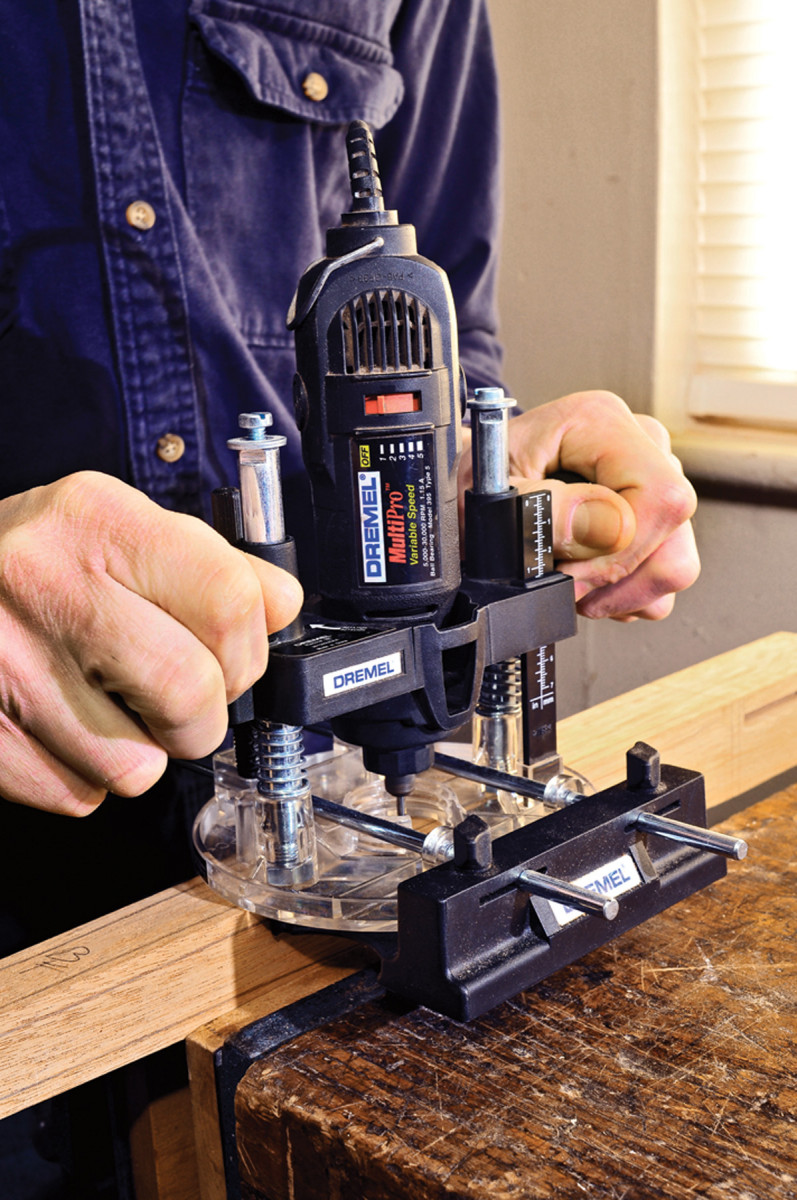
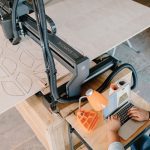
Accuracy is key. A rotary tool makes short work of the straight grooves along the leg’s edge.
Stringing is made from solid stock or from 1⁄16” veneer, depending on availability. In the case of solid stock, use a band saw to rip strips slightly thicker than the thickness of the finished stringing, then sand to the precise thickness. I use a commercial fixture mounted in a drill press but you can use an oscillating spindle sander with a straightedge fence.
The veneer stringing is also sanded to the desired thickness. Individual strips are ripped at a band saw that’s fitted with a zero-clearance insert. To facilitate bending, rip the pieces to about 1⁄16” wide.
Grooves for the vertical sections of the stringing are routed to a depth of 3⁄64” with a rotary tool fitted with a 3⁄64” carbide end mill. Some of these tools lack power, so take your time even with a groove as small as this. Also, there can be significant run out, so get the groove right the first time because routing it a second time could result in a groove wider than planned.
The starting position of the groove at the bottom of the leg does not require great accuracy because the cuff banding (added later) covers the area, but accuracy is a must where the groove terminates at the top. The groove must consistently stop short of the top banding by 3⁄64” to create a mitered intersection with the curved string from which the uppermost bellflower hangs.
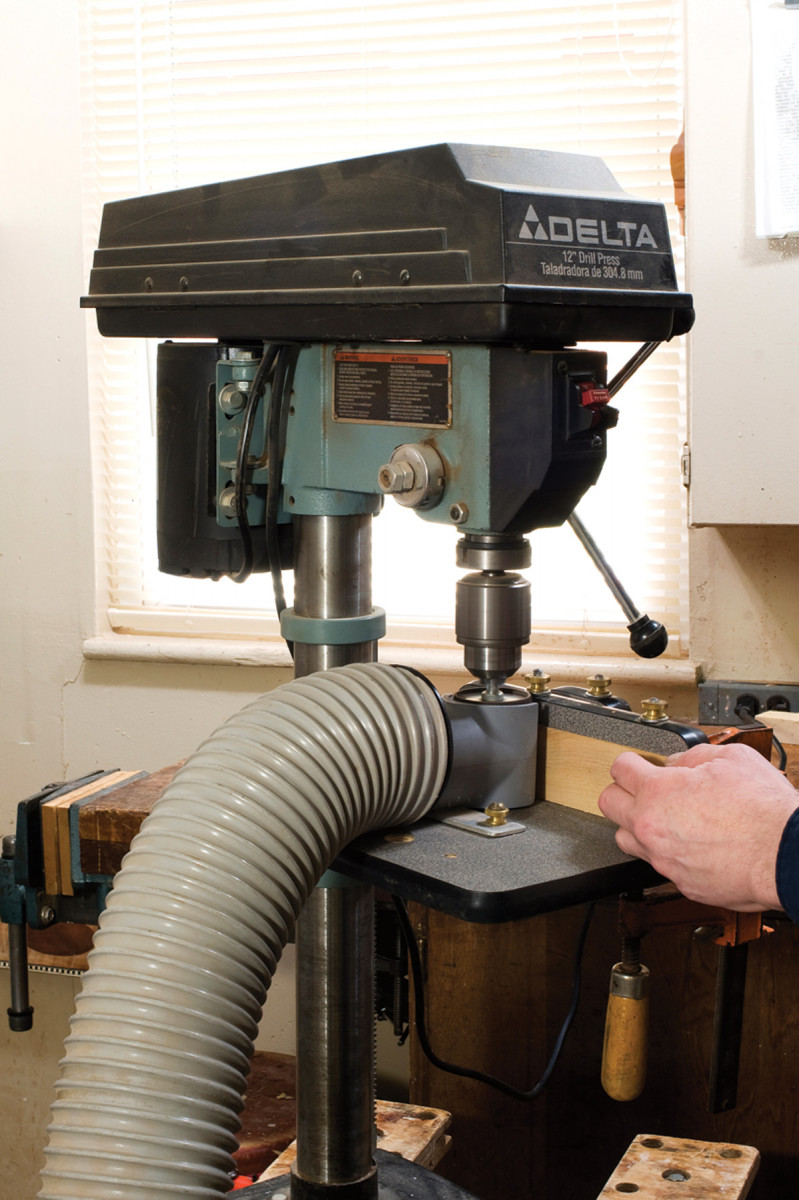
Get it right. A sanding fixture at the drill press produces a precisely thicknessed strip of wood for stringing.
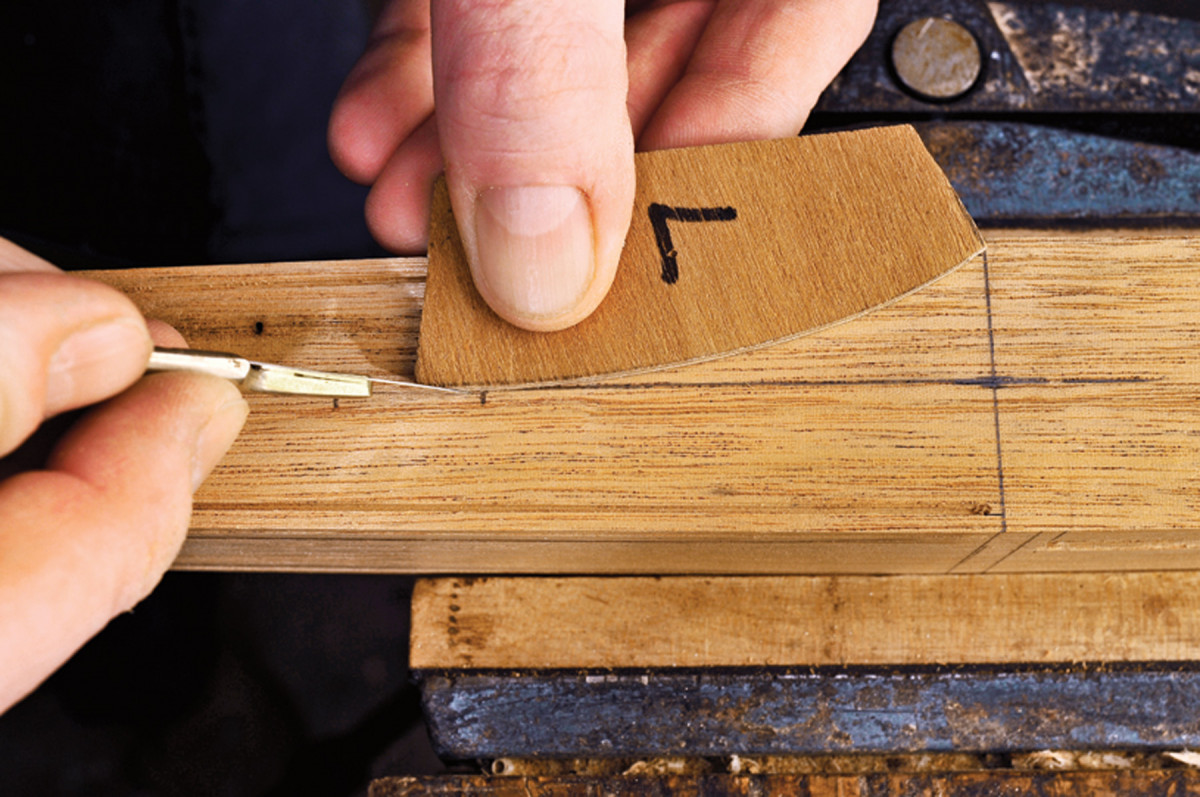
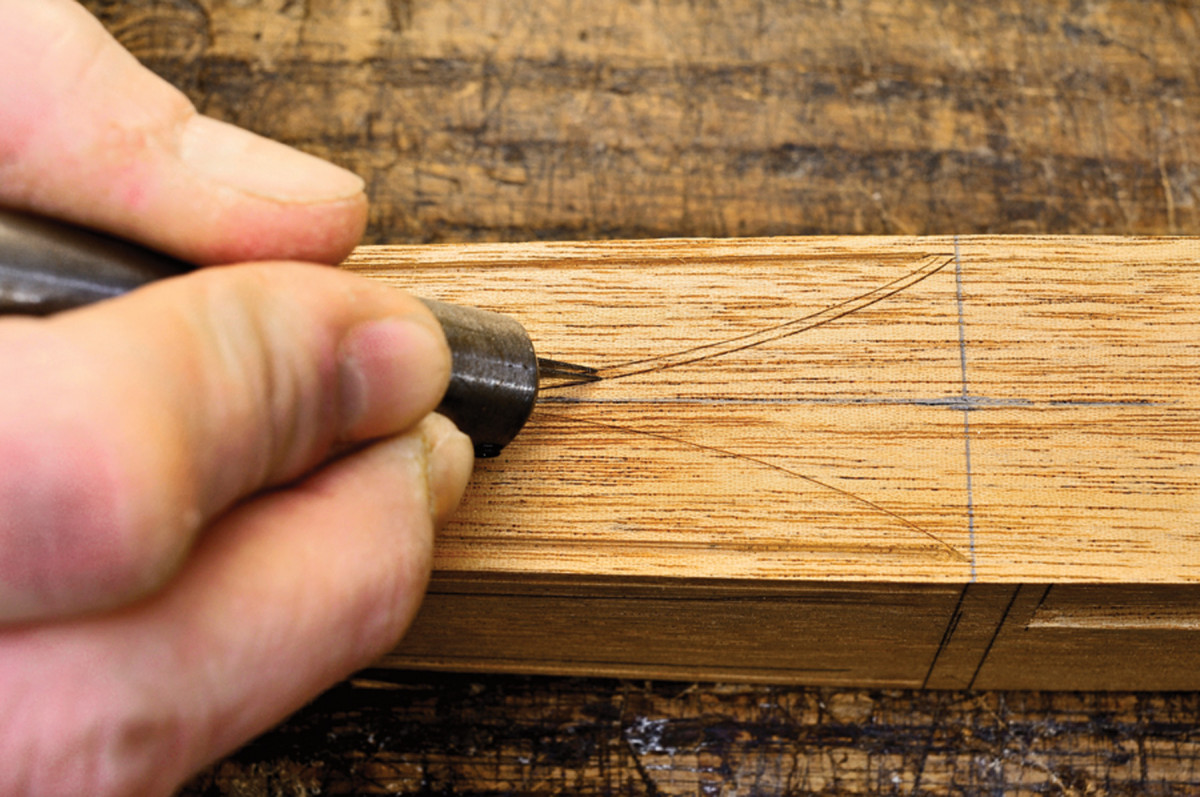
The descending curved pieces of stringing come together at the inner edges about a 1⁄2” above the top of the bellflower. To lay out this intersection, place a scrap piece of the stringing with its centerline on the centerline of the top of the leg where the upper dot is to be inlaid, then scribe along each side of the scrap stringing.
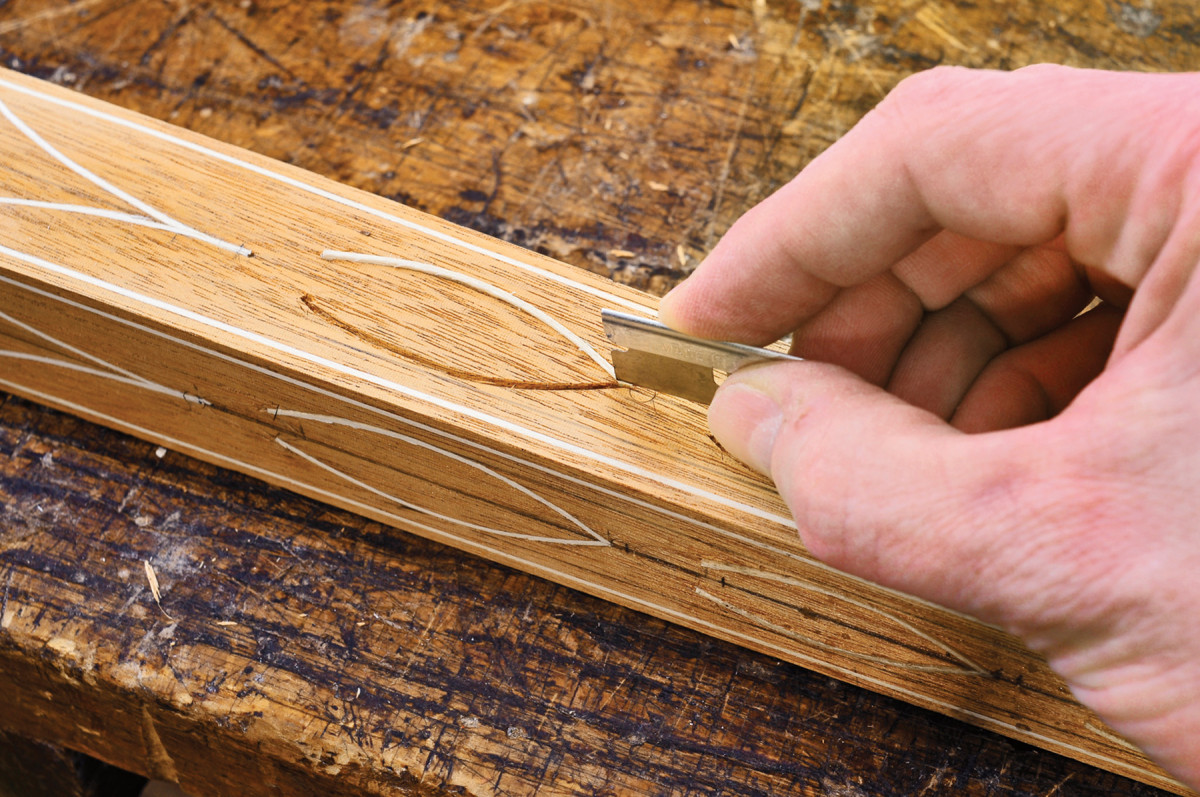
I guess one could devise a template or jig to use with a router to form the curved grooves, but I prefer to do the work by hand. A scalpel has just the right balance of rigidity, maneuverability and sharpness to form the curved grooves. A hobby knife works, too.
Use your tool to extend the outside edge of the vertical groove to where it intersects with the curved stringing. Place your template to intersect with the vertical line that was just extended, with the outside of the line routed up the leg’s side. With the template location carefully fixed, scribe along it with your knife. Scribe in two steps – one light pass with the template in place, and a heavier pass after the template is removed.
A constant arc. Templates establish one side of the groove for the stringing.
To cut the other side of the groove, I had a handle made that holds two hobby knife blades that are spaced apart to scribe varying widths – a similar setup is available at my web site (americanfederalperiod.com) or you could clamp two knives with a spacer in a small C-clamp to do the work. This setup is very handy, but it requires a light touch, because the blades are easily deflected.
Define your groove. The double-bladed knife, tracking in the line scribed against the template, sets the width of the groove.
Allow one blade to track in the line scribed against the template, and with careful attention so as not to apply any side pressure that could alter the spacing of the blades, scribe the other line. Then go back and deepen the second line with a standard knife. You may need to do this several times to reach the proper depth – be careful not to widen the groove as you work.
Remove the waste from the groove by making opposing angled cuts. When making these cuts, be careful not to angle the knife so much that it removes material outside the intended area. The result of these opposing angled cuts is a groove with a somewhat irregular bottom. There’s a peak in the center. This is not a problem from a gluing standpoint as long as the sides are accurate. Repeat the same steps to form the groove for the opposing inlay.
The stringing needs to be installed in two steps. In the first step, glue in one long vertical piece – this piece has to have its top end cut at a slight angle to accommodate the curved groove – and install the opposite side curved piece. (See photo below.)
I’m a strong advocate of using hide glue for nearly all inlay work – not out of some sense of historical accuracy, but because of its unique qualities. One of these qualities is its ability to fill tiny gaps around the inlays yet not interfere with finishing. To keep the mess to a minimum, I brush the glue on the stringing, and push it into the groove with a veneer hammer.

A softer touch. A veneer hammer works stringing into its groove with kid gloves.
If your shop is cool you may have to heat the stringing with an iron to keep the glue from setting. Hide glue has little adhesive properties when it has gelled. Also, be sure to clean excess glue from the open grooves so it doesn’t interfere with the next piece.
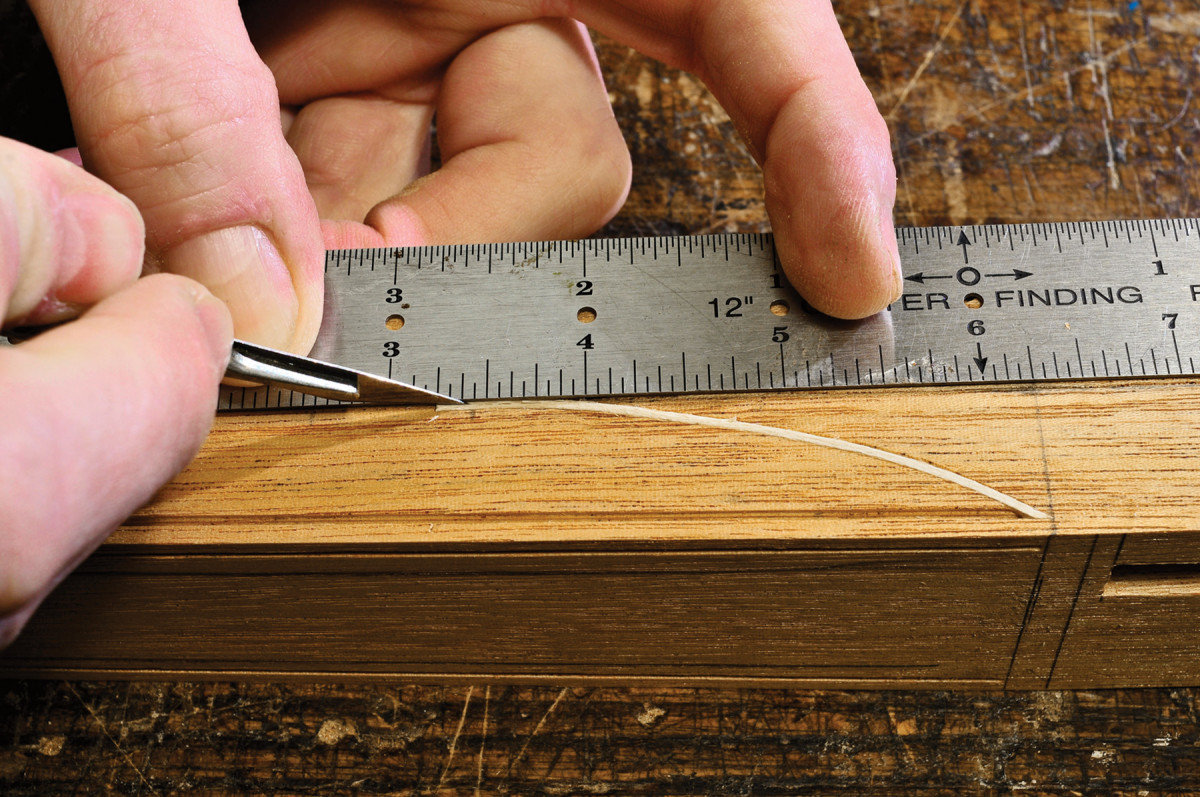
The stringing becomes surprisingly pliable when wet from the glue and doesn’t cut as cleanly as when dry. A two-step stringing installation allows the glue to set and increases accuracy as the miters are cut. After the glue cures and the stringing dries, cut the miters with a sharp knife. I do this by eye, which is quite accurate.
Cut the miters on the yet-to-be-glued pieces with a single-edge razor blade, but leave the miter on the curved piece until the intersection where the two pieces become one is cut and fit. That intersection is the most difficult aspect of the entire process.
The glued-in-place piece is easy to trim; just use a straightedge to scribe a line on the centerline and remove the waste as before.
No miter saw needed. Trim your miters with a sharp knife while using a sharp eye.
The second piece is more problematic. The long scarf-like joint is cut with a fresh razor blade, but even with that there is a tendency for the piece of stringing to rotate as the pressure is applied, making an inaccurate cut. I do this cut by eye also, but I’m almost never able to get it right, so I have to use a chisel to refine the fit.
It helps to extend the groove down to where it’s covered when a dot and bellflower are inlaid. This allows you to, for lack of a better word, jam the intersecting piece in the groove and force it to make a tight joint where the two come together. After that intersection is well fit, you can miter the curved piece to length and glue it in place.
Scribing the Bellflowers
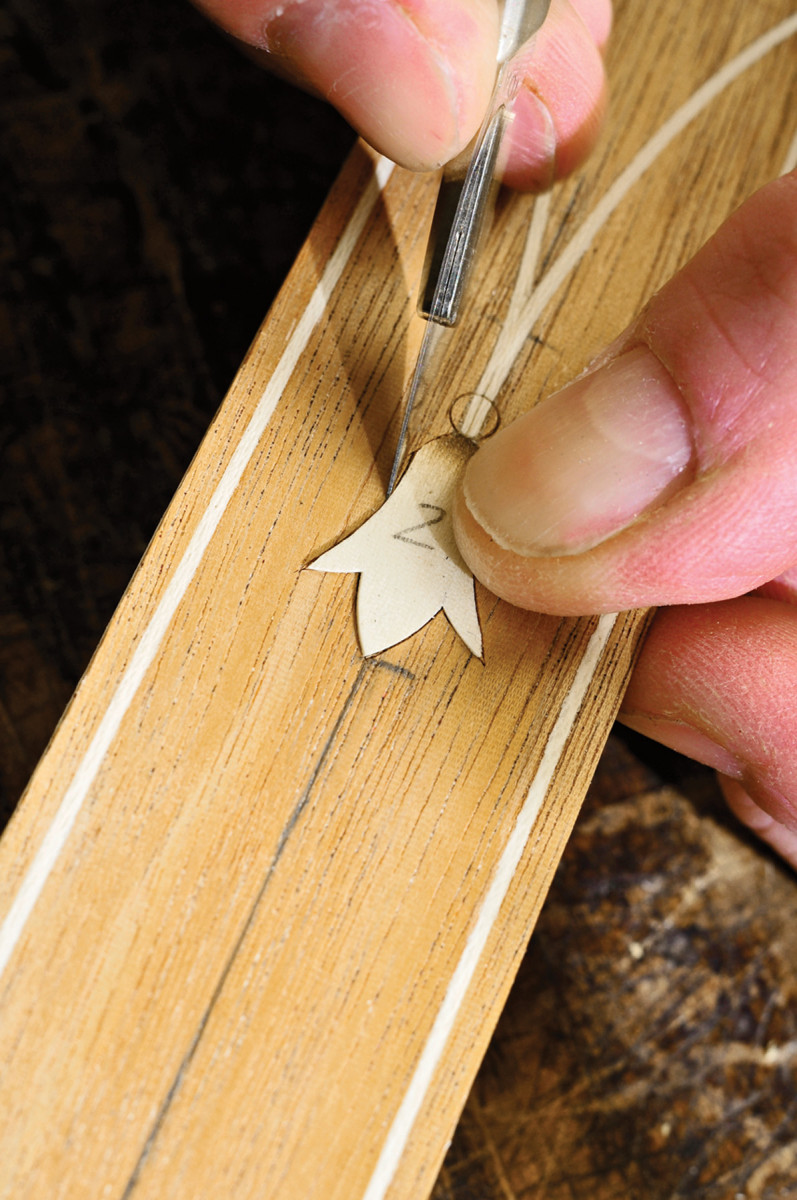
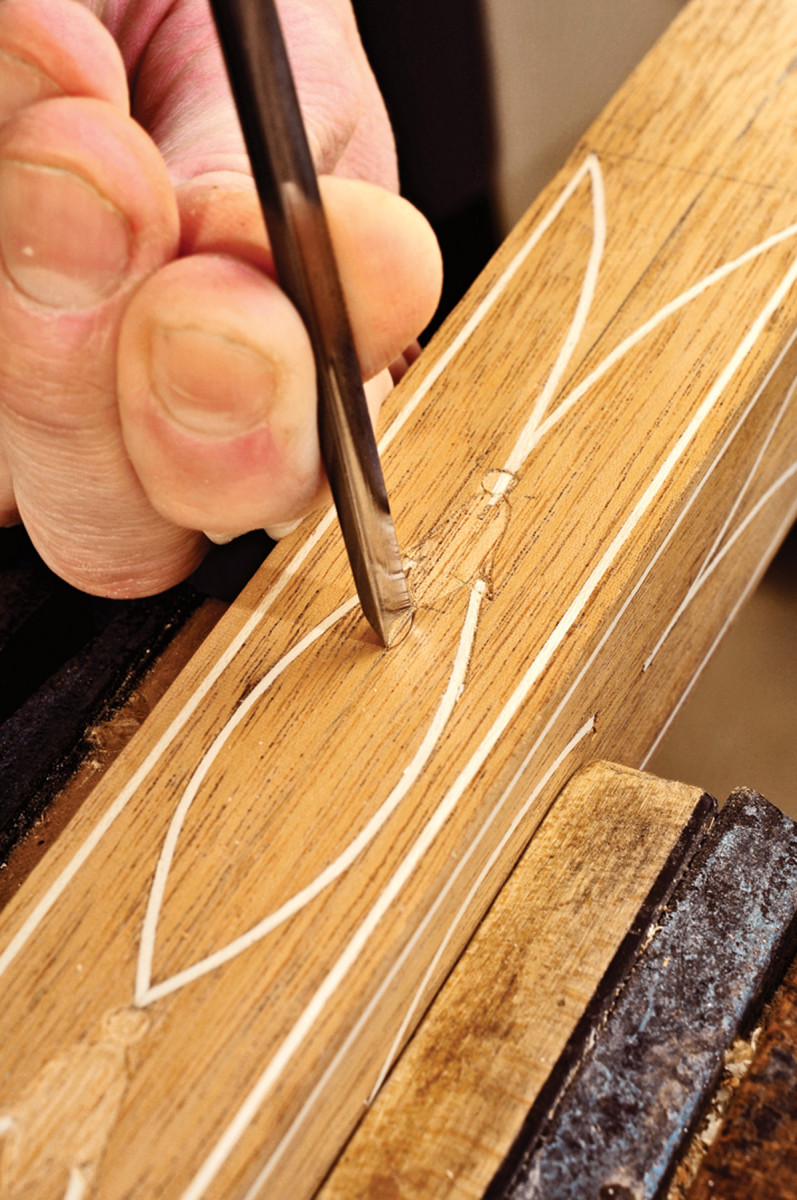
Stay tight. With careful scribe work, the bellflower will look as if it bloomed in place.
Number the legs and the corresponding bellflowers so they can be returned to their proper location later. To do so, hold the bellflower in position and scribe around it lightly. Scribe the line more deeply after the actual flower is out of the way.
Be persnickety. Scribe carefully where the stringing intersects – precise work yields a good fit.
It is best to work in from the sharp ends of the petals toward the center of the flower so as to not over-cut at the ends. Use a spiral punch to establish the location of the dots. The bellflowers and the dots are not inlaid at this time, but their location must be fixed now, because that determines the location of the connecting loops.
Connecting Loops
Minor corrections. As you slice stringing, the pieces roll away from the cut. Often the scarf joint requires paring with a sharp chisel.
The connecting loops are inlaid in much the same way as the earlier stringing, but here you can do all the pieces at the same time.
Odd woodworking tool. A razor blade becomes a handy tool to miter the bottom edge of the loops.
This is possible because where the stringing intersects at the bottom of each loop there is sufficient space behind the bellflower to use a razor blade to make the miters without the cuts running past what your inlay covers, unlike the previously fitted stringing.
Use a small hammer to work the stringing into the grooves of the connecting loops. A word of caution: Before these pieces of stringing are leveled they will look very poor, with the glue smears and deformation that occurs when the stringing is forced into the grooves.
Inlaying Bellflowers
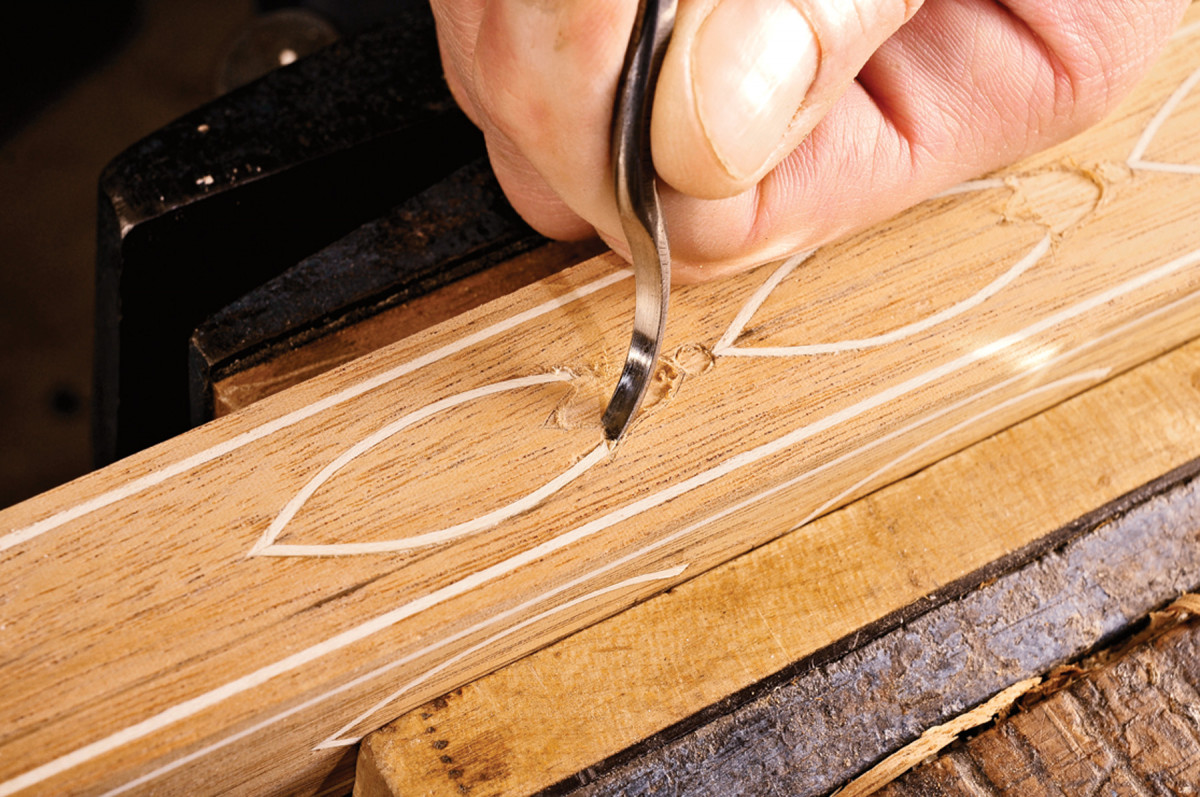
Dig into the corners. A skewed spoon gouge reaches into sharp corners and cleans out the recesses for the bellflowers without damaging an edge.
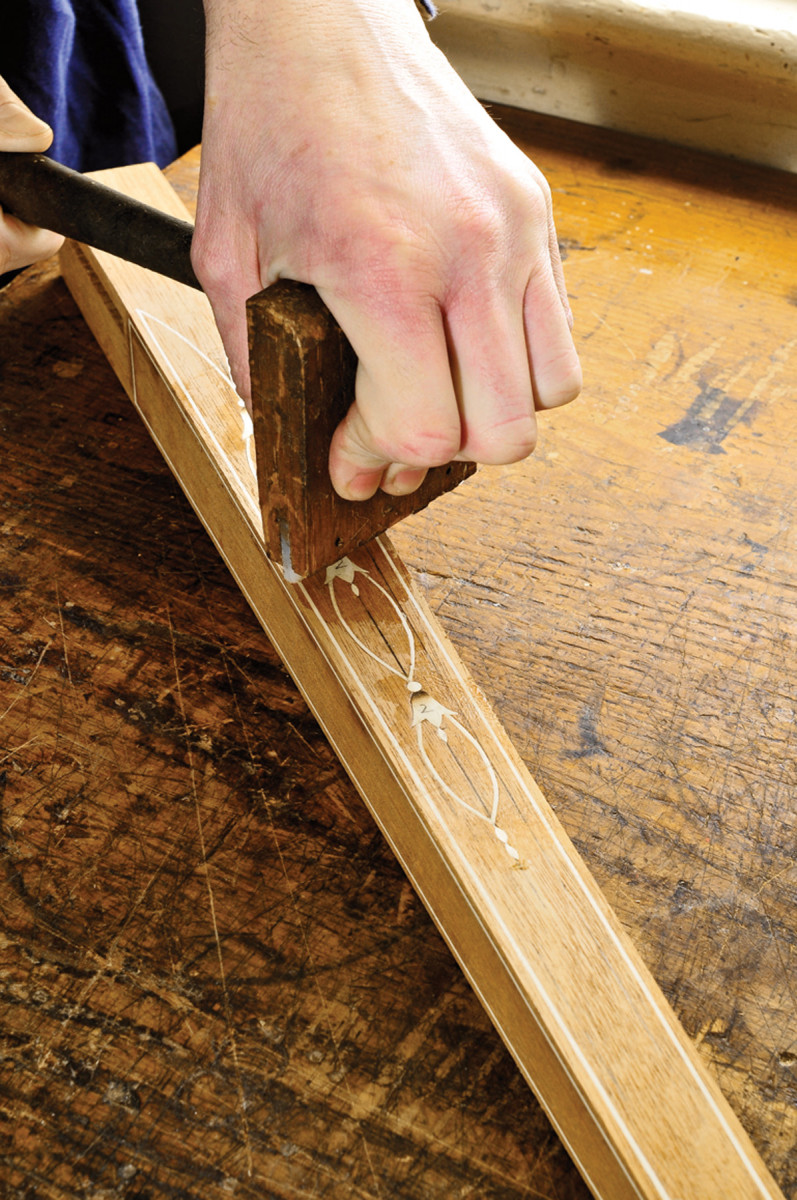
Before any bellflowers are inlaid and after the glue has fully cured, the stringing needs to be leveled. Rushing the process can leave a depression. If leveled early, the stringing, having swelled slightly from the glue, shrinks back as it dries.
Same, same. Excavate the area for the teardrops with the same gouge used to cut out the inlay. That’s the best way to get a perfect match.
Use the card scraper for this and be sure to use one that is in top form. Employ the scraper carefully because a dull scraper or a heavy-handed application of the tool can tear out pieces of the stringing.
A rotary tool fitted with the same 3⁄64” end mill that was used to make grooves is used to excavate the recess for the bellflowers and dots. The depth of cut has to be set perfectly; the bellflowers are quite thin, which allows only a very small margin for error. This is even more critical when working with holly, which if scraped too thin, can appear translucent under a finish, and that would reduce the contrast with the mahogany.
Choice of seating. The veneer hammer seats the bellflowers into position and removes any excess glue.
If your eyesight isn’t what it used to be, use a magnifying visor when routing the recess. The magnification allows you to cut very closely to the scribe line, leaving little to clean up. What little is left is easily cleaned with a 2mm beveled spoon gouge.
The recess for the teardrops is formed with the same gouge that was used to punch them out of the veneer. This is a somewhat delicate operation. You have to angle the gouge so the bevel is vertical. The pressure on the gouge should be light or the recess will be too deep. The waste between the gouge cuts is removed in much the same way as for the curved grooves, but here the depth is critical.
The bellflowers, dots and teardrops are also installed using hide glue. Depending on climate conditions, you may get by using a veneer hammer to stick the pieces in place. However, in extreme hot or cold weather, a clamping block might be the answer.
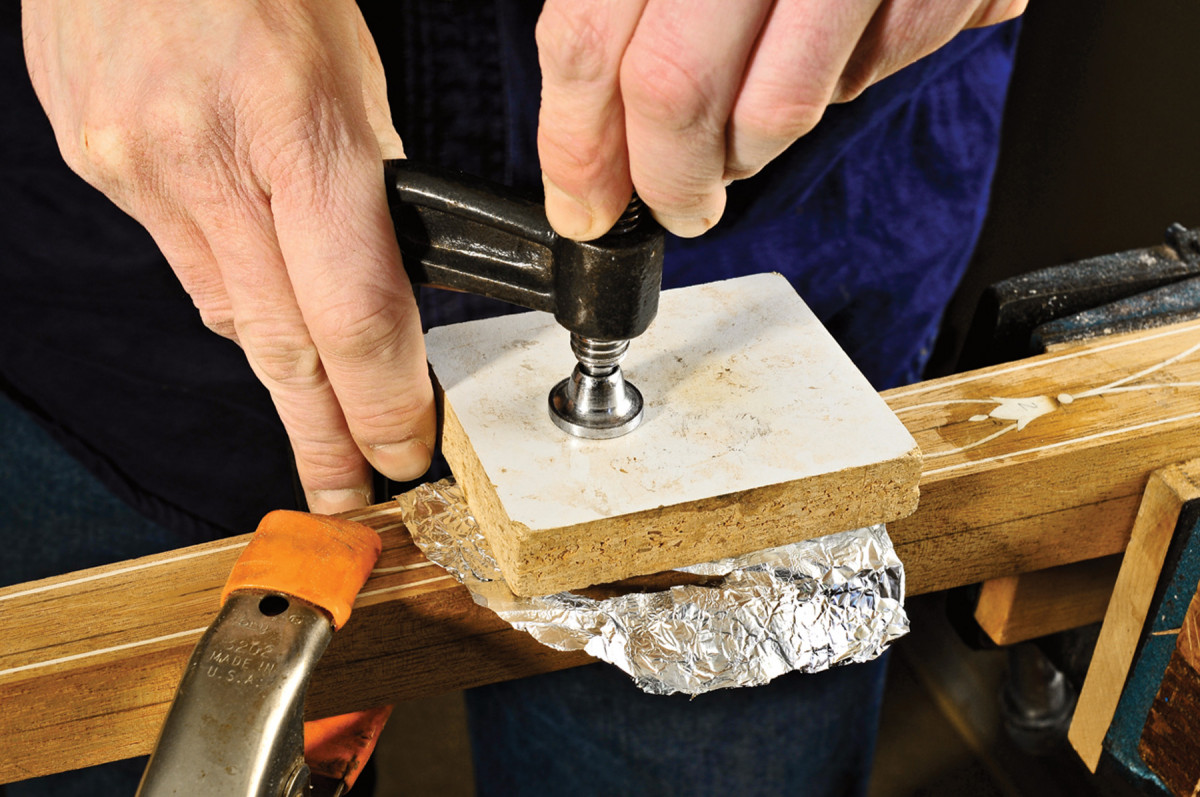
Climate change. Sometimes it’s too cold for hide glue to bond properly, so a heated block is clamped over the bellflower, while aluminum foil keeps the block from sticking to the leg. In hot weather, the block is not heated.
In hot weather the glue gels too slowly, so I clamp a block over the inlay. A piece of aluminum foil sandwiched between prevents the block from sticking. In cold weather I heat the block to liquefy the glue. In all cases I lightly mist the inlays to prevent curling.
When gluing in the dot and teardrops, look carefully for a slight bevel on the piece left from the cutting action of the tool and place the larger side up; this results in a near-perfect fit. Also try to orient the dot so its grain is running vertically.
Once the glue has cured, lightly scrape the leg to remove the excess glue, then follow up with fine sandpaper. It is when finishing that you get to see the full beauty of the inlays. The contrast, the delicate appearance and the refined look boast of fine craftsmanship.
Here are some supplies and tools we find essential in our everyday work around the shop. We may receive a commission from sales referred by our links; however, we have carefully selected these products for their usefulness and quality.


I’ve inlaid several dozen legs this way and followed Rob’s methods exactly. I found it nearly impossible to get a uniform recess with the double bladed knife, though, so I resorted to a trammel – guided dremel for the arcs. Everything else worked great, though splicing the uppermost curved stringing into each other required some extra patience.
StewMac.com makes the drill press sanding fixture for luthiers, which is very handy for making your own stringing, banding, or inlay components and has already saved me extra money in buying veneer and inlay stock.