We may receive a commission when you use our affiliate links. However, this does not impact our recommendations.
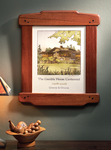
All this useful beauty. Tool pusher Patrick Leach found the original of this square in England. I built this reproduction, which is an excellent tool for layout chores.
This useful tool is easy to make, easy on the eyes and awesome to use.
Wooden layout tools usually are superior to metal ones in my opinion. They are lightweight, inexpensive and as accurate as woodworking requires. Period.
A 36″-long wooden straightedge can easily be trued to be as accurate as a metal machinist’s straightedge, which can cost as much as a good handplane. And you don’t have to treat the wooden straightedge like a holy relic. If the straightedge is dropped or run through a wood chipper, you can make another in short order.
In May, I destroyed one of our shop’s large wooden squares that we use for marking out the joints for large carcases. I was about to build a replacement square when I received Patrick Leach’s monthly tool newsletter.
Leach’s electronic list of tools for sale has always been more dangerous for me than opening an e-mail virus. (Sign up for his free newsletter at supertool.com – if you dare.) Leach has good taste in vintage tools and manages to find fine stuff, month after month.
In a recent newsletter he listed a gorgeous English layout square in mahogany that I couldn’t afford. So I did the next-best thing – I built one (actually two) using photographs and details from Leach.
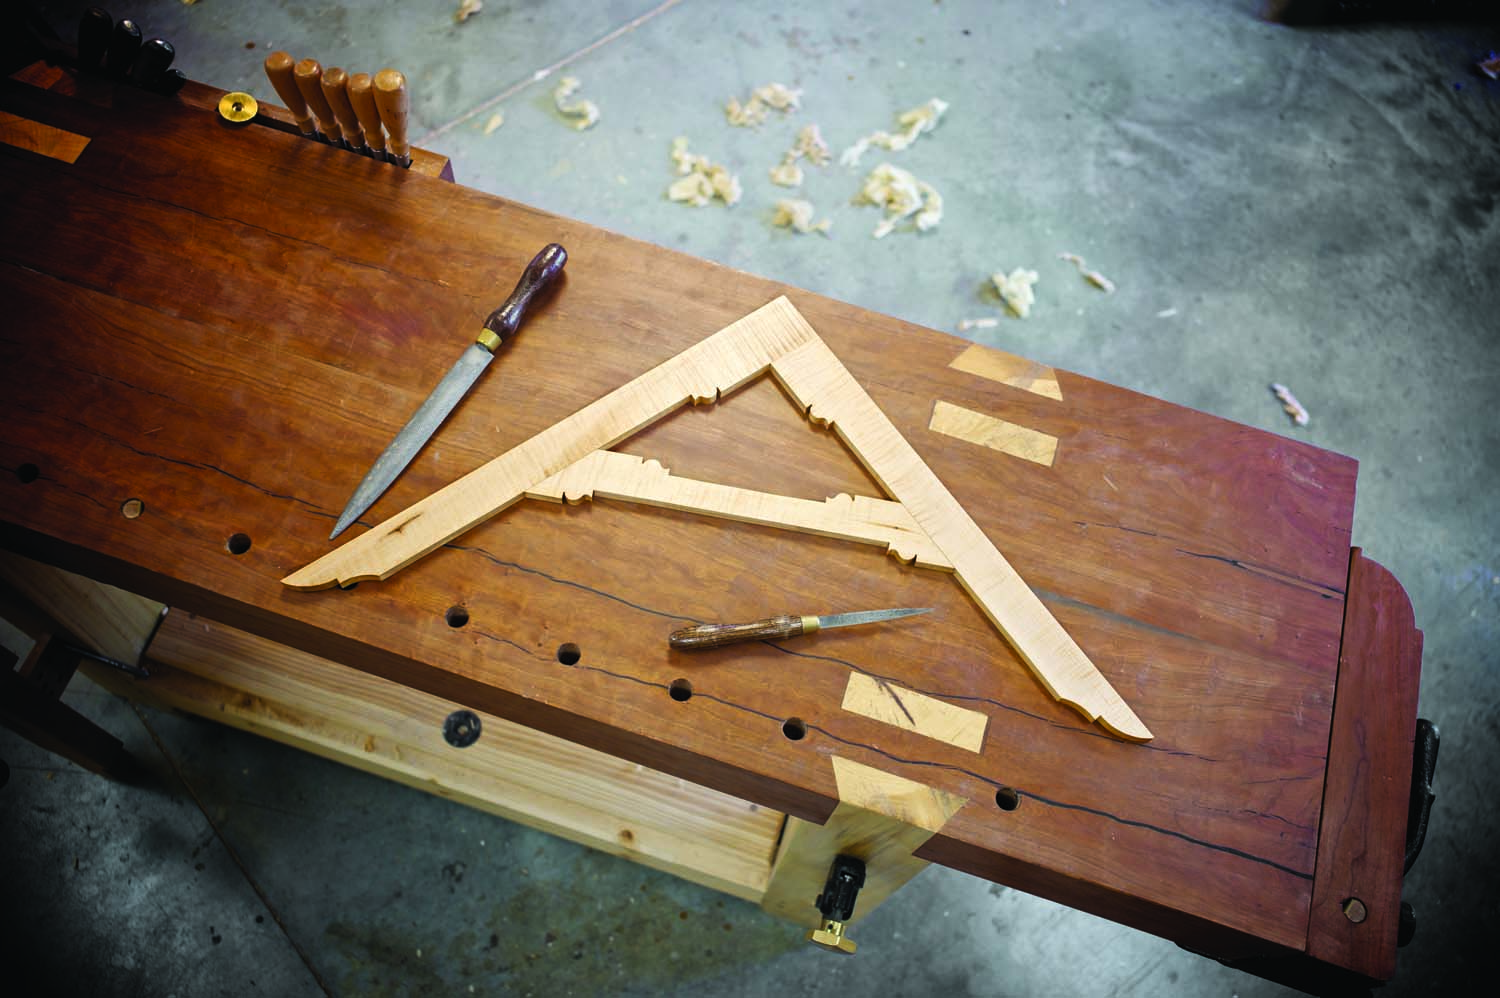
My square looks like the original, but I changed the joinery to suit me. I joined the center brace with a mitered half-lap instead of a mortise and tenon. And instead of mahogany, I used curly white maple I salvaged from a 19th-century dresser that was headed for the dumpster.
Square & Fair
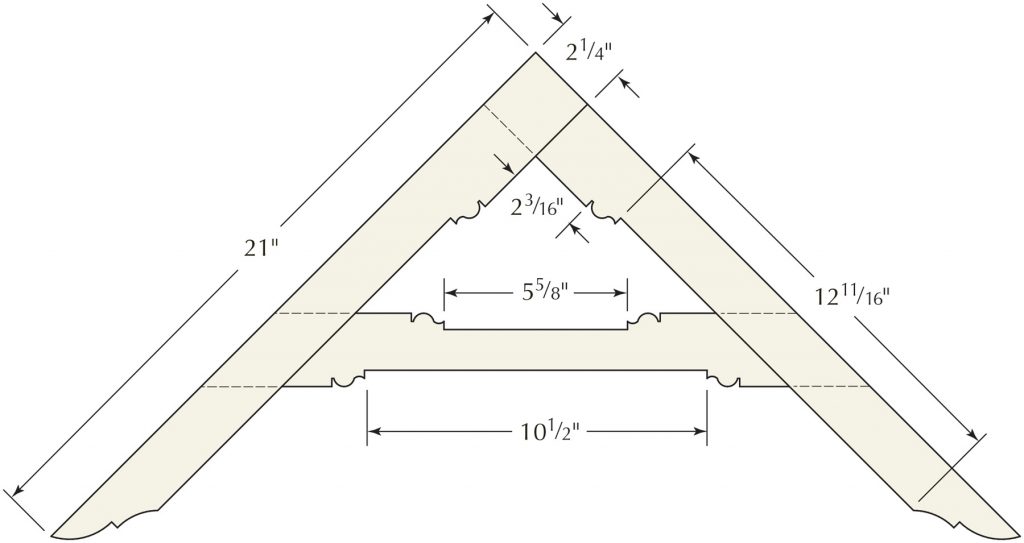
Here’s how the square works: The two long legs are joined with a bridle joint. Then you cut the decorative details on the long legs and glue the two pieces together. The center brace is the most work. You cut all the frilly stuff first. Then you cut the lap joints on the brace and trace their shape on the assembled legs. Finally, you cut the lap joints in the long legs, glue in the brace then square the whole assembly.

Clamp like this. Two bar clamps and an F-style clamp are the best way to clamp the bridle joint. The scrap block helps to distribute the clamping pressure.
Begin with the bridle joint. The parts of this square are all 1⁄2“ thick, and you want the tenon on one leg to be one-third the thickness of your stock, which means it should be a little less than 3⁄16“ thick. Cut the tenon on the end of one leg. Then cut the mating bridle joint on the other.
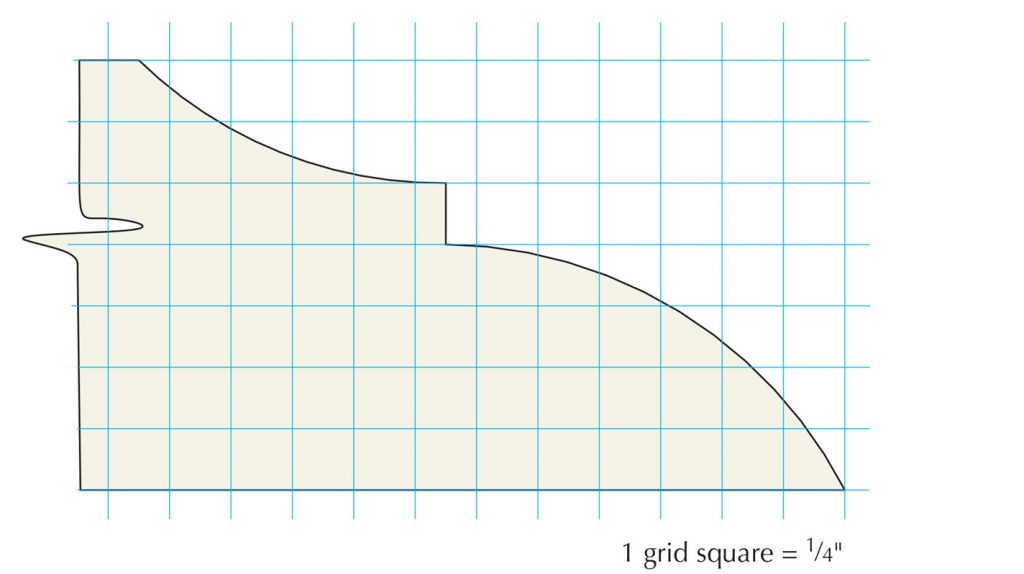
Now rip away the excess width on each leg right up to the ogee detail. Saw out the ogee details and fair them with rasps and chisels. Glue the legs together and then cut the ogee details on the ends.
Half-laps Get You Home
Now cut all the details on the center brace and fair everything up. Position the assembled legs on top of the brace exactly where you want them to go and trace the shoulder of your half-lap joints onto the brace with a knife. Saw out the 1⁄4“-thick half-laps then place the center brace back in position on the legs.
Now trace the shape of the brace on the assembled legs and cut the mating lap joints on the legs. Fit everything so it is nice and tight, then glue the center brace in place.
Time for the Truth
When the glue dries, trim off any excess wood around the joints and get ready to true the square. I do this on a sheet of poster board. Place one leg of the square on the edge of the poster board and trace along the edge of the other leg onto the poster board. Flip the square 90°, align it with the edge of the poster board and compare the pencil line to the leg. If the line and the leg are parallel, the square is square. If the line doesn’t match the leg, you need to plane the exterior of one leg (or both) until the square is indeed square.
Then break all the sharp edges of the tool and apply a few coats of varnish.
After I finished this square, I showed it to Leach, who sold the original to a customer. He said that the antique square was all but destroyed by the post office when he was shipping it to the buyer, so this fine tool could have met a bitter end.
But thanks to these plans (and the SketchUp drawing of this square we’ve made available), you can ensure that this attractive and useful design will endure, despite the mail system’s best efforts.

 Website: Download a free SketchUp drawing of this square.
Here are some supplies and tools we find essential in our everyday work around the shop. We may receive a commission from sales referred by our links; however, we have carefully selected these products for their usefulness and quality.