


We may receive a commission when you use our affiliate links. However, this does not impact our recommendations.
Got a light? With the help of our patterns and a small router, this lamp is an easy weekend project.
This project first appeared in the August 2011 issue.
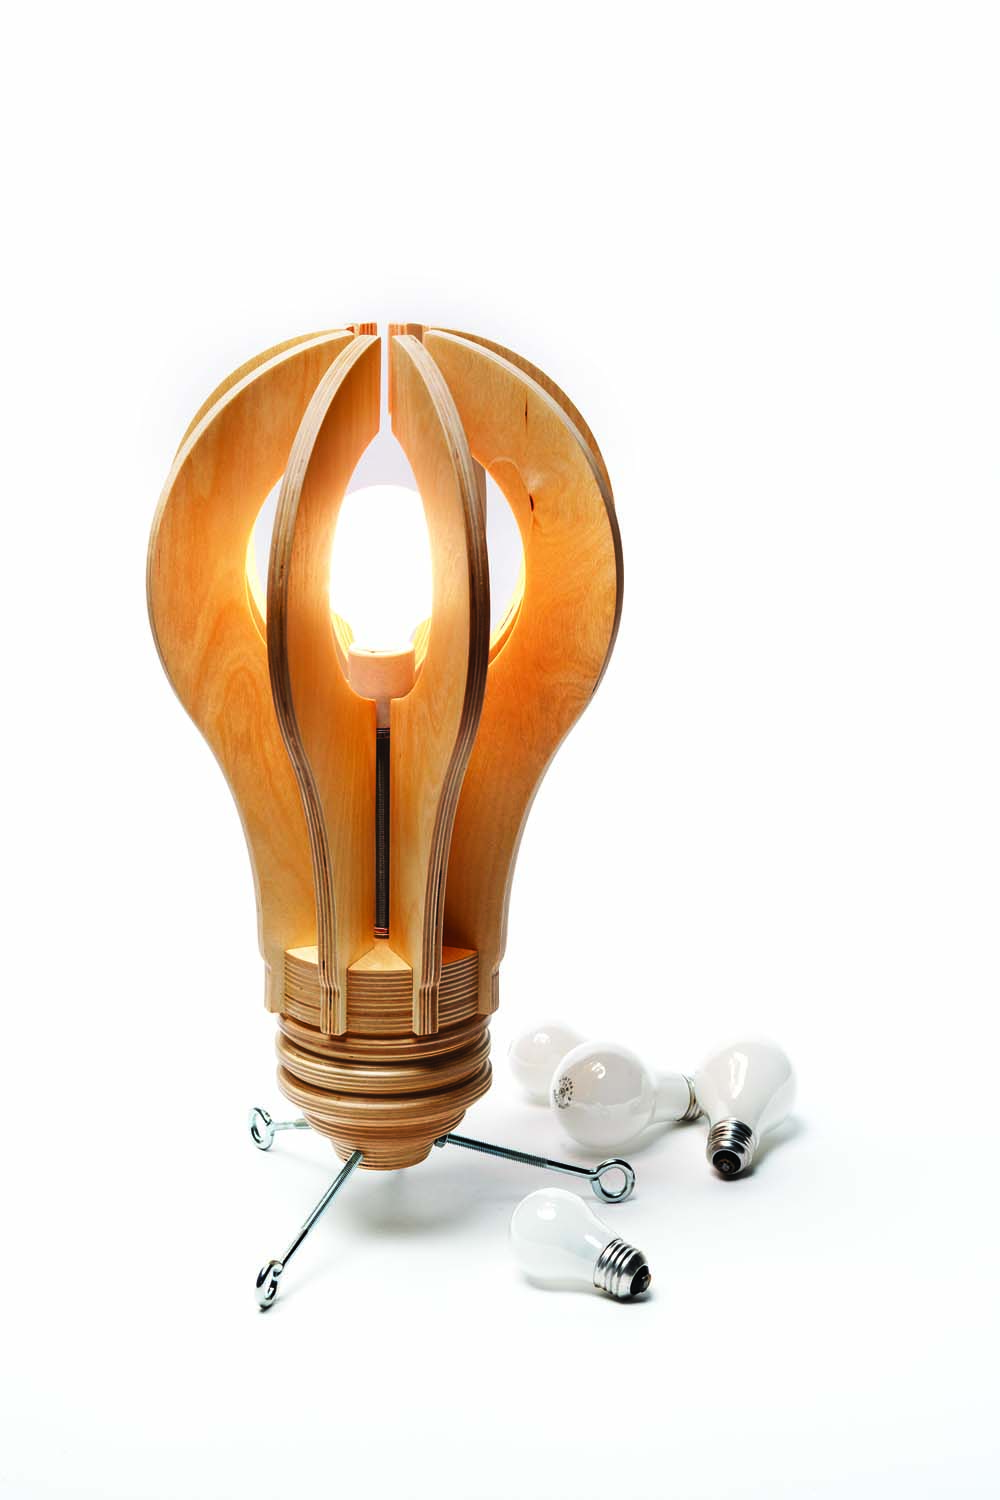
For me, one of the most perfect shapes ever designed is the general-purpose incandescent light bulb. While some people use the word “mushroom” to describe its profile, I’ve never seen a fungus with such sinuous and perfect curves.
The most elemental light bulb combines a sphere with a perfect ogee. While I’m sure there is some proportioning system embedded in its form, I have yet to decipher it. I just know that if you try to draw it and it’s even a little wrong, it looks a lot wrong.
With the advent of the new compact fluorescent light bulbs, the classic incandescent bulb is an endangered species. So to preserve the form of the familiar old-school bulb in my house, I decided to make a desk lamp in its image.
This project requires only a little Baltic birch plywood. The lamp’s base is simply laminated discs of 3⁄4“-thick plywood. The curvy shape of the bulb is created by eight identical “blades” of 1⁄2“-thick plywood. The only real “joinery” in this project is the eight slots in the base that hold the blades.
Begin With the Blades
The best way to make the blades is to create a pattern in 3⁄4“-thick scrap material. Draw the shape of the blade using the illustrations as a guide, or print it out using the SketchUp plan on our web site. Saw and sand the pattern to perfection.
Cut out the eight blanks from 1⁄2” Baltic birch plywood and trace the shape of the blade on each blank. Now nail your pattern to a large piece of scrap that you can secure on your workbench.
Rough out the shape of the blade on your band saw, then affix the blank to your pattern. You can use double-sided tape or even temporarily nail the blank to the pattern. Then use a router with a pattern bit to shape the eight blades.
The Big Discs
The base of the lamp is a stack of seven layers of 3⁄4“-thick Baltic birch plywood. The top five layers are all discs (see the plans for them here) that are 49⁄16” in diameter. Let’s begin with these five.
The top two discs of the base hold the blades of the lamp. Begin by taking two pieces of 3⁄4“-thick Baltic birch and face-glue them together into a 11⁄2“-thick chunk. Square up this piece and mark out the lines for the eight slots: two lines at 90° to one another, and two more lines at 45°. All the lines intersect at one point.
When the glue is dry, scribe a 49⁄16“-diameter circle on one face from the centerpoint. Cut out the circle on the band saw. Sand away the sawblade marks.
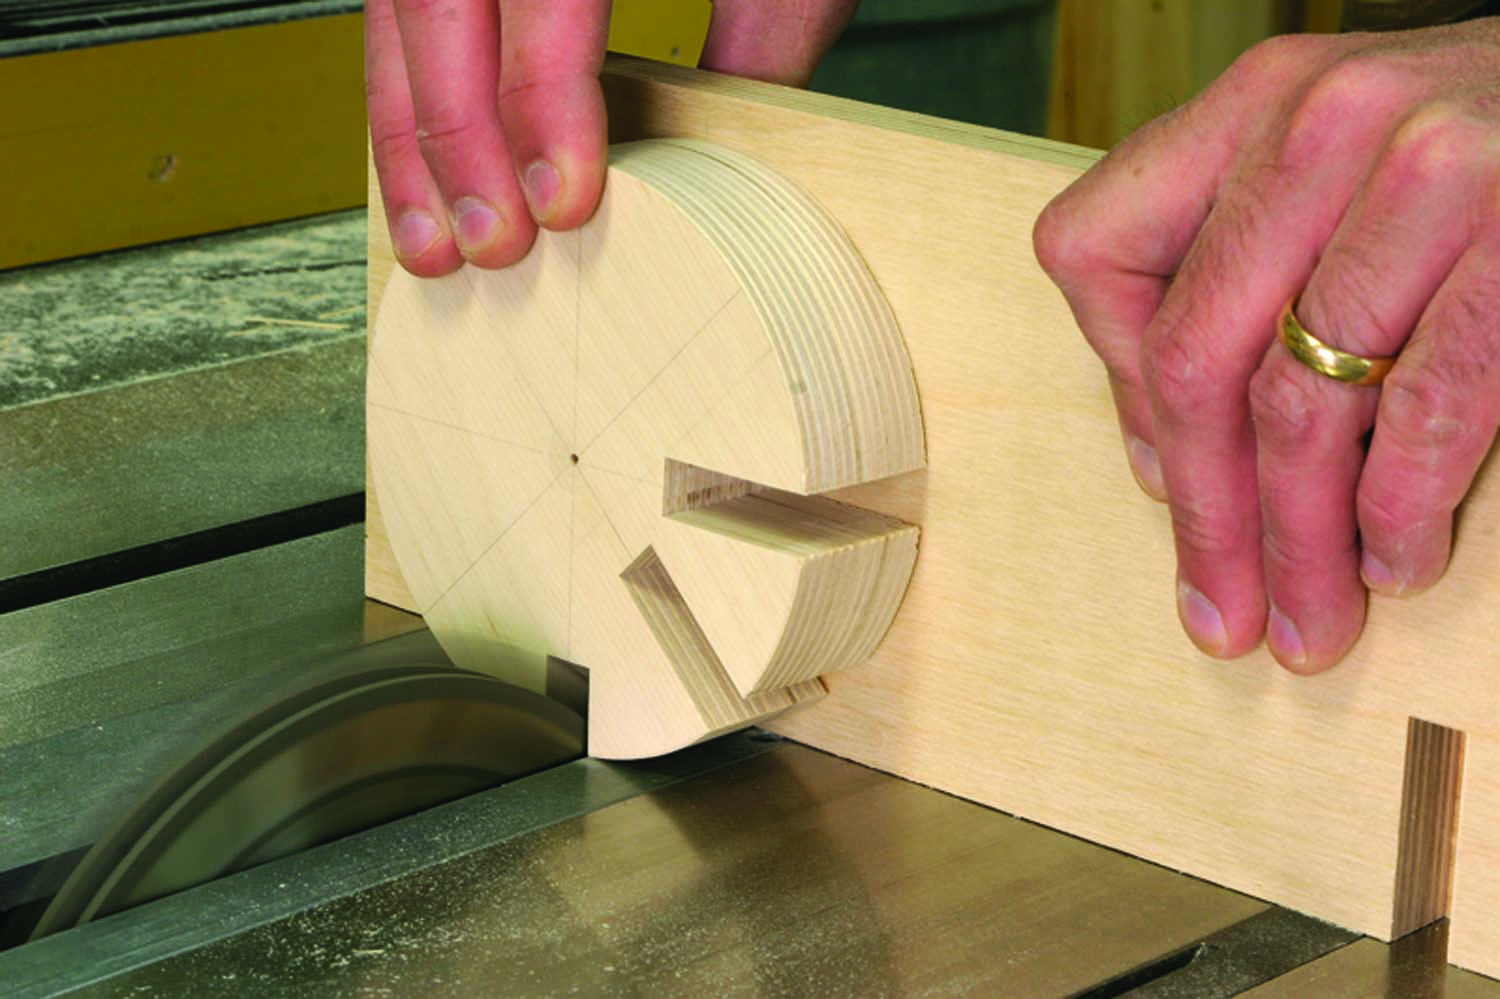
Eight notches. If the center of your blank and the centerline of the dado stack line up, then all your notches will be easy to cut. All you have to do is confirm that your layout lines on your blank are vertical before cutting each notch.
Cutting the eight slots is easy with a stack dado set in your table saw and your miter gauge.
First arrange your stack dado’s chippers and shims to cut a slot that is the thickness of your lamp’s eight blades. Then raise the stack dado to 13⁄8“. Now screw a tall sacrificial fence to your saw’s miter gauge. Screw the blank to this sacrificial fence so the centerline of the slot lines up with the centerline of the dado stack.
Rotate the blank until the line is perfectly vertical. Then push the blank into the spinning stack dado. Rotate the blank. Confirm the next line is vertical. Cut the next slot. Repeat until you have cut all eight slots. Remove the blank and turn your attention to the other three discs that are 49⁄16” in diameter.
These three discs are supposed to look like the part of the bulb that screws into the light socket. Saw and sand each disc to round. Then use a router to cut a 1⁄4” x 1⁄4” chamfer on the top and bottom edges. 


The Smaller Discs
The two smaller discs (31⁄2” and 21⁄2” in diameter) are cut round in the same manner as above. On the 31⁄2“-diameter disc, cut a 1⁄4” roundover on one edge using your router. On the smaller disc, bevel the edge to 22.5°. The easy way to do this is on a disc sander with a tilting table.
If you are going to use a metal base made from 1⁄4” x 5″ eye bolts like I did, use the photo at right to see how to drill the three holes for your hardware.
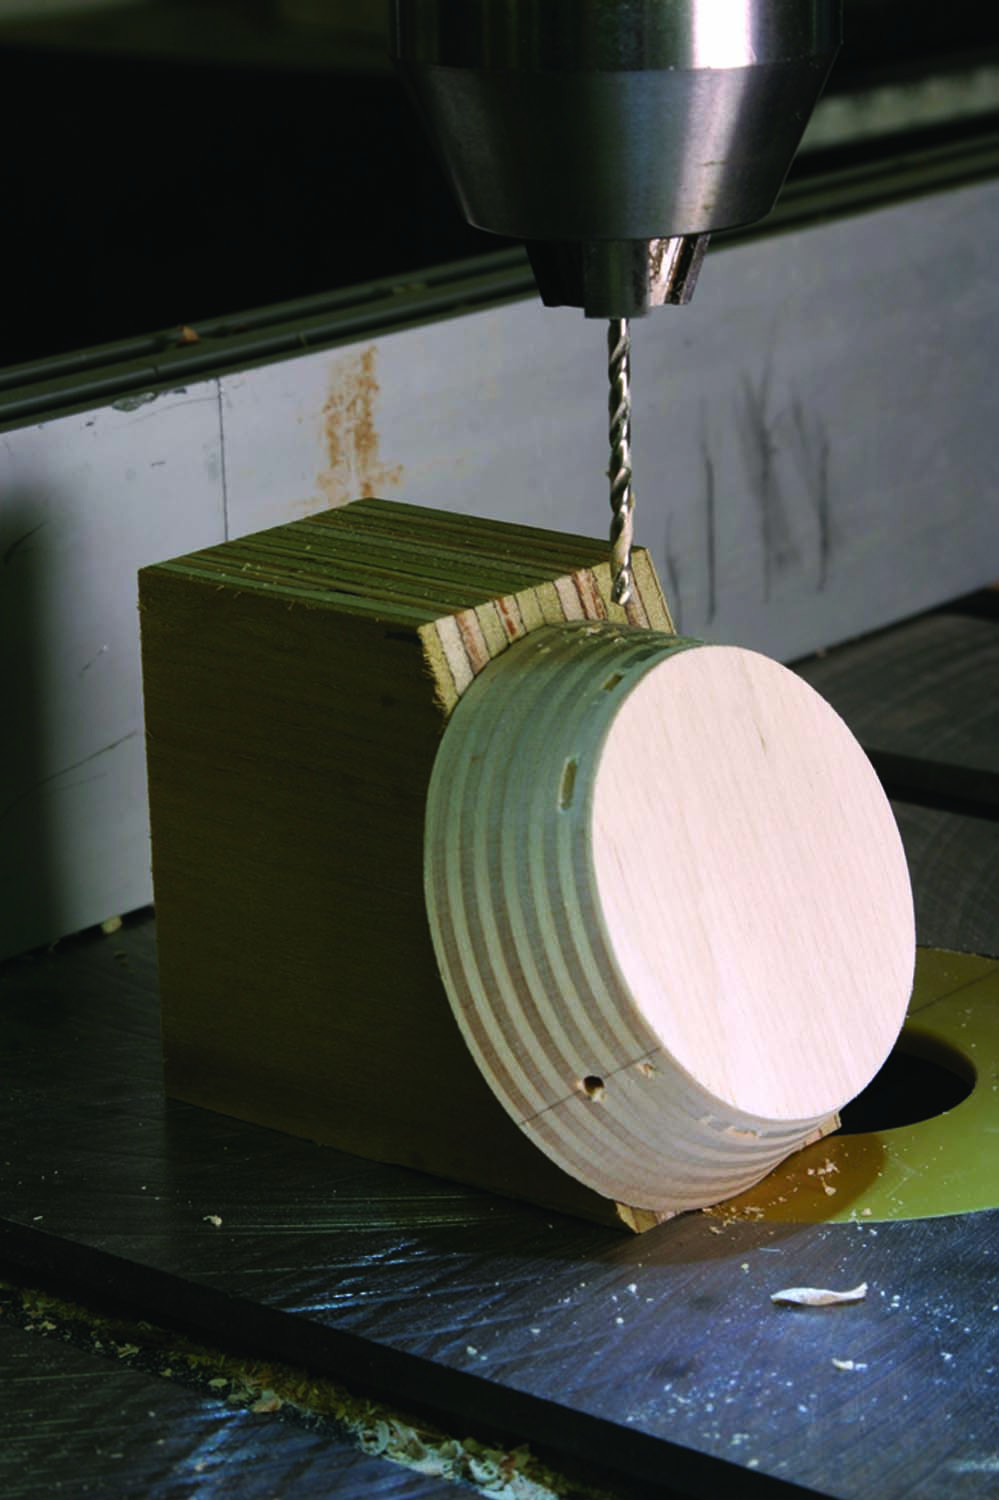
Holes for hardware. The edge is angled at 22.5°. Cut that angle on a piece of scrap and hold your small disc against it. Line up your layout line with a line on your scrap or (in this case) a lamination line in the plywood.
With all the discs cut and shaped, drill a 1⁄2“-diameter hole in the center of each for the wiring. Now glue up the discs into something that looks like the base of a light bulb. You can do this process one layer at a time or all at once. Your choice.
We Interrupt this Program
Before assembling the lamp, sand and finish all the parts. Mask off the areas that will be glued; stuff packing peanuts into the slots in the base of the light bulb to protect those surfaces for gluing.
Glue in seven of the blades and make sure the eighth fits in its notch with a friction fit – you’ll remove that blade to change the bulb when it burns out.
The Metal Bits
To create the electrical part of this project, I used parts from a lamp-building kit from the home center. The 1/8-IP threaded metal nipple is secured to the lamp base using jam nuts. An electric cord snakes through the nipple up to a light fixture screwed to the nipple. (Follow the lamp kit’s instructions for wiring, or call an electrician to help you.)
About the Base
I made the base of this lamp using 1⁄4” x 5″ eye bolts, though I had other aspirations at the outset. I wanted to use shielded metal electrical conduit to create a somewhat pose-able base – like a light bulb crossed with a spider. Or perhaps even hang it as a chandelier.
VIDEO: See how to cut and sand the round discs – no jigs.
MODEL: Click here for the SketchUp model of the Light Bulb Lamp.
Here are some supplies and tools we find essential in our everyday work around the shop. We may receive a commission from sales referred by our links; however, we have carefully selected these products for their usefulness and quality.


