We may receive a commission when you use our affiliate links. However, this does not impact our recommendations.
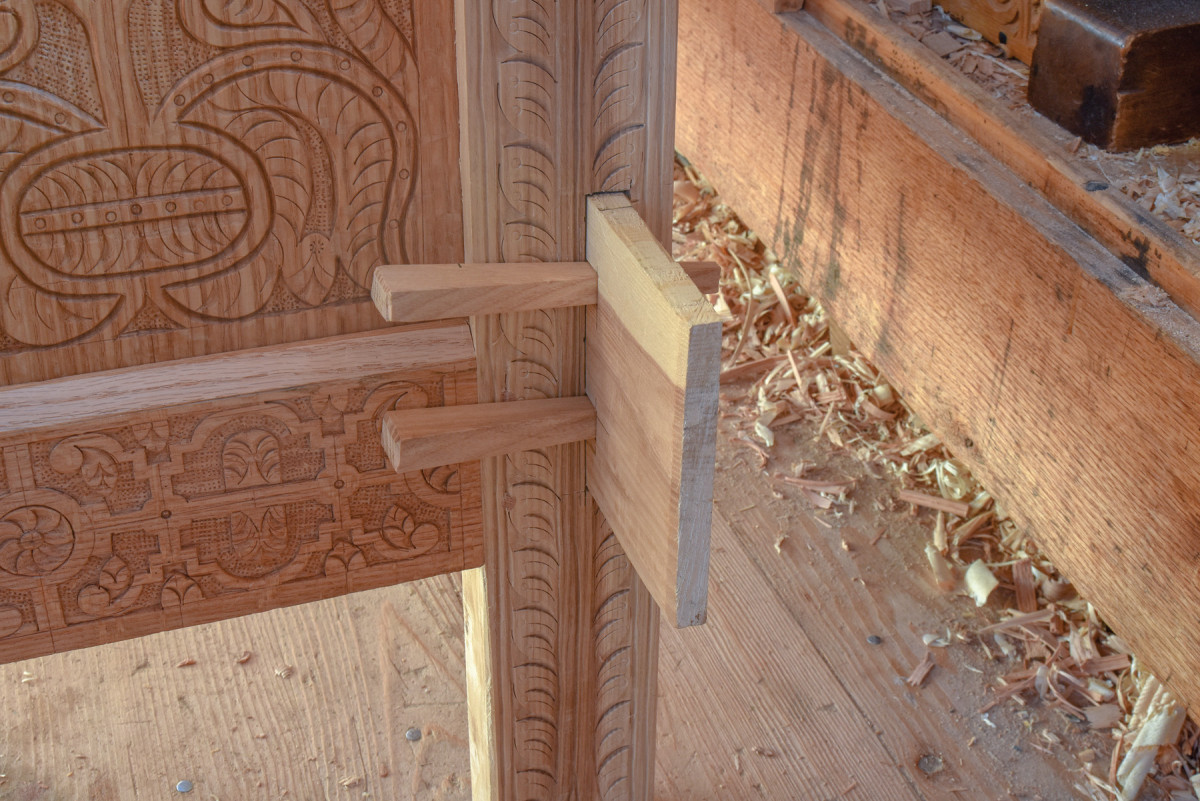
This joint has been test-fitted; its wedges just need trimming and some small touch-ups and it’s done.
This time-tested joint is perfect for knockdown furniture.
This bedstead I’m building is a perfect place to use a joint that I rarely cut: the wedged, through-mortise and tenon. I need to be able to ship this bedstead across the country, so I wanted something the customer (with some simple instructions) would be able to assemble herself. The head and foot are all joined in the “usual” manner; pinned mortise and tenon joints. But the long rails connect these two sections with a through-mortise and tenon joint that’s then wedged through the extended tenon.
I’ve seen it called a “tusk” tenon, a wedge tenon (although there are other kinds of wedged tenons, too) and a “keyed” tenon. Whatever you call it, this is a joint that can really pull things together, but if need be, can be disassembled.
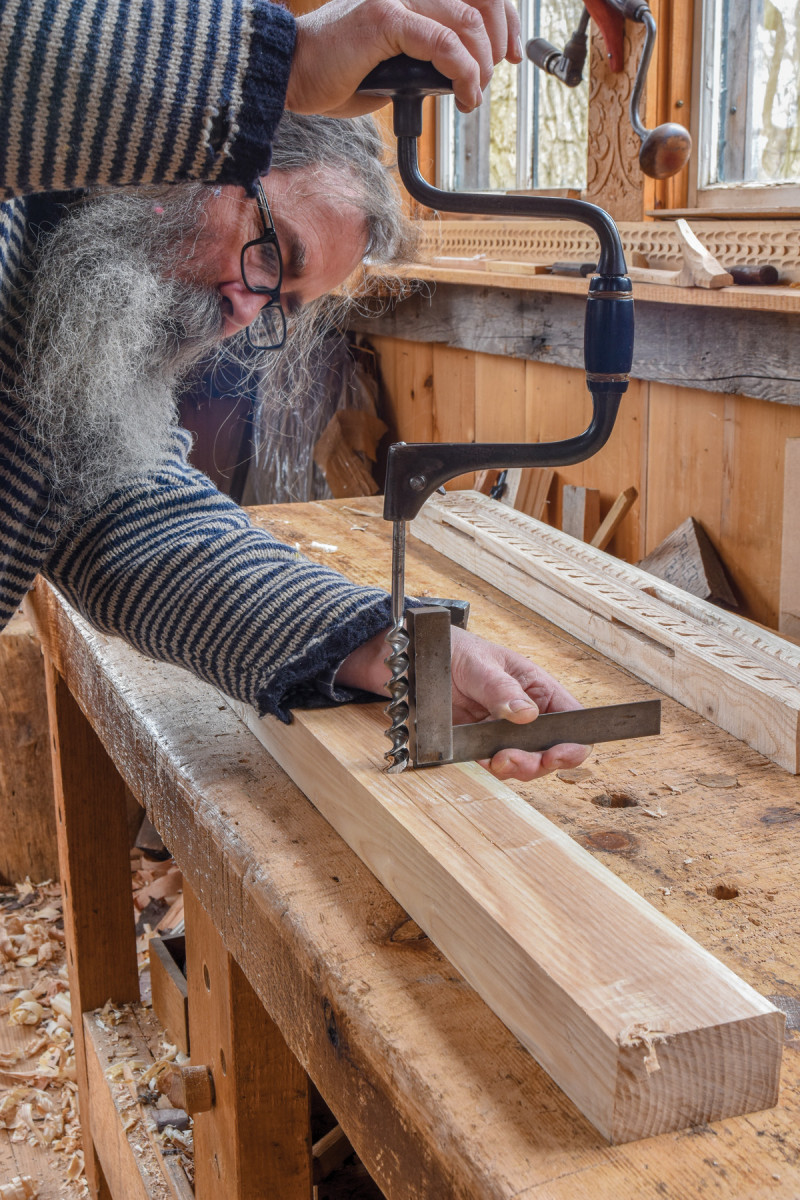
1. It’s worth checking that the brace is plumb, it will make a difference.
The rails in this case are 2″ x 6″ ash timbers; the posts are 2″ x 3-1/2“. Because of the scale a bedstead dictates, I settled on 3/4“-thick tenons. I laid out the mortise on both sides of the posts, and bored a series of holes that remove the bulk of the waste. Use a square to align the brace and bit, so your mortise isn’t tilted one way or the other. Check the holes at each end of the mortise in both directions; fore and aft, left and right. I used an 11/16” bit, leaving some wood to be pared away.
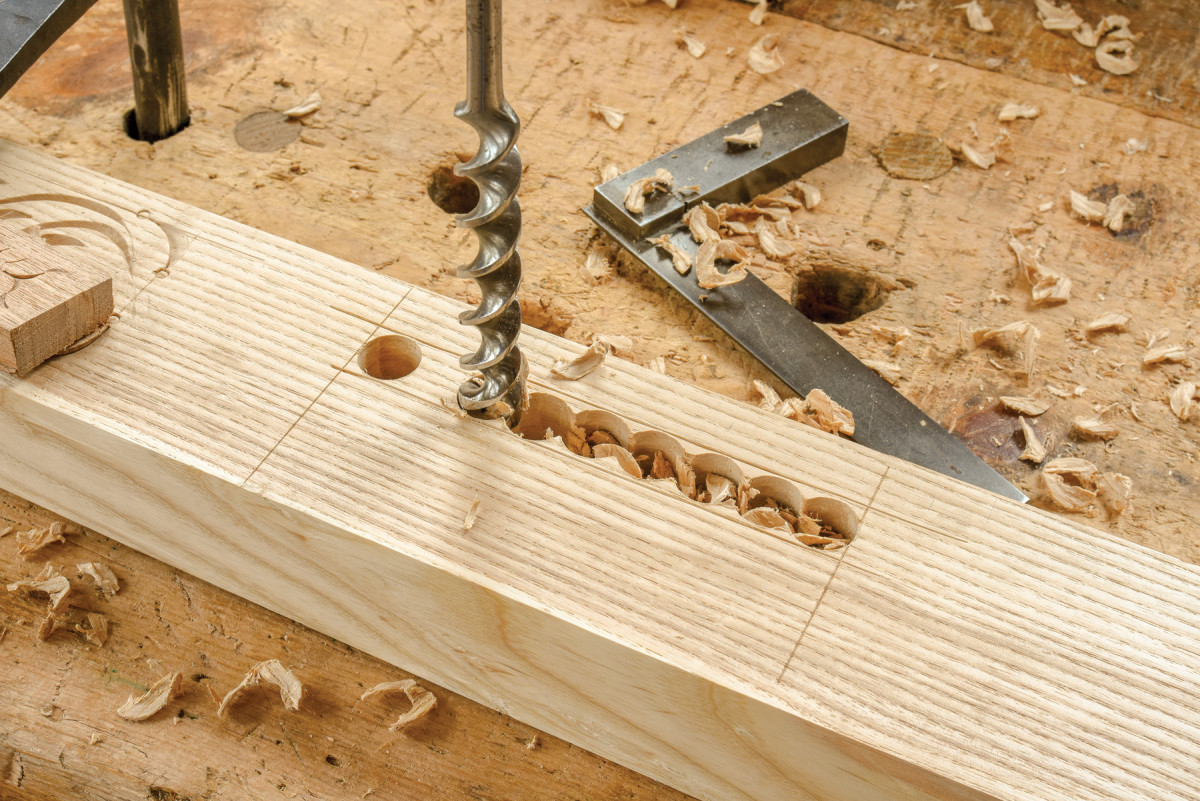
2. It’s a lot of holes to bore, but it’s easier to remove that excess material with the brace and bit rather than just the chisels.
I bored partway through the post, then flipped it over and finished boring from the other side. This does two things; it reduces the chances of blowing out the wood if you go all the way through from one side, and puts any alignment errors inside the joint. When paring the mortise walls, I prop the bedpost up on a piece of scrap wood so I don’t drive my chisel into the bench. Be sure to get the walls even. A bedstead needs to withstand a lot of stress on its joints, I’m aiming here for a mortise and tenon without any wiggle room.
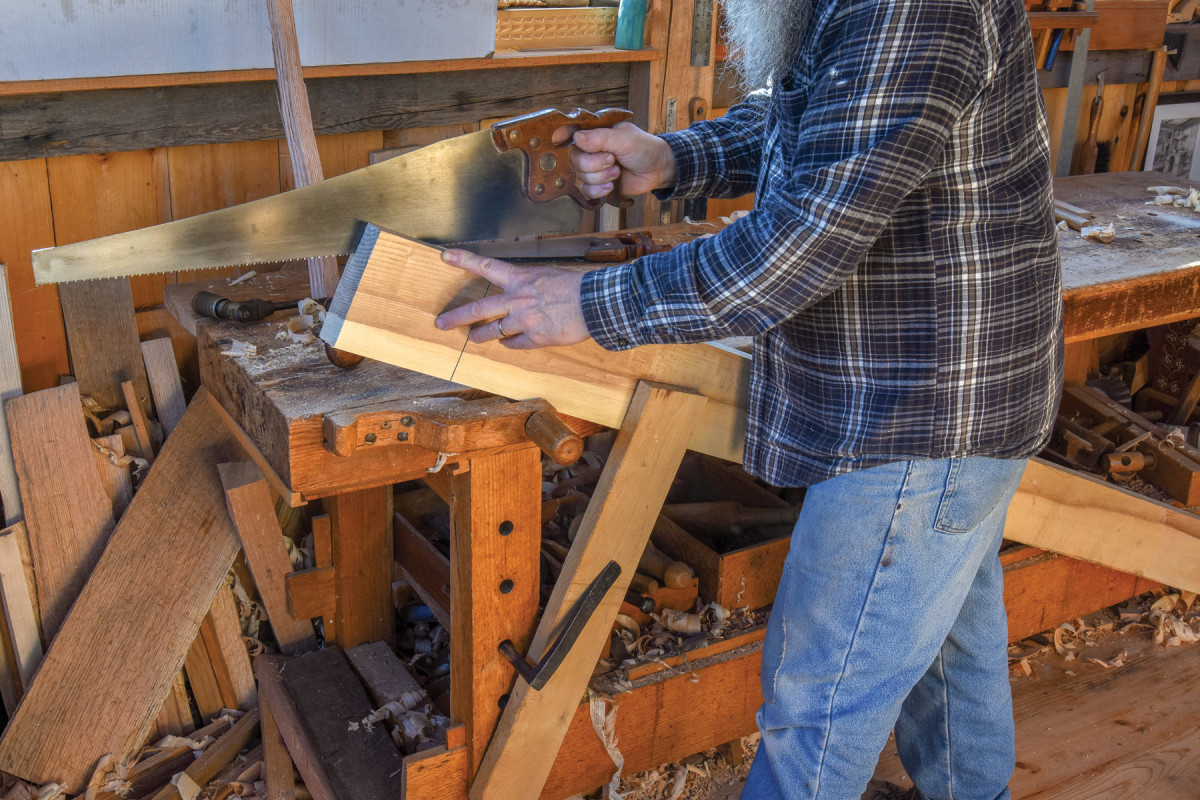
3. Ripping the tenon is careful work. It’s not like I have lots of large timbers around if something goes wrong.
Cutting the tenon is pretty straightforward. I saw the shoulders first, then rip down the cheeks. The hardest part in this case was holding the 61/2‘ rail for rip-sawing. I propped it against the bench and worked across the top corner, just like when I was resawing walnut recently. I sawed across the end grain and down the tenon edge near me. I did both kerfs to that point, then flipped the piece over and continued down the other edge.
I pared the tenons’ faces with a smooth plane, tapering them slightly toward the ends. I cleaned up right against the shoulder with a large framing chisel across the grain. I aimed for a tight fit just as the tenon is finally all the way home. At first, I left about 5″ of the tenon extended beyond the bedpost. Then I test-fitted the tenon in the mortise and scribed a line where the tenon protrudes beyond the post. This locates the baseline for the wedges that secure the tenon.
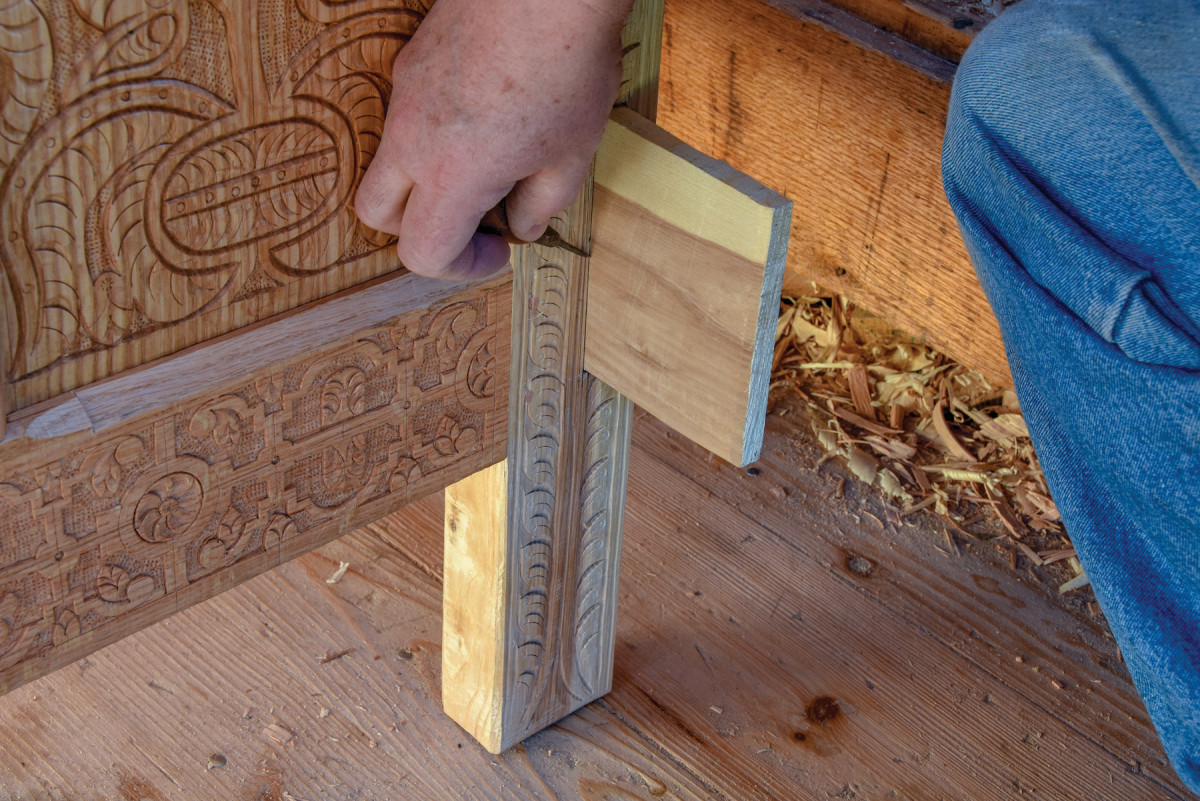
4. Make sure the shoulders are tight, then scribe this line on both faces of the tenon.
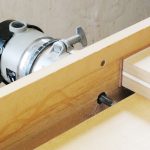
In some cases, I drive the wedge down along the post, through the height of the tenon. With this tenon being only 3/4” thick, I decided to drive two wedges across the post, through the tenon’s thickness. You may be surprised at how slight a taper is needed to wedge a joint like this.
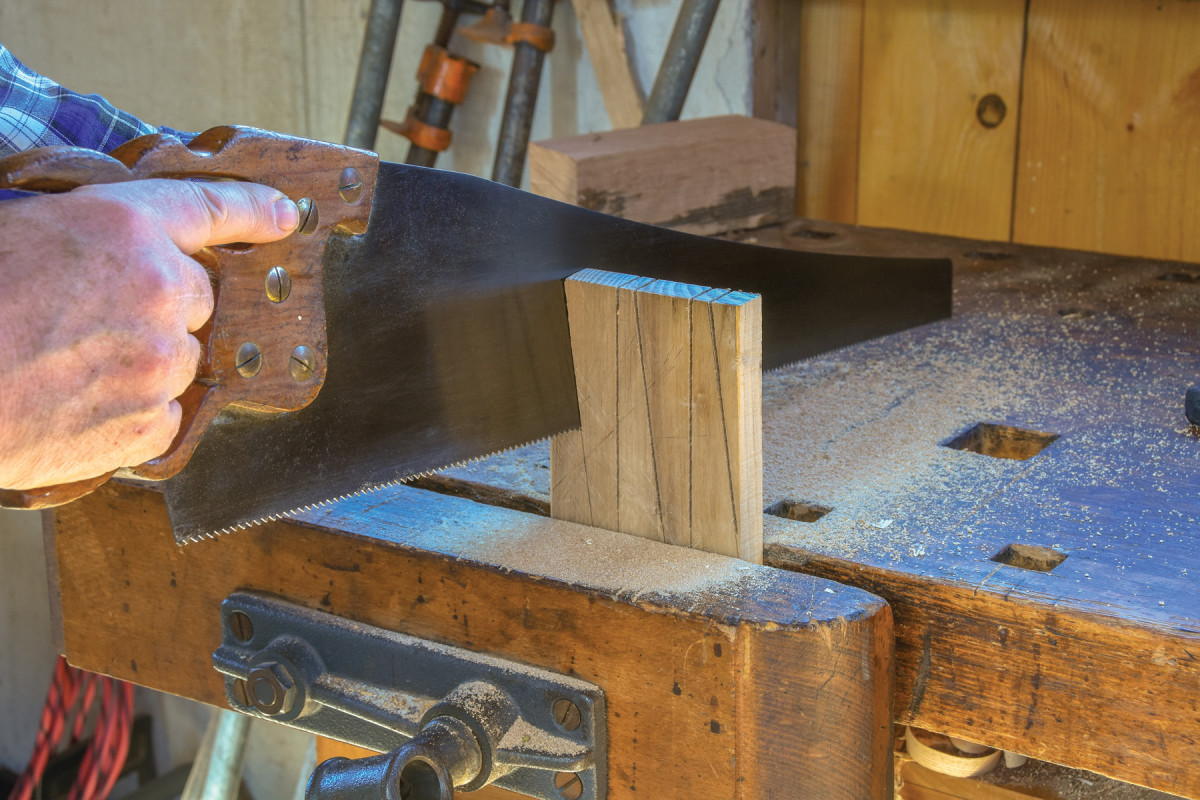
5. Sawing out wedges that are laid out flip-flopped across the width of the blank.
Cutting the wedge-mortises in the tenons requires careful layout. The first (and very important) detail is that the baseline is NOT the line struck during the test-fit. Move it back, toward the tenon’s shoulders. That way the wedge won’t hit this baseline and will bear on the bedpost and the tenon’s end grain. I used an adjustable bevel to mark the wedges’ slope, then dropped lines with a square. Check everything before picking up the tools to make these mortises, as there’s no going back. I bored these mortises from the small side of the taper, then cleaned up with paring chisels.
To make the tenons, I planed a small piece of wood to the desired thickness, then marked out a gang of wedges this way and that across the width. Make them longer than you need them, it’s easy enough to trim after the fact. After sawing them out, plane their edges and try to slip them into the mortises. Aim for a thickness that eases into place, you want the pressure to be on the edges of the wedges, not the faces. Bevel the ends so they don’t chip when driven home. As you test fit the wedges, if one is snug in one joint, try it on another before trimming it. When I like the fit, I mark all the wedges and joints so assembly will go smoothly. They all look the same, but they might not be interchangeable.
Here are some supplies and tools we find essential in our everyday work around the shop. We may receive a commission from sales referred by our links; however, we have carefully selected these products for their usefulness and quality.