


We may receive a commission when you use our affiliate links. However, this does not impact our recommendations.
From Popular Woodworking’s “The Ultimate Router Guide”...
Routers were developed to cut moulded shapes in wood. Although their workshop role has expanded (greatly) during the last century to include joinery and other operations, moulding is still what they do best. They remain the chief woodworking tools for edge and surface “treatments” – cutting decorative shapes.
Two Sides of Grooves Make Pretty Decorative Panels
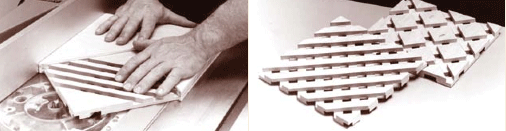 |
| Cut a set of grooves in a board that are parallel to each other. Make each groove a little more than half as deep as the board is thick. Then turn the board upside down and cut another set of grooves at an angle to the first set. Where the grooves intersect, they will create openings. The size, shape and spacing of these openings depends on the size, shape and spacing of the grooves. |
Simple Cock Beading
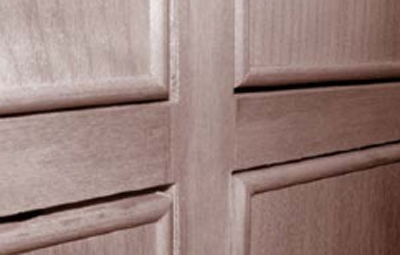 |
| Cock beading is a simple edge detail that can dress up doors, drawers and much more. But cutting this detail on a door panel can be a lot of work. The simple option is to run a quantity of 1⁄8″ hardwood through your router table adding a bullnose detail to one edge. Then, simply glue this edging to your panel. Presto – simple cock beading. |
Keep That Piece Clamped Down Tight
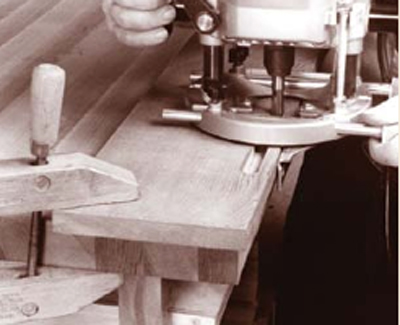 |
| Whenever you’re routing something, make sure that either your work-piece or your router is stable and secure – they can’t both move. If you choose to move the router across the work, clamp the work to your bench. If a clamp interferes with the operation, rout up to it and turn the router off. Then move the clamp to an area on the workpiece that you’ve already cut and resume routing. |
This is an excerpt from “The Ultimate Router Guide.” Now available on ShopWoodworking.com for paperback and ebook.
Layers Can Help if You Want Complex Mouldings
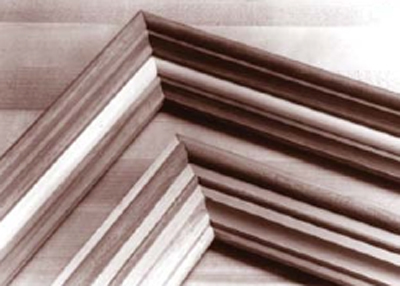 |
| Instead of making multiple passes to create a complex moulding, just glue up several simpler shapes. The easiest way to do this is to “laminate” the shapes – or build them up in layers. But you can also “join” the shapes by cutting dados, rabbets or grooves in the moulding stock, then glue smaller strips of wood in these joints. The strips that you glue together don’t have to be the same species – you can use contrasting wood, if you want. |
A Bit of Advice — These bits are great when using your router to make edge & surface treatments.
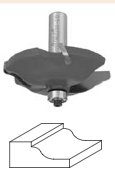 Panel-raising Bit: This bit combines two small wings (which cut downward to shear the top edge) with two large wings (which shear upward for a smooth finish). It’s ideal for creating decorative tops and should be used in a router table. |
 Beading Bit: These bits add an attractive profile to furniture and millwork. They can be used to cut all kinds of material – plywood, hardwood and softwood. They’re also available with steel pilots or bearings for similar designs. |
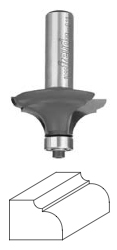 Table Top Bit: This bit, designed with sharp curves, helps you generate a strong, uplifting edge, creating a bold effect on all kinds of furniture. |
 This is an excerpt from “The Ultimate Router Guide.” Now available on ShopWoodworking.com for paperback and ebook.
Here are some supplies and tools we find essential in our everyday work around the shop. We may receive a commission from sales referred by our links; however, we have carefully selected these products for their usefulness and quality.


