We may receive a commission when you use our affiliate links. However, this does not impact our recommendations.
Once we recognized the structural problems, we knew what we should do: put glue in the loose joints and pull the parts back together. The question was how to do it in the most reasonable way in light of the fact that Sharon did not have clamps long enough to span the height of the carcass, so we had to think of other alternatives.
The Glue: In an ideal world Sharon should have clean all residues of the old glue before brushing in new glue and clamming the case. But this was impossible since he could (and should not) take the piece apart. I told Sharon that since the old glue (hide glue) is a water based glue, and since the new PVA glues (yellow glue) are also water based, he could skip the tedious task of scraping old hide glue crystallization. I informed him that what will most likely happen is that water in the yellow glue will partially dissolve and react with the old hide-glue and the hide glue/yellow glue collaboration could do the job of providing sufficient adhesion.
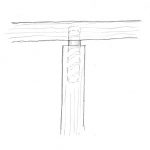
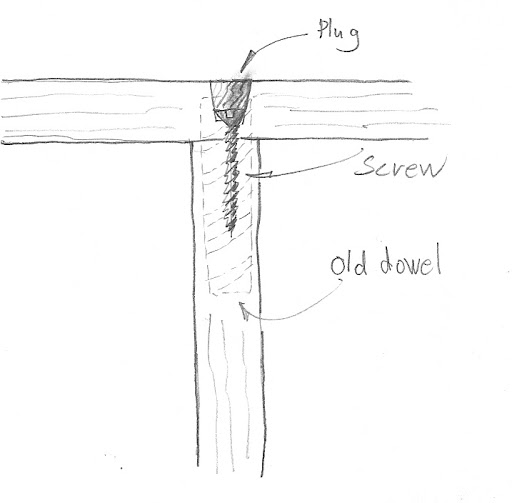
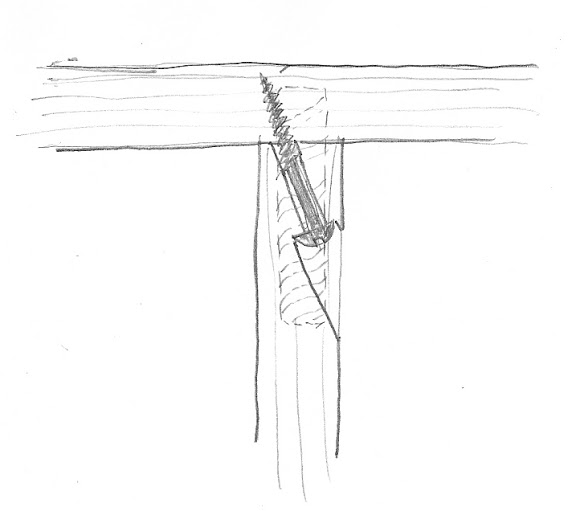
Once we concluded what to do with the glue, we could think about ways to pull the parts together. The simplest way to do that is to use wood screws, hiding their heads with plugs. If we do not want to have the plug be visible on the pieces top, we can pull the divider to the top with some screws from underneath. We can instal a strip of wood and connect it both the the divider and to the top. We can also drill screw holes in a diagonal and pass a screw from the divider to the top via the through hole.
Here are the three screw-related options as drawn by me.
Plug and screw coming from the top and anchors in the divider. One remark about my drawings. I show the old dowel in dashed line for clarification purposes. It is important to make sure that the screws will not be driven into old dowel but rather into another areas on the divider.
Using a wood-strip and screws.

Puling the parts together with a screw in a diagonal hole.
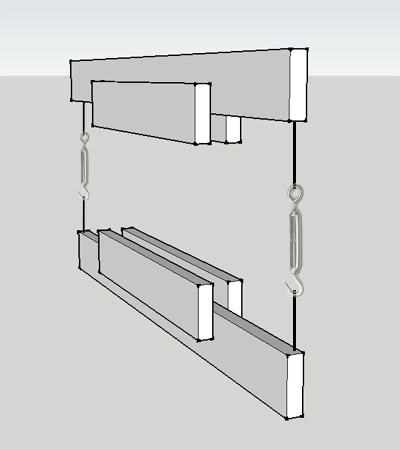
Although Sharon could have used one of the above screw techniques, he decided to vote against it and device a clamping contraption that will substitute for the clamps that he does have. We knew that we need to spread the clamping force evenly on the surfaces of the top, while at the same time to dodge crashing the pieces bottom apron. Sharon sent me a 3D drawing that he did using google SketchUp. In the 3D rendering you can see the dedicated beams that he planed on building for this job.
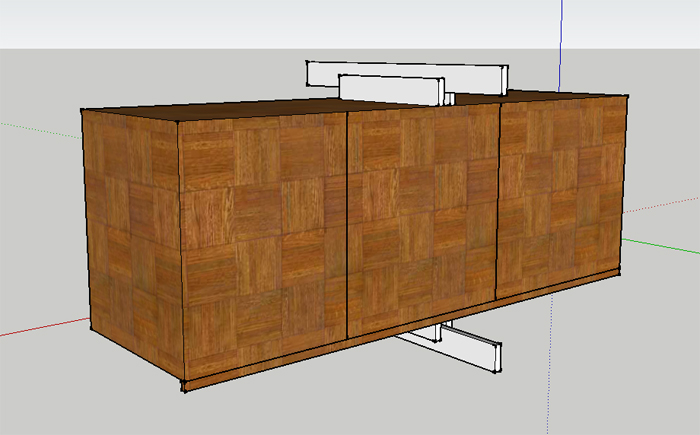
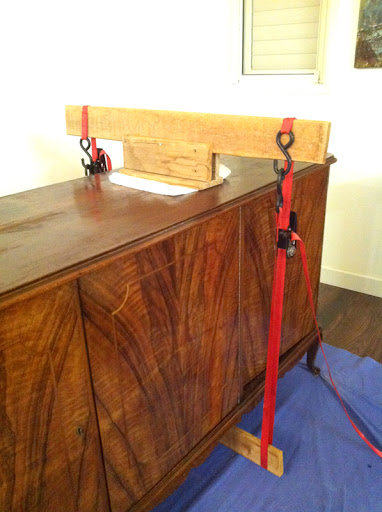
But, how to pull the beams together when you don't have the adequate clamps? There are simple alternatives: a ratcheted band clamp or tensioning Turnbuckles.
Here is the way to clamp the piece using steel cables and two Turnbuckles.
Sharon decided to go with the ratcheted band clamp and successfully re-glue the divider and the top together.
Next time I will talk about refinishing techniques for old furniture whose finish is not in such a bad shape.
Here are some supplies and tools we find essential in our everyday work around the shop. We may receive a commission from sales referred by our links; however, we have carefully selected these products for their usefulness and quality.


