


We may receive a commission when you use our affiliate links. However, this does not impact our recommendations.
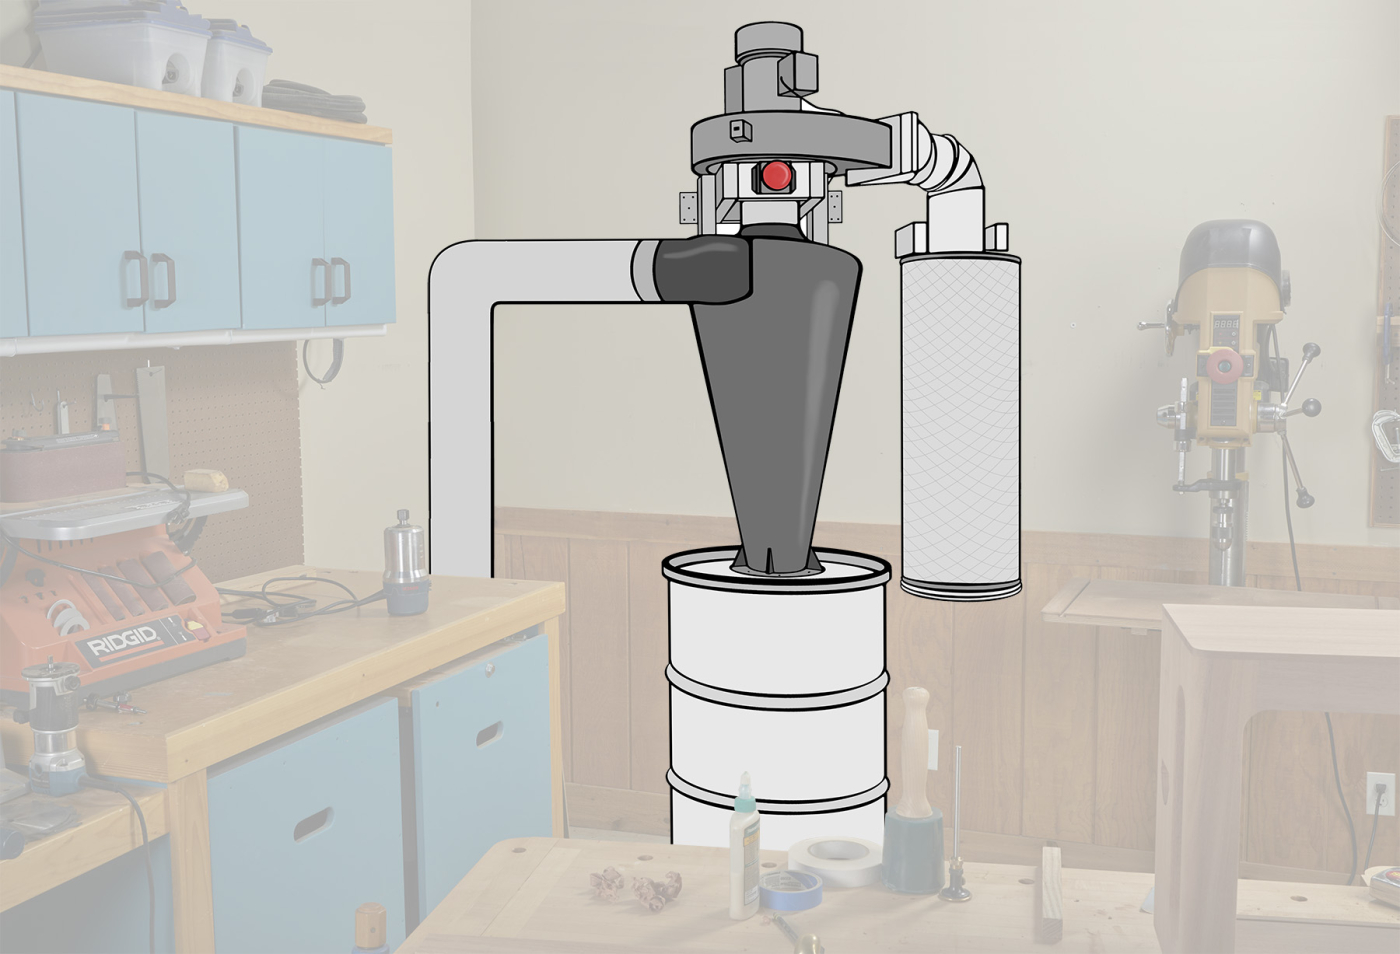
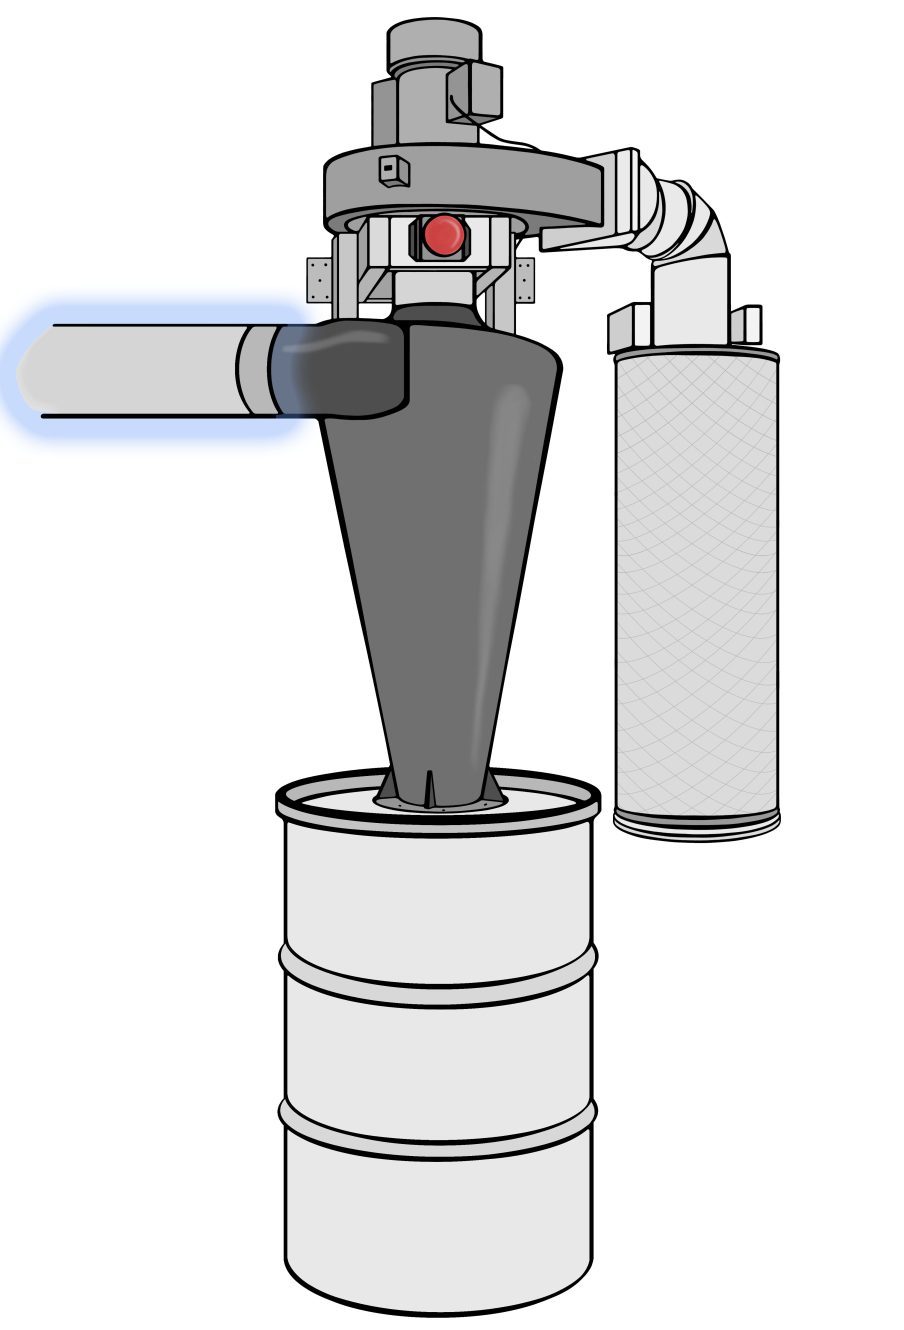
In the world of home-shop dust collection, dust collectors come in (basically) two flavors — single stage and two stage systems. A single stage system is what most of us are familiar with. These are the dust collectors that wheel around the shop and have a blower motor connected to a collection area. The collection area (usually) is a bag hanging below a fabric filter. As the blower motor collects dust, the air (and dust) is pushed into the collection area. The air is exhausted through the bag (or filter), and the dust is dropped into the bag via gravity. These are common style dust collectors, especially in the home-shop market. Unfortunately, they’re not terribly efficient. The more efficient style is the two-stage dust collector. Here, the blower pulls air through some form of separator. This separator (such as the illustration below and photo above) forms a vortex that speeds the air up, and creates a high-low pressure differential. What this means is that the heaviest dust particles drop down into the collection bin (below the separator) while the air and fine dust spins around and exits through a filter. This style of separator leads to much better suction, and more efficient dust collection. While these styles of dust collectors are becoming more and more common (such as the Oneida Supercell), most home shops already have a single stage dust collector. But, that doesn’t mean you can’t upgrade your single stage dust collector to a more efficient two-stage collector. Scroll on to read how.
Upgrade the Filter
The first thing people should look at when improving their dust collector is the filter. You want to filter at least 99% of the particulate within the 1-10 micrometer range, as industrial hygienists consider this to be the most difficult for the lungs to expunge.
While some dust collectors will come right from the factory with 5-10 micron filter bag, a large number allow bigger particles through, even up to 30 microns. Not only are most stock bags inefficient at filtering, they also tend to be inefficiently sized. A properly sized filter provides the correct air-to-cloth ratio, which allows most of the dust that enters to slow down enough to be entrapped by the filter. The ratio is determined by the collector’s rated air output (calculated in cubic feet per minute, or CFM) and the filter’s surface area. A rough guideline for the air-to-filter ratio is one square foot for every 12 CFM. Not only will this provide optimal filtration, but it will lessen air resistance created from dust building up on the filter media.
Keep in mind that a 1000 CFM-rated collector’s actual operating range may be 200-800 CFM due to fan restriction from port size, ducting diameter and length, flexhose, and/or a clogged filter. Undersized filters and clogged filters are the primary reasons for low suction/CFM at the emission source, which in turn leads to dust being lost into the shop air.
So how can you fix an inadequate filter? Well, there are two ways: a larger filter bag, or upgrading to a cartridge filter.
A larger bag lowers the can velocity, because it has more volume, which allows the air to slow down before it contacts the filter. A filter will operate most efficiently if there’s a large difference between the collector’s can velocity and its fan outlet velocity (the air speed at the impeller). When that’s the case, the heavier sawdust will fall out of the airstream, and the fine dust that’s left won’t be densely packed against the filter’s surface. This fine dust can later be dislodged by shaking or using reverse air on the filter.
Unlike a cyclone—where only extremely fine material passes through the filter—a single stage system (depending on the design) won’t separate the finer dust as effectively. Only one third of the fine dust will be passed to the filter, while only the heaviest sawdust is separated out.
Like a larger filter bag, a cartridge-style pleated filter is more effective than a typical OEM filter bag, because the pleated filter’s surface area is much larger. This offers several advantages. The more surface area available, the more particles retained, the better the filtration, and the longer it will take for the filter to clog. This in turn reduces how frequently it needs to be cleaned. Over the long run, a pleated cartridge filter will keep your shop cleaner and require less upkeep on your part, a definite win-win.
Add Mechanical Separation
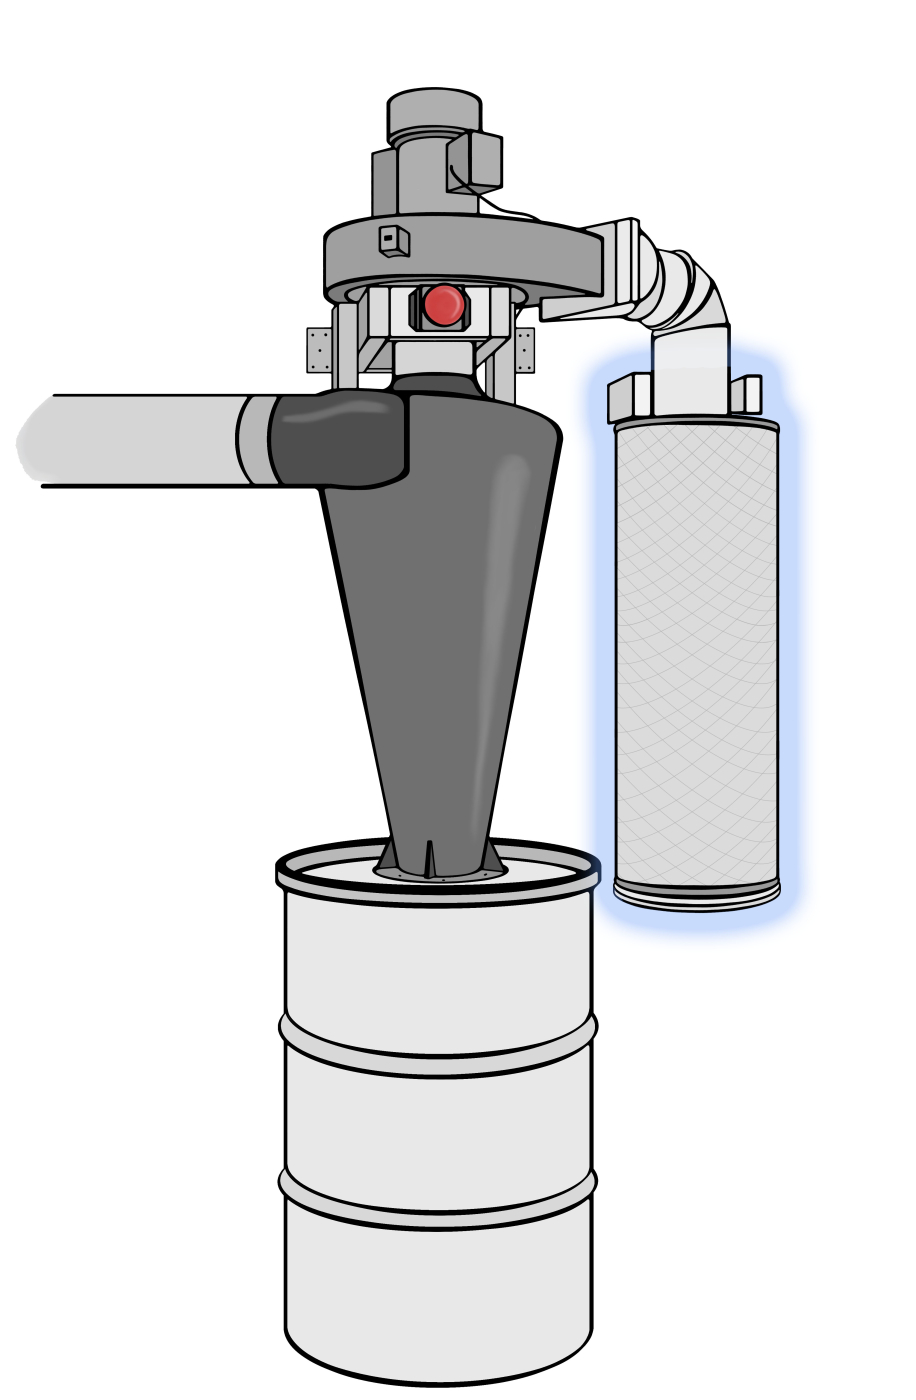
If your filter is working as it should, but still you want better performance, it’s time to look at a mechanical dust separator (commonly known as dust cyclones). As the name implies, it’s used to separate larger particles from fine ones. The larger particles then drop down into the dust collection bin, falling out of the airstream before reaching the filter. If that sentence sounds familiar, it’s because I used the same description for how a better filter improves performance. Basically, as soon as the dust reaches the collector, you want the largest particles to enter the bin as quickly as possible, allowing only the smallest particles to reach the filter. This will help to prevent filter clogging and prolong the lifespan of your filter. The better shape your filter is in, the more constant your rate of suction will be.
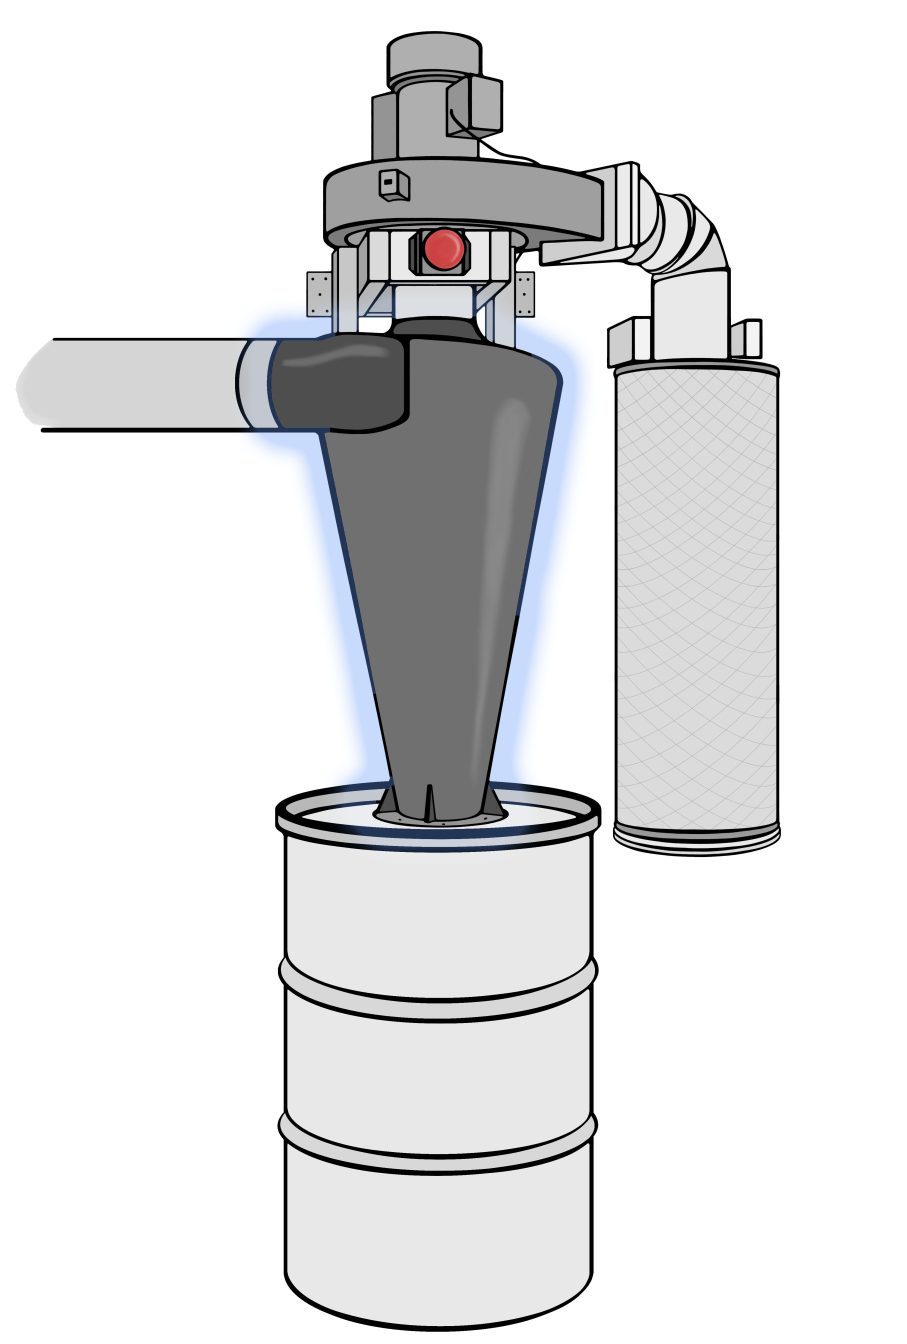
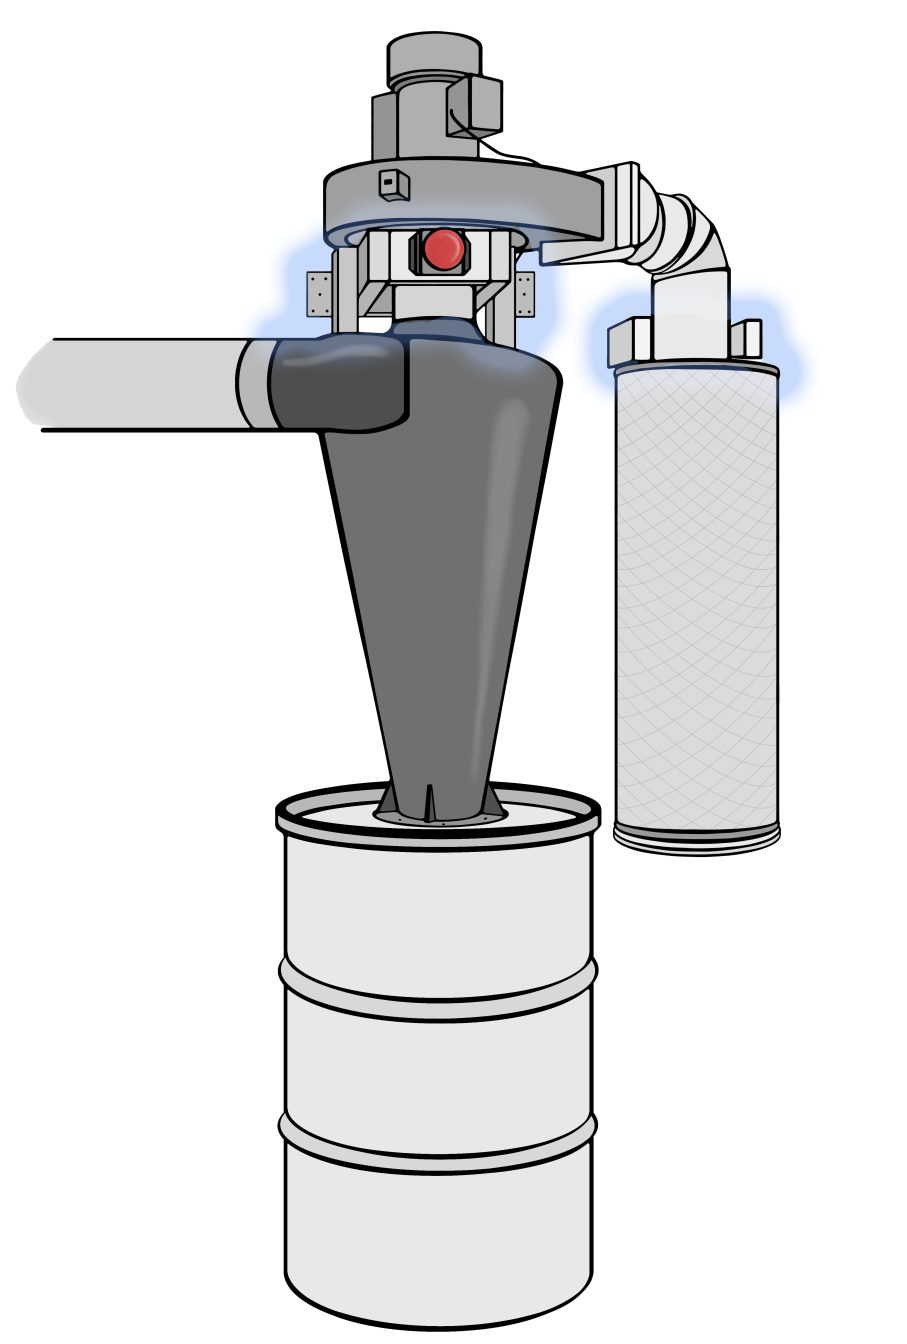
So how does it work? The funnel shape dictates the direction of the air, generating centrifugal force to separate the larger particles from the airstream. At that point, gravity does its part, causing these heavier-than-air particles to drop into the dust receptacle below.
Most mechanical separators isolate 99% of the particulates before they reach the filter. With only a small percent of the finest material passing through, the filter is allowed to breathe. As it does this, the system delivers maximum airflow (CFM) at the source tool, entraining nearly all dust in the collector.
Mount The Dust Collector to the Wall
Mounting your dust collector to the wall isn’t quite the same slam-dunk performance upgrade as our first two tips, but it’s still a worthwhile improvement. Firstly, it frees up floor space in the shop, which is almost always at a premium. It also allows for the installation of hard (as opposed to flexible) runs to all of the tools around your shop. Hard runs reduce drag and allow the collector to run more efficiently. Which leads us to our last improvement:
Inspect Runs and Hoses
When you look at the dust collection lines around your shop, what do you see? Are there lots of straight runs with solid pipe, or are hoses snaked around, over, and under every work surface? While flexible hoses are great for their, well, flexibility, they don’t perform as well as solid lines. Depending on your shop, it might not be feasible to completely eliminate hoses, but assessing your layout and shortening those runs will yield better performance. Don’t forget to look at your solid runs as well. Each bend in the pipe negatively impacts airflow. So streamlining your ductwork will help with overall performance.
Bonus tip: Blast Gates
All the efficiency upgrades in the world won’t help if your dust collector is drawing air from tools not being used. It’s inexpensive to swap out hoses or cap lines not currently in use, but outfitting your shop with blast gates is far more convenient in the long run. It’s generally recommended to have the blast gates located closer to the main line, instead of the tool itself. A good rule of thumb would be installing a gate at the location of each y-fitting that splits off of the main. You can even make your own blast gates for less than buying them new.
By utilizing all of these upgrades, you can multiply the performance of your single stage machine.
Here are some supplies and tools we find essential in our everyday work around the shop. We may receive a commission from sales referred by our links; however, we have carefully selected these products for their usefulness and quality.


Personally, I ditched the entire bag/filter debate by running my outflow, outdoors!
I just downgraded from my 1800cfm dual stage system to a much smaller 600cfm single stage. And I downsized my 6in sch40 pipe to 4 inch drainage piping (as it was ½ the price of the 4in sch40). I already had several rubberized fitting sleeves, and was able to set up everything properly.
But my biggest difference came from dumping the exhaust out through the wall. It saved space, and is guaranteed to be better for my lungs as the 0.01% that filters can’t catch, is now outdoors.
Now, at ½ the size and “Strength” I’m actually getting every bit of functionality my old, larger, hotter and heavier collector had.
It took me a while to find a decent single stage style though. I tried several. The HF one, it had gone downhill and now has serious overheating issues (135f-155f) and had no power. The “Blue” one that claimed 2x more cfm than others (and was $600+) and a few others. In the end, I was cycling through different collectors on Amazon… and to my surprise, I ended up going with my nemesis… WEN. They had a new model out, and I figured for $200, if it wasn’t great, I’d just keep cycling the guantlet.
Once I got the motor style chosen, I mounted it directly to a 55gal steel drum lid via two, 45° fittings that went through the lid (I like two 45° opposed to using one 90° as it’s not so drastic a bend, and allows me to get a better cyclone action inside the drum. I mounted them in a 12 o’clock (dust collector) and 6 o’clock (intake fitting) position on the lid) that had an inside coating of Teflon (that I scored for $10!!!) And had mounted the cyclonic piping to the lid as well. Then I used a 5in dryer exhaust port that I mounted to the wall outside the garage, and ran a 5in flexible AC exhaust to that from my outflow port on my dust collector.
So far, I’m collecting almost 100% of my dust in the barrel. I ran it and with my router table, and orbital sander, that my wife used, and I seen no dust escaping the system from outside where I put the vent. I thought something was wrong. But it already has proven to be far more efficient than I expected… and plenty of cfm volume to pull from my planer, and even my miter saw station ,which I figured might need it’s own devoted unit in order to get all the dust from my enclosure around the Bosch. (Sigh… oh Bosch, I hope all the drama gets resolved, and you don’t leave the NA tool market.)
So… all in all, I got a lot better functioning from a smaller, weaker dust collection system than I could’ve ever expected. The only downfall is when using anything under 4″. The 2½” adapters, and fittings are getting what I had hoped, so I’m modifying those tools the have secondary dust collection ports. That way, I can run a splitter on a 4″ that I can hook two, 2½” hoses and fitting to. (Like my router table. I use 2 pieces of 2040 (2in x 4in) extrusion olas my main fence, and theyre hollow, So i made an adapter that allows my to attach a 2½” fitting to the end on the left and right outside end, and it pullsdust directly through the hollow extrusion, to each side. I still have some tweaking to do on it though.)
TL;DR … run your outflow, through the wall, and outside. If you have a good cyclonic system, only super fine particles will escape, and I’m not even able to see the particles if they are making out if the cyclone. My duct collector fan blade is still spotless and drum is filling up nicely. I just need to find a bag that I can put in it, to make emptying it easier.
When you only have 1 functioning arm/leg you have to adapt.