


We may receive a commission when you use our affiliate links. However, this does not impact our recommendations.
A welded base provides tons of strength for a versatile platform.
Project #2003 • Skill Level:Intermediate • Time: 2 days • Cost: $250
My shop is a 12×24, one-car garage. I’ve fought (myself mostly) to optimize every square foot of that space to create a shop I enjoy spending time in and doesn’t leave me perpetually frustrated. I’ve worked in this space for a little over a year and recently made a major layout change with a new miter station.
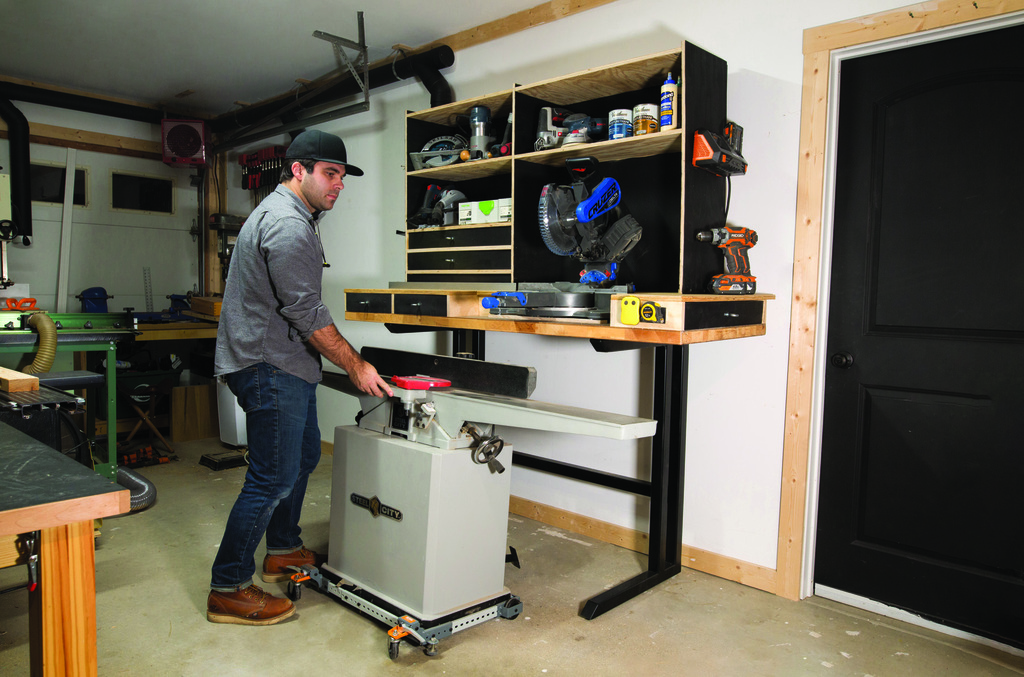
The purpose of the change was to find a place on one of the long walls, preferably in the middle of my shop, for my jointer. It was the last large power tool that didn’t have a home. For the last year, I’ve parked it against the garage door, and I had to drag it out to the middle of the shop when I needed a decent amount of infeed and outfeed space. That process wasn’t awful, but one that I dreaded enough that I wasn’t using my jointer for quick tasks because of the hassle. My solution was to park the jointer under my miter station.
To do this, I designed a cantilevered stand that would allow my jointer to slide under the miter station for storage and back out from under the miter station–right into the long walking path through my shop for use. I have at least 8′ of infeed and outfeed by placing the jointer in this location. After researching available options for cantilevered worktables, I decided to build my own.
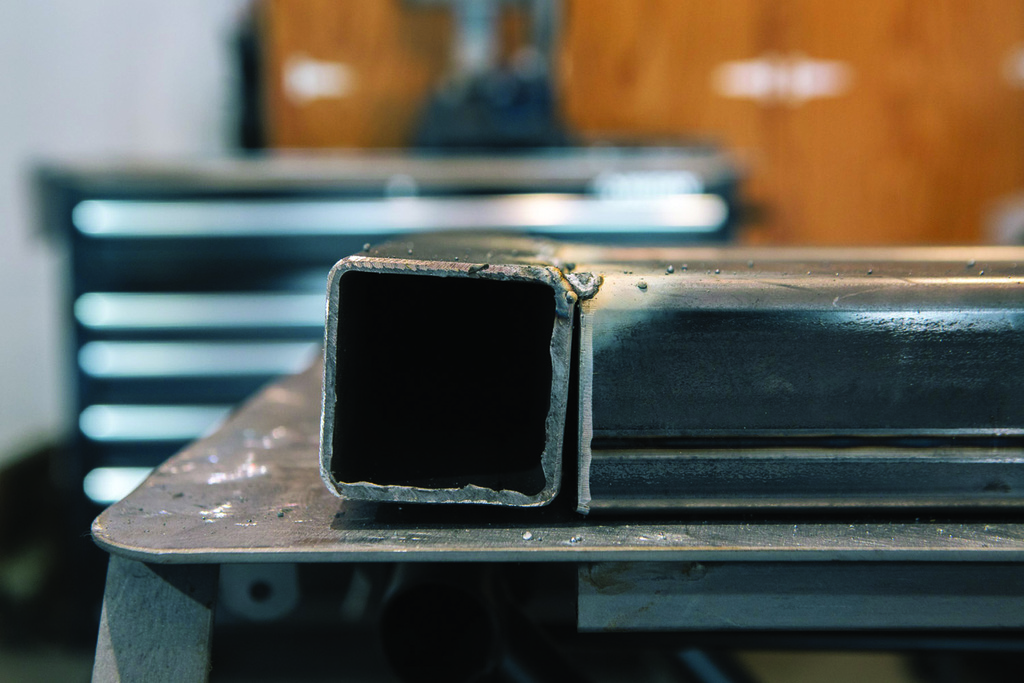
I sketched out the design for the stand in a few minutes based on some measurements of my jointer and the miter station top that I already had on hand. I wouldn’t have felt comfortable building the frame in the style that I wanted with wood stock that was less than 3″x3″, and that would have made it very bulky (and taken up more space). So I made a quick decision to use tube steel. I’ve used 2″x2″ before and liked the aesthetic of it. Also, I tend to use 1/8″ wall material in my shop because I run flux core wire in my MIG setup. That gives the tube enough meat that I won’t easily blow through the material, and there’s plenty of material to feather in any welds that need extra grinding. Plus, a shop project is the perfect time to practice my welding skills.
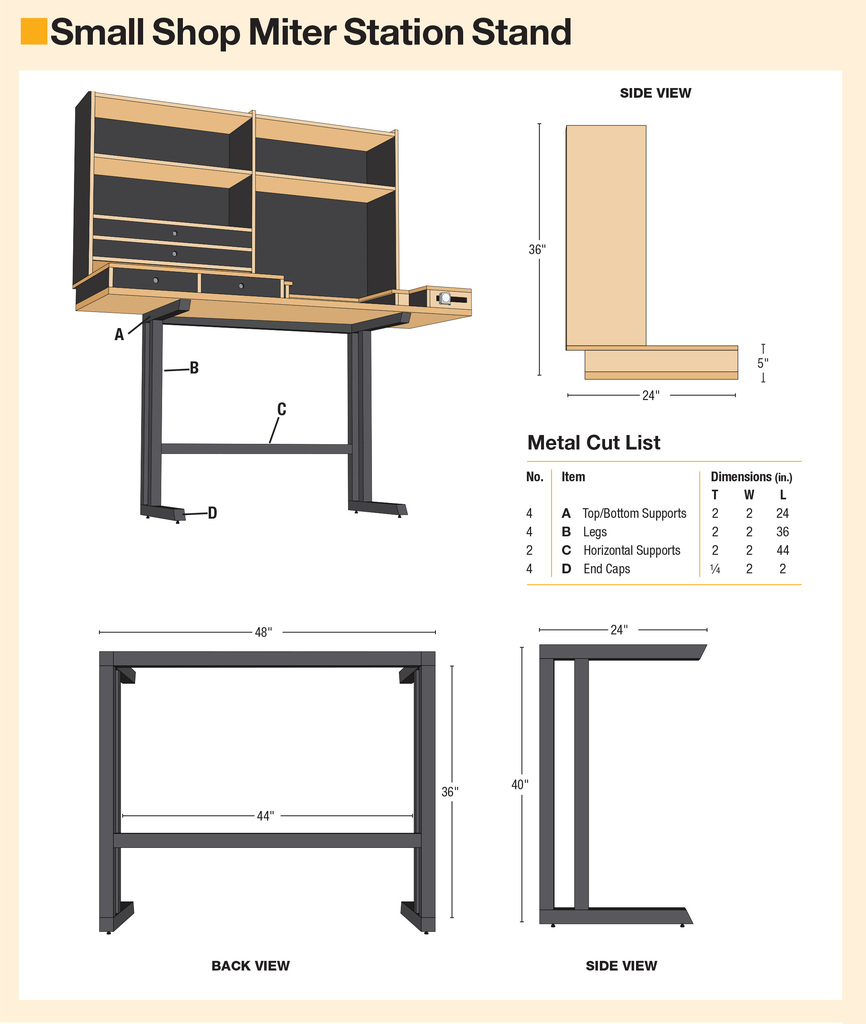
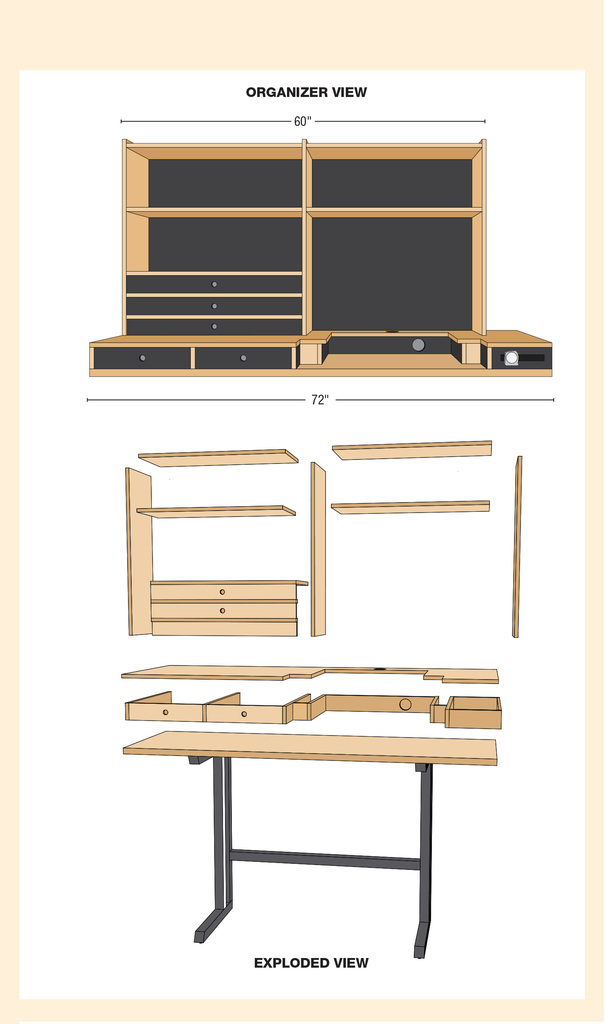
Exploded view and cut list at bottom of article.
Totally Tubular Frame
Cantilevered frames are typically very simple. They’re essentially a regular table with the front legs pushed back toward the rear legs. Some forgo the four “legs” and will use a wide piece of material in their place. Either way, the front of the table acts as a lever upon the legs, so everything must be robust. I’ve seen commercially available cantilevered tables for as low as $500 and for more than $2,000. I am happy to report that the steel for this project clocked in at just north of $125. A bargain for a custom tool stand that will accommodate my needs perfectly. In my neck of the woods, we have several metal suppliers that will sell to individuals and will provide cutting services for a small charge. Online vendors will do the same, but shipping can be pricey.
For this project, I purchased two full pieces of 2″x2″ tube with a 1/8″ wall thickness. From the supplier, a full piece of that stock is 24′ and for this project, I elected to have them cut all of the stock to 48″ pieces (so I could pick it up on my lunch break in my car). You’ll also need some 2″ wide flat stock—I had some leftover from my last build.
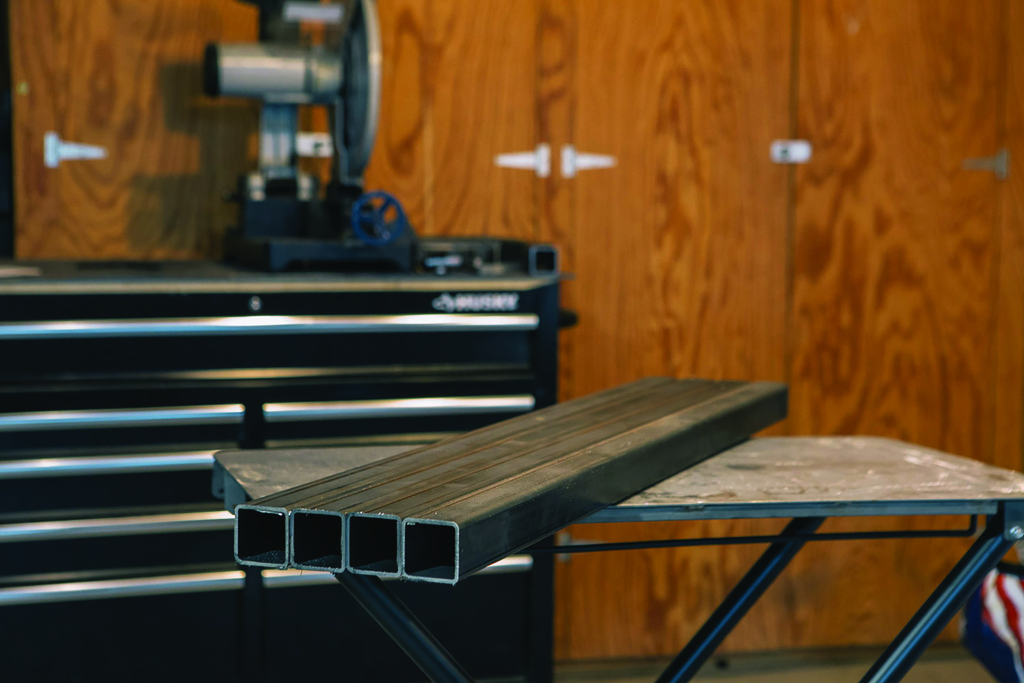
I had my stock rough cut to 48″ sections. Convenient for transport and a reasonable rough size for this project.
Start with the Feet
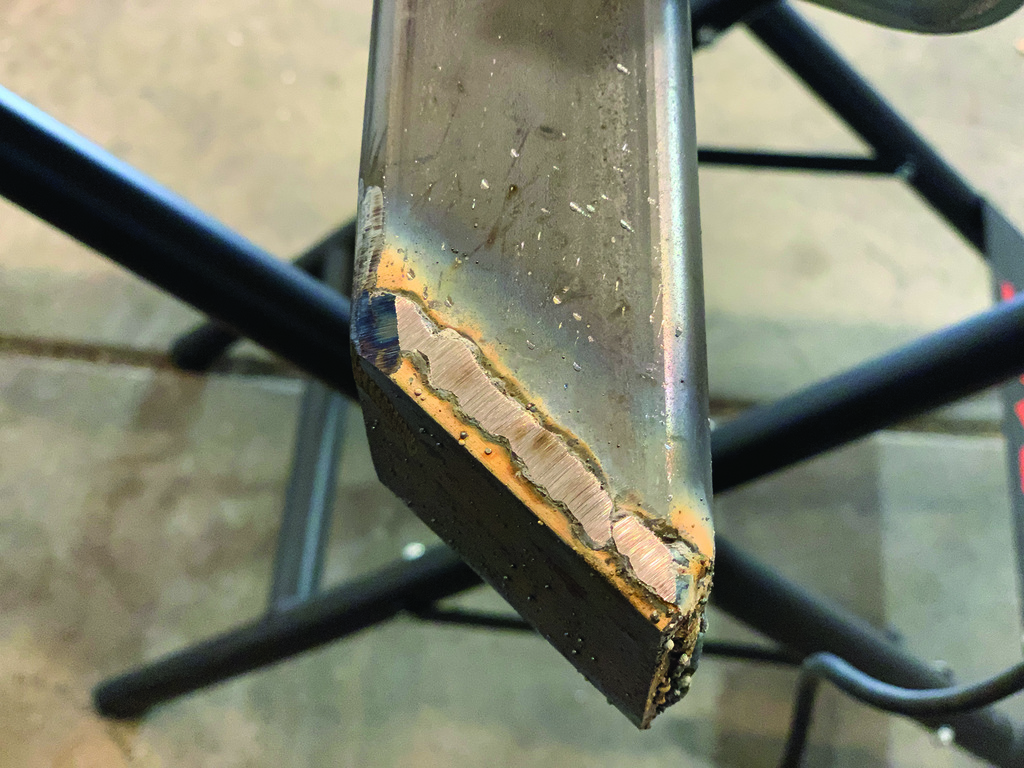
The bottom feet and the horizontal top supports receive a 45˚ cap on the front end for aesthetic purposes. The idea is to relieve some of the chunkiness of the tube frame. The top supports and the feet are both 24″ long, so you should fit all 4 parts into 2 sticks of precut, 48″ stock. I made the angled cut on my cold cut miter saw and then cut flat stock for the caps to 21/2″ long.
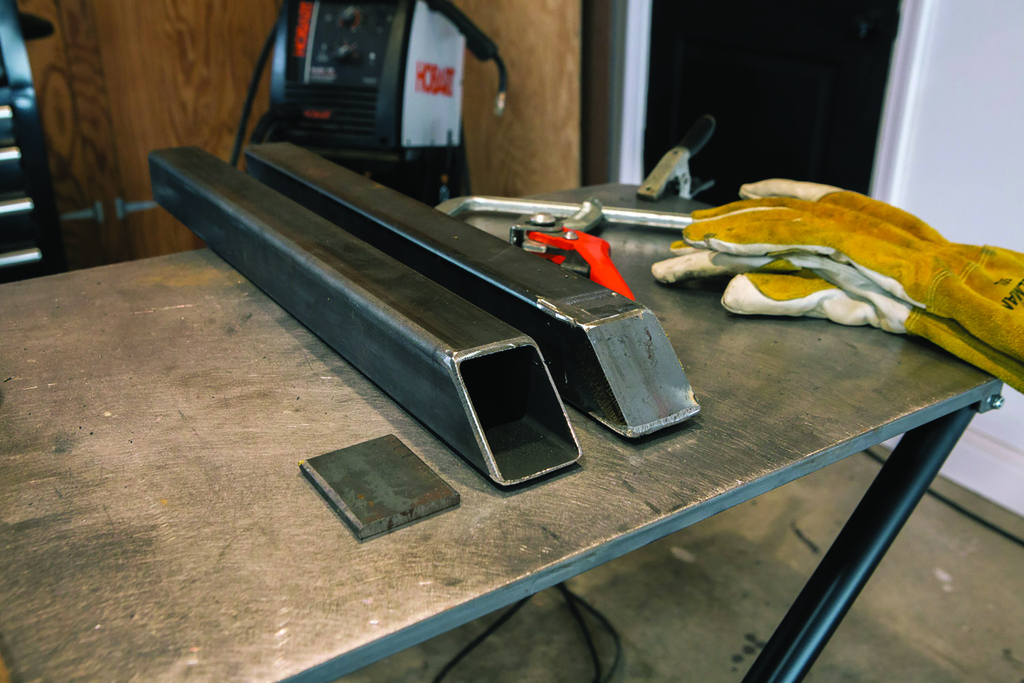
Capping the square tube isn’t necessary, but it looks much nicer. Here’s the cap, the part with the 45° cut and the finished product.
Grind down every edge that will receive weld. Think of the caps as sitting upon the face of the angled cut. Once the cap is welded on, there will be a considerable amount of grinding to bring everything flush. Had I cut my cap to fit inside the tube, I’d have less grinding to contend with. But with the 2″ flat stock on hand, I decided to put it to use.
Tack the top corners of the cap and then quickly tack the bottom two corners. If you allow the top tacks to cool before the bottom of the cap is tacked on the cap will pull up as the tack welds contract. This is an issue we’ll address more thoroughly while assembling the frame.
While I was welding all four caps on, I found that a thick bead was best for the top and bottom of the cap, so as to compensate for the angled nature of those surfaces. The sides of the cap need a much smaller bead, as there isn’t much room for anything else. Grind down the welds, but be mindful of exactly what you are grinding.
It’s easy to go overboard when grinding welds. Once the weld is ground flat, there’s a tendency to grind surrounding areas and your part will look bad once the paint is applied.

Here I’m working the bead down until its flush with the tube.
It’s easy to get carried away and to attempt to make everything smooth, only to find out you changed the shape of the whole front of the tube. Focus your grinding on the bead itself and work it down until you are essentially flush with the surface of the tube. Then you can gently smooth everything together.
Tap Your Levelers
When you start working with metal, you’ll find that drilling and tapping is a really handy skill to have. For the leveling feet, I am using standard 1/4″x20 bolts–nothing fancy. Taps are paired with a specific drill size. In this case, a #7 drill. The closest drill bit size to this is 13/64″, 0.002″ larger than a #7, but it will work in a pinch (especially in a non-critical application like this). When drilling your pilot hole for the tap, make certain you’re drilling as close to 90˚ to the workpiece as possible. A drill press is ideal, but I did it with a hand drill.
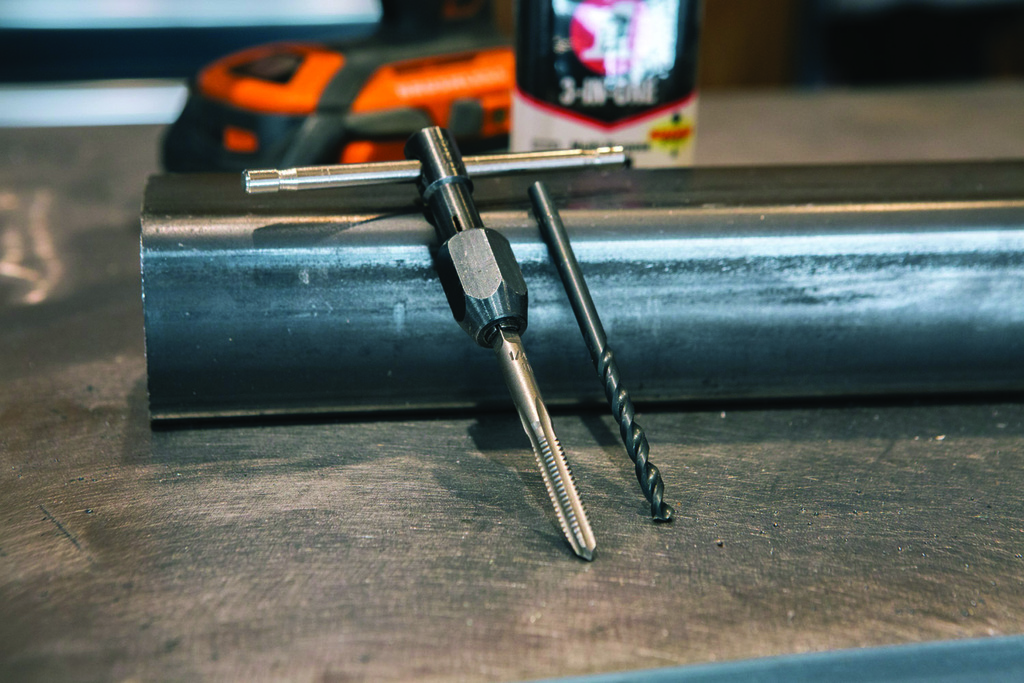
A 1/4″x20 tap and #7 drill bit. These are often sold as a pair, but if you lose the bit, you can use a 13/64″ bit in place of the #7.
Drilling holes in metal tube is something you’ll develop a feel for. I mark my location with a center punch because unlike drilling in wood, your bit will wander before it engages with the material. Once you are fully engaged with the drill bit, you can progress quickly, but there will be feedback in the hand drill as the bit nears the backside of the tube. It’ll almost feel like the material starts to give and that’s when I back off of the downward pressure and punch through slowly.
With the hole drilled, you can start tapping. I add a drop of oil to the tip of the tap and start tapping slowly. The tip of the tap has a small amount of cutting surface, widening as you move deeper into the tap. Keep the tap as perpendicular to the work as possible. It’s easy to allow the tap to pull to one side and create threads that are off of 90˚.
Tapping by hand is slow, but there’s less chance of the tap breaking. Taps are brittle and a pain to remove if you break it in the hole mid-cut. Once you get some experience, you can run a tap in hand drill, but that comes with time.
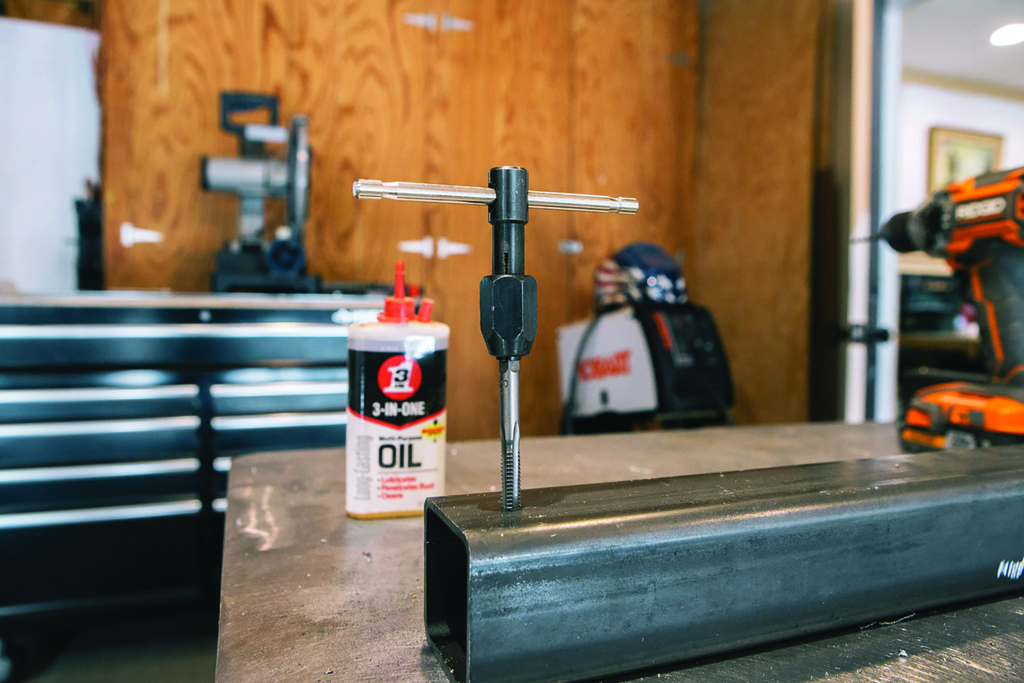
When running the tap through the pilot hole, make sure to break the chips every turn (at least). A short counterclockwise movement will cause the chip forms on the cutting edge of the tap to break off.
Leg Assembly
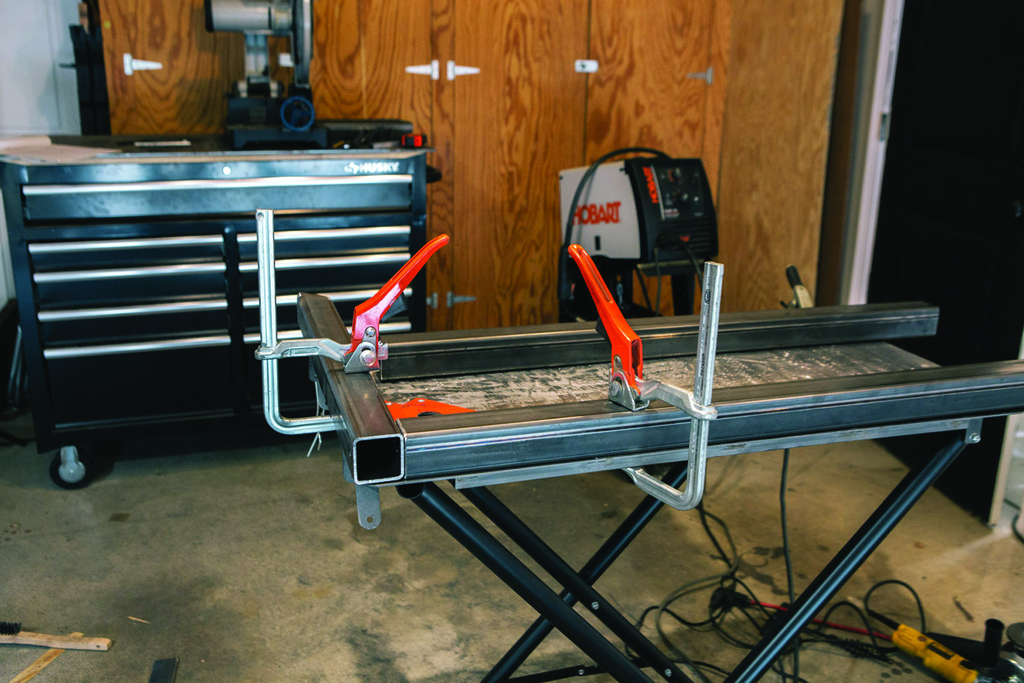
Cut the next four pieces of your leg assembly, two 36″ sections for each side. I work on a small folding welding table, and this project just about maxed out its capacity. If your work table is flat, you can clamp the feet (or the top supports, depending on which end you’d like to start with) and ensure everything is square. I really appreciate the quick action of the Bessey lever clamps for this work, there’s very little metal in their construction and they’re bite is ridiculously powerful. Once engaged, your work isn’t going anywhere.
Tack each corner where the legs and supports meet. I once heard that you can think of this process akin to tightening lug nuts. You want to move around the work in a star pattern. If you tack everything on one side, you’ll end up warping the frame and you’ll have to grind every tack off and start over.
I did not cap the back of the feet and the top supports. These will never be seen when the miter stand is backed against a wall.
A tack weld will pull as it cools. Here I am demonstrating what will happen if you don’t tack your part in the correct order or use strong clamps.
A full weld is not necessary on every single edge. For a frame like this, I did not weld inside corners. This gives a very clean corner and you’re really not jeopardizing the strength of the stand in this application.
Once you have each assembly tacked together, you’re ready to grind down all the welds on each of the legs. Follow the same process as before, you may need to feather the grind into the radius on the side of the tube to achieve a clean look.
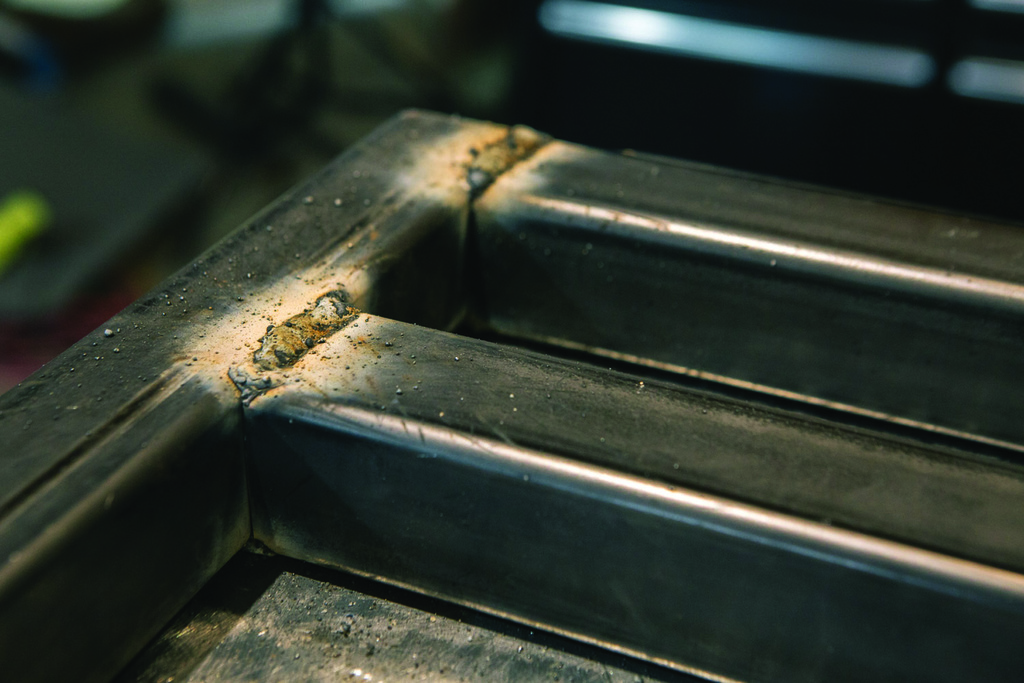
Avoiding inside corners is one way to save time and create a clean looking joint. These welds haven’t had the flux chipped off yet, but the inside corners are visible. Carry the bead all the way to the corner.
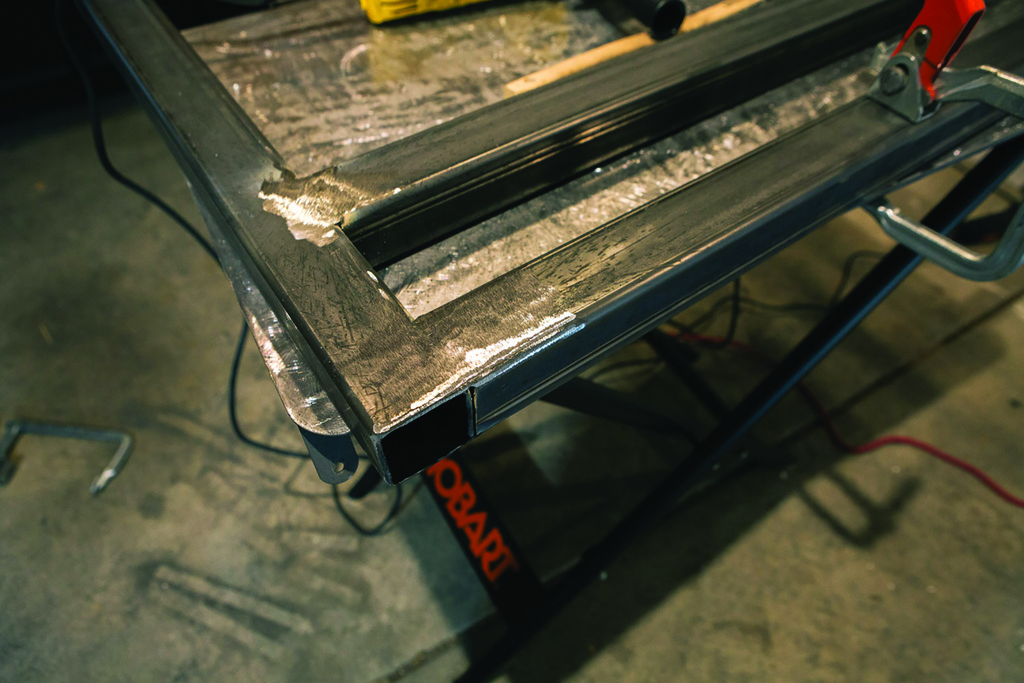
Attention to your feathering and sculpting here will pay dividends when you apply your paint.
Stretchers
It’s unlikely that your welding table will be big enough to bring the final assembly together, time to move to the floor. Make sure you’re working on a single slab, not across an expansion joint if you can help it. When working on the ground, you’ll need to move the ground clamp for your welder to the actual part you are working on.

Both legs standing on their own. Time to weld the stretchers into place.
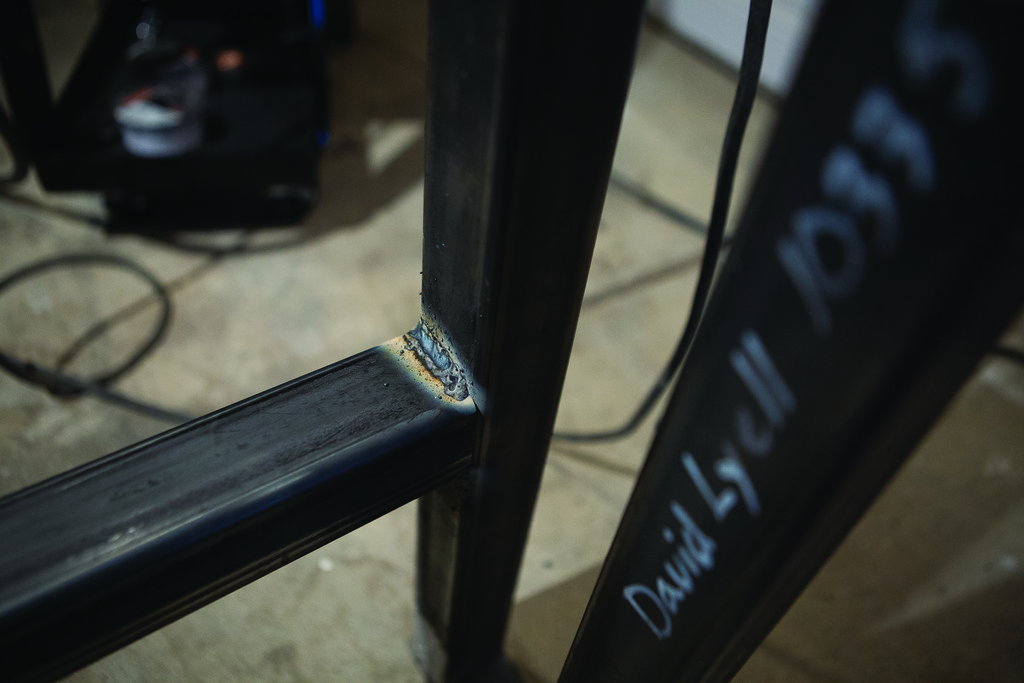
Wrapping your beads across all four sides would be nice, but two full sides are enough for this build.
The upper stretcher sits flush with the top of the stand and is 44″ long. I used a clamp below the stretcher to support the weight while putting the tacks welds on. Again, as long as you have full beads on at least two sides, you’ll be in good shape.
The bottom stretcher sits 12″ off of the bottom of the ground. And will add the final rigidity to the frame that is necessary for the miter station.
Final Touches
Once you’ve degreased the stand, you can spray the frame with a can of spray paint. I find that a simple rattle can lays nicely on the tube steel. Add your 1/4″x20 bolts to the feet and make sure the frame sits level. I drilled straight through the two-inch tube to attach the miter station worktop to the frame. If you have a solid wood benchtop, you may want to create larger holes in the frame to allow for wood movement or weld tabs to the inside of the top supports. Then, you can get to work on kitting out the top.
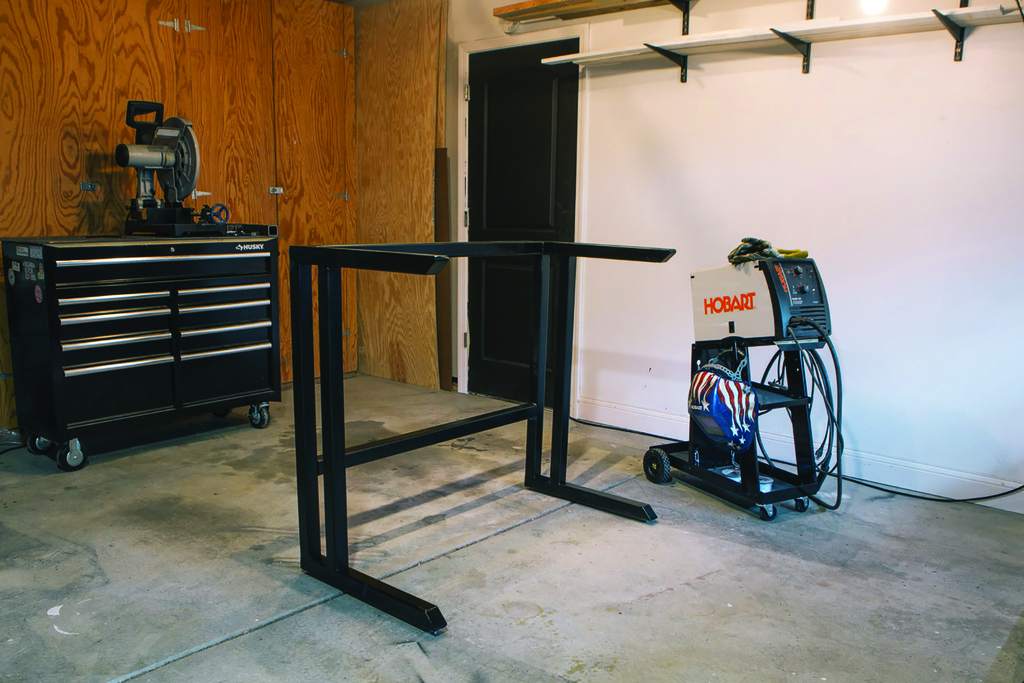
The finished stand, freshly painted. Now it’s time to work on the platform, drawers and whatever other storage you want to include.
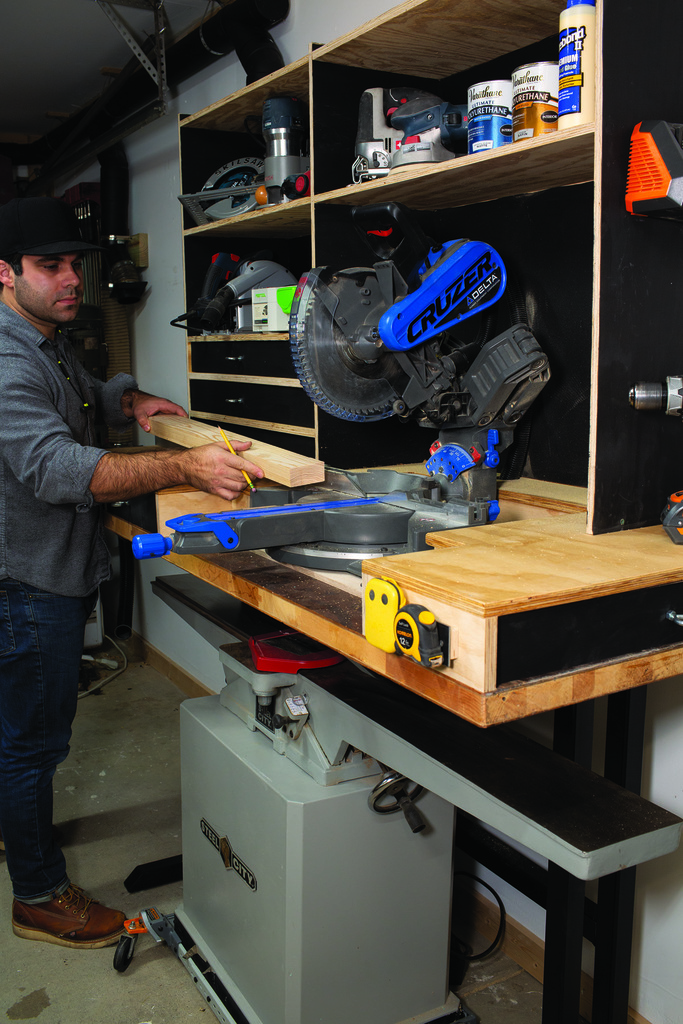
My first iteration of this stand was just my miter saw on a benchtop. Eventually, I added supports on either side, flush with the surface of my miter saw. I noticed empty space in those supports and added drawers. There was a bunch of wasted space behind the miter saw, so I enclosed it, added a couple ports for dust collection, and made a series of shelves.
Like all good shop furniture, it’s just plywood, butt joints and screws. With a sturdy base in place, I packed a surprising amount of utility into this compact spot. And, my jointer takes just a minute to slide out for use.
Planning Your Saw Station
The real key to this miter saw station is the cantilevered steel base. That was what unlocked the design for me —the ability to store a jointer and a miter saw in the same spot, and have them both easy-to-use.
Building the cubbies, drawers and shelves on top of the stand are what took this idea from good to great. It’s also very specific to my needs in the shop, the footprint of my 6″ jointer and my specific miter saw.
So, put some thought into your needs before breaking out your welder. More storage is almost always useful, but pay special attention to what you’re actually going to be storing. Maybe more drawers make sense for you, maybe you only need open shelves. Maybe you want doors on your shelves? And if you change your mind later, removing some screws and making modifications isn’t the end of the world.
Shop projects like these really push my design skills, and often I’m iterating and designing as I go. Maybe that’s why some of my favorite builds are from scrap sheet goods and cutoffs. For a woodworker, building shop furniture is one of the most satisfying activities I’ve found. But if my wife asks, I had to finish this so I could get to building that next piece of furniture for her.
Here are some supplies and tools we find essential in our everyday work around the shop. We may receive a commission from sales referred by our links; however, we have carefully selected these products for their usefulness and quality.


David, your article is well done. Just finished reading through it. I picked up tubing and will start this pretty soon. I see in your first photo that you have dust collection near your stand, have you thought through how you will include this into the saw area of your organizer?
Thanks
Todd
I think that the table is a great idea. The one thing that I would change is to add some other way of adding more thread contact for the 1/4-20 feet. The 1/8″ wall tubing would only provide 2 and 1/2 threads to support the weight of the table, times four of course. Welding a nut or a threaded insert would provide ample support.
That was my first thought also, hardly no threads to support the weight. I have pretty good luck by using two nuts threaded to support, one within the tube and one outside tube. Either one can be welded to tube and holds it in place while nut is tacked