We may receive a commission when you use our affiliate links. However, this does not impact our recommendations.
Keep your guard up. To be safe in the shop, you need three things: guards that work, practical safety devices to assist your cuts and good rules to work by.
I recently ran into an old woodworking friend of mine who had his hand all bandaged up, and the first thing he told me was: “I have new respect for my router table.”
He went on to say that he was doing something that he knew was dangerous, had done it before and was sure he could get away with it again. The workpiece was definitely too short and sure enough it caught and pulled his hand into the cutter. The first thing I asked him was, “Were you using a push stick and was the guard in place?”
His head sank while his eyes looked at the top of his shoes and he uttered an embarrassed “no.” He knew better and he was going to pay the price with a scar for the rest of his life. And even though his fingers were mauled and sore, he knew the accident could have been much, much worse. Throughout the years I have probably heard as many woodworking horror stories as anyone, and I have always found the explanations of what happened to start off one of two ways. Either: “I was doing something stupid,” or “It was late and I had just one more cut.” But I have never, ever had someone tell me that their accident happened because of a properly working guard, or because of a properly functioning safety device or apparatus, or because of proper techniques. But sometimes accidents happen because the user simply chooses the wrong machine. For example, when trying to cut a 1″ x 1″ block of wood in half, the power miter box would be the wrong machine; a scrollsaw or a fine hand dovetail saw would be a much better and safer choice.
Remember the 12″ and 3″ rule from the first chapter of this series. If the work is shorter than 12″, ask yourself if that piece is too small for the capacity of the machine you have chosen. And you should always follow the 3″ rule, which causes you to set a boundary limit of hand clearance of 3″ or more away from any guard, shield, pulley or pinch point.
Machines used in woodworking can be dangerous, particularly when being used improperly or without proper safeguards. Often, machines are asked to do a variety of tasks. Sometimes these tasks are within the limitations of the machine and sometimes they are not. More than likely, when a machine is being asked to do something complicated, such as cutting cove moulding on a table saw, or cutting very small pieces on the band saw, the standard guard will not work and might even make the process more dangerous.
However, it is important that you provide additional safety devices such as guarding and push sticks to establish control and to protect yourself. Guards, whether the original to the machine or homemade, play an enormous role in safety and should always be considered before any cut is made. OSHA explains guards this way: “A guard should prevent employees from contacting the dangerous parts of the machines, and it should be secure. Workers should not be able to easily bypass, remove or otherwise tamper with the guard. In protecting the worker, however, the guard must not create additional hazards, nor prevent the worker from performing the job.”
Although OSHA rules do not apply to hobbyists or the one-man shop, they do set practical and reasonable standards that everyone should follow.
Point of Operation
The point of operation is the place where work is performed on the material. This is where the stock is cut, shaped, bored or formed. Most woodworking machines use a cutting or shearing action that is produced by rotation or reciprocation. These actions, when under power, are dangerous regardless of the speed, size or surface of the moving parts. It is at this point that considerations have to be taken to guard or protect the user from accidental contact.
There are two aspects to consider when it comes to safeguarding machines at the point of operation. The first is to use some type of guard to help cover the cutter and prevent physical contact with the dangerous part of the machine. The second safeguard is to set shop standards such as the 3″ rule. It is important when setting boundaries of awareness such as the 3″ rule to understand when to use safety devices such as push sticks, push blocks, featherboards, combs and special aids to assist in feeding stock through the process.
Types of Machine Guards
There are three types of guards that are used on woodworking machines: fixed, adjustable and self-adjusting.
Fixed guards provide a permanent barrier on a part of a machine. Usually fixed guards are used to cover pulleys and belts, cutterheads on a planer and protect the on/off switch from being accidentally activated. These types of guards require little to no maintenance and provide maximum protection.
Adjustable guards provide a barrier that may be adjusted to facilitate a variety of operations. These guards are set by the operator before the cut is made and they maintain that setting throughout the cut. There are a few downsides to adjustable guards in that they don’t stop your hands from entering the danger zone and that they can also limit visibility.
Self-adjusting guards provide a barrier that moves according to the size of the stock entering the point of operation. A self-adjusting guard stays in place when the machine is at rest then adjusts for the wood while the cut is being made. These are the types of guards found on most all woodworking tools such as table saws, jointers and power miter boxes. These guards can require frequent maintenance and they can limit visibility.
Remember: An important part of woodshop safety is that you must guarantee safety for two – you and the machine. It is therefore important to understand the choices you have in deciding which guards will work best. There are three options. The first is to use the standard guards that come with the machine without any alteration. However, there are times when those guards can be cumbersome, difficult to work around or just plain in the way.
The second way to safeguard a machine is to purchase one of the great aftermarket guard systems such as the Biesemeyer, Excalibur or the Brett-guard. (I have always used the Biesemeyer table-saw guard with both the splitter and overhead shield, and have been very happy with its effectiveness on my table saws.)
The third way is to make your own guard or shield. Yes it’s perfectly legal to make your own safety guard in your shop. Remember: OSHA does not regulate the individual homeowner’s shop. With any homemade guard, it must be well engineered, securely fixed in position and allow safe operation of the equipment. If you have employees using this equipment, then OSHA rules apply and they require that guards be designed and installed by technically competent and qualified persons. OSHA might also require that the manufacturer of the equipment review the proposed guard design to ensure that the guard will adequately protect your employees.
Making Guards
I recommend that guards and shields be made out of the best material you have available. That might include solid wood, such as the spring-type guard and hold-down, or the wooden block to protect the user from the blades after the cut has been made that are shown on page 44. Baltic birch, MDF and particleboard are all good guarding materials except they can restrict your vision. I recommend you drill a few holes to allow a little peek into what’s happening at the point of contact.
The last and probably the best material to use whenever possible is Lexan, a polycarbonate plastic made by
General Electric. It is said to be 200 times stronger than Plexiglas. It is worked easily by the band saw, table saw and drill press. It is a bit expensive so I recommend that you buy it as scrap or off-fall from your local plastic dealer. Because Lexan is a polycarbonate material, it can be glued together, but I suggest that you ask your plastic dealer which adhesives he recommends. It’s possible to order a two-part adhesive specially formulated for polycarbonates that is made by IPS Corp. The product is a high-strength clear polyurethane glue called Weld-On 55.
Push Sticks and Other Safety Devices
Push sticks are the ultimate sacrificial tool. If you have one that doesn’t have at least one nick or cut in it, then you aren’t using it enough. They are used on table saws, band saws, jointers, router tables and shapers to push short or narrow lengths of material through the cut. Some push from behind the work, some hold and push from the center of the work, some are very thin, some are made of plastic and some will be forfeited to make a very specific cut. They are always replaceable. Push sticks are valuable tools regardless of their shapes and sizes. However, there are specific ways to use them and some push sticks are better for certain cuts than others.
It is important to understand when to and when not to use a push stick. As long as you have your hands on a board when making a cut, you will always have a great degree of control. As soon as you use a push stick, you lose a great degree of that control. I would always recommend that you choose to use your hands for pushing your work when you have more than a 3″ clearance from the guard – you simply have more control.
However if your hands will be within 3″ of the guard then a push stick is definitely necessary. Again, be aware that you will lose some control. Push sticks should not be used at the beginning of a cut on a long board – your hands have more control and will not be at risk. I keep my push stick handy, and when my push hand gets to that 3″ limit, with one hand holding the board firmly, I let the other hand pick up the push stick and finish the cut.
There is one catch to push sticks. We’ve all seen the old-style push sticks – you know the kind you had in high school shop class that look a bit like a snake with an open mouth. Well, those are the ones I would use as a second choice. These types of push sticks have a pushing vector that is almost straight down at the back of the board. With too much pressure applied at the wrong time it could cause your board to tip upward. However it is always a good idea to have a variety of different styles of push sticks available. Here are my recommendations for making a first-class push stick, which works more like a push block.
1. You can make push sticks out of any scrap material in the shop, however, Baltic birch would be the best choice because it has great internal structure, is rigid and can bear a great pushing load. Particleboard and MDF would be lesser choices because they have no internal structure and can fracture easily. Still, if particleboard or MDF are all you have, they will make acceptable push sticks.
2. Never make a push stick with a handle grip (similar to a handsaw grip). Although this seems like a good idea, it can cause your hand to be trapped, and if for some reason the push stick gets grabbed or thrown, your hand will be caught and could be seriously injured.
3. Push sticks should always be thinner than the width of wood being cut. If the push stick is too wide, it will not clear between the guard and the fence. It is a good idea to make several push sticks of varying thicknesses.
4. Push sticks should be designed to hook the back of the board, however, I think it is very important to have the push stick also sit on top of the wood. This will change the vector of push from the back of the board to on top of the board and will greatly improve the amount of control. Again, it would be a good idea to have push sticks of varying lengths for different-sized work.
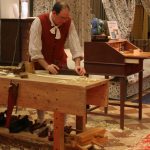
5. Good push sticks that sit on top of the board (such as the one for the router table pictured above) can be used both on the vertical and horizontal, which make them very handy.
6. Be aware that sometimes push sticks can slip off of your work causing a very dangerous situation. Always keep your push stick hooked firmly over the edge or side of your work.
Push Blocks
Push blocks are very similar to push sticks but they permit you to apply considerably more forward pressure throughout the cut. There are two types of push blocks. One simply sits flat on the top of the board; the other sits on top of the board but also hooks over the back. One of the big struggles we all have with push blocks that don’t hook over the back of the board is that they can have a tendency to slip. I recommend that you take a piece of sticky sandpaper and attach it to the bottom of your push blocks (replace the foam). This will give the push block more grip and less slip.
I think it is important to understand the correct way to use push blocks with handle-type grips because your hand can become trapped if you grab through the handle. Unfortunately, all the plastic push blocks have this type of grip. The grip also is at an angle to allow the pushing vector to force the wood to move in a specific direction. I recommend that you hold this type of push block with your fingers over the top of the handle in order to avoid being trapped. It is also important to make sure that the angle of the handle grip is forcing the work against the fence or in the direction you wish the force to be directed.
When using the table saw to cut thin stock, I prefer to use a push block that straddles the fence. This will give the push block more control.
Hold-downs and Restraints
Featherboards, spring boards, combs, anti-kickback fingers, spreaders and magnetic hold-downs are all methods to hold the work down or against an edge. Shopmade featherboards and combs should be made out of solid wood. They are usually cut on one end at an angle of about 45°, with slots cut in the same end to make the board somewhat flexible. These do a great job of providing side or top-down pressure with resistance to the wood being thrown backward toward the operator (similar to anti-kickback fingers). It is important that featherboards, combs and magnetic hold-downs not be placed to create side pressure behind the blade for ripping on a table saw or band saw. If one of these devices is placed toward the back of the blade it will cause a binding that could result in the start of a kickback. Sometimes featherboards are asked to hold down and push in at the same time. This can easily be accomplished in one of two ways.
The first is to simply use two featherboards: one in the horizontal position and one in the vertical position. A second option might be to use a featherboard that is cut from thick material. It can be made like a regular featherboard with the exception that on the 45° leading edge, you cut a bevel that will help push and hold down the stock at the same time. There are sometimes challenges to overcome with clamping featherboards to your cast-iron tables. If a simple clamping solution is not readily available, you might try placing high-strength, fiber-woven carpet tape on the down side. This will hold the featherboard to the table but will not quite give the “stay put” holding power that you can get with a screw or clamp.
Use Stops for Safely Reproducing Production Cuts
Stops for production cutting or cutting duplicate parts can be set up on just about every machine except the planer. The requirements for stops vary from machine to machine and depend on the actions that are taki
ng place at the point of operation. Stops are most commonly used for three purposes. The first is for repetitively cutting wood to a consistent length. The second is for acting as a control during a start cut where the wood is engaged in the center of the board. The third way is to prevent wood from kicking back during operations. The resulting action of the cut will determine how the stops are to be placed and how they are to be used.
There are very specific rules for stops. For example, using the fence on a table saw as a stop for crosscutting could be very dangerous if done improperly, while using a stop on the fence of a jointer might be perfectly fine. Because there is an infinite number of stops and ways they can be set up and used, it is better to have some simple safety guidelines to follow with their application. Keep in mind that placement of all stops might depend on whether the cut is made across the grain or with the grain.
1. Stops must be set up to create no binding whatsoever. They must not interfere with any guards or safety apparatus and should not restrict the user from safe operations.
2. Never crosscut on a table saw when using the miter gauge and fence at the same time. The cut-off work can be captured and twisted between the fence and blade and can be thrown back toward the user. This will create a dangerous kickback.
3. When stops are used, the wood captured between the stop and the blade must be held securely. For example, on a chop saw the wood between the stop and the blade must be held firm and still until the blade comes to a complete stop in the down position.
4. Be aware of the rotation of cutters, bits or blades when choosing the location of a stop. For example, whenever using stops on the drill press, you need to remember that the chuck spins in a clockwise direction so the pulling or kicking force will be in that same direction.
5. Whenever possible, stops should be double-clamped into place to prevent movement of the stop and to make sure it doesn’t come loose during operations.
6. Stops must be designed so that sawdust does not build up and interfere with the accurate or safe use of the stop.
7. Stops can also be used to prevent wood from being kicked back, such as the stops used on a jointer when cutting tapered legs. These types of stops must always be tight and can be used as a way to prevent kickback when the cutter fully engages the wood. PW
Marc Adams is the founder of the Marc Adams School of Woodworking in Franklin, Ind., one of the largest woodworking schools in the world. For details, visit marcadams.com or call 317-535-4013.
Here are some supplies and tools we find essential in our everyday work around the shop. We may receive a commission from sales referred by our links; however, we have carefully selected these products for their usefulness and quality.