We may receive a commission when you use our affiliate links. However, this does not impact our recommendations.
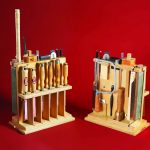
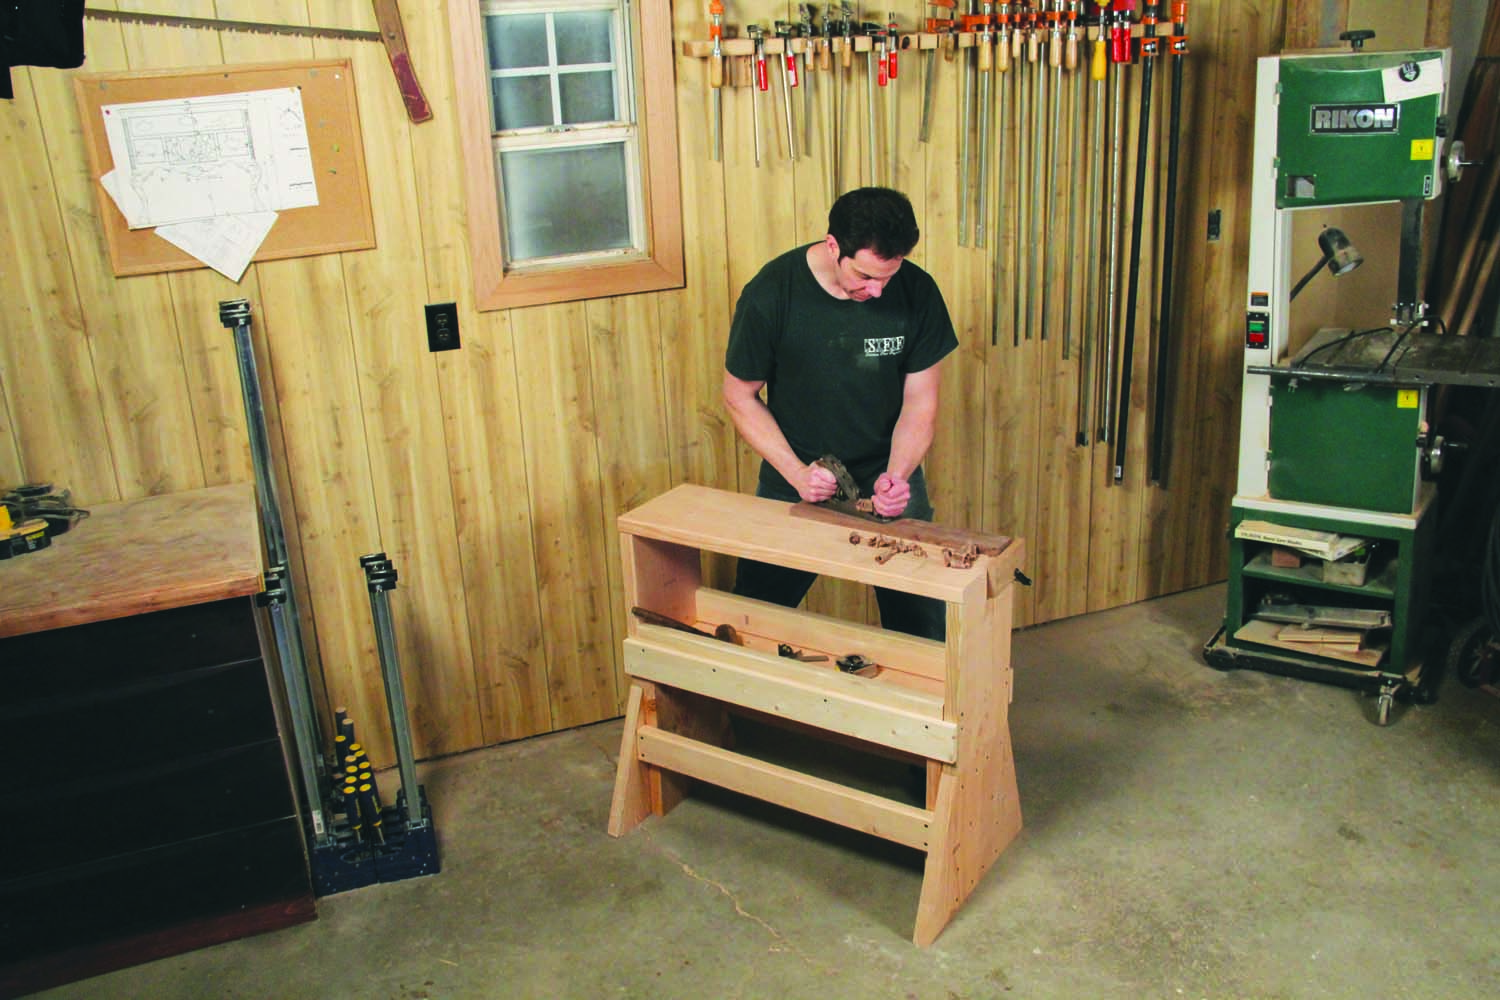
 This sawhorse/workbench combo is made using dimensional pine construction lumber from a home center. It’s rugged and inexpensive, with no complicated joinery – just butt joints, glue and screws. While my sawhorse bench is perfect for taking along to a job site, its versatility makes it equally handy in the shop.
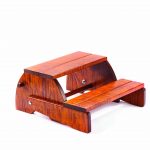
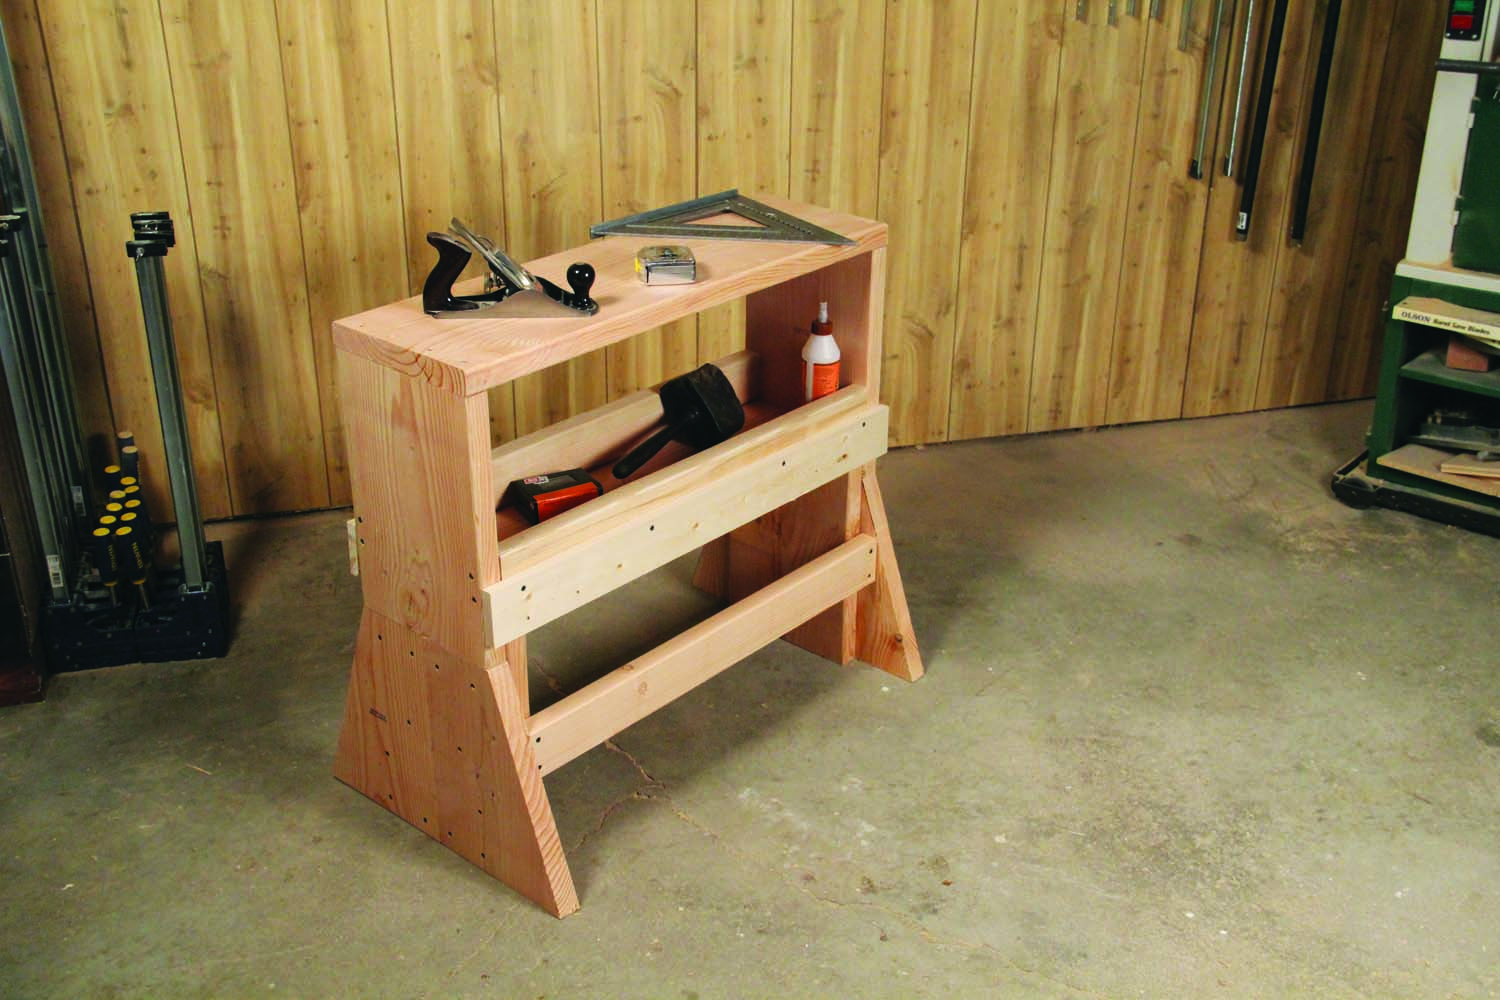
Jobsite Friendly This small workbench is portable, sturdy and customized to your height. When assembled, it even sports a tool tray.
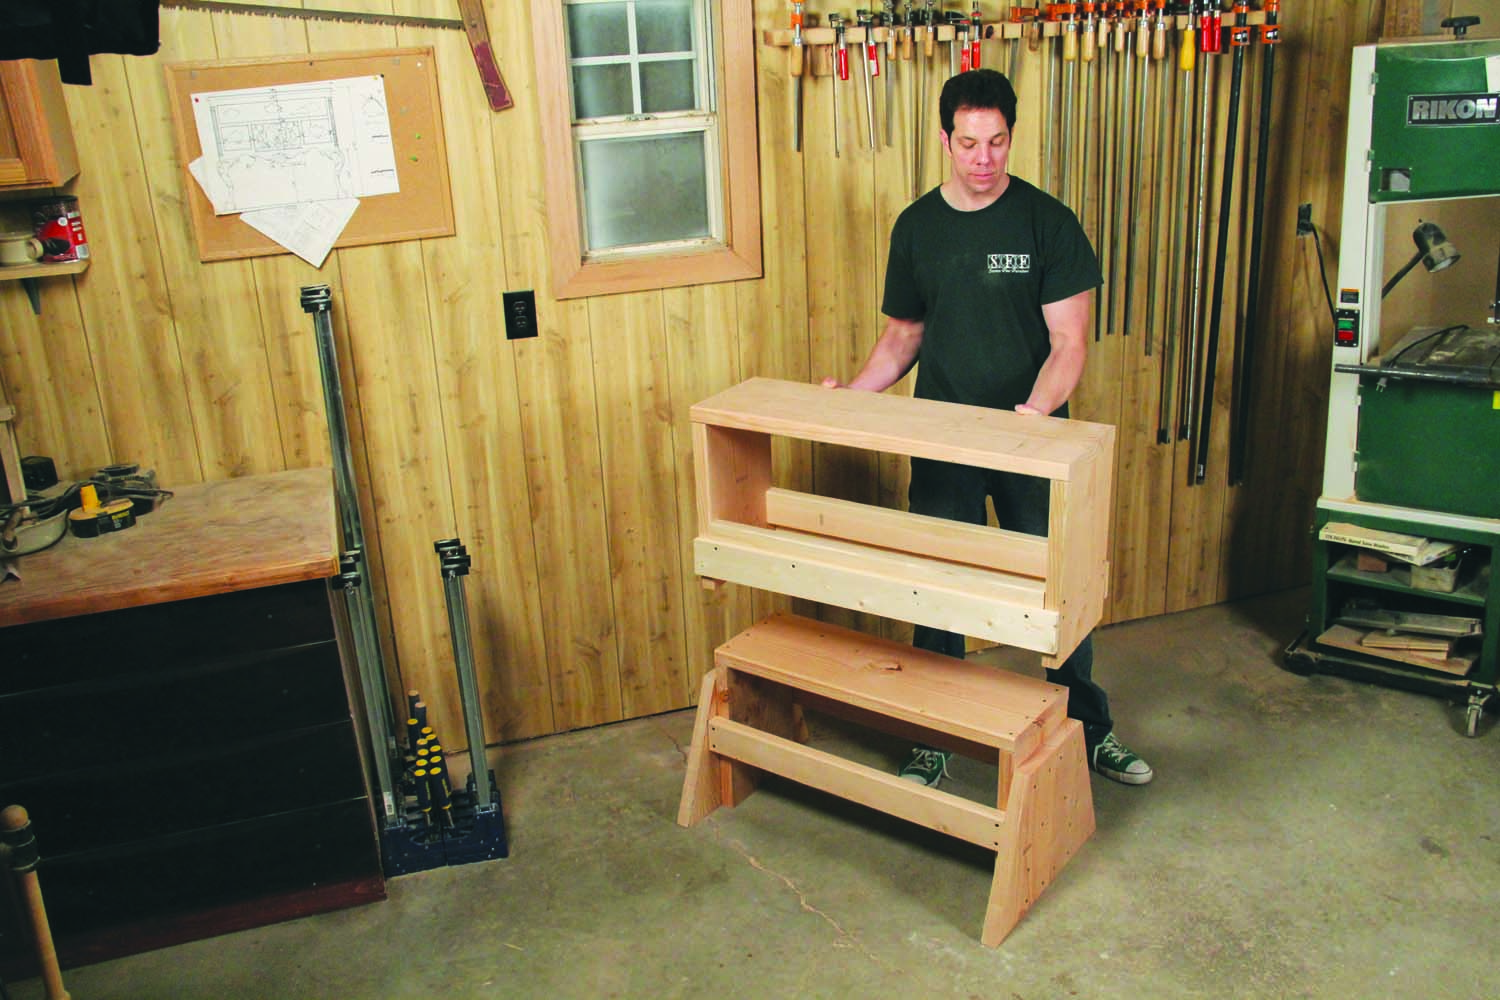
Easy Break-down When you need to move the bench or stick it in the back seat of your car, it simply lifts apart – no tools required.
Sawhorses and workbenches are not a one-size-fits-all deal. For working comfortably and efficiently, they should be customized to the individual. So before making any cuts, you’ll need to figure out the height of the individual sawhorses and the assembled bench.
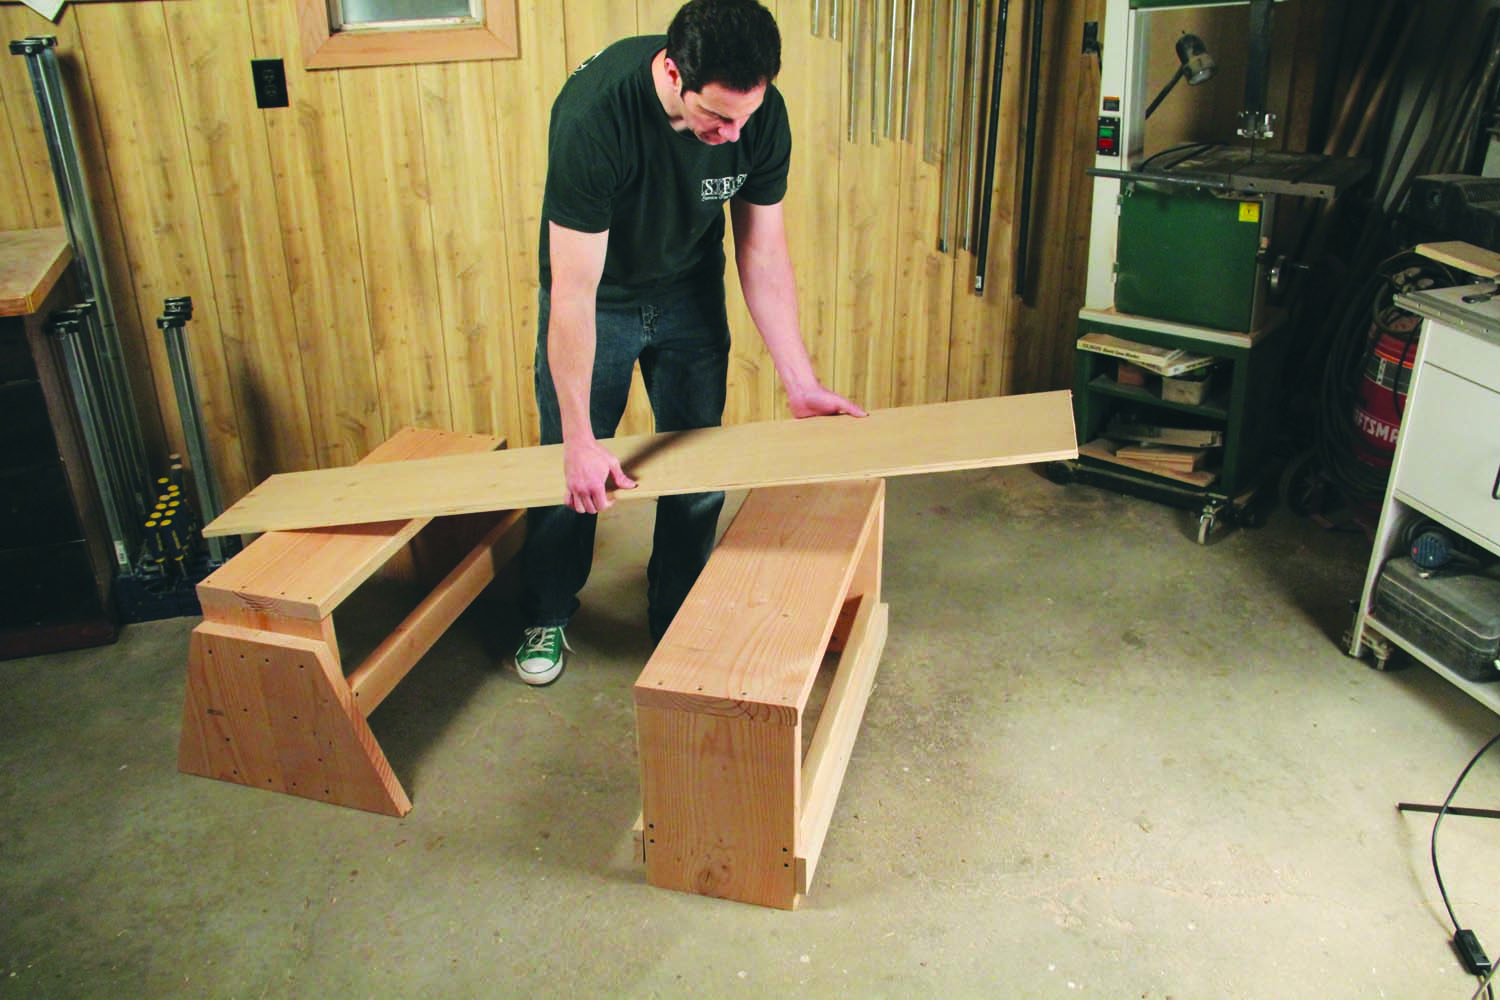
Becomes Two Sawhorses The two units are the same height, so when you take the bench apart, you have two sturdy sawhorses.
To find the height that’s right for you, stand next to a wall or board that you can mark. Bend your knee so your shin is parallel to the floor. Make a mark right beneath your knee. Measure 1” down from this mark to find your ideal sawhorse height (Photo 1). The reason for the 1″ gap is to allow room for a board of average thickness to lie on top of the sawhorse while you apply pressure with your knee. Both the upper and lower units will be this height.
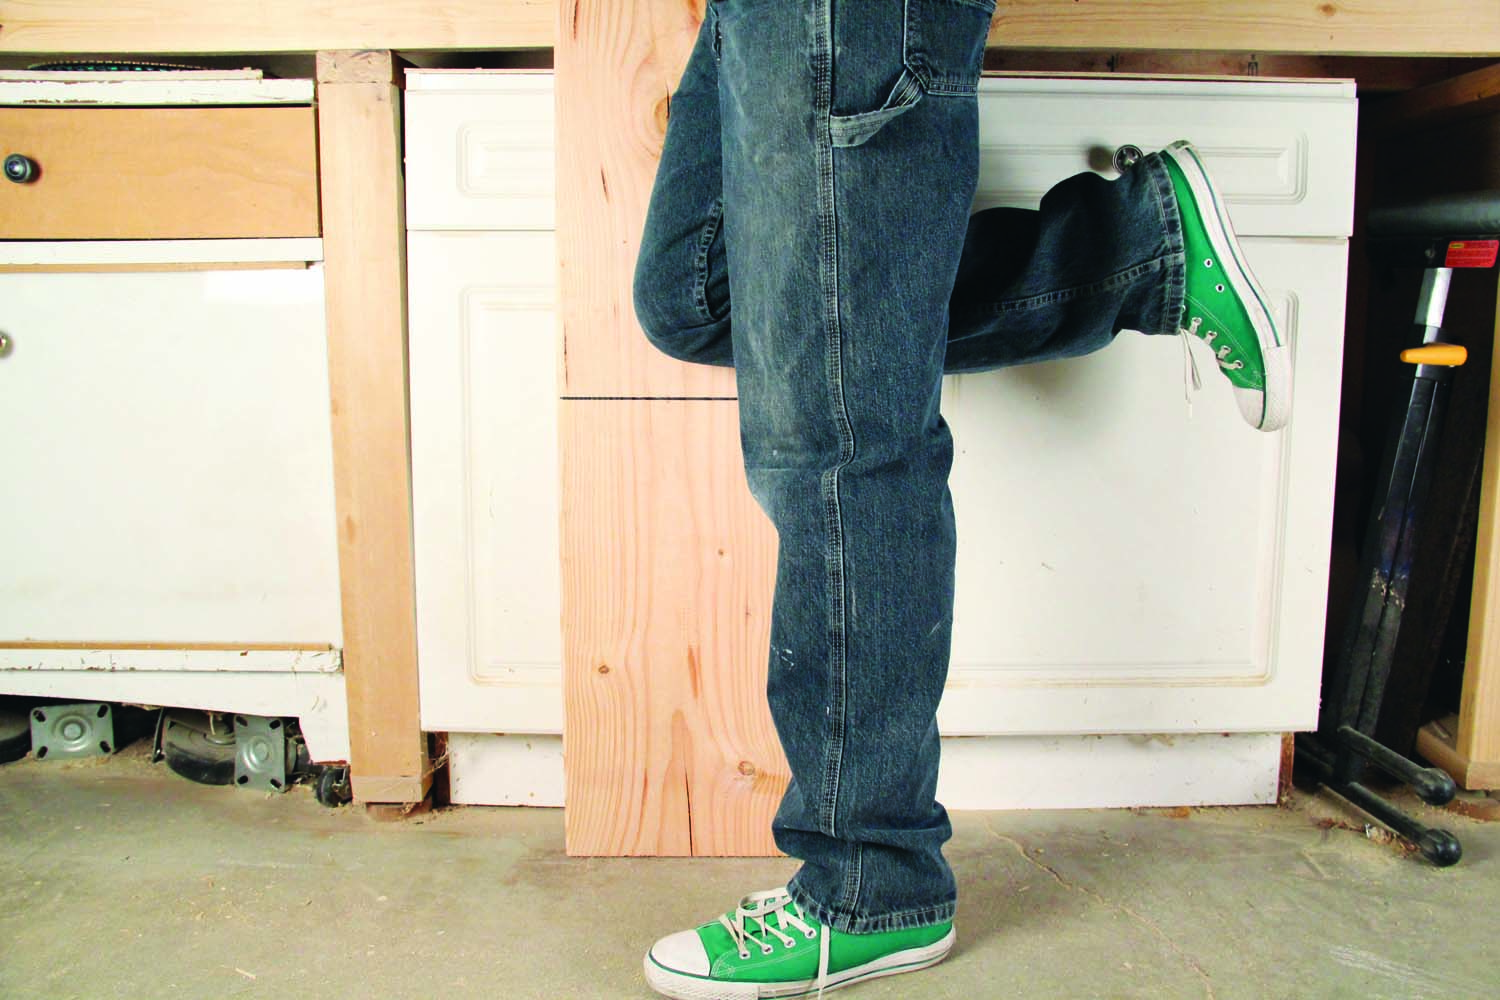
Photo 1. Determine a comfortable sawhorse height. Lift one foot so your shin is parallel to the floor and make a mark 1″ below your knee. This will be the height of the individual units.
Now, determine the ideal height for your bench. Stand by the same wall or board, bend your wrist so that your palm is parallel to the floor and make a mark directly under your palm. Measure 1″ below this mark to find the right height for a bench (Photo 2).

Photo 2. Determine the workbench height. Measure from the floor to 1″ below your palm with your wrist bent. This will be the total height of the units when they’re stacked up.
My sawhorses need to be 18″ high, and my bench needs to be 33″ high. But 18 plus 18 equals 36, so now what? You need to take 3″ away without changing the sawhorse height. I did this by making the flared legs that the upper unit sits on 3″ shorter than the sawhorse height. This way, when the upper unit slips down onto the lower unit, it rests on top of the legs and the total height is 33″ (Fig. 01). I’m 6’1″, so if you’re my height, the dimensions in the cutting list will probably work for you. But it’s still worth checking, as we’re all proportioned differently.
I used standard dimensional lumber for my bench. You’ll need about 18’ of 2×12 material, 12’ of 2×4 material, and 6’ of 1×4. The nice part about using dimensional lumber is that it’s readily available and inexpensive. The downside is that it’s not necessarily dry and stable. Wide boards – like 2×12’s – are prone to cupping. If you like, you can minimize this risk with a little extra work.
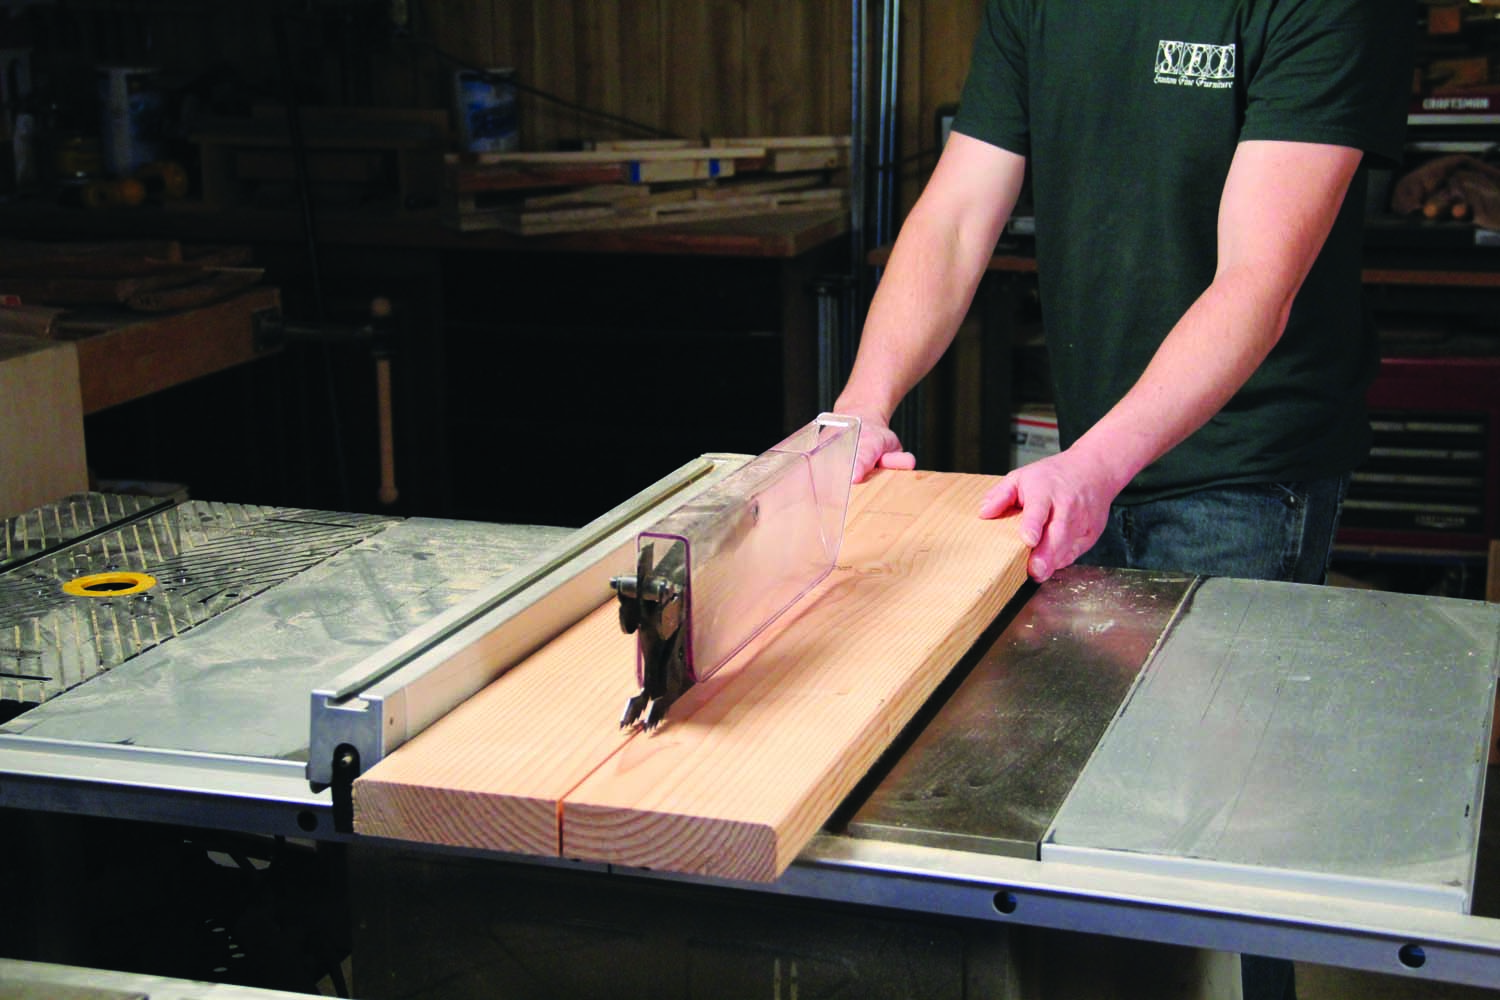
Photo 3. Rip the 2x12s in half after cutting them to rough length. Trim their edges square and then reglue them, outer edge to outer edge. Rearranging the grain in this way helps prevent the wide boards from cupping.
Here’s what to do: After cutting the boards to rough length, rip them in half (Photo 3). Joint the outer rounded edges and glue the boards back together outer edge to outer edge. Essentially, taking flat-sawn boards and rearranging the grain pattern this way gives you something close to quarter-sawn lumber, helping reduce the risk of cupping.
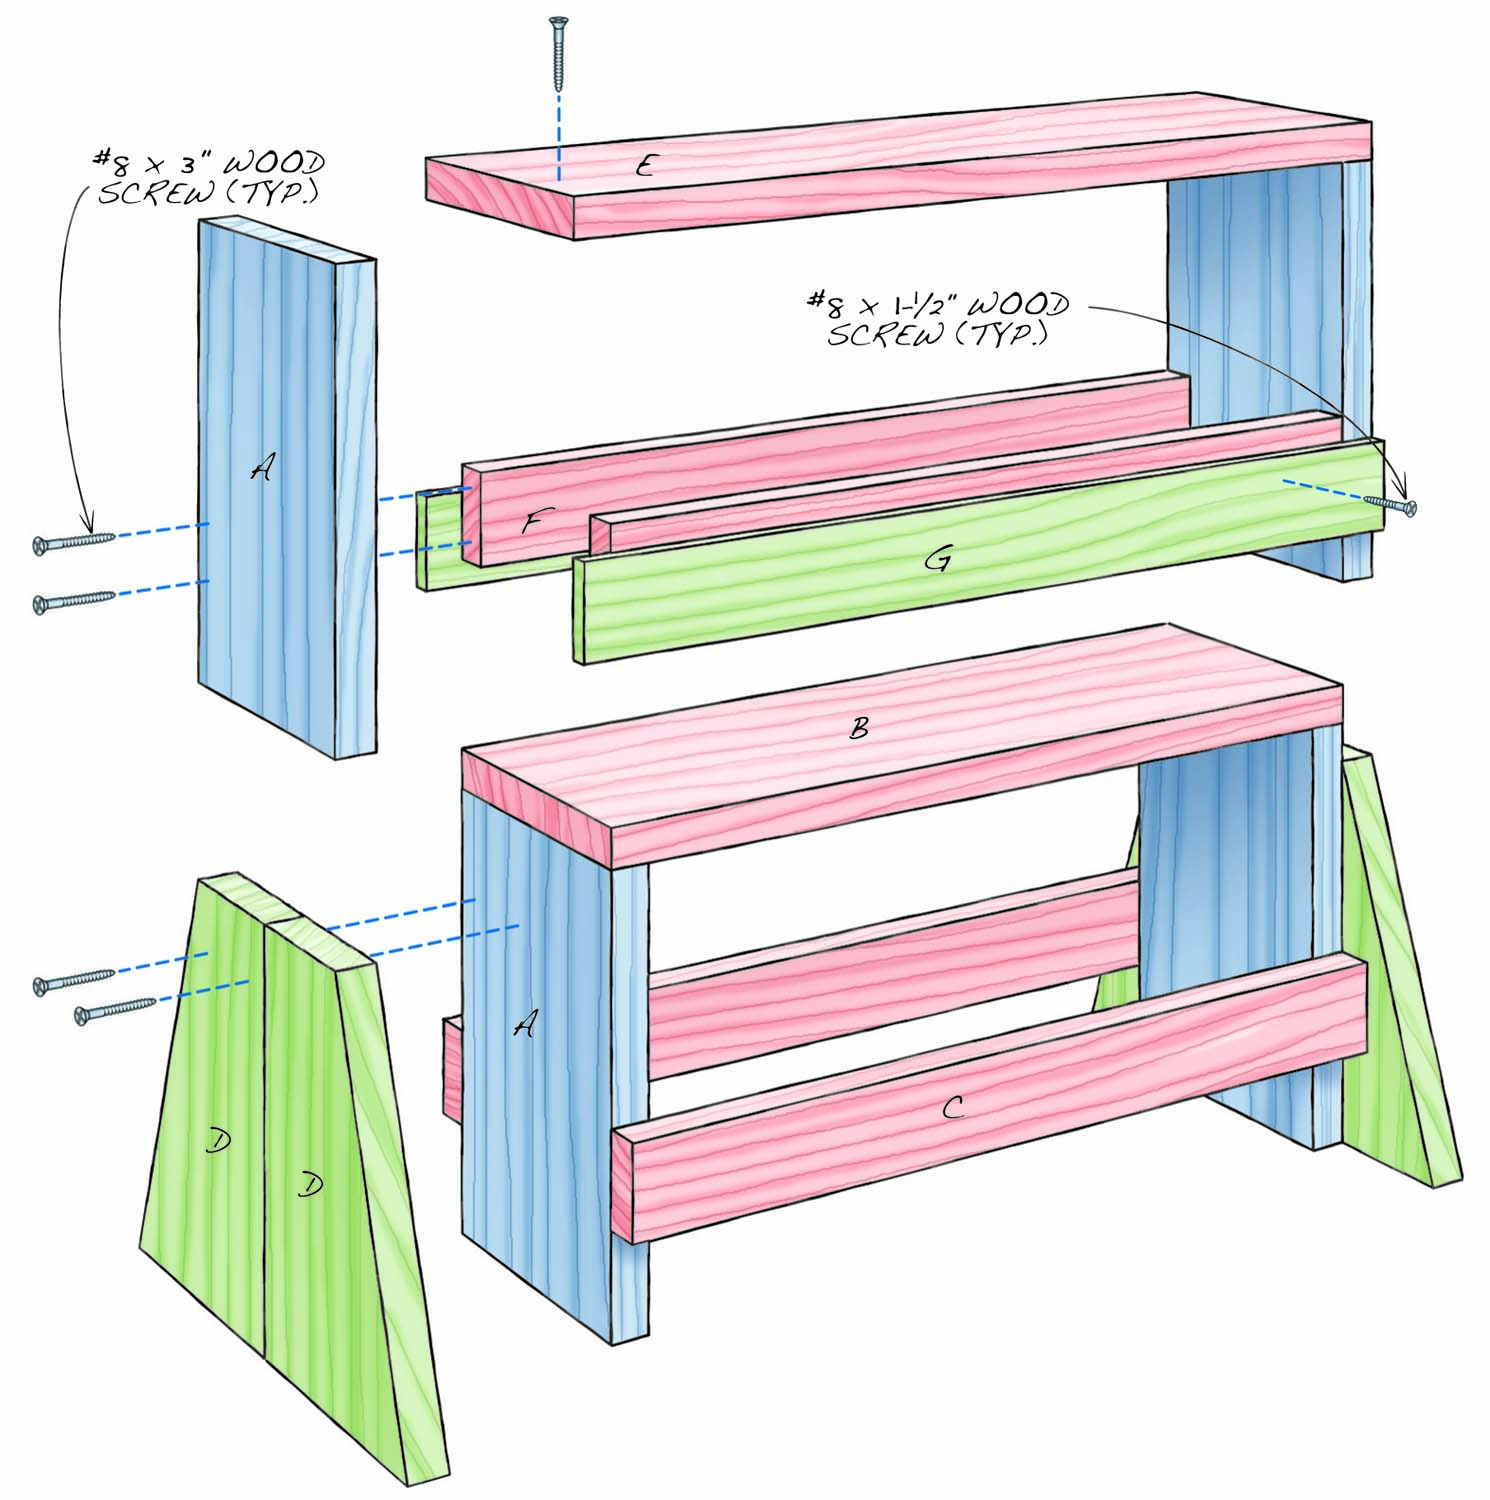
Fig. 01. Exploded View
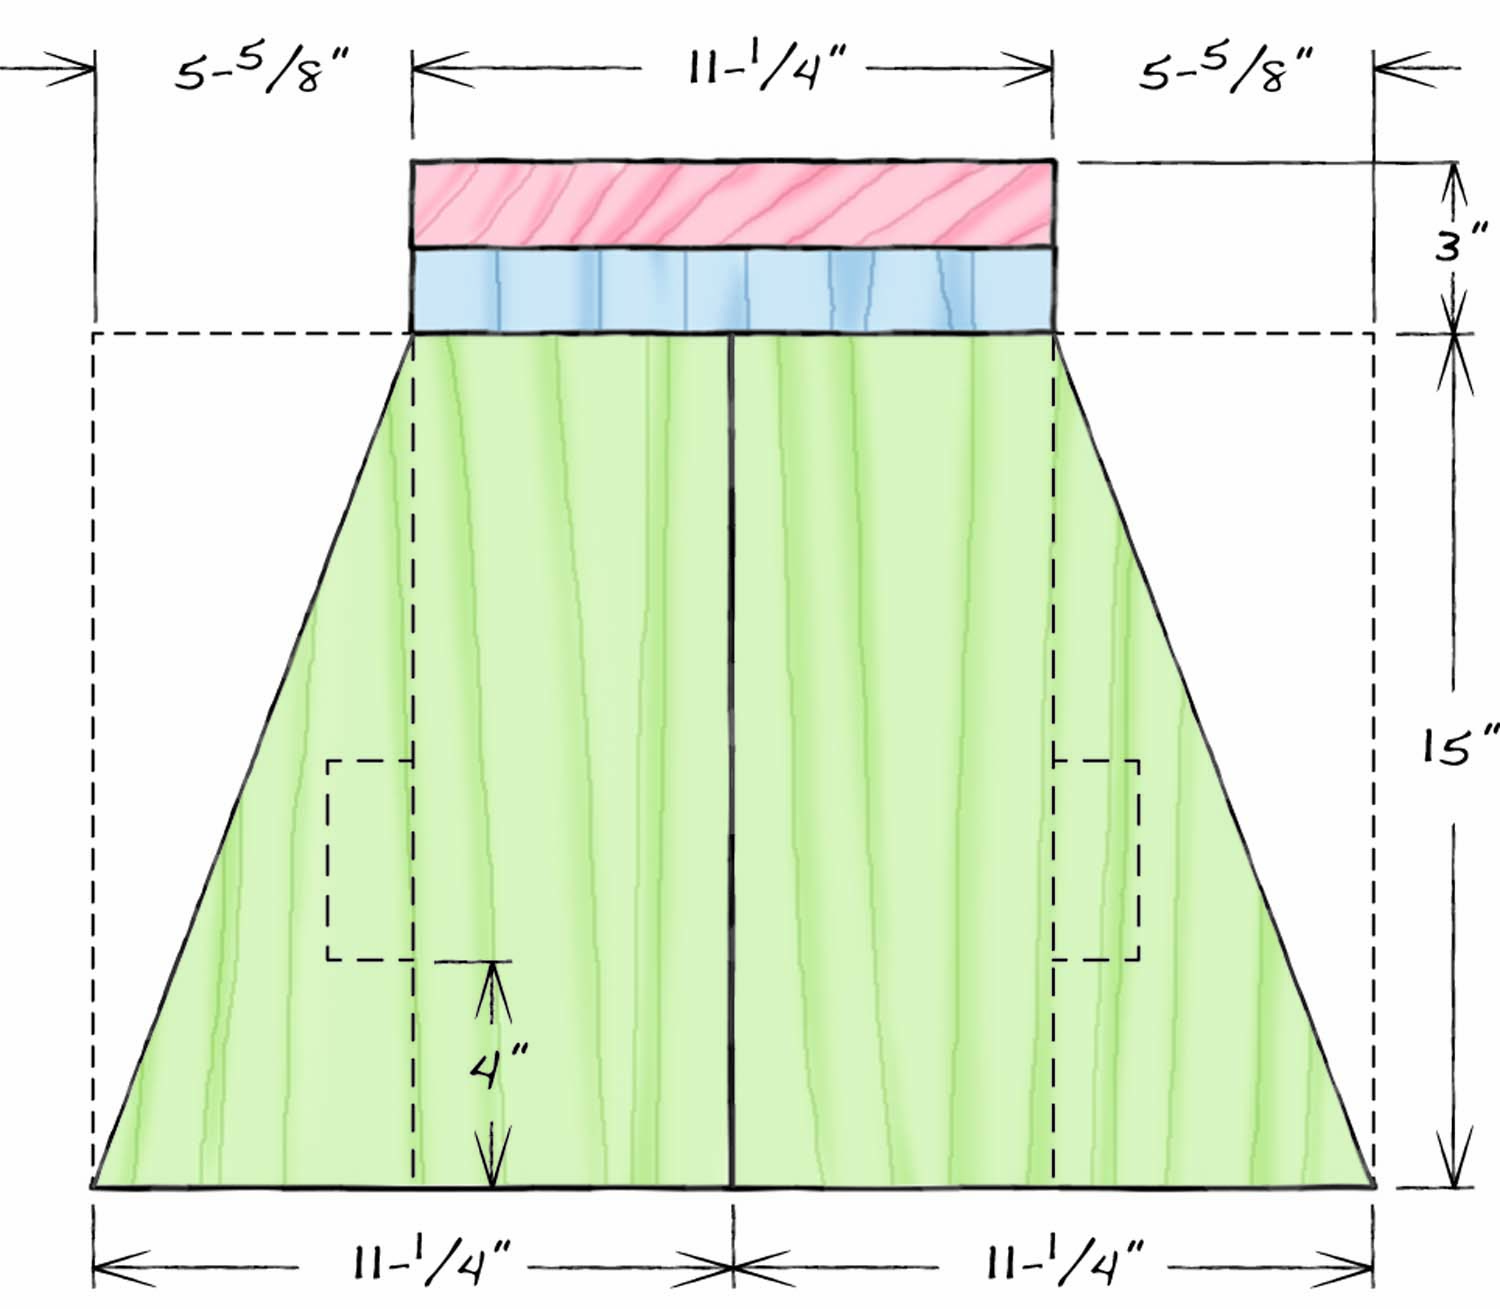
Fig. 02. Leg Detail
Cutting List
| Overall Dimensions: 33″ H x 36″ W x 22-1/2″ D | ||||
| Part | Name | Qty | Material | Length |
| A | End | 4 | 2×12 | 16-1/2″ (a) |
| B | Lower unit top | 1 | 2×12 | 33″ |
| C | Lower unit stretcher | 2 | 2×4 | 33″ |
| D | Leg | 4 | 2×12 | 15″ (a, b) |
| E | Upper-unit top | 1 | 2×12 | 36″ |
| F | Upper-unit stretcher | 2 | 2×4 | 33″ |
| G | Batten | 2 | 1×4 | 36″ |
| Notes: | ||||
| (a) Cut length to suit your height. | ||||
| (b) Each leg is made by edge-gluing two 2x12s. | ||||
It’s well worth the effort to dig through the stack of boards to find the straightest and driest of the bunch. Short of bringing a moisture meter with you to the store, the simple way to determine dryness is by weight; the heavier the board – in relation to other boards the same size – the wetter it is.
Now that you’ve determined the units’ ideal sizes, cut the ends (A) and tops (B and E) for both units. Fasten the tops to the ends using glue and screws (Photo 4). Since you’re driving screws close to the end of the board, make sure you drill pilot holes. The pilot holes through the top should be equal to the screws’ major diameter (the total diameter including threads). The pilot holes going into the ends should equal the screws’ minor diameter (the screw diameter minus the threads).
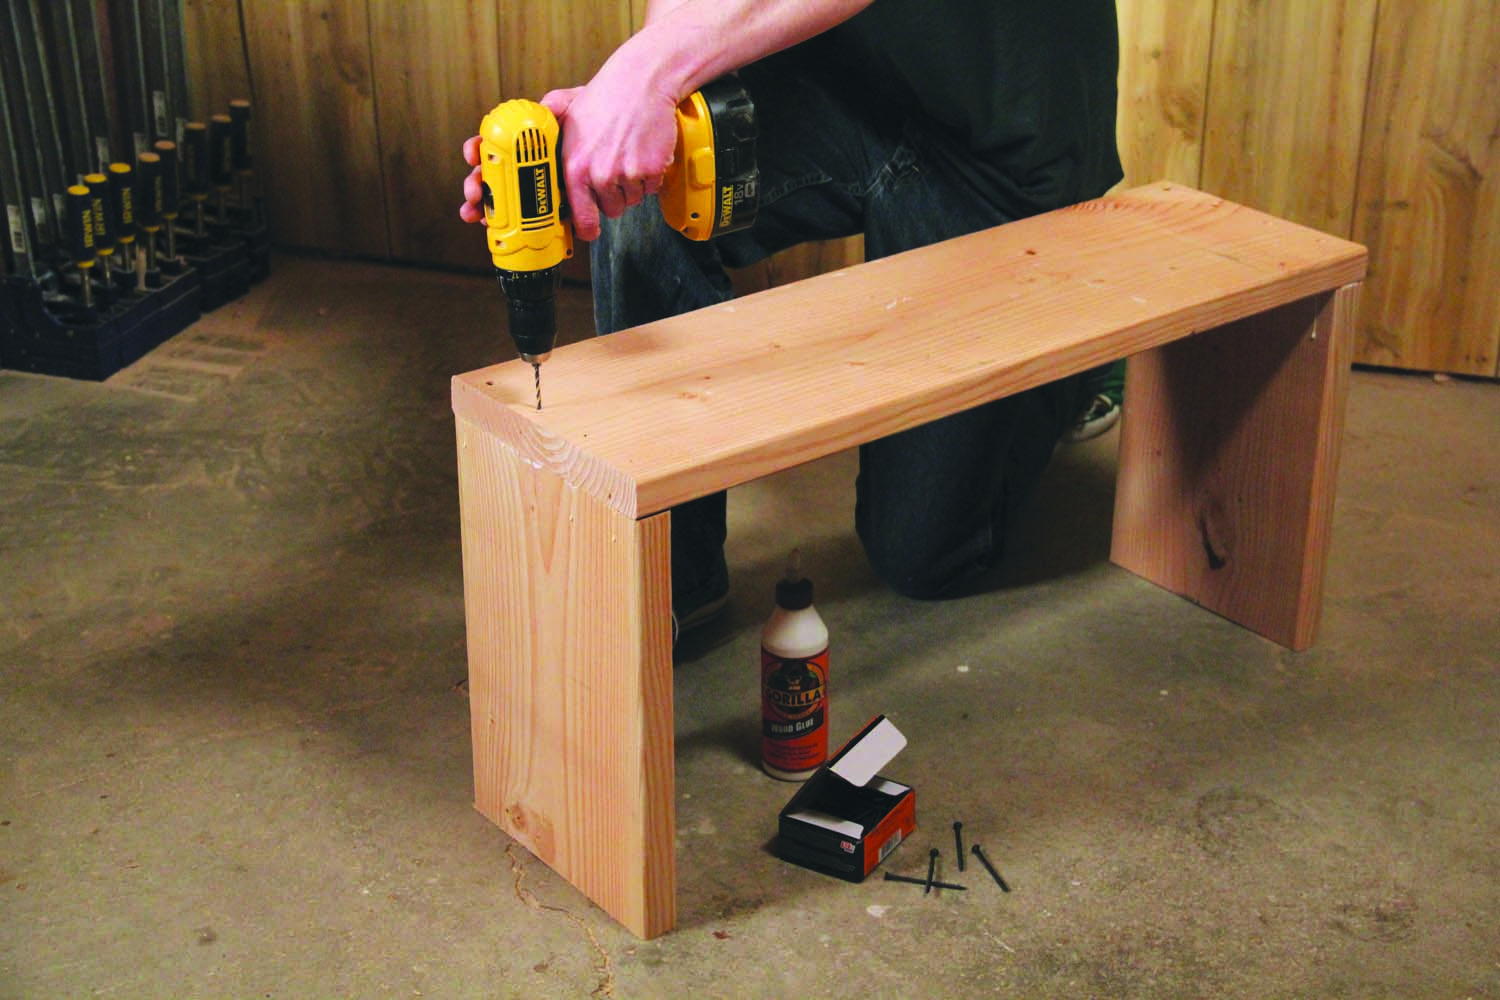
Photo 4. Screw the tops to the ends using simple butt joints. The screws are close to the board’s ends, so make sure to drill pilot holes to prevent splitting.
Next, fasten the lower unit stretchers (C). Fasten the stretchers 4″ from the floor to create a toe space. Use a framing square to ensure that the unit stays square during assembly.
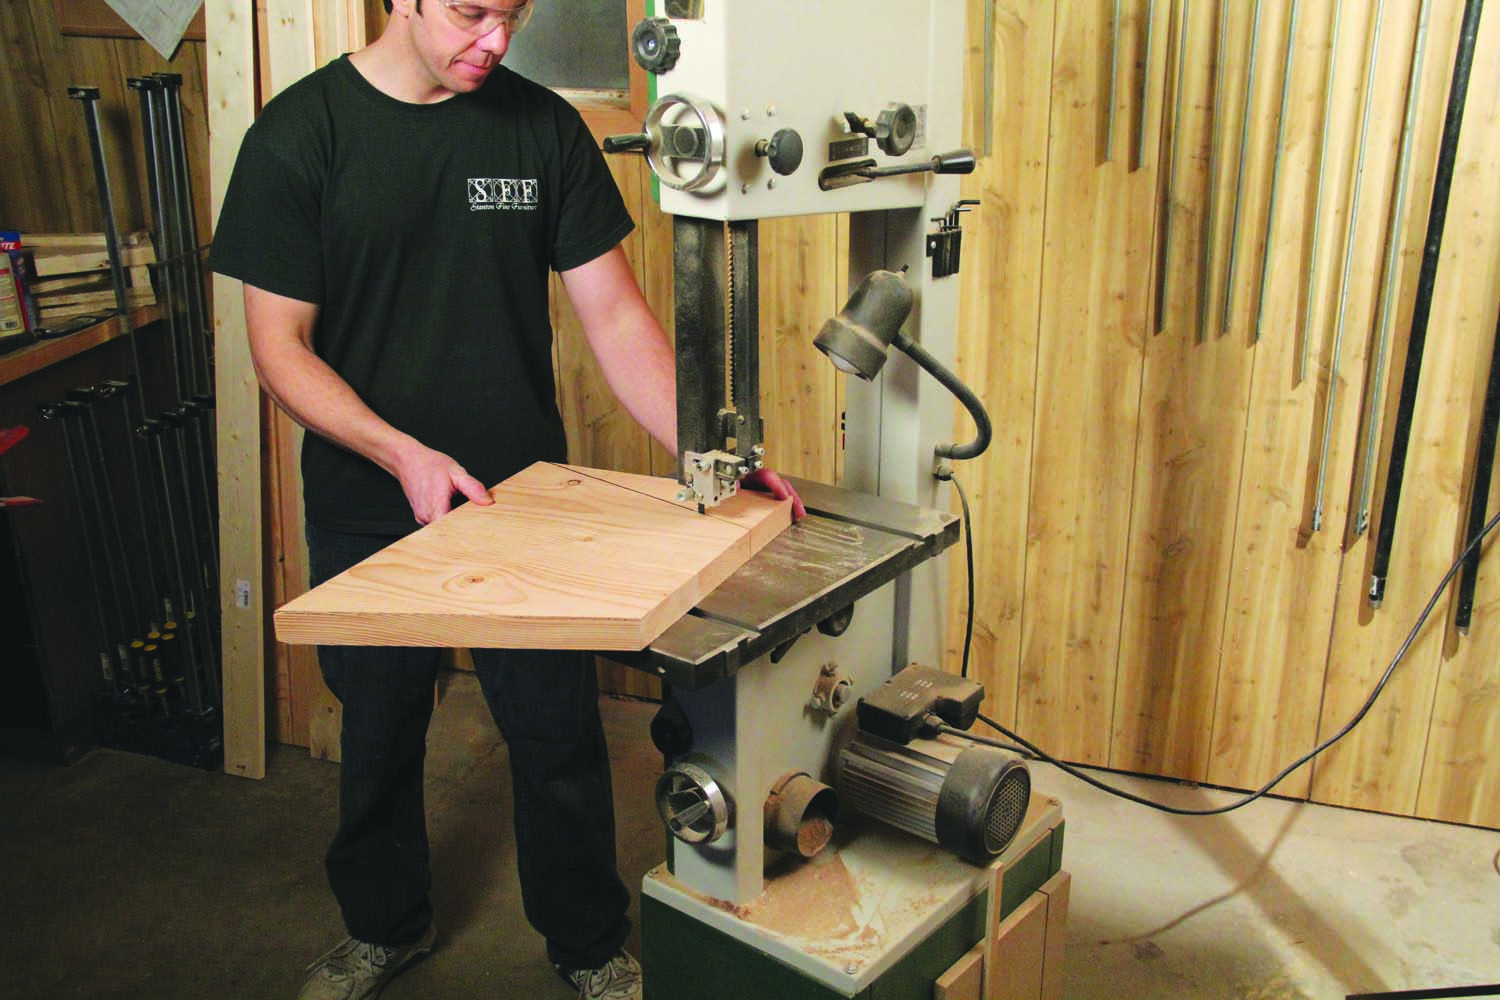
Photo 5. Glue up two 2x12s edge to edge and then bandsaw the legs’ trapezoidal shape. The top of each leg is the same width as the unit’s ends and tapers to the full width of the glued-up 2x12s.
To make the legs (D), start by edge-gluing two 2x12s, forming a single piece about 22-1/2″ wide. Mark the center of each leg on its top edge. Mark the lower unit’s end where it meets the top of the leg and then line up the marks. Mark the top of each leg where it meets the edges of the ends. Make lines from these marks to the bottom corners of each leg (Fig 02). Cut along the line to make the flared legs (Photo 5). Glue and screw the legs to the lower unit (Photo 6).

Photo 6. Fasten the legs to the lower unit using glue and screws. When the two units are assembled, the flared legs provide a wide, stable base.
Set the upper unit on top of the lower unit. Cut the upper-unit stretchers (F) to length and then glue and screw them inside the legs so they’re sitting directly on top of the lower unit (Photo 7). This provides extra support and stability to the workbench. It also creates a tool storage tray when the units are assembled.
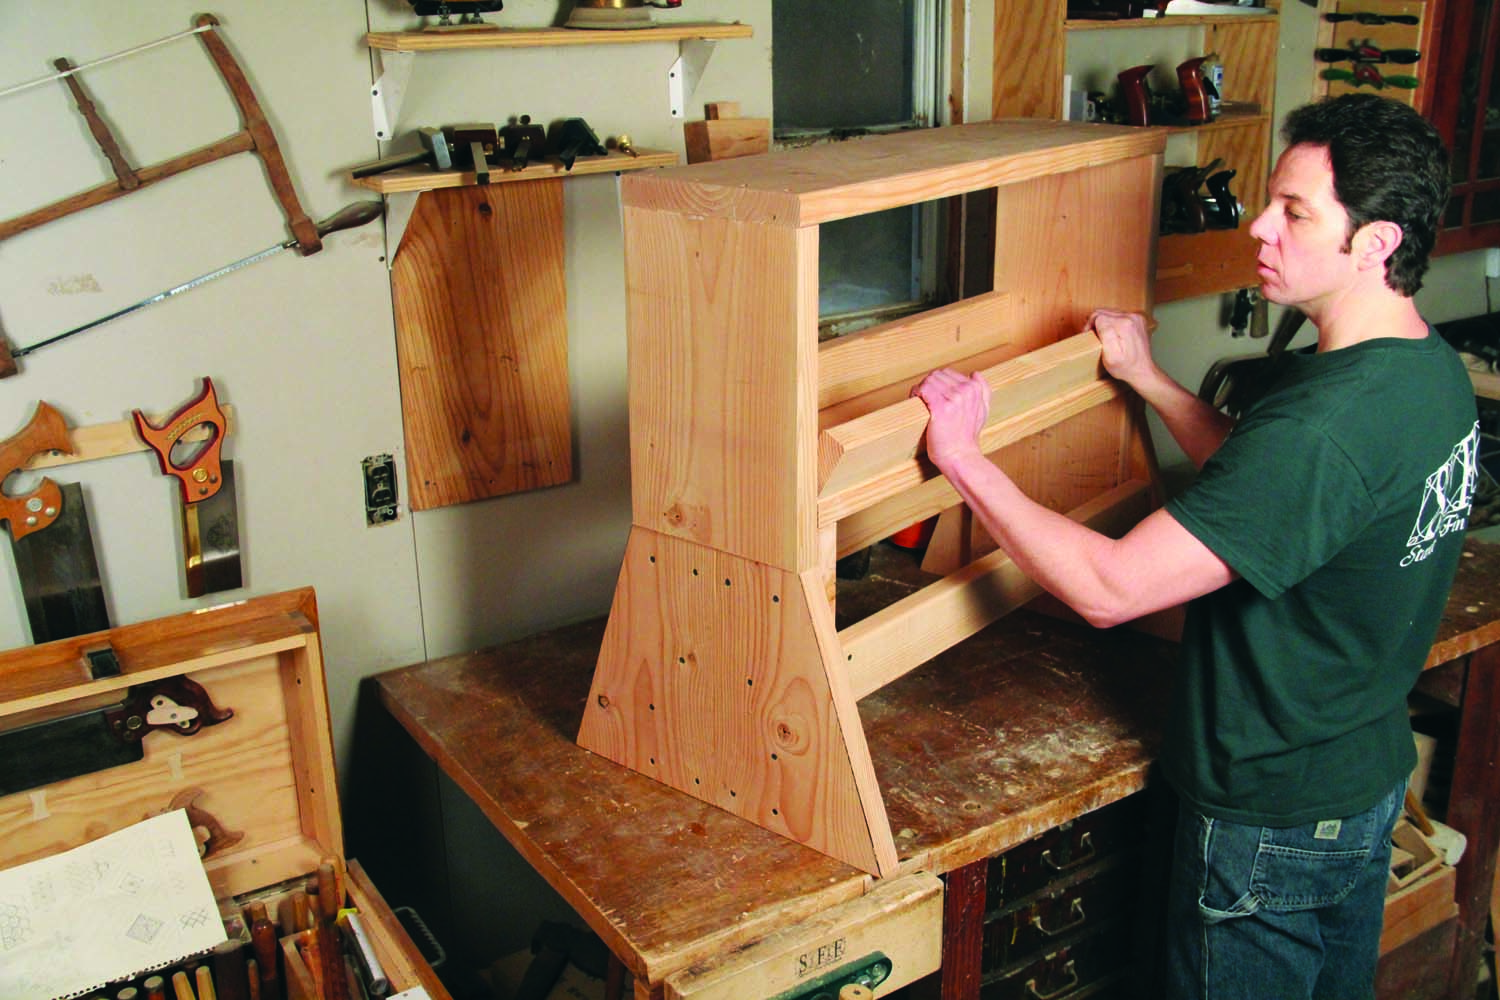
Photo 7. Set the upper unit in place on top of the lower unit and then fasten the inner stretchers to the upper unit. The inner stretchers provide full contact with the lower unit and form a tool tray.
Lastly, fasten the battens (G) to the upper unit (Photo 8). The battens are fastened to the upper-unit stretchers and they overlap the lower unit by roughly half of their width. The battens help stabilize the workbench and keep the upper unit from sliding off of the lower unit.
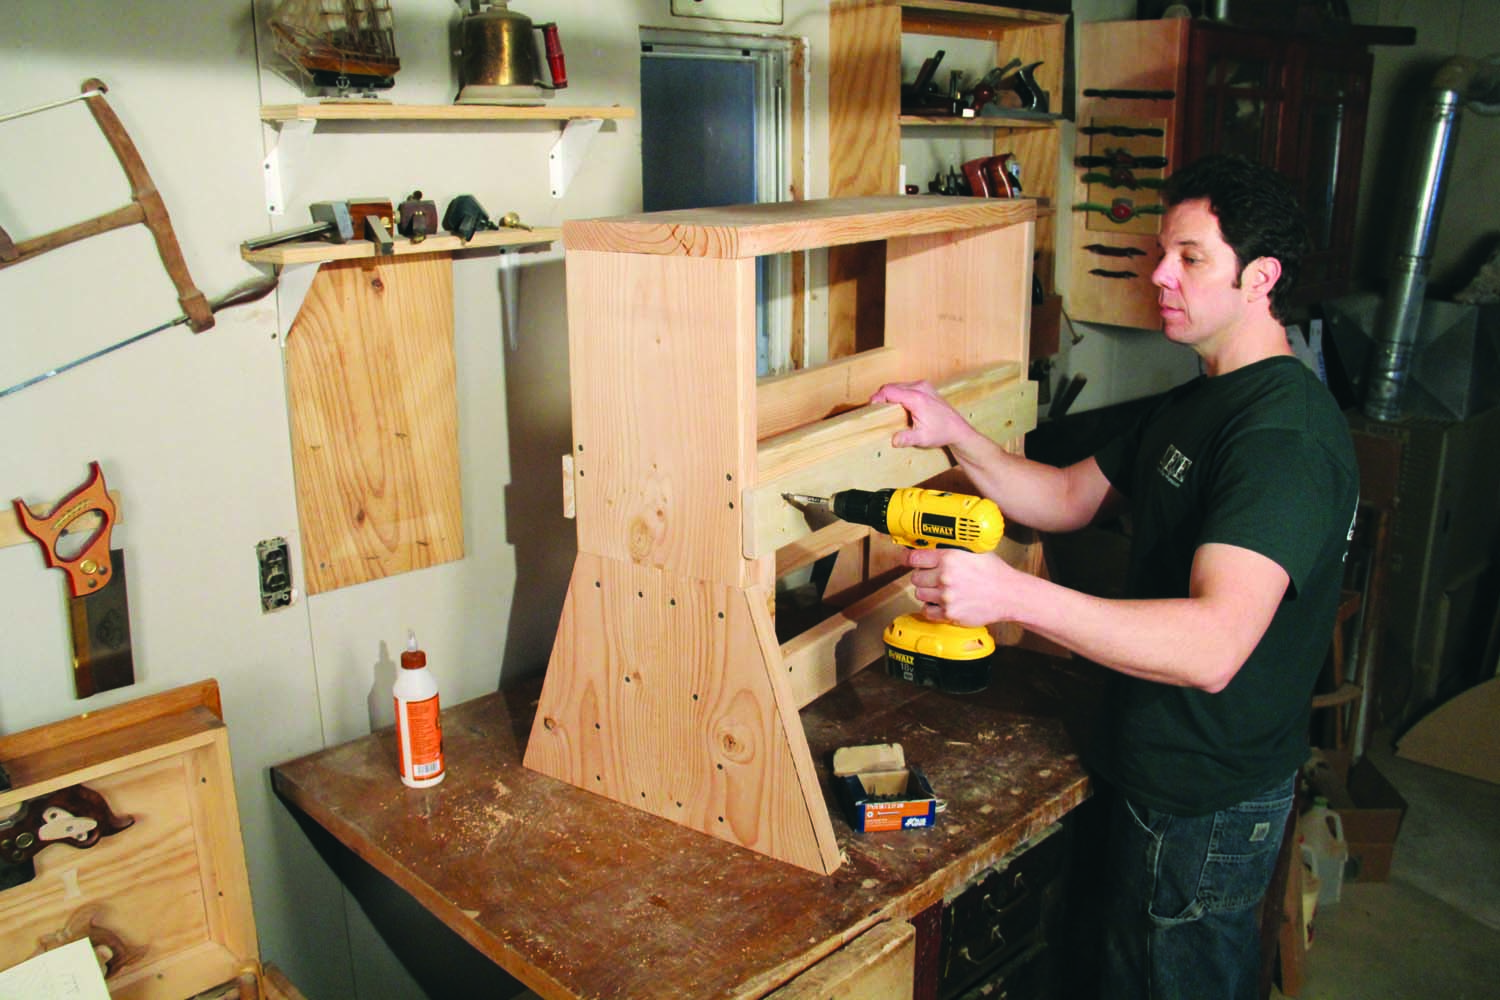
Photo 8. Fasten the battens. The battens lock the upper unit in place on the lower unit.
Here are some supplies and tools we find essential in our everyday work around the shop. We may receive a commission from sales referred by our links; however, we have carefully selected these products for their usefulness and quality.