


We may receive a commission when you use our affiliate links. However, this does not impact our recommendations.
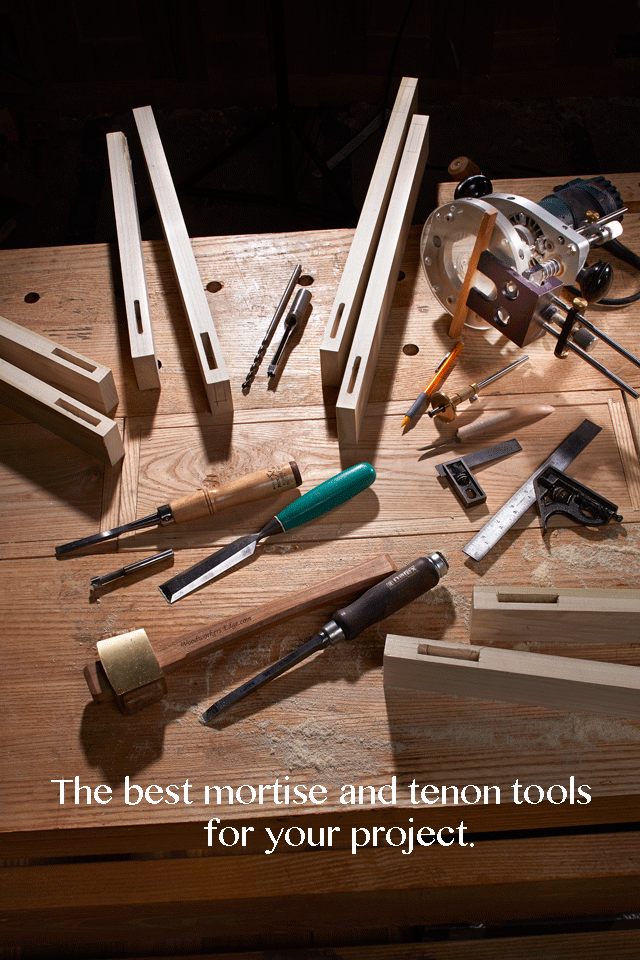
What are the best mortise and tenon tools to use for your project?
This article originally appeared in the February 2014 issue of Popular Woodworking Magazine as “4 Way to Make a Mortise.”
by Robert W. Lang
pages 44-48
The mortise-and-tenon joint is fundamental in woodworking. Along with the dovetail, this joint has been used for thousands of years. If you judge by the number of devices and methods developed to avoid making mortises, you might think it difficult and demanding. In truth, a mortise is just a square hole.
As with most holes, it doesn’t really matter how you dig it. The fundamental elements are the same whether you chop by hand or mill with a machine; confusion arises because it isn’t always obvious what is important to make a sound joint in a reasonable amount of time.
A mortise isn’t any good without a matching tenon. If the joint fails it is usually because too little wood is left around the mortise, so it makes sense to let the location and size of the mortise determine the size of the tenon.
The first thing to consider is where to locate the mortise – too close to the end of a board leaves weak grain that can easily break while making the mortise, or when the finished joint is stressed.
The width and depth of the mortise are equally important. When planning a joint, take no more than one-third the thickness of the mortised piece, and make the mortise as deep as you can. The strength of the joint is mainly a function of how far into the mortised piece the tenon goes.
Through-mortise-and-tenon joints are the strongest, but if you can’t (or choose not to) go clear through, two-thirds the width of the mortised piece is a reasonable target.
That leaves the length of the mortise, or the width of the tenon to be determined. The tenon will be strongest the closer it is to the size of the piece on which it is made. Make the tenon as wide and thick as possible, and at least half as wide as the overall width of the workpiece.
What’s Important, What’s Not
There are five surfaces in a typical mortise. Two of them need to fit just right for the joint to work. The other three don’t much matter.
If you try to make a mortise with a perfect bottom and ends you’re wasting time, and asking for trouble. Worry instead about the wide cheeks and make sure they are straight and square, but don’t bother to make them perfectly smooth. Extra space beyond the end of the tenon doesn’t compromise joint strength and it leaves room for excess glue and bits of debris.
Unless you are making a through-mortise, extra space at the ends will let you adjust the position of the piece and easily take it apart after a test fit.
A good joint can be pushed together by hand pressure and stay together when you lift it by the tenoned piece.
 Layout Rules
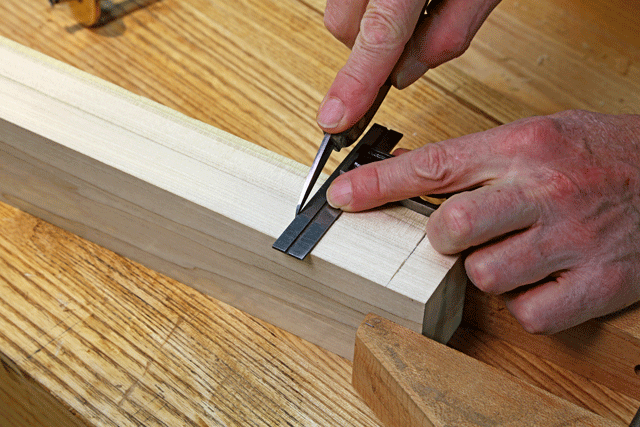
Whatever method you use to make your mortises, getting them the right size and in the right spot is critical. With machine methods, it is easy to set where the mortise lies in the thickness, and generally the width of the mortise matches the width of your tool, be it a drill bit, router bit or a chisel. Depth is also an easy target, especially if your aim is a bit deeper than the tenon length.
Unless you are setting up for a large production run, it will likely take less time to mark all your mortises and work to your lines. If you accept that the ends don’t need to be perfect, you don’tneed to spend precious time setting stops. Getting close by eye will be faster.
If at all possible, gang parts together and mark them as a group. Prepare a story stick and you need only to measure once. Knife lines and marking-gauge lines might take a little longer to make, but the payoff is in cutting the finished edges before you start to excavate and in providing a path for your tools to follow.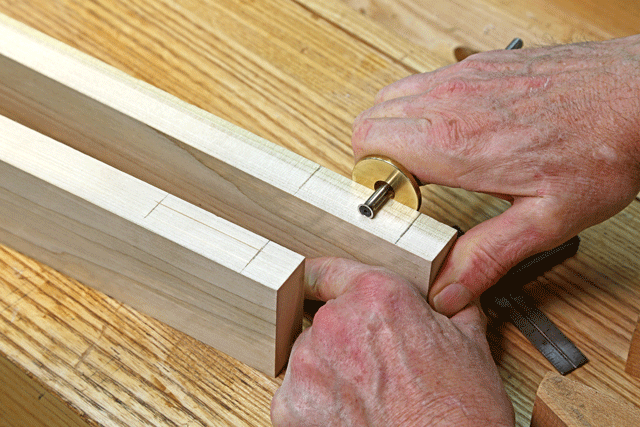


 The Mighty Chisel
In recent years it has become fashionable to write about and demonstrate chopping mortises entirely by hand. It’s a good skill to have, and mortise chisels are great for squaring up the ends of machine-made mortises. But in the end you’re digging a hole and no matter how skilled you might be and how nice your shovel is, you’re still digging a hole by hand.
There are two steps to making a mortise – removing the waste and tidying up the edges. The mass of a mortise chisel helps considerably, and if the wood is soft and agreeable, you can hand-chop a mortise in a short amount of time. If the wood is hard, or the mortises many, you’ll find yourself in the position of your ancestors – wishing for a more expedient way.
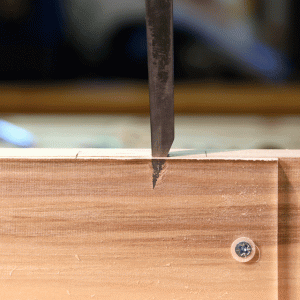
After marking out the joint location, there are two general methods for using the chisel to chop out the mortise. The first is to make a cut in the middle area of the space and reverse the direction of the bevel with each cut to create a V-shaped recess. Placing the chisel to start the cut requires some finesse, so this method takes a while.
The other method is to start near an end and make a series of cuts in one direction, then lever out the chips and repeat until you reach the desired depth. When the bulk of the waste is removed, drive the chisel straight down at the ends. If you can keep the chisel from leaning side-to-side, that’s all there is to it.
The mass of the chisel helps keep it plumb, if you have a loose grip when you place it. If the business end of the chisel is square, that is another aid to keeping it vertical. And if you position yourself behind the chisel, you will be able to see if it is leaning left or right.
You can tell when the chisel has been driven to an optimal depth by the sound and by the amount of resistance you feel. Pry against the bevel to gain leverage and the back and end scrapes the sides as you remove the waste.
If you don’t own a mortise chisel, you can still make a mortise by hand, but you need a lot more patience. The process is essentially the same: Make a series of vertical cuts then lever out the waste. A standard chisel doesn’t have the mass to go as deep with each cut.
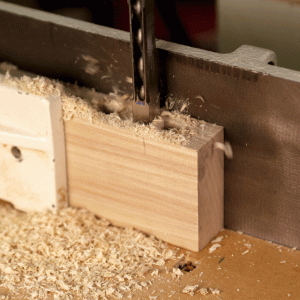
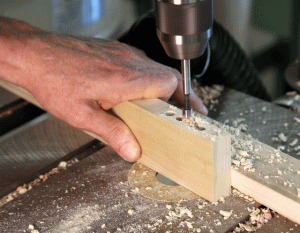 No Shame in Using a Drill
If you look back in old books about woodworking technique, the use of a drill begins to be recommended right about the time that efficient drill bits became readily available. Again, the method you choose depends on the wood you are working with, the number of mortises you need to make and your desire to get the job done.
If your mission is to avoid the spouse and kids, get out your brace and bit and drill a hole to the depth of the mortise at one or both ends. That reduces the need for chopping. If you want to be productive, the more wood you can remove by drilling the better – if you have an efficient and reliable way to power the drill.
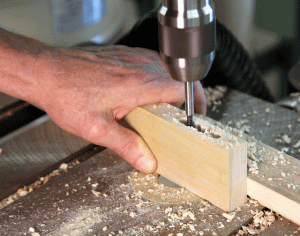 A drill press, equipped with a fence and a Forstner bit, is ideal. You can use a bit the exact size of the intended mortise, overlap the holes and be confident that the holes are vertical. This reduces the chisel work to easy paring on the side walls and perhaps a couple of cuts on the ends.
If you don’t have a drill press, use a hand-held drill with a brad-point bit. Because you won’t have the control you would have with a stationary machine, use a bit that is 1⁄16“-1⁄8” smaller than the width of the mortise. As with the chisel, the important thing is to keep the bit plumb side-to-side, and you can easily see that from the end of the mortise.
After drilling you need to pare the side walls with as wide a chisel as you can. If you marked the edges with a gauge or a knife, you will have a defined channel to locate the chisel. Paring is easier than you might think, especially if you excavated the holes with a drill press; all you need to do is shave off the high spots.
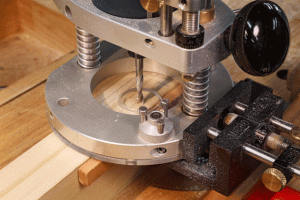 Router & Fence
In theory, the electric router is the ideal tool for making mortises. In reality, it is only if you can wade through the dozens of jigs and complex methods that are available and arrive at an expedient and reliable technique. Most of what you read, however, makes the operation far more complicated than it needs to be.
With a plunge router equipped with a fence and an spiral-upcut bit, you have what you need and can get to work. Remember that the ends of a mortise do not need to be pretty and they do not need to be precisely located. What does need to be precise is the width (the  diameter of the bit) and the location (that is controlled by the fence). It is generally easier to bring the router to the work so you can see what you are doing than it is to plunge the work onto the bit at the router table.
If you can keep from tipping the router or biting off more than the router can chew, all you have to worry about is keeping the fence tight to the work. I usually plunge the bit to the final depth at each end, setting the location by eye. Then I waste the material in between with successive passes that increase in depth.
There are limits to what the router can comfortably do. Mortises 1⁄4” wide and 1″ or so in depth can be made with a small router. Beyond that it becomes time for the big-boy router that can be harder to control.
The spiral bit pulls the material out of the mortise as you go. A straight bit can grind up the wood, but the chips and chunks have nowhere to go.
Routers are also effective for through-mortises in the sides of cases. It’s easy to put together a jig to guide the bearing on a flush-trim bit and get precise walls that are square to the surface. Drill a hole to get the bit started (and to remove some of the waste) then square the corners after routing.
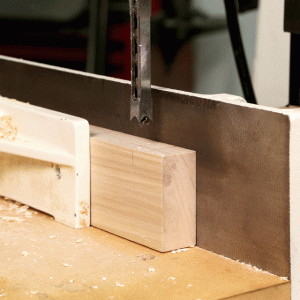
 Dedicated Mortiser
It’s easy to think that a single machine will solve all your problems, at least for a specific task. A hollow-chisel mortiser is an efficient method for making mortises, but the cost of this one-trick pony, in both dollars and in space, can outweigh its usefulness unless you make a lot of mortises on a regular basis.
A benchtop machine, as discussed in “Woodworking Essentials” in the November 2013 issue (#207), will do the job, but not much faster than using a drill press and a Forstner bit. A machine with a moveable table costs considerably more. The benefit is a quantum leap in productivity if you’re willing to pay the price.
The performance of hollow-chisel mortisers suffers as the size of the bit and chisel increase. You can fit a 1⁄2” or 5⁄8” chisel in a benchtop machine, but a 1⁄2” square contains four times the material as a 1⁄4” square and a 5⁄8” square has more than six times the area.
An inexpensive machine might breeze through 5⁄16” or 3⁄8” mortises but give up when you increase the size. You can make mortises larger than the chisel set by making multiple passes.
At the other end of the spectrum, 1⁄4” hollow chisels and bits can be fragile. There isn’t much metal – you can’t lean on a gardener’s trowel the way you can on a spade. The good part of this is that in most cases you don’t need to buy a complete set of bits.
The chisel/bit combination removes the waste and cuts the mortise sides cleanly in one step. Most chisels benefit from a bit of sharpening. Make the outside smoother and touch up the inside with a diamond cone. Honing to fine grits makes the outside look nice, but doesn’t add much benefit.
As the bit chews up the wood inside the mortise, the chips must move up through the chisel to escape. Leave enough of a gap to provide room and give the bit a head start on the chisel. If the machine makes a chattering noise or starts to burn, the bit is set too close; it’s choking off the escape route for the waste.
The best practice for making mortises with a hollow-chisel machine is to make a series of square holes with a space in between. After defining both ends of the mortise, come back through and remove the material that remains. Both the chisel and the bit follow the path of least resistance and bend into an open space next to the cut.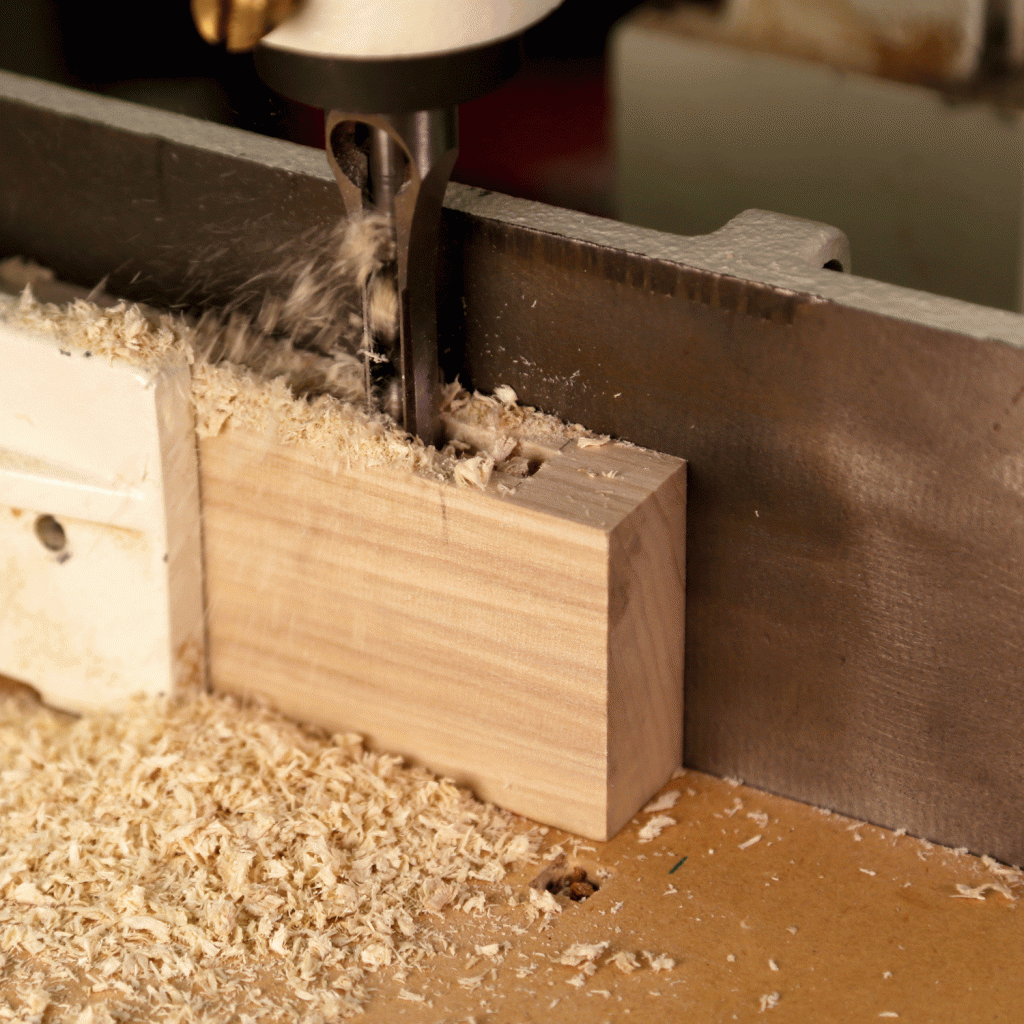
Adjust the Tenon
Mortises are straightforward to make, and if you don’t get caught up in the minutiae of making them perfect at the ends or bottom, they don’t take long to create. Adjusting the size of a completed mortise is another story – you’re trying to make fine adjustments inside a narrow hole.
Tenons, on the other hand, are much easier to tweak – mainly because you can see what you are doing and have access to the work. If your skills in mortising make the size unpredictable, wait and cut your tenons to fit. Err on the size of a slightly big tenon then adjust it until you get a decent fit.
— Robert W. Lang
Download a full PDF of this article here…
Here are some supplies and tools we find essential in our everyday work around the shop. We may receive a commission from sales referred by our links; however, we have carefully selected these products for their usefulness and quality.


