We may receive a commission when you use our affiliate links. However, this does not impact our recommendations.
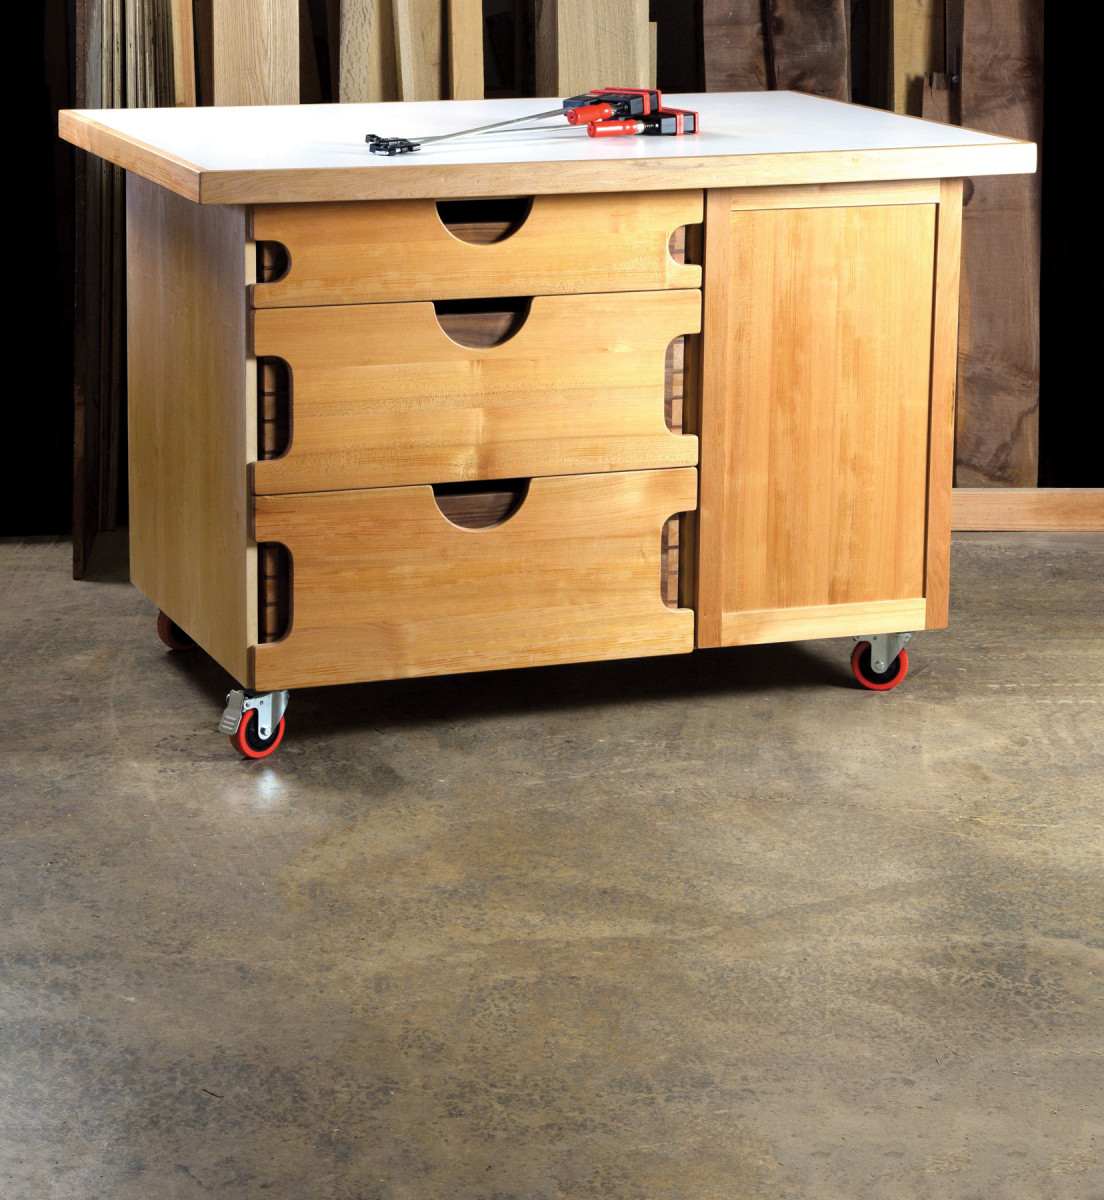
Storage and utility in just the right size.
It’s often said that a shop layout is never truly complete. While that may be true, I have discovered a valuable asset in my shop that can move and adapt to changing layouts. I’ve been testing a mobile shop cart over the last several years to make sure it holds up to the rigors of woodworking.
 The key is middle dividers that act like the webbing of an “I-Beam.” With this tested construction technique, the entire cart forms a rigid base to support the top. The work surface is a double-layer of thick MDF, forming a flat top that can handle daily use and abuse in a shop environment. Special features include pass-through doors, slide-proof adjustable shelves, and a built in clamp rack for even greater utility.
Construct the Base
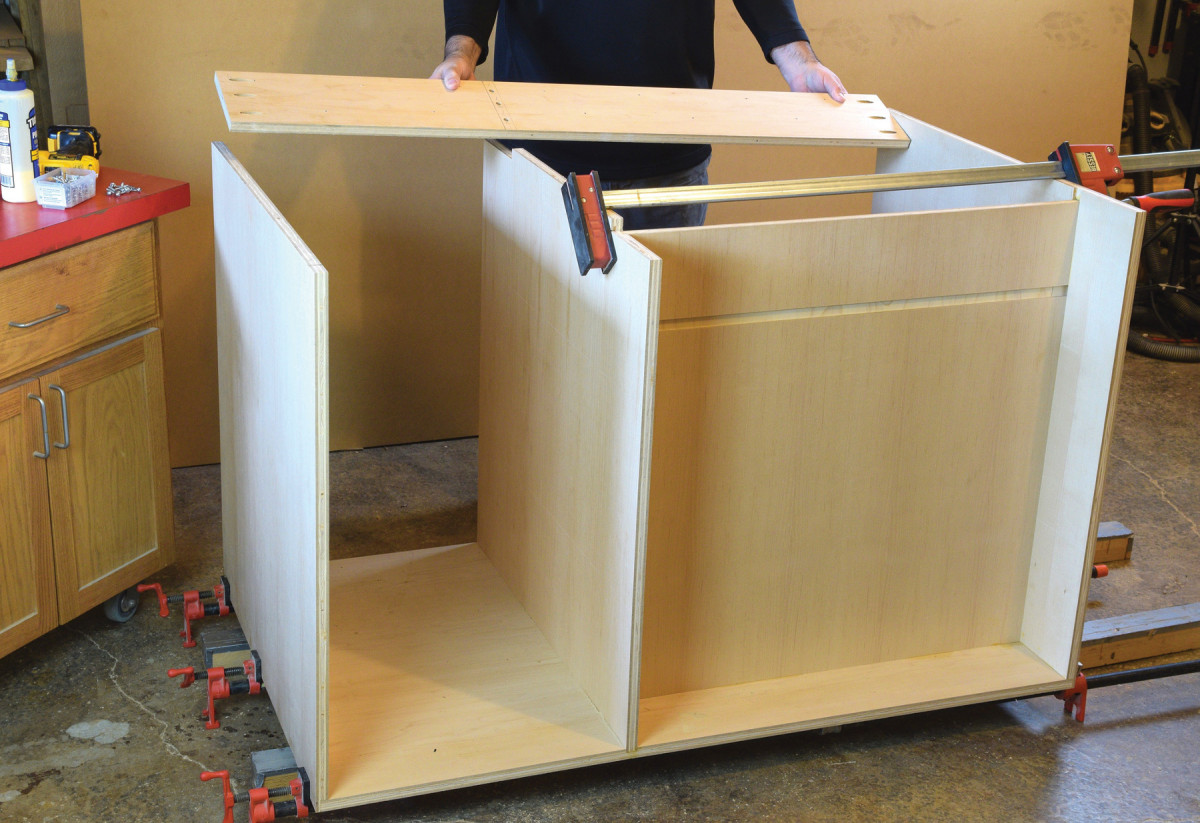
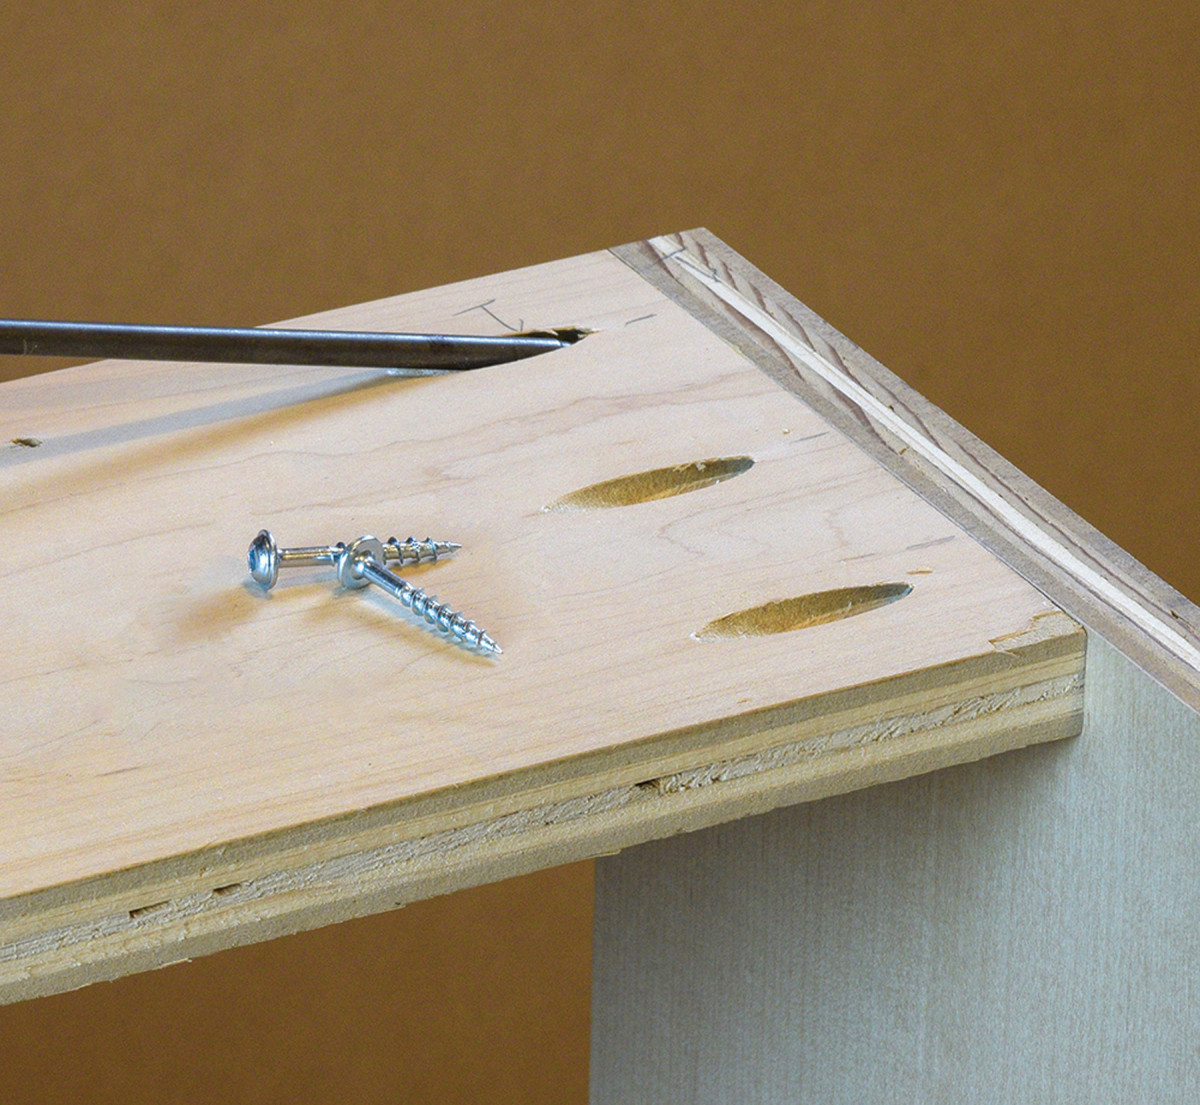
1. The end panels are rabbeted to fit over the bottom panel, and the middle divider sits in a shallow dado. The clamp rack wall is also housed in grooves on both sides. Glue the main case together, and add the cleat strips to lock it square.
Cut plywood parts to size, and complete the basic joinery shown in the detail rendering. Start with the bottom panel, which has a dado to receive the middle divider. Cut 6“ wide x 3/4“ notches at the top corners of the middle divider. These notches will eventually receive long cleat strips, which function to lock the dividers square. Install the end panels, which are rabbeted to fit over the bottom panel.
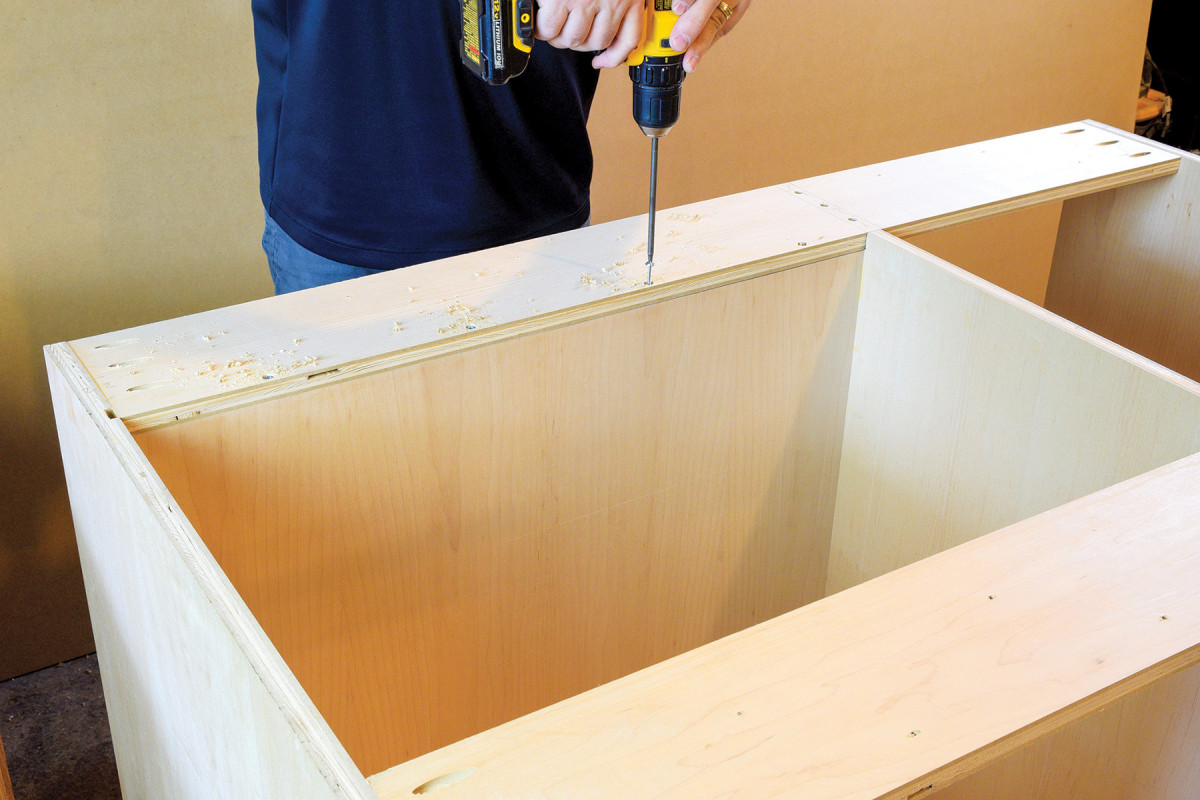
2. Secure these long strips flush to the end panels with three pocket hole screws. Add glue to reinforce this butt joint.
As you install the first end panel, you’ll capture the “clamp rack wall” in vertical grooves. Add a bead of glue to the bottom of the clamp rack wall component and reinforce this butt joint with screws from the bottom. Now add the other end panel, and glue and nail it in place with 18-gauge brad nails. Finally, add the cleat strips to lock everything in place. The cleats are screwed into the middle divider from the top and attached to each end panel with pocket hole screws.
Wheels and Clamp Rack
3. Clamp rack wall is like webbing of an i-beam. The clamp rack wall is key to the carts design, and functions to prevent both racking and sagging. Reinforce the connection to prevent both racking and sagging. Reinforce the connection to the cleat strip with glue and 11/2″ long #8 screws.
Before the cart gets too heavy, turn it upside down and add 4“ locking casters at each corner. Finish the carcase by adding maple edge banding to any exposed edges. I used iron-on edgebanding and trimmed it flush once it cooled down.
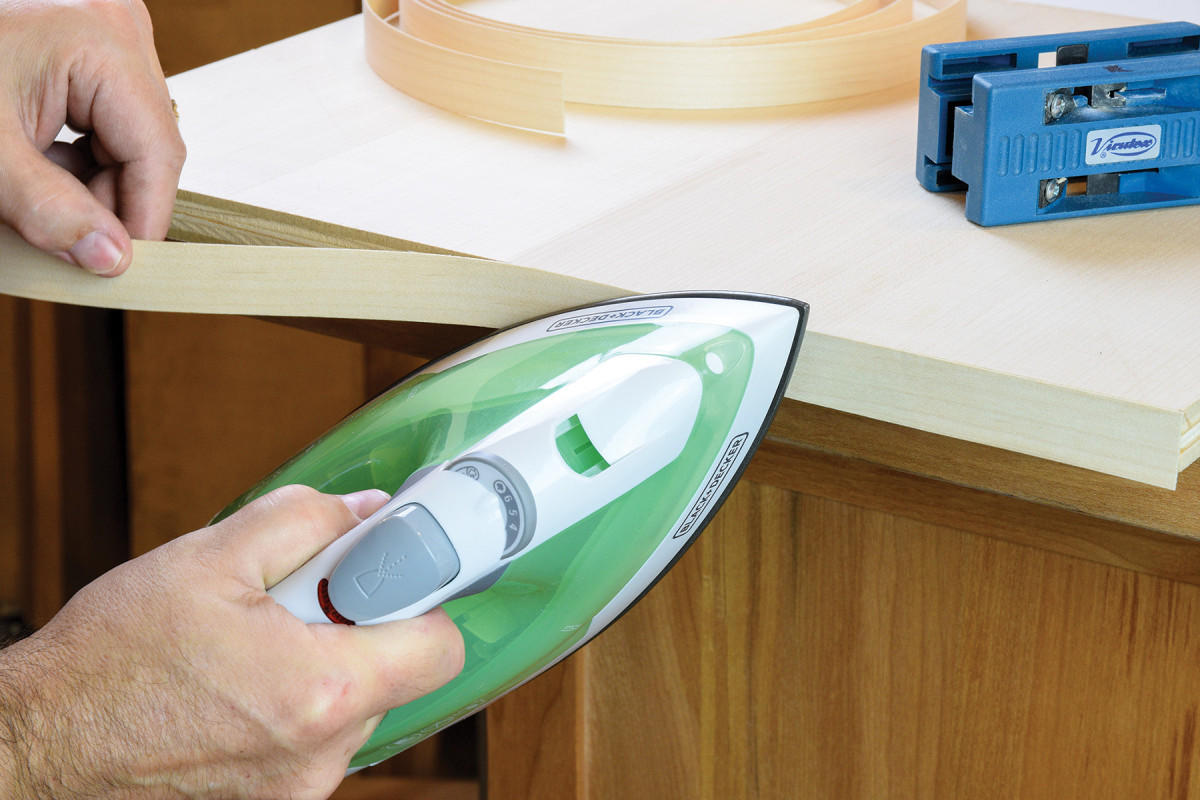
4. Cover any exposed edges with maple edgebanding. I use the iron-on variety, and align one edge to the plywood veener as I go. The opposite edge overhangs the plywood, and will be trimmed of later.
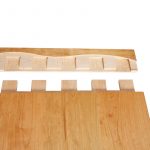
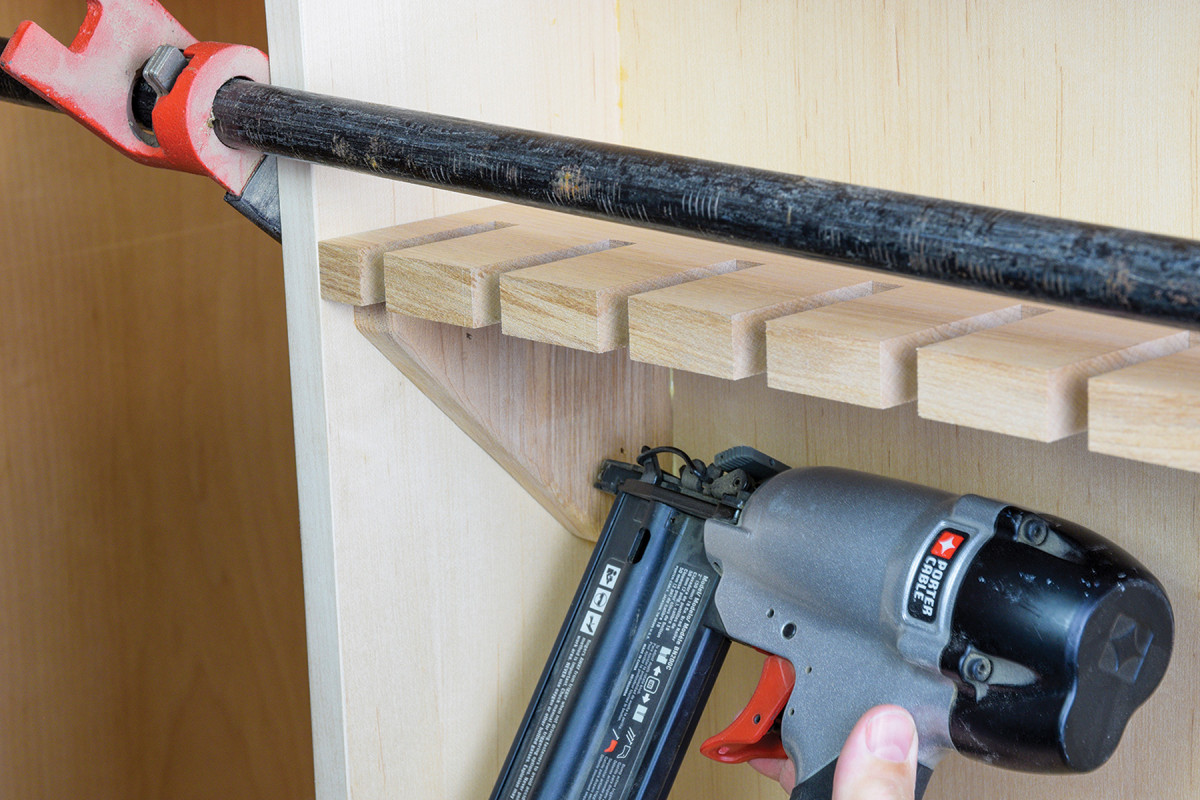
Take a moment to sand any sharp edges, and add the last fixed part to the base, a hardwood clamp rack. Use a 1/2“ wide dado stack to cut evenly spaced notches in a 293/4“-long x 51/2“-wide board.
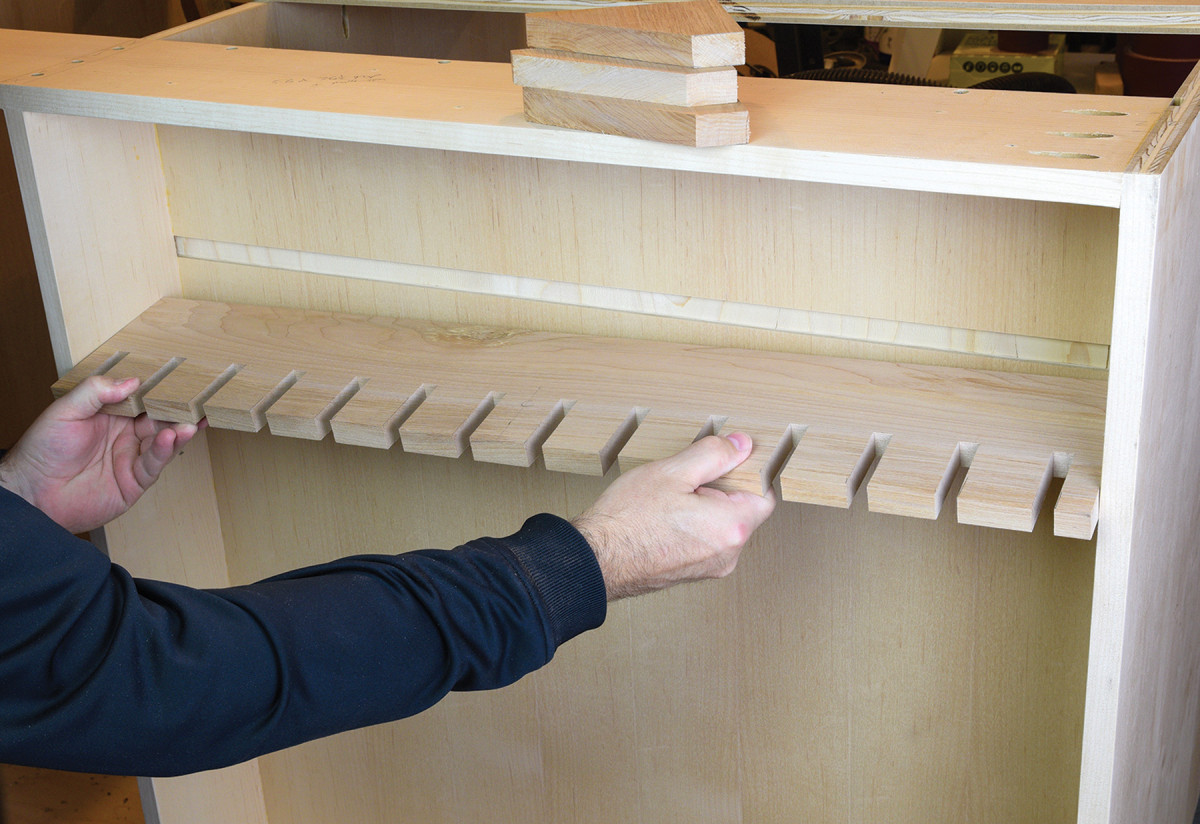
5. Plane a board to fit the dado, and cut a series of notches with a 1/2″ wide dado stack. Crosscut the clamp rack to fit, and glue it in the shallow dado.
The clamp rack is installed in a 1/4“ deep dado in the clamp wall panel. Three small brackets offer additional support to the clamp rack. I sized mine for small parallel clamps, however it could be adapted for various clamps in your shop. It’s a handy spot to always have a clamp at the ready when assembling projects.
Making Drawers
6. Attach three small triangular supports with glue and fasteners. Now your clamp rack is complete and ready for years of service.
I knew the drawers on this cart would carry a heavy load, and wanted them to last a lifetime, so I built them with solid hardwood lumber. The drawer boxes feature maple sides and walnut front and rear panels.
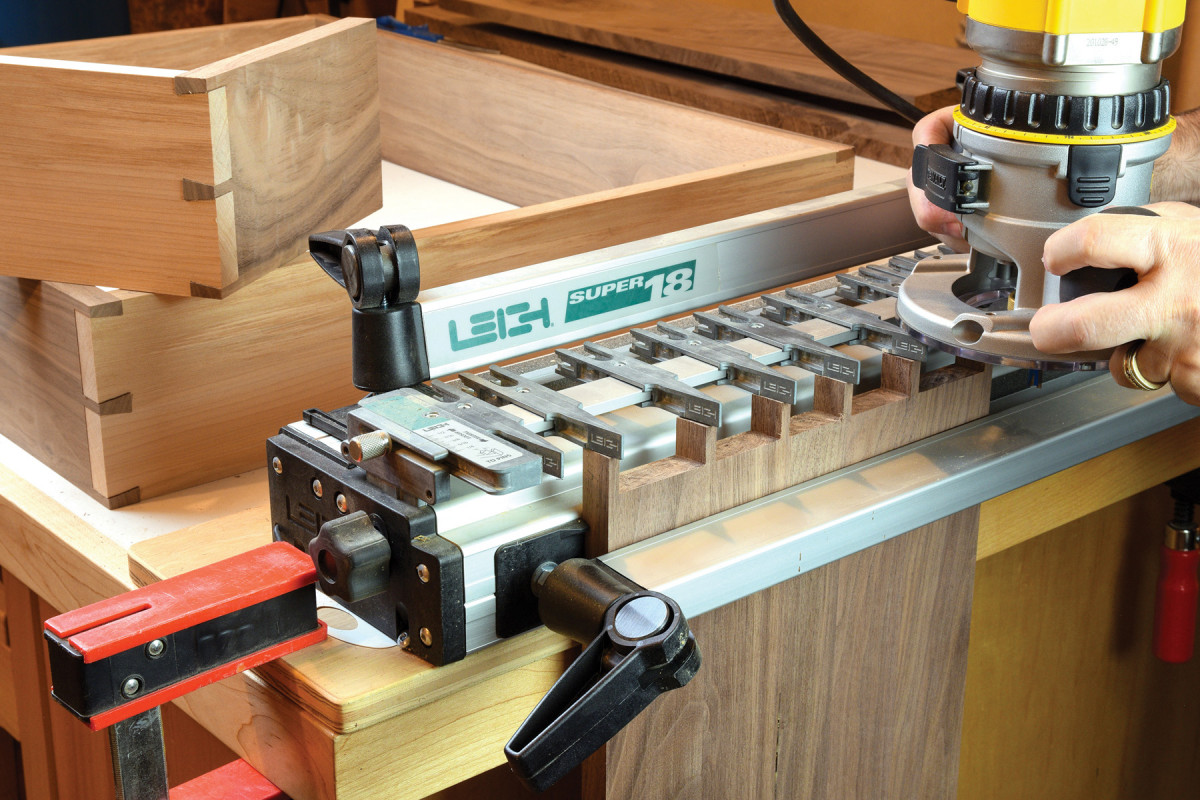
7. A variable spaced dovetail jig and router make quick work of the standard through dovetail corners. A dovetail bit handles the tails, while a straight bit cuts the pins.
The drawer bottoms are plywood panels. I used 1/4“ aromatic cedar plywood for the small top drawer, and more substantial 1/2“ maple plywood for the lower two drawers. The corners are joined with through dovetail joinery, and were cut with a variable spacing dovetail jig.
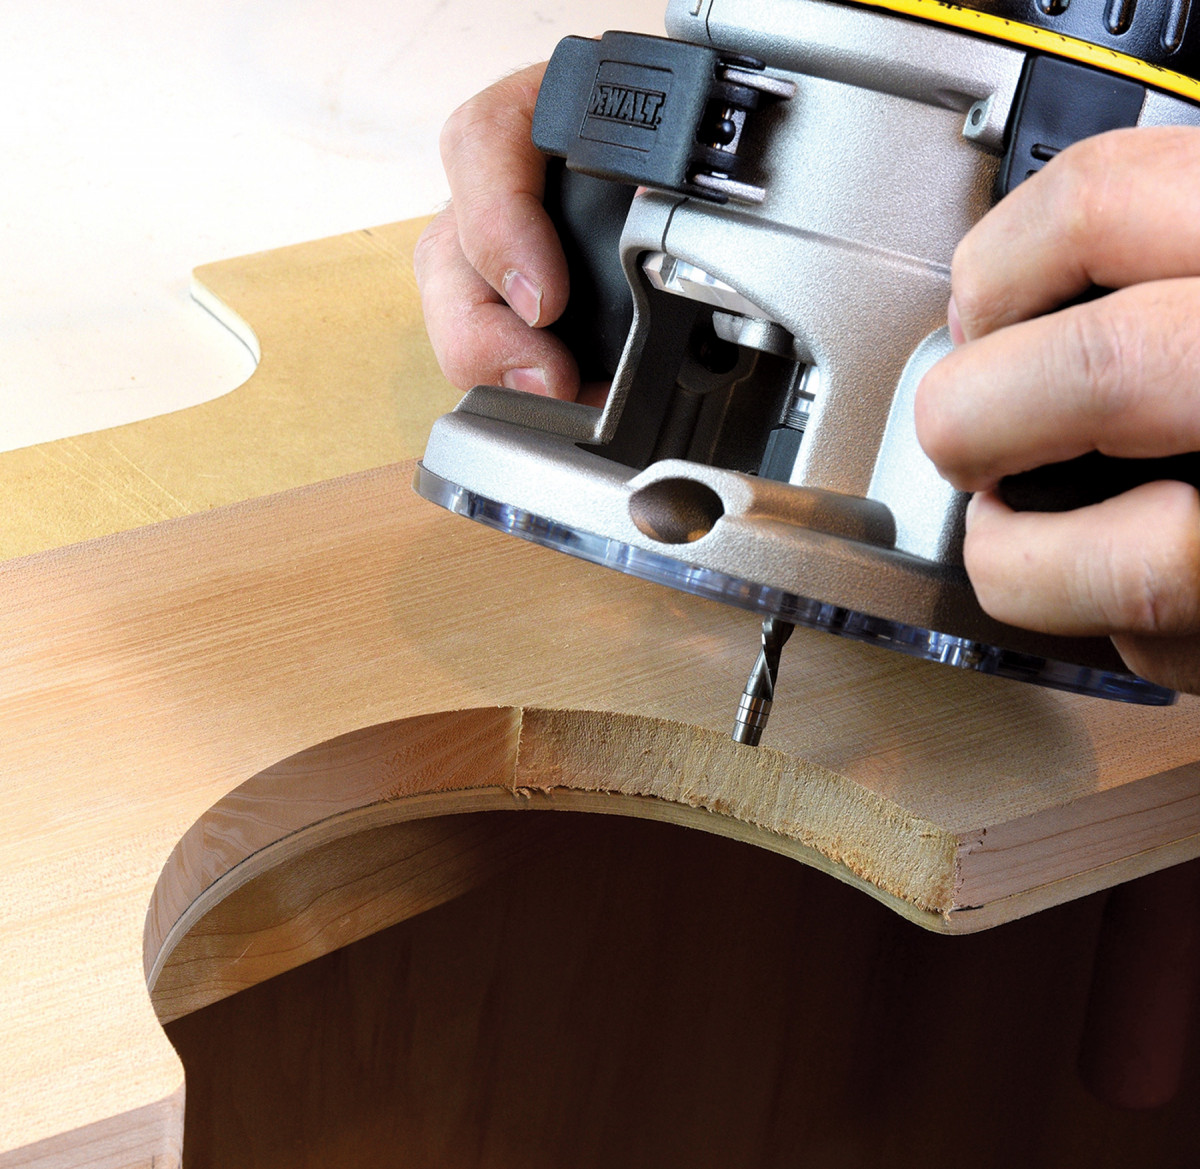
8-9. One template handles both draw front cutout shapes. Adhere the template to your workpiece with double-sided carpet tape, and clamp them to a workbench, before trimming to final shape
Once the drawer boxes are built, install the full-extension drawer slides in the cabinet. Hang the drawers and test them for proper operation. The finishing touch is the maple applied drawer fronts with curved cutouts. Mark the semicircular shapes for the drawer pulls, and joinery-exposing curves on each side.
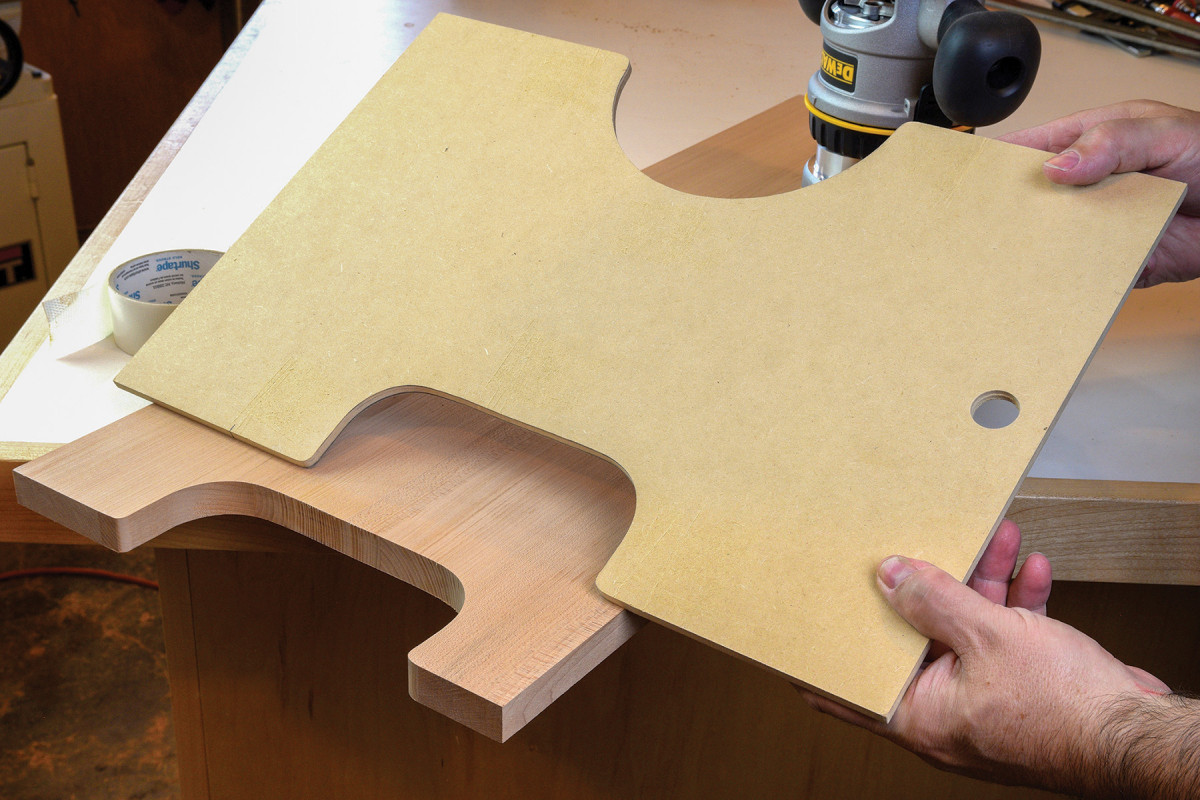 Rough cut the shapes at the bandsaw, and finish the job with a router and template setup. I made a two-sided template from a scrap of 1/4“ MDF to handle both shapes. Attach the template to the drawer with double-sided carpet tape, and chuck a bearing guided flush-trimming bit in your router. Once the final trimming is done, ease the edges with a 1/8“ radius roundover bit.
Pass-Through Doors
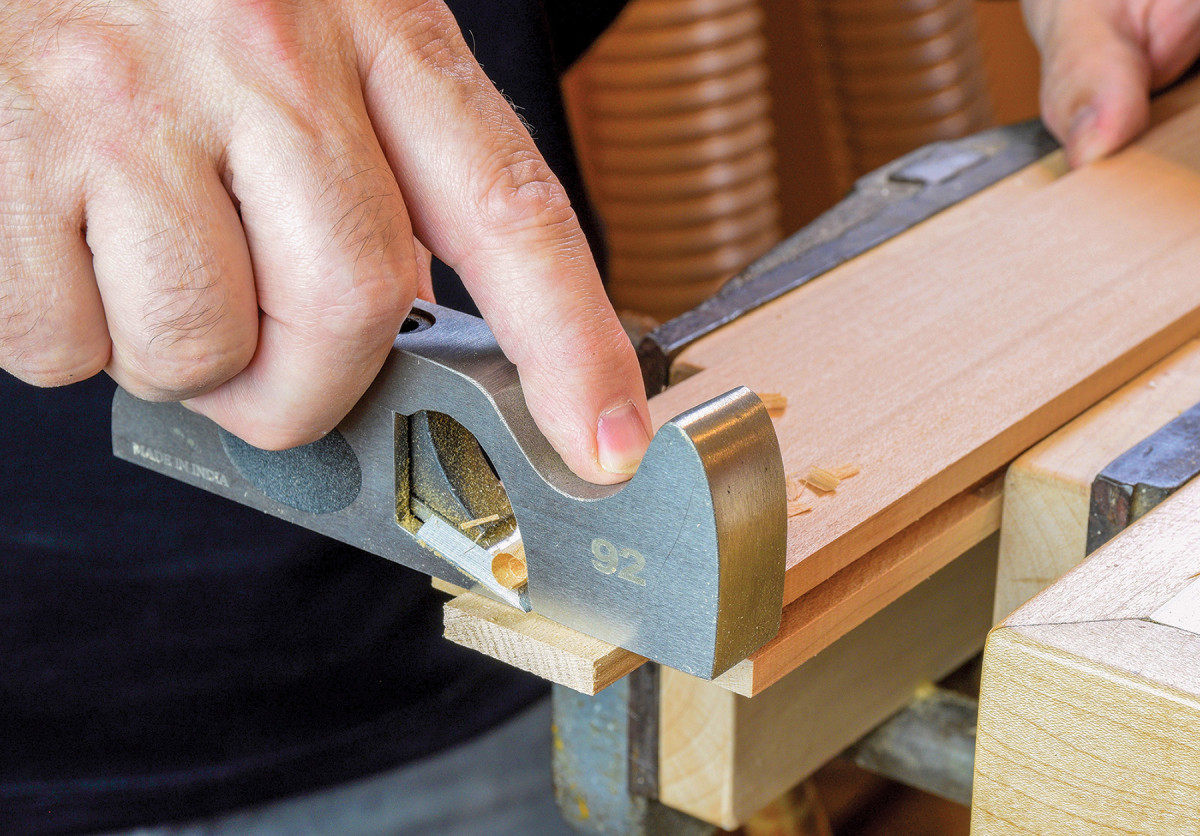
10. With a sanding block or shoulder plane, shave the door rail tenons until they nestle into their mortises. Take light cuts and check the fit frequently for best results.
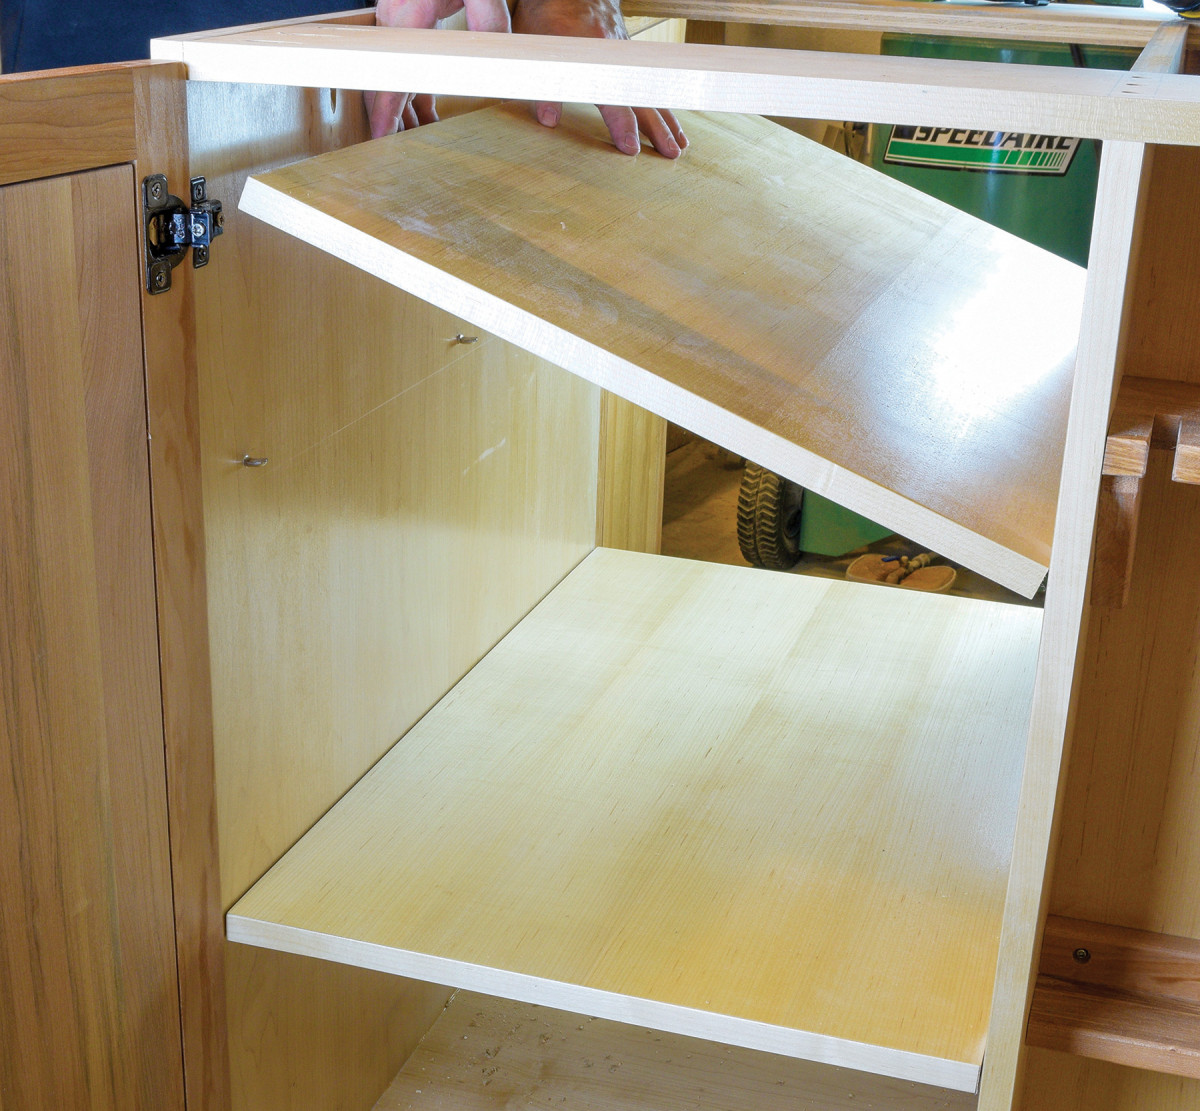
One limitation with typical shop cabinets is lack of space for long and bulky items. I wanted space to store my dovetail jigs and dowel stock, so I designed the cart with a pass-through cavity. It features long shelves that are accessible by a door on either side of the assembly table.
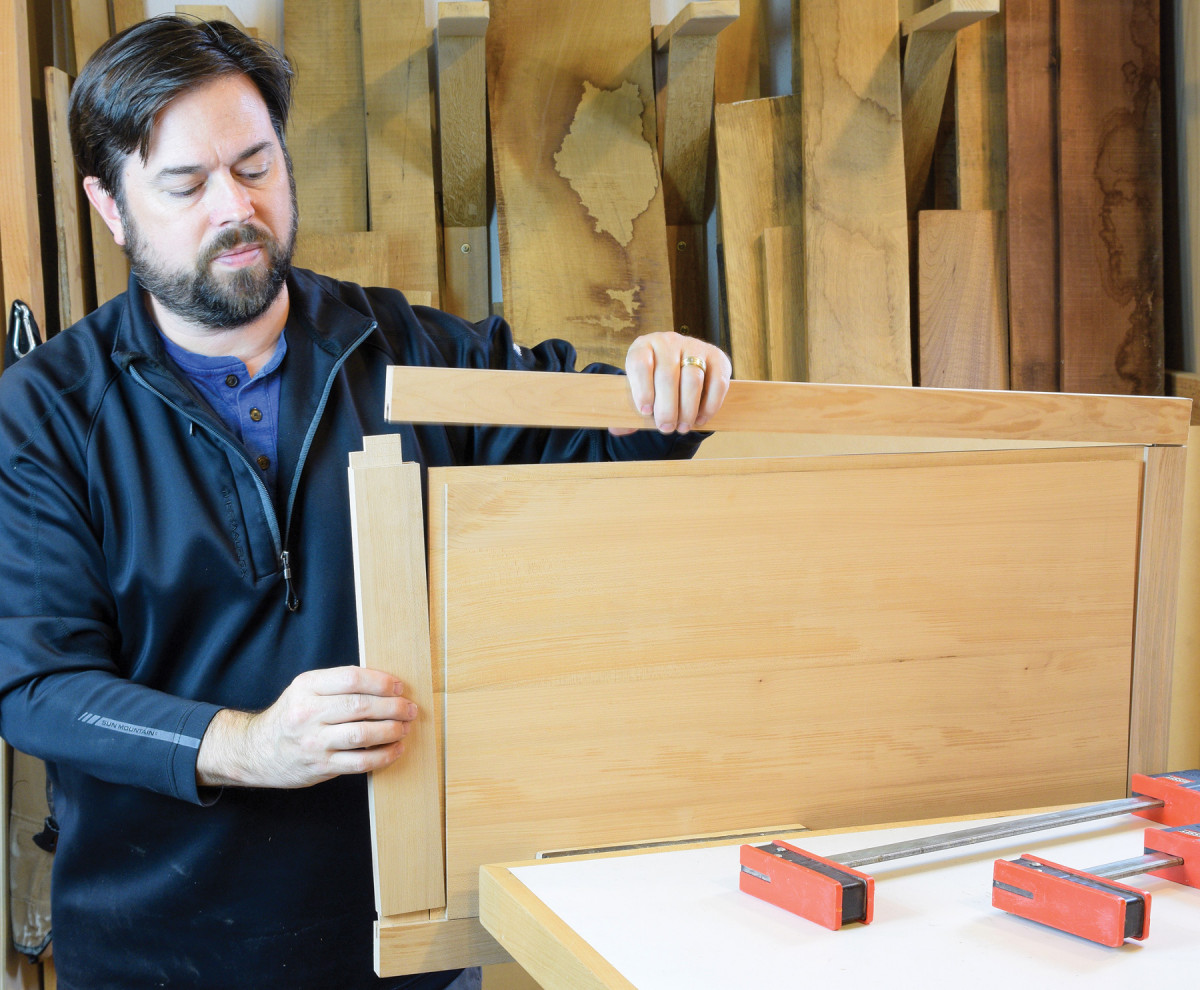
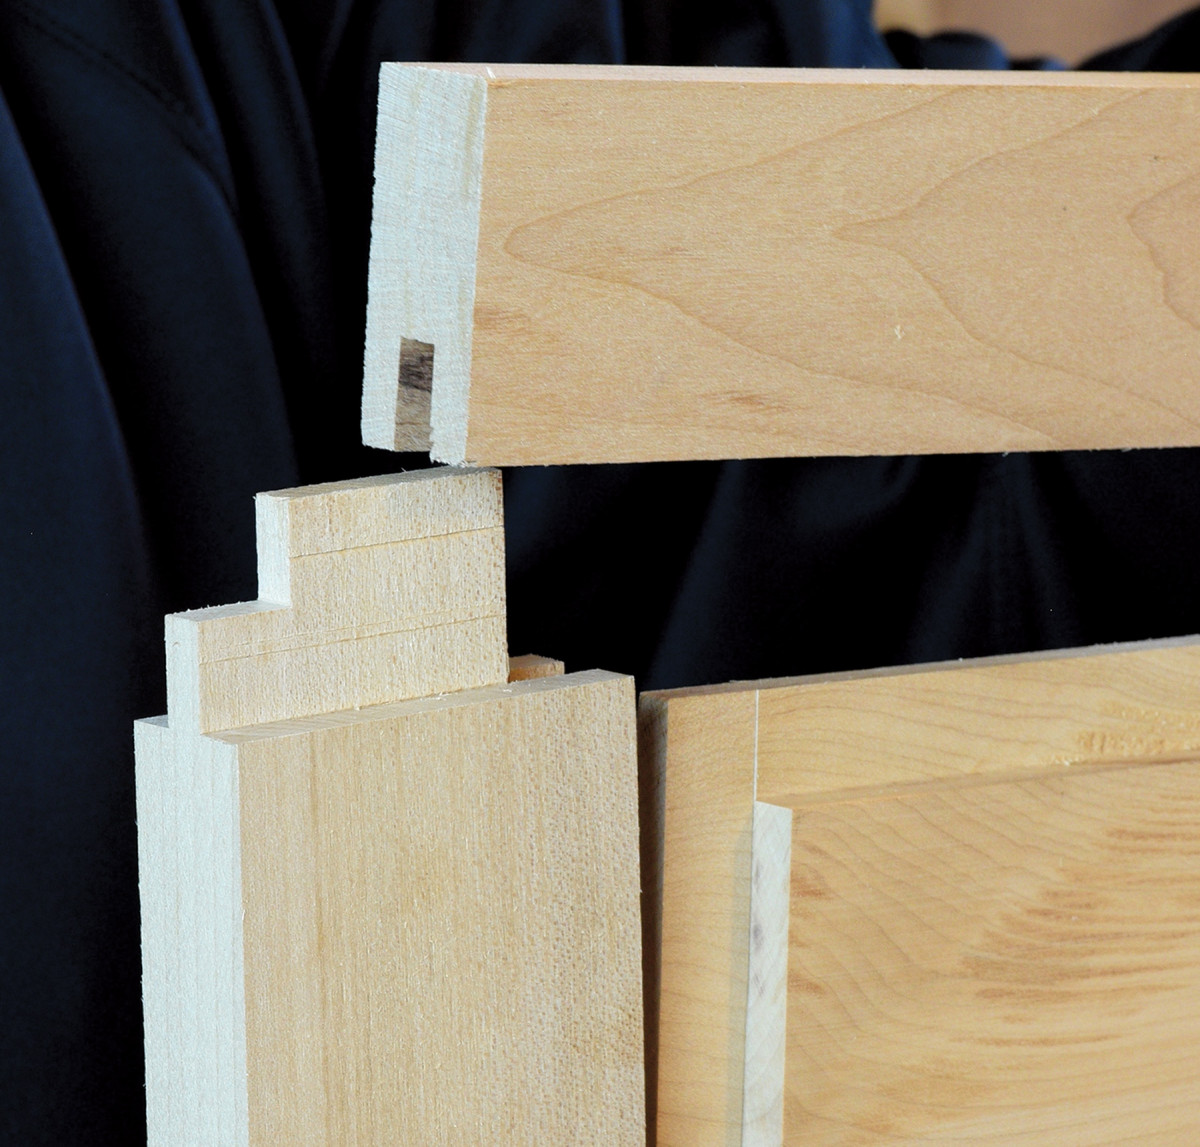
11-12. The 1″ long x 1/4″ deep tenons are haunched to fit the door stiles. The extra tenon length adds strength to the joint.
Build the doors with simple mortise and tenon construction, but make the tenons extra long for improved strength.
 The door is a solid maple panel, rabbeted to a 1/4“ tongue. If you’re running low on hardwoods, 1/2“ maple plywood is a reasonable substitute.
13. Use a spacer stick to set the 1/16″ gap between drawers, and attach the drawer fronts with carpet tape. Permanently secure the drawer front with five screws driven from inside the drawer box.
Attach each door to the cart with a pair of overlay cup hinges. Cut two long shelves to fit, and install them on six shelf pins each.
Extra Thick Top

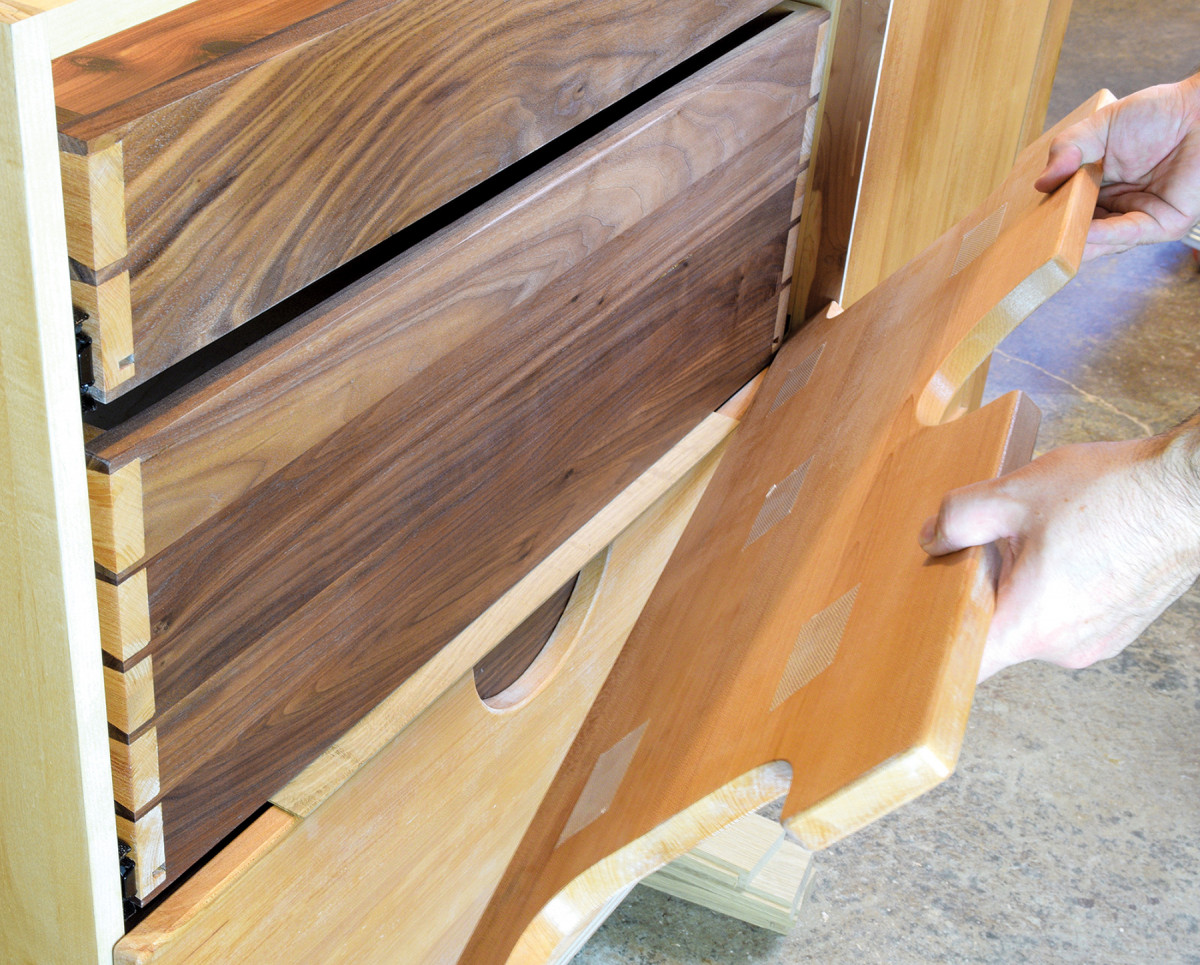
14. No metal knobs here, which could interfere with clamps when the cart is in use. Instead, a cove cut that aligns with the top drawer cutout making a convenient finger pull to open the door.
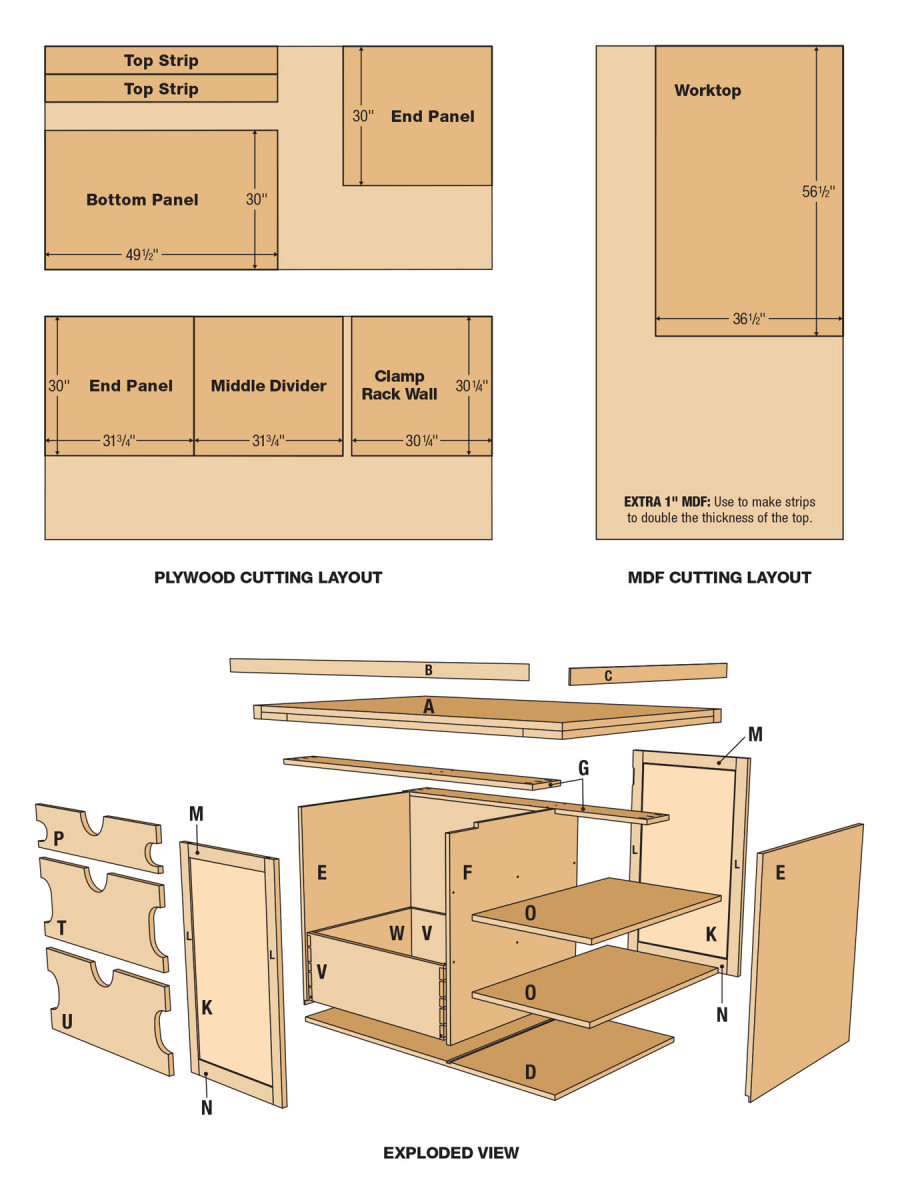
The top work surface is built-up from two layers of 1“ thick MDF. Cut a piece of thick MDF 58“ x 38“, and use the rest of the sheet to make 8“ and 12“ wide strips. Attach the strips around the perimeter of the worktop, as well as over the carcase dividers.
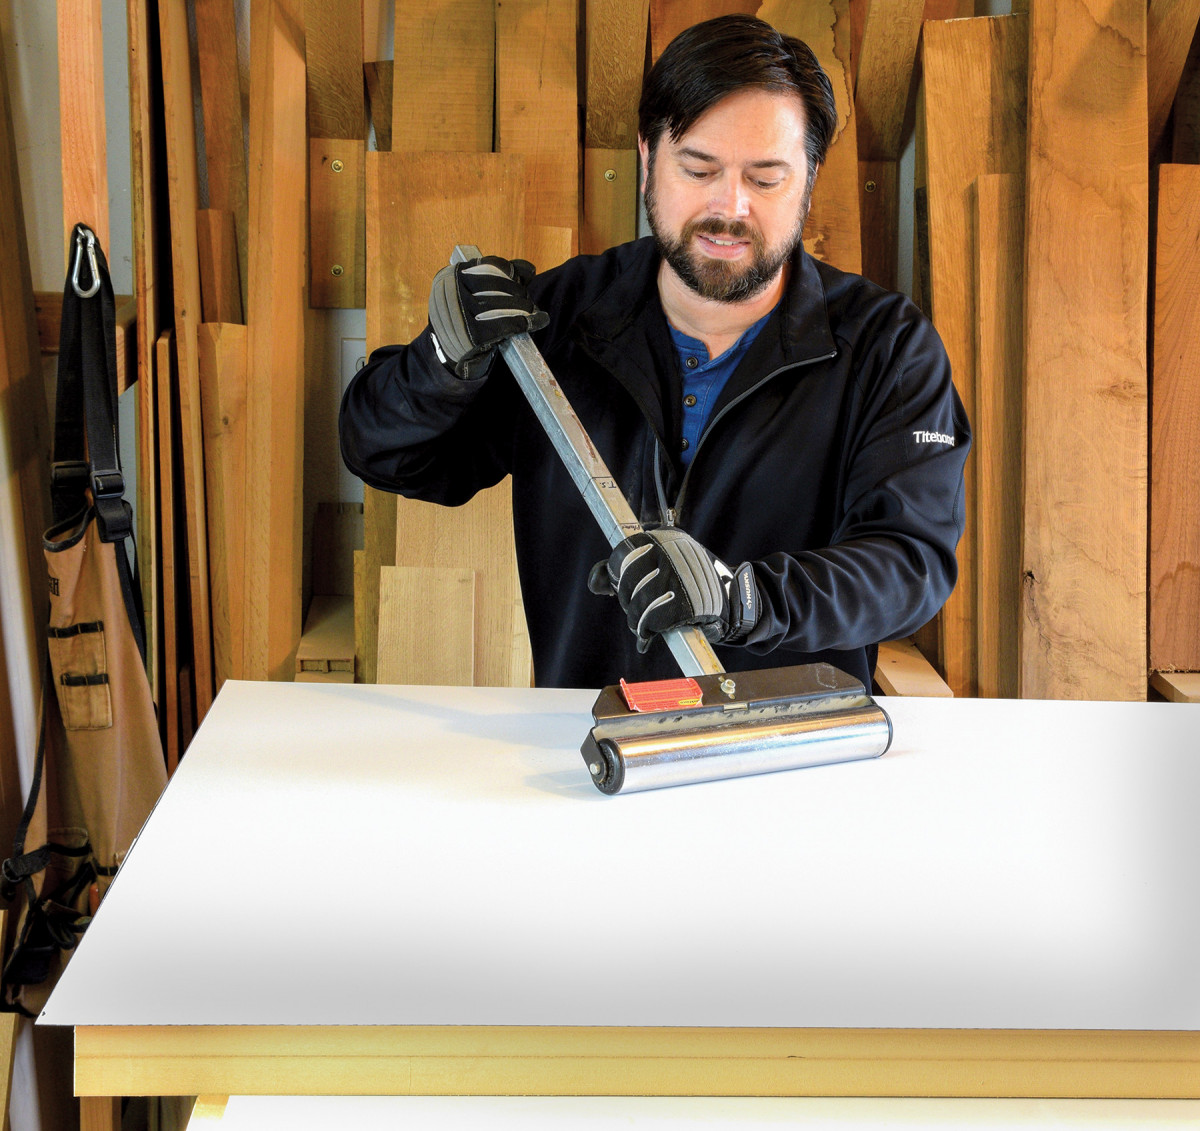
15. Attach a durable laminate surface to the thick MDF top with contact cement. Once the contact cement tacks over, press the laminate firmly in place with a J-roller or workpiece support roller.
This stiffens the countertop, as well as achieves adequate bearing on the cabinet framework. Instead of trying to align the edges perfectly, let the strips overhang the top panel slightly. Attach the strips with glue and screws, and flush trim the edges once the glue dries.
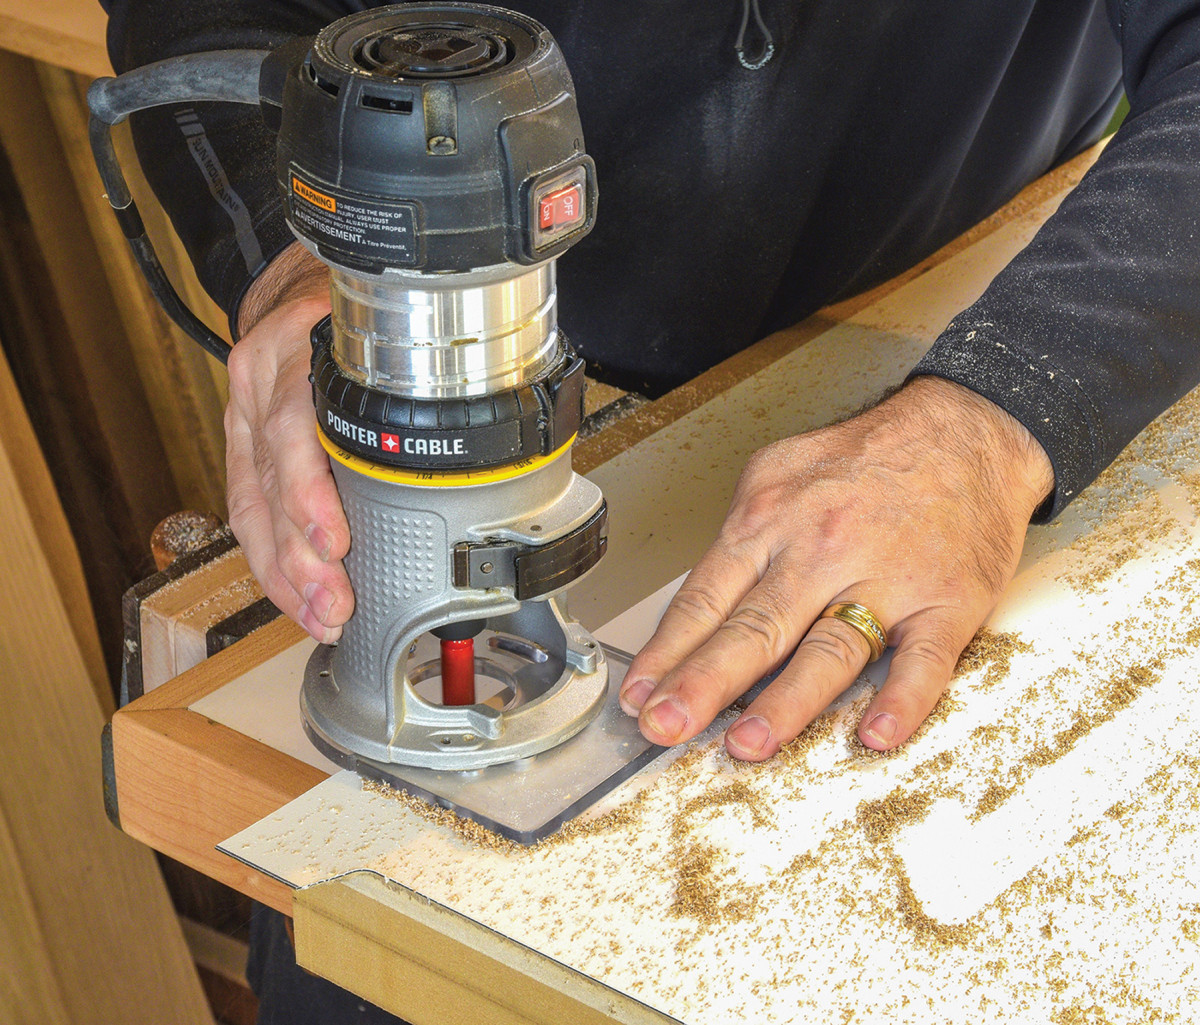
16. Install a laminate trimming bit in a compact router, and trim the surface flush.
Now add plastic laminate, for a work surface that’s durable and easy to clean. Apply contact cement to both surfaces with a low-nap paint roller and allow it to tack over until it feels dry to the touch.
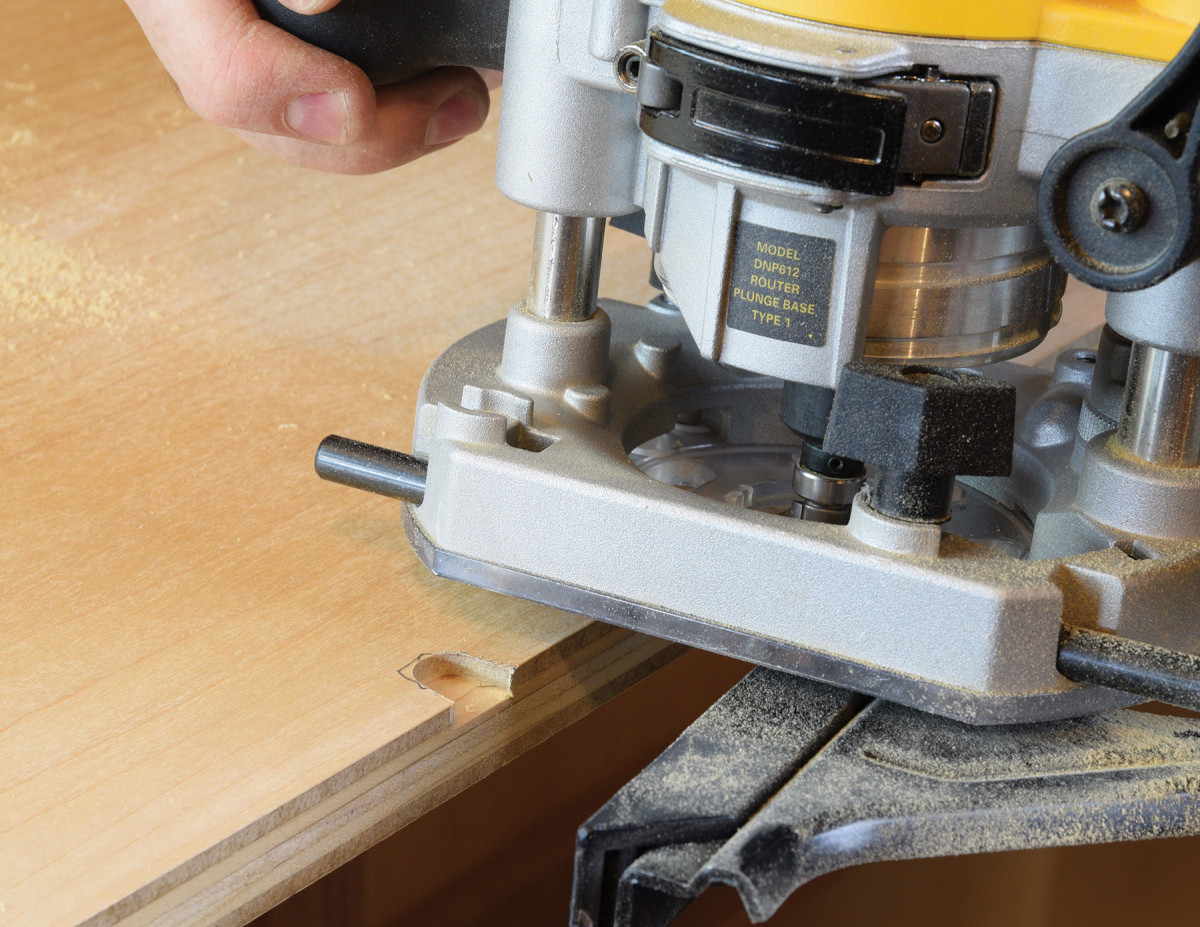
17-18. Install 6 shelf pins per shelf, and trace the location of each one. Then cut shallow recesses with a router, before dropping the shelf in place.
 The paint rollers for smooth walls with a 1/8“ or 1/4“ nap seem to work best. Apply the laminate, allowing it to overhang the top in all directions.
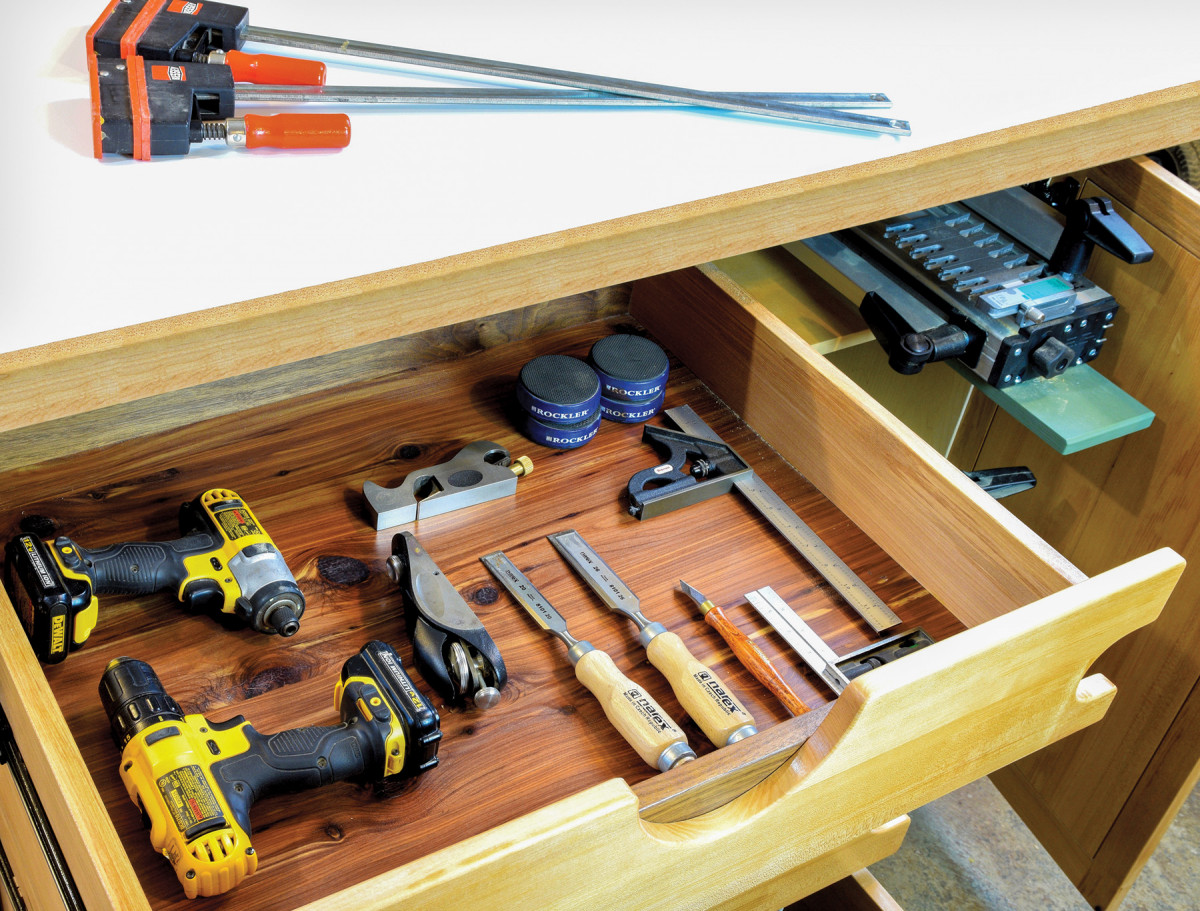
19. Load the drawers with your most frequently used tools, and they’ll be within reach on your next project.
With a trim router and laminate trimming bit, flush up the plastic laminate around the edges. Use a J-roller, or top half of a shop workpiece support roller, to press the laminate firmly to the substrate. The final step to complete the top is to add hardwood trim around the edges. I dressed the top out with 2“ wide x 3/4“ thick maple boards, mitered to fit. The maple edging is attached with biscuits and glue and clamped in place.
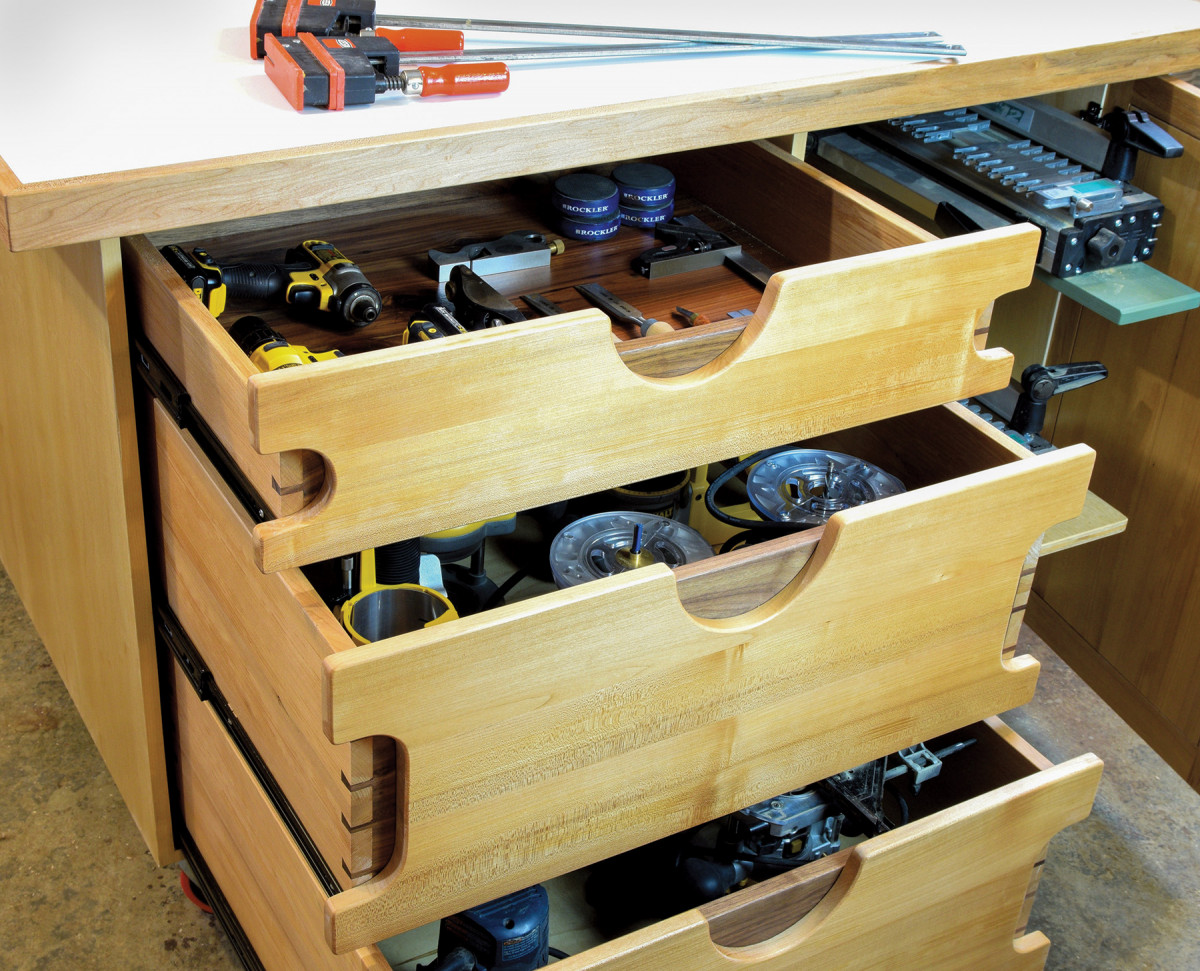
20. Even bulky router stored upright will disappear into the oversized drawers. Just like the cabinet doors, skip metal drawer pulls for unfettered access when clamping workpieces to your table.
Applying finish is optional, but I like to add a few coats of something for a bit of protection—usually whatever I have on hand. This assembly table is finished with waterbased polyurethane, which I’ve used on a lot of my shop furniture. It’s simple to apply and makes things easy to clean up. All that’s left to do is load it up and start working.
Materials List
Maple edgeband: 7/8” W x approx. 50′ L
Pocket hole screws: #8 x 11/4” and 11/2” L
3 pairs of full extension drawer slides
2 pairs of 3mm cup hinges
Plastic laminate (white): 37″ W x 57″ L
Maple trim for worktop: 3/4” T x 2″ W x 16′
Misc. 3/4” MDF for template
Four Total locking swivel casters: 4″ wheel diameter, 5″ overall height
Mobile Assembly Table Cut List
No. Item Dimensions (inches)
T w l
1 A Worktop 1 x 36 1/2 x 56 1/2
2 B Worktop edge boards: long 1 x 5 x 56 1/2
2 C Worktop edge boards: short 1 x 5 x 26 1/2
1 D Bottom panel 3/4 x 30 x 49 1/2
2 E End panels 3/4 x 30 x 31 3/4
1 F Middle divider 3/4 x 30 x 31 1/4
2 G Top strips 3/4 x 6 x 48 1/2
1 H Clamp rack wall 3/4 x 30 1/4 x 30 1/4
1 I Clamp rack component 3/4 x 5 1/2 x 29 3/4
3 J Clamp rack brackets 3/4 x 3 x 3
2 K Door panels 1/2 x 16 1/4 x 28 3/8
4 L Door stiles 3/4 x 1 3/4 x 31 3/8
2 M Upper door rails 3/4 x 1 3/4 x 17 1/4
2 N Lower door rails 3/4 x 2 1/4 x 17 1/4
No. Item Dimensions (inches)
T w l
2 O Pass-through shelves 3/4 x 18 x 30
1 P Top drawer front 3/4 x 6 7/16 x 30 5/8
2 Q Top drawer boxes: front/rear 3/4 x 5 x 28 3/4
2 R Top drawer boxes: left/right 3/4 x 5 x 23 1/2
1 S Top drawer bottom 1/4 x 22 3/4 x 28
1 T Middle drawer front 3/4 x 12 x30 5/8
1 U Bottom drawer front 3/4 x 13 x 30 5/8
4 V Lower drawer boxes: front/rear 3/4 x 11 x 28 3/4
4 W Lower drawer boxes: left/right 3/4 x 11 x 23 1/2
2 X Lower drawer bottoms 1/2 x 22 3/4 x 28
This project requires two 4×8 sheets of 3/4” maple plywood, one sheet of 1″ thick MDF (worktop piece), a piece of laminate for the top, plus smaller amounts of 1/4” thick and 1/2” thick miscellaneous plywood for the drawers and doors. It’s a great excuse to use all your scraps.
Here are some supplies and tools we find essential in our everyday work around the shop. We may receive a commission from sales referred by our links; however, we have carefully selected these products for their usefulness and quality.