We may receive a commission when you use our affiliate links. However, this does not impact our recommendations.
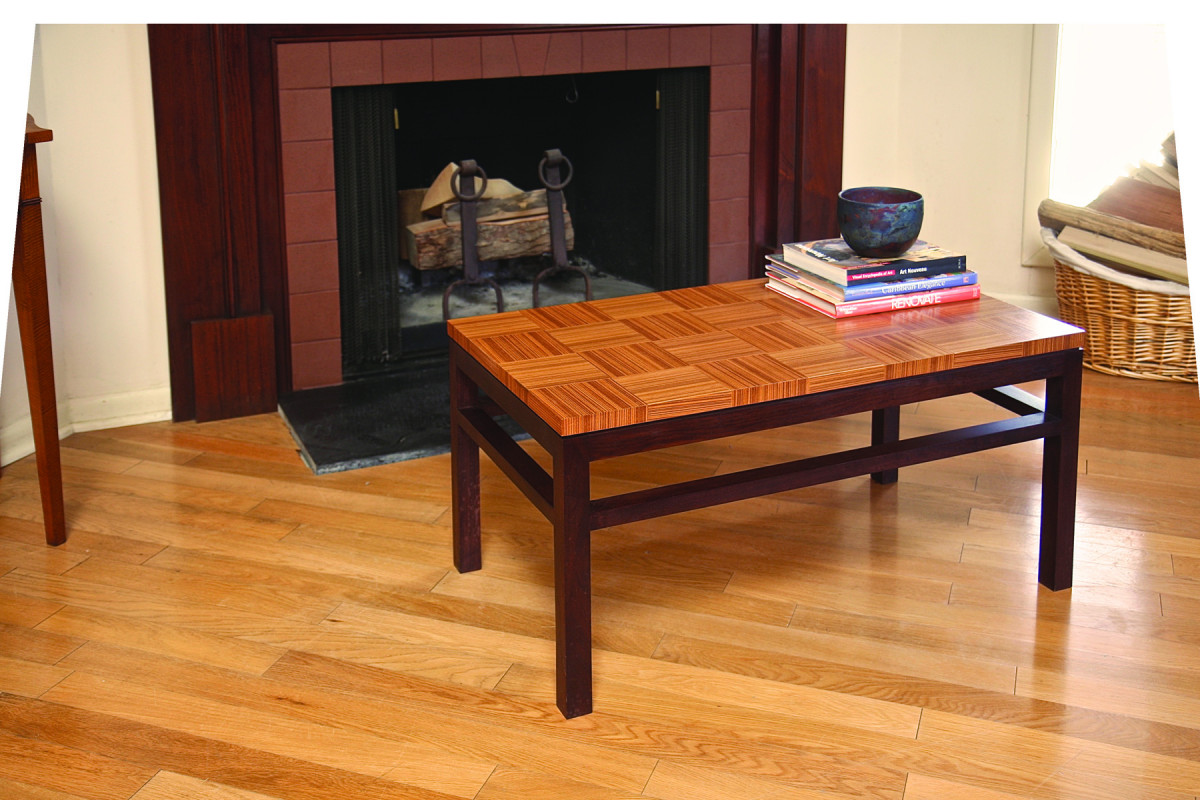
Top this sleek design with patterned veneer – it’s much easier than it looks.
All over the country, mid-century designs, with their sleek surfaces and clean lines, are turning up in high-style interiors. Here’s a simple table that’s perfect for any modern interior setting. It employs loose-tenon joinery and a veneering technique I introduced years ago that uses yellow glue and a common household iron.
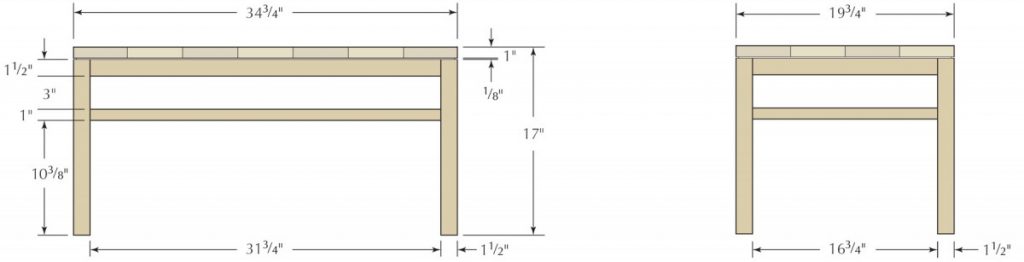
The base is made up of square legs that are joined to rails of the same dimension. Then the construction is reinforced by a second set of slightly narrower rails. The rectangle formed by the legs and top rail is visually divided and reinforced by a second, slightly narrower, rail. This simple arrangement of the rectangle creates a nicely divided space that is both strong and pleasing to the eye.
Simple Joints for a Clean Look
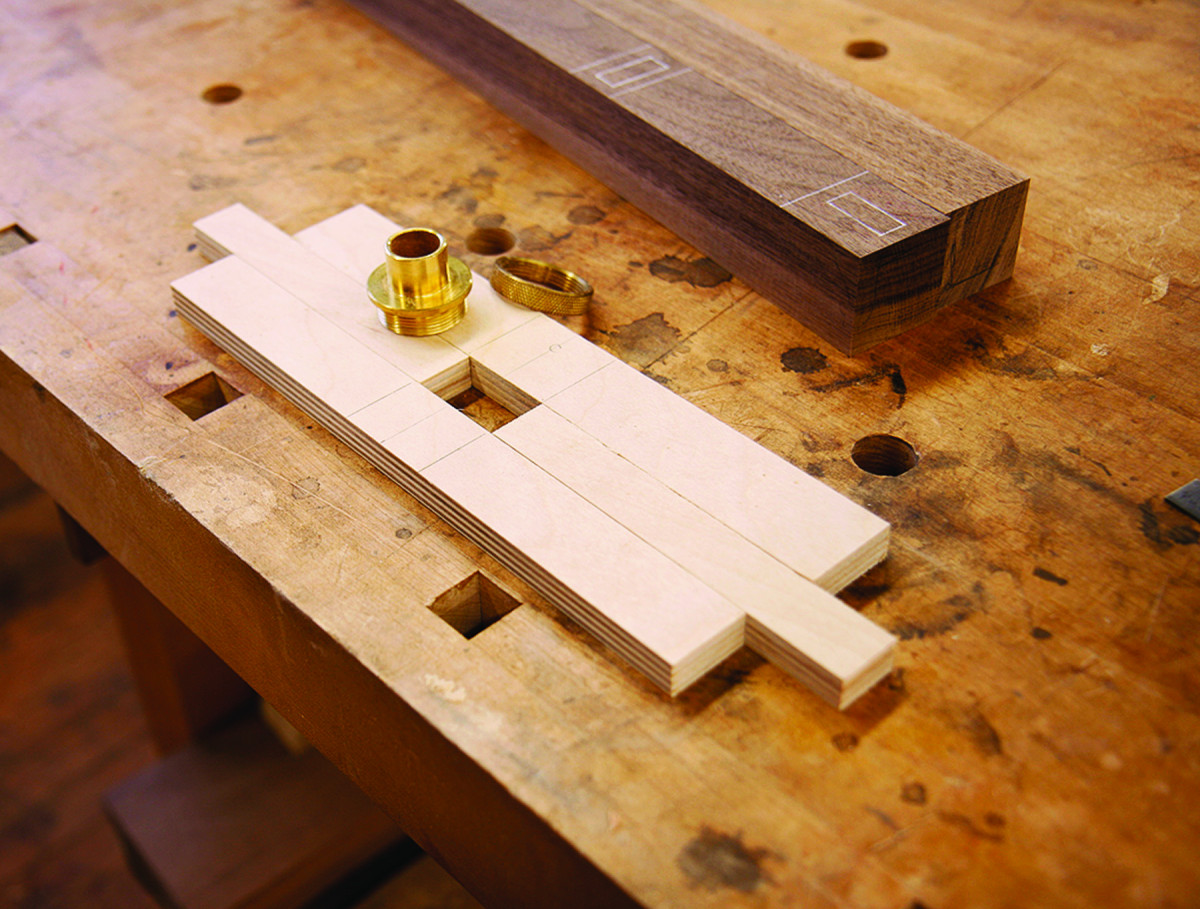
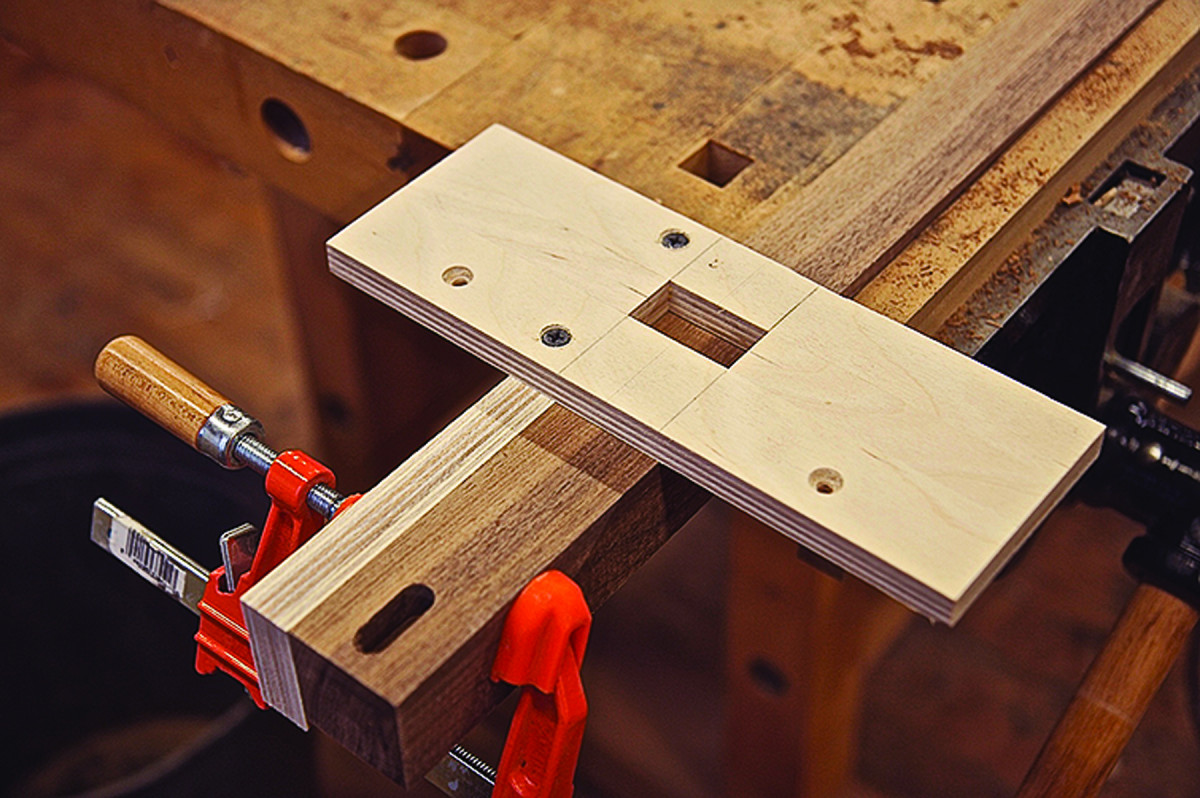
This equals that. The jig platform is assembled around the bushing to ensure a snug fit. The narrow strips in the middle are equal in width to the diameter of the bushing.
The key to this design is a base that doesn’t distract the viewer from the intricate top – so I kept the rails and legs at 11⁄2” square. Working with such slender members presented a problem: How could I maintain the dimensions of the parts yet join them soundly?

Double duty. Mortises are cut into both the legs and aprons with the same jig and at the same settings.
I decided to use loose mortise-and-tenon construction for the base. Loose tenons provide the necessary strength and allow me to speed up and simplify construction.
To cut the mortises, use a jig made from scrap plywood that supports and secures the parts, and provides precise registration and uniform results. The key to the jig is a platform that controls the travel of a 3⁄4” outside-diameter router bushing to set the length of the mortise. The mortises are 3⁄8” wide and cut with a upcut-spiral router bit. The space between the router bit and the router bushing provides adequate clearance for chips and debris generated by the cut.
One good turn. With the jig fence re-set, mortises for the lower rail (which run across the leg) are also cut.
The distance between the outside of the bushing and the bit is figured into the length of the slot on the router jig. The jig platform is mounted onto a fence that centers the mortise on the wood thickness and a stop is attached to the fence. This setup controls perfectly both the position and dimensions of the mortises for both the legs and the rails.
In one configuration, the jig is set to cut the top mortises in the direction of the leg. With the fence re-set at 90º to the slot, I cut the mortises for the lower rail, which run across the leg.
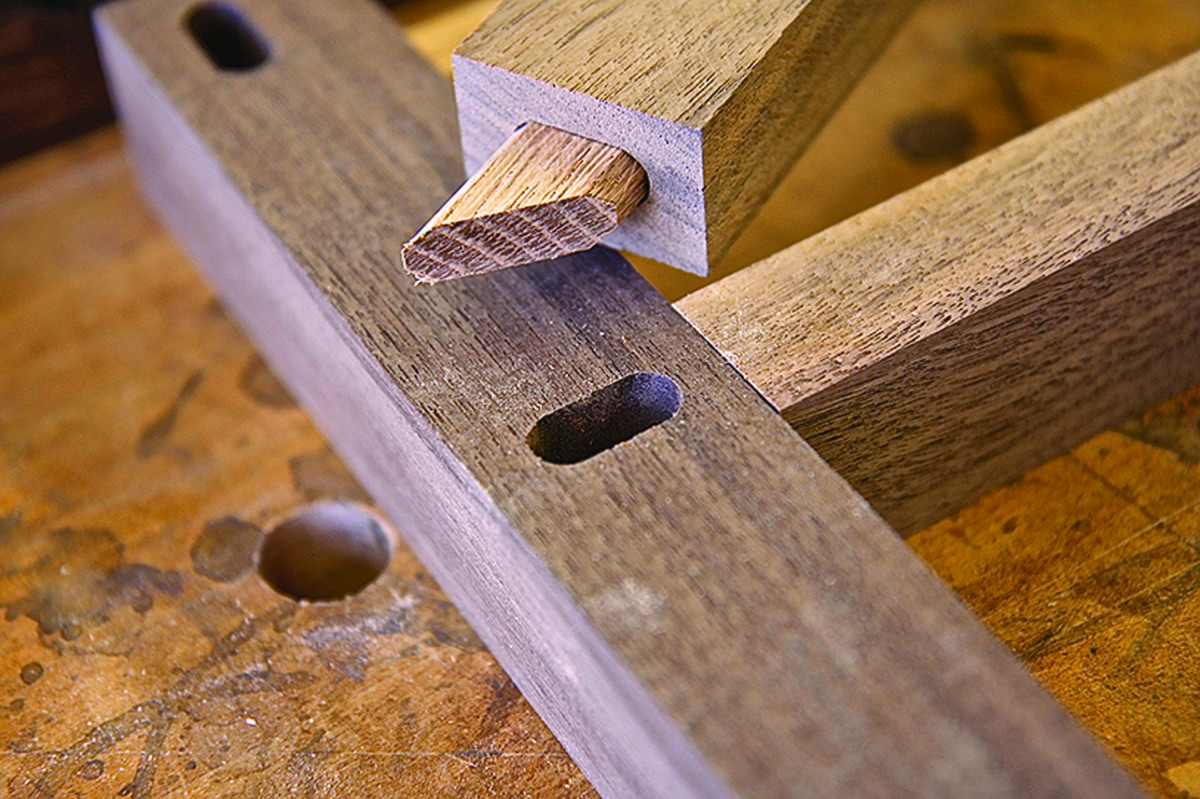
No interference. The ends of the tenons are mitered for a stronger joint.
To make the tenons, dimension oak stock to a precise 3⁄8” thickness and rip it to a fat 1″ to match the length of the mortise. Then set the table saw blade at 45º and cut off the corners of the tenon stock to produce tenons that fit neatly into the rounded mortises without any play or slop.
Finally, cut the tenon stock to length on the band saw. Because the legs are only 11⁄2” square, the mortises are a little shallow. But by mitering the protruding ends to 45º, the tenons more fully engage the mortises for increased strength.
Two Steps for the Base

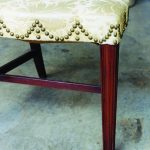
Thin & pinned. Thin strips applied flush with the inside edges create a 1⁄8″ reveal between the upper edge of the rails and the tabletop.
Carefully clean and sand the legs and rails, removing all mill marks before the glue-up. Then join the legs to the longer rails, checking for square and for tight joints. After allowing the longer frames to set up, join the frames to the shorter rails and again check for square.
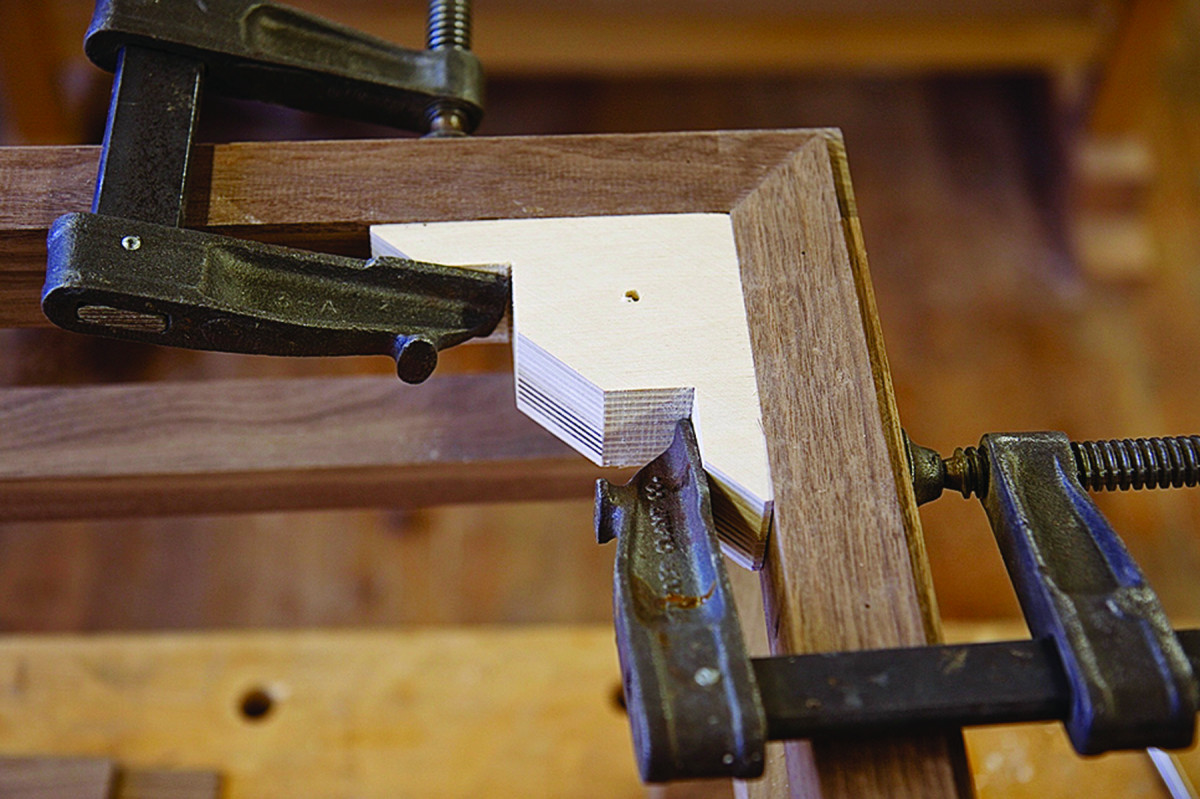
Solid addition. Corner blocks are glued and screwed into place. They strengthen the corner and provide a way to attach the top.
When the base is completely glued up and set, I glue and nail 1⁄8“-thick x 11⁄4“-wide strips flush with the inside top of the table base with mitered corners. These strips create an attractive reveal between the top and base when the table is assembled. Next, I screw and glue reinforcing blocks at each corner to strengthen the base assembly and provide a means of attaching the top to the base later.
Weave the Top
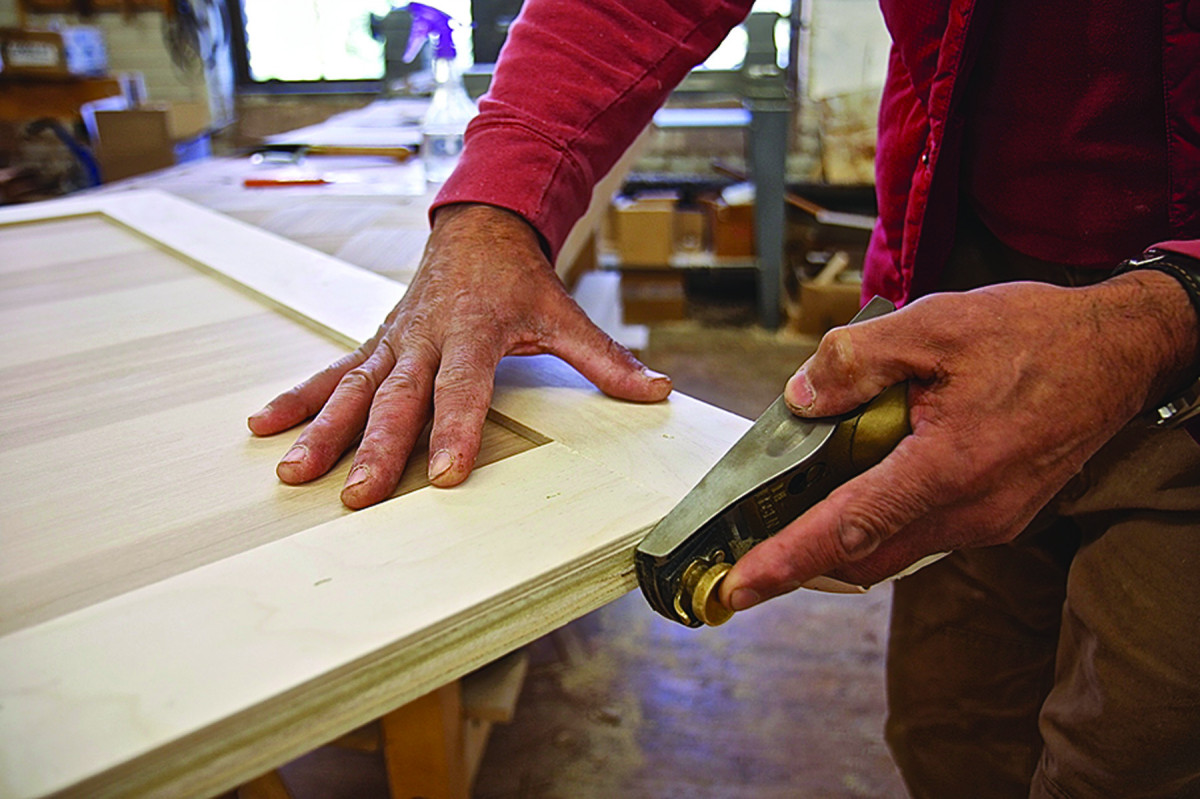
In the thick of it. Thin strips added to the perimeter make the plywood top appear thicker. A block plane is used to trim and flush the substrate edges.
I use 3⁄4“-thick shop-grade plywood for the top, “beefed up” to a 1” thickness with 1⁄4“-thick strips glued and nailed to the underside of the thicker plywood. When the glue is dry, use a block plane to plane the edges flush.
The veneered top is arranged in a pattern of squares, with each square’s grain running perpendicular to those surrounding it. This easy arrangement achieves an attractive design that resembles a basket-weave pattern that’s made even more striking by the strong linear grain pattern of the teak veneer I used.
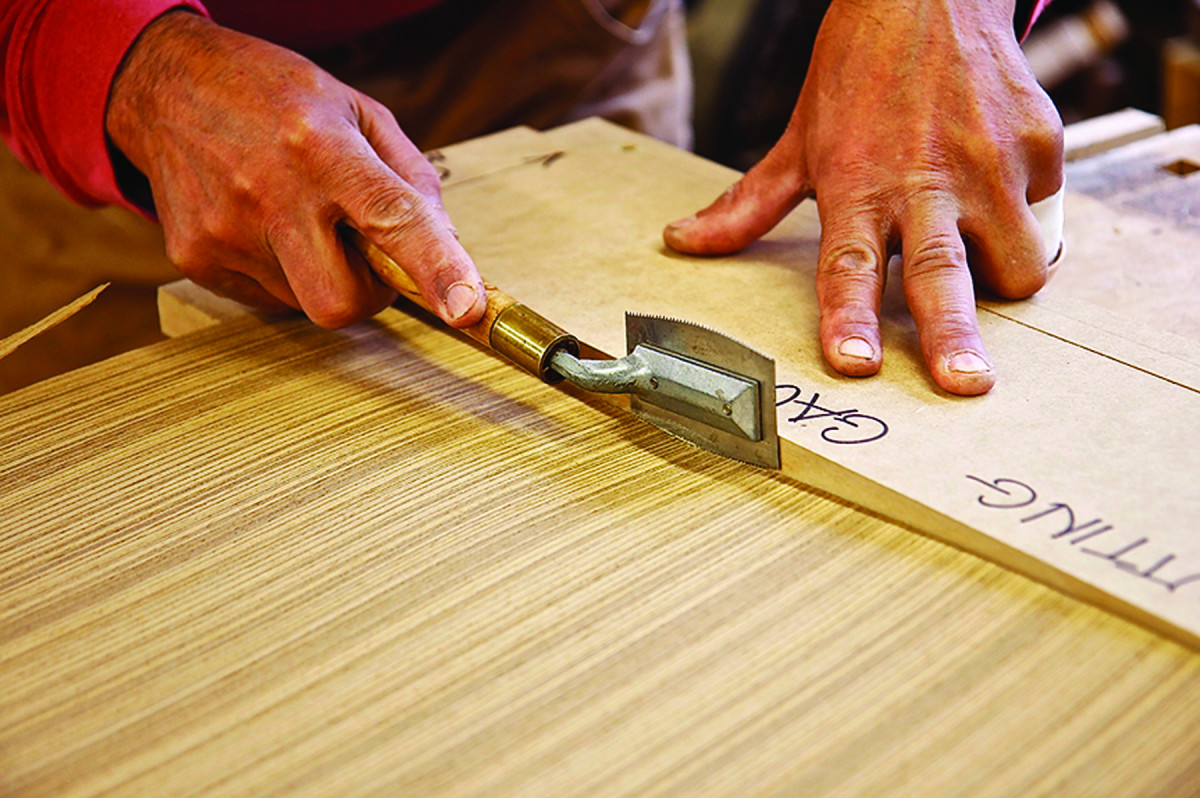
This way. The reconstituted veneer sheet is cut across the grain into 5″-wide strips.
The thought of working with veneer usually strikes terror in the hearts of most woodworkers. Veneering can be messy, difficult and unpredictable – but on this project, it’s a piece of cake; many of the problems commonly associated with veneering are easily avoided.
I chose reconstituted teak veneer for its straight grain and strong contrast. Unlike conventional veneer, reconstituted veneer is made up of sliced veneer that is re-glued into a distinctive yet uniform color and pattern, then sliced into sheets. This produces an unusually stable and well-behaved material, well-suited to this veneering technique and perfect for this project.

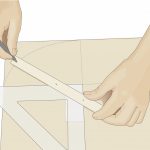
Then that way. After pinning the strips into place, dampened veneer tape is applied along the entire seam.
The veneer is sold in sheets measuring 26″ x 135″ and is available in several wood species. Because of its unique constitution, the veneer is fairly easy to handle and not prone to cracking or tearing as easily as conventional veneer.
After reducing the large sheet to smaller, easier to handle sections, cut several 5″-wide strips across the grain and a number of 5″-wide strips along the grain. Then tape these strips together, alternating long-grain with cross-grain strips.
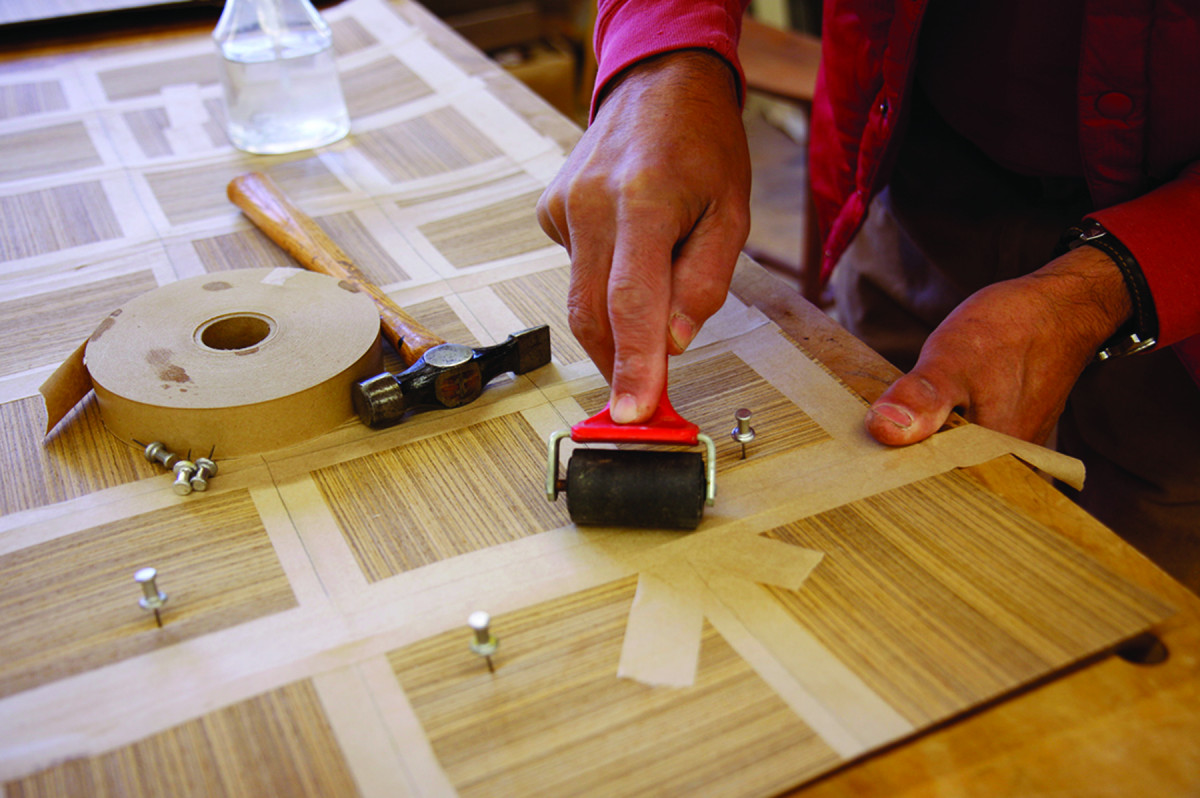
Rolling along. A roller secures the veneer tape and ensures a strong bond and a tight seam.
Next, cut this reconfigured sheet into 5″-wide strips, producing strips with alternating grain squares. Finally, flip every other strip end over end to achieve the basket-weave design and tape this arrangement together. (As a precaution, I applied tape along the perimeter to prevent any damage.)
From offcuts and leftovers, form enough edging to cover the tabletop’s edges, then generously apply tape to these strips.
Basket Weave by the Numbers
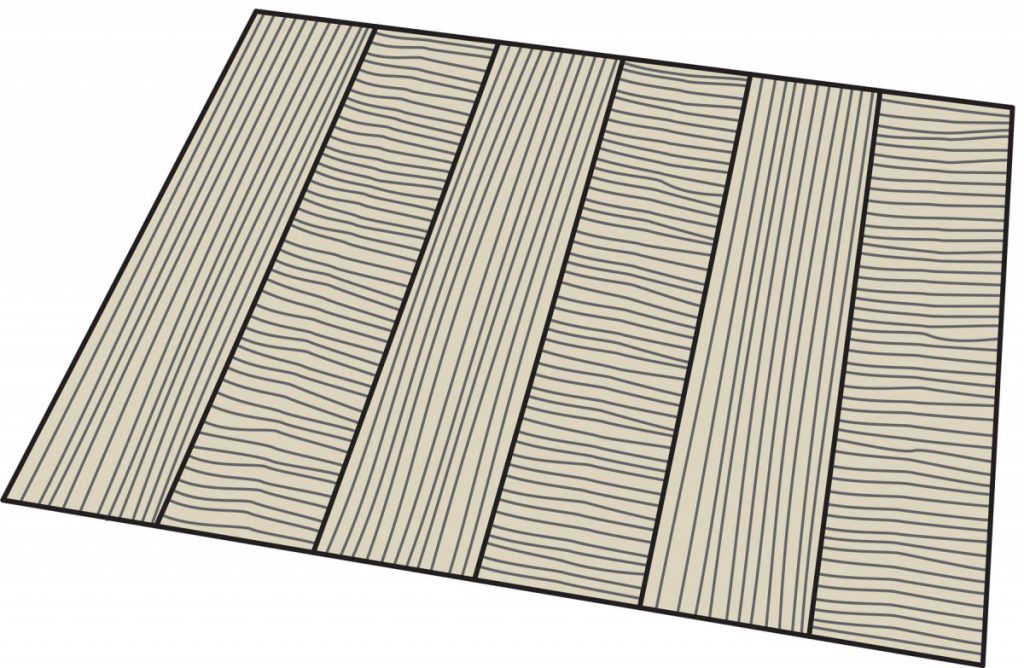
1. Reconstituted veneer is sold in sheets measuring 26″ x 135″.
2. Cut 5″-wide cross-grain strips from the sheet.

3. Cut 5″-wide strips with the grain from the sheet.
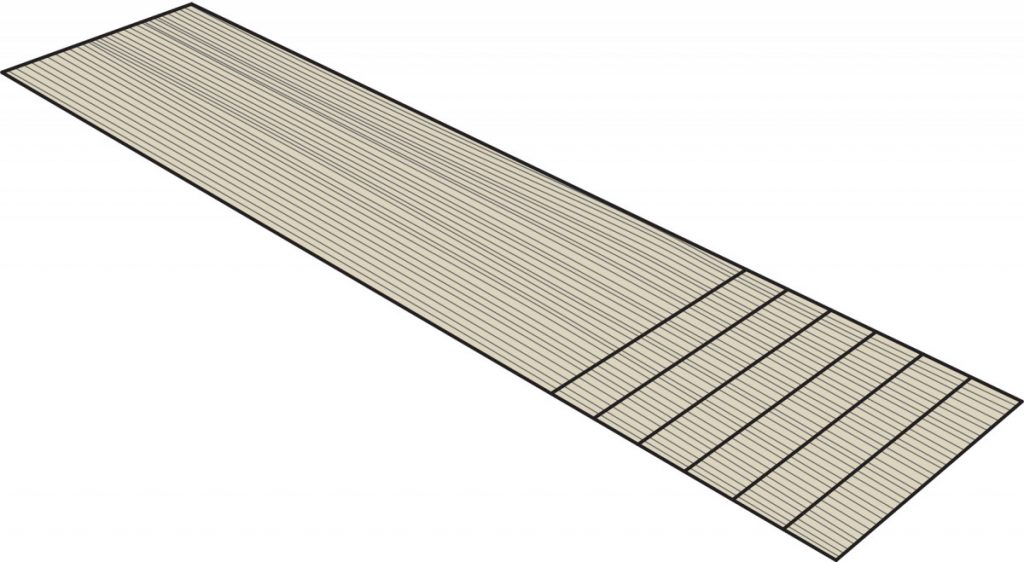
4. Tape alternating strips together. Begin with a long-grain strip and end with a cross-grain strip.
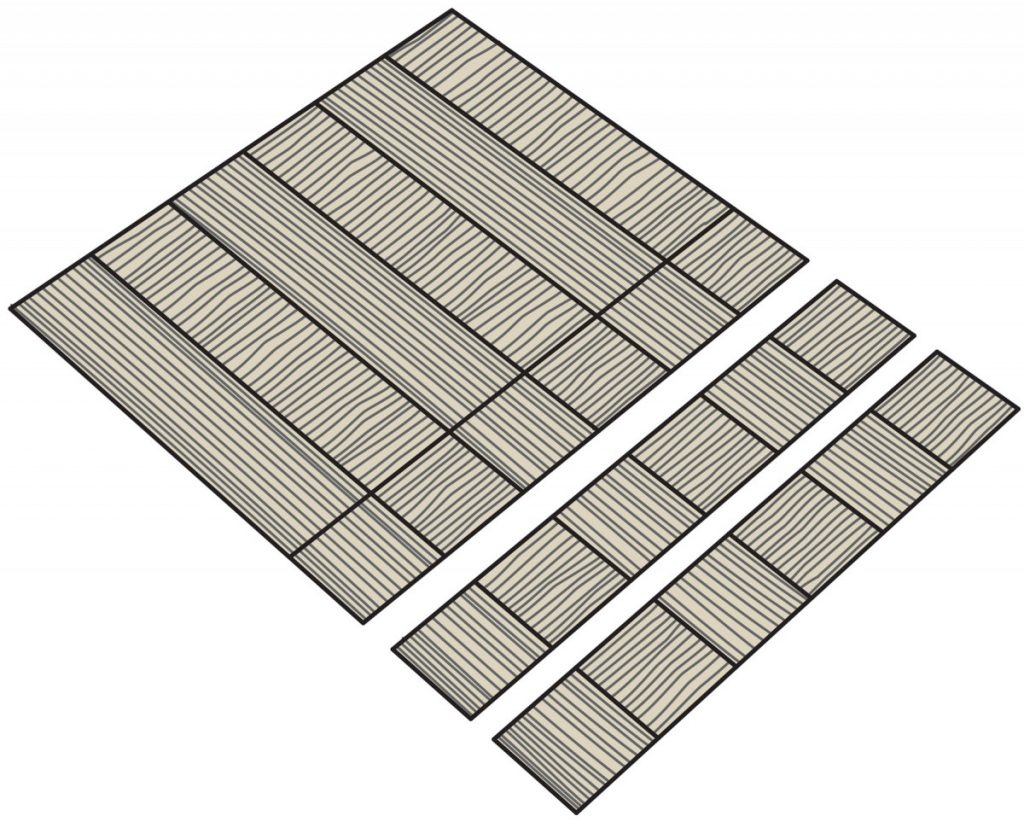
5. Cut 5″-wide strips from the composite sheet.
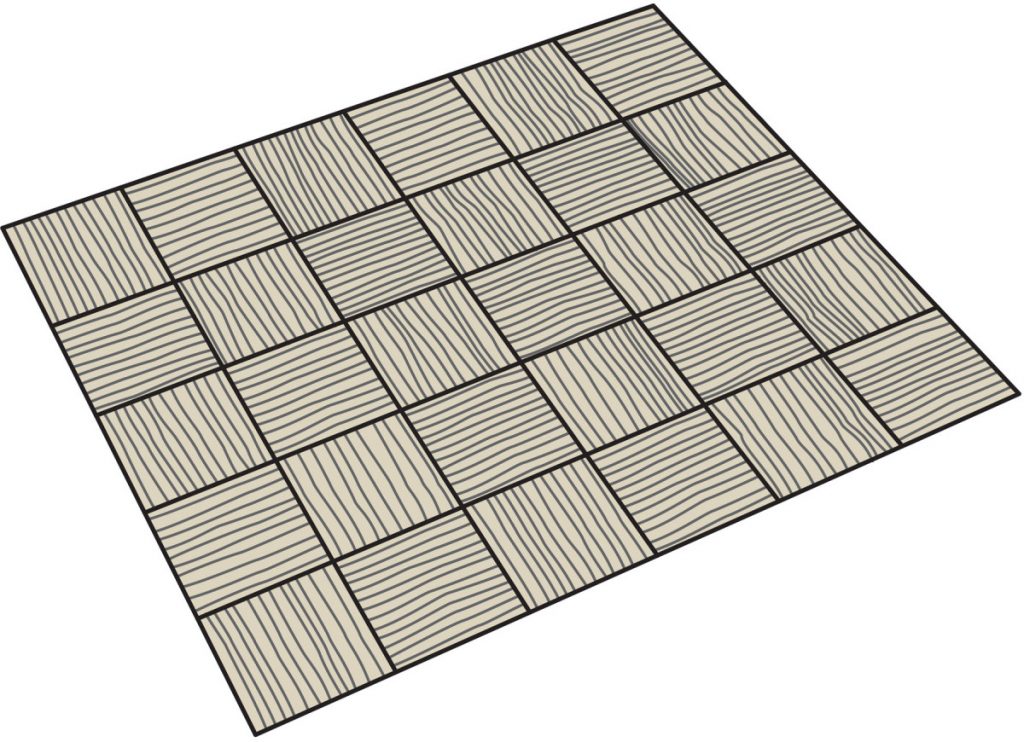
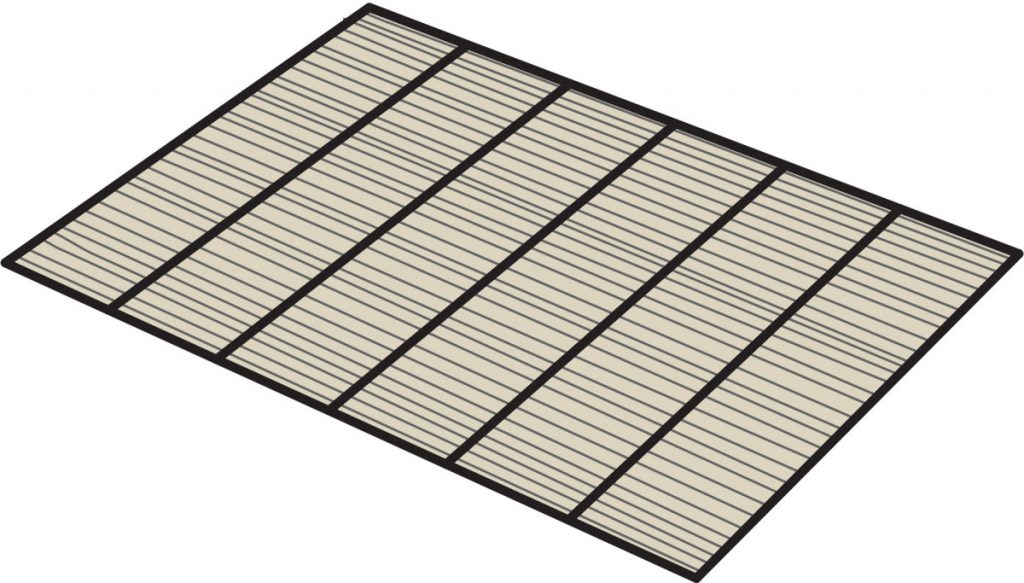
6. Flip every other strip end over end to achieve a basket-weave pattern and tape the strips together. Edging strips are cut from this basket-weave sheet.
Mid-century Coffee Table Cut List
No.ItemDimensions (inches)Material
t w l
❏ 4 Legs 1 1⁄2 1 1⁄2 15 7⁄8Walnut
❏ 2 Long top rails 1 1⁄2 1 1⁄2 31 3⁄4Walnut
❏ 2 Short top rails 1 1⁄2 1 1⁄2 16 3⁄4Walnut
❏ 2 Long mid rails 1 1 1⁄2 31 3⁄4Walnut
❏ 2 Short mid rails 1 1 1⁄2 16 3⁄4Walnut
❏ 2 Long reveal strips 1⁄8 1 1⁄4 34 1⁄4Walnut
❏ 2 Short reveal strips 1⁄8 1 1⁄4 19 1⁄4Walnut
❏ 1 Top* 1 19 3⁄4 34 3⁄4Plywood
*Top substrate 3⁄4” plywood with 1⁄4“-thick strips along bottom edges.
Modern Method
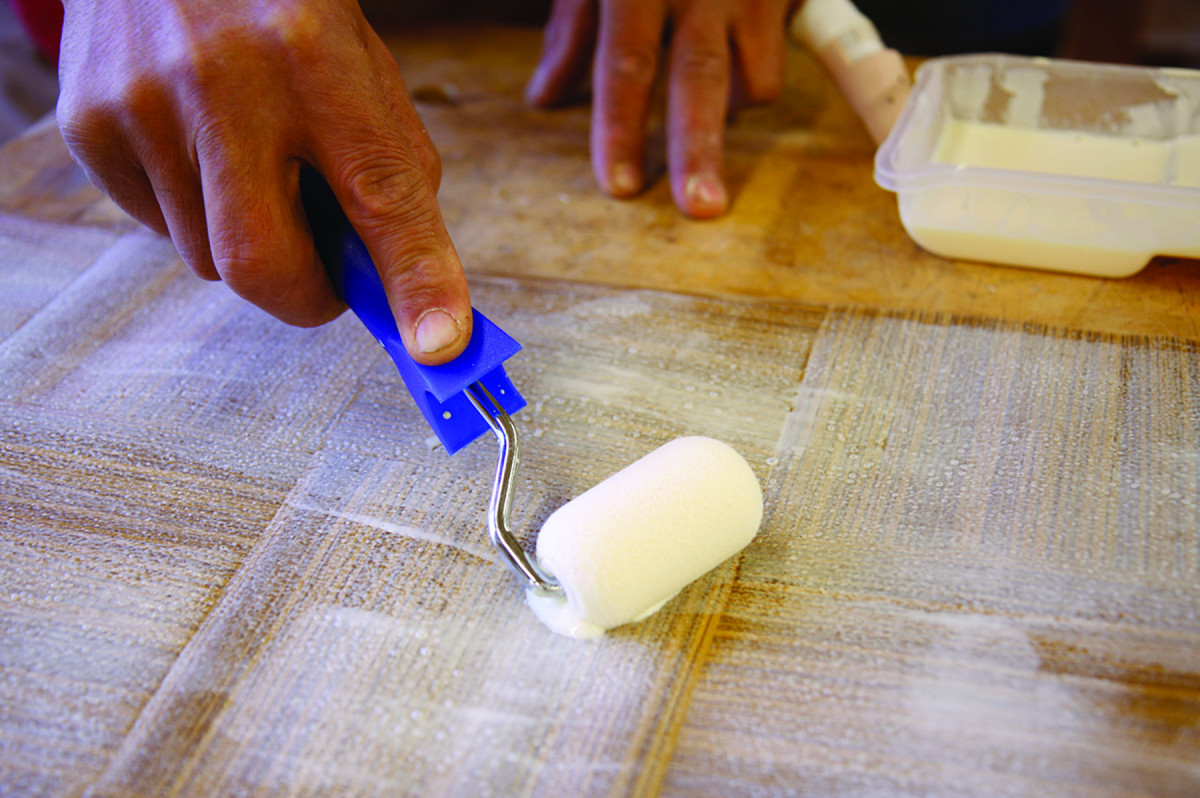
Down under. Yellow glue is applied with a foam roller to the back of the veneer and to the substrate.
To better protect the edges and corners of the table, I decided to glue down the top first then snug the edging up against it. This critical gluing sequence protects the more vulnerable edging from being easily damaged or pulled away later.
Use a 4″ foam roller to apply yellow glue to both the plywood substrate and the veneer. The initial application of glue to the veneer causes it to buckle slightly because of the water contained in the glue. That inevitable movement can be minimized by lightly wetting the face (taped) side of the veneer. Be careful though – too much water can loosen the tape. Let the glue dry thoroughly before applying a light second coat.
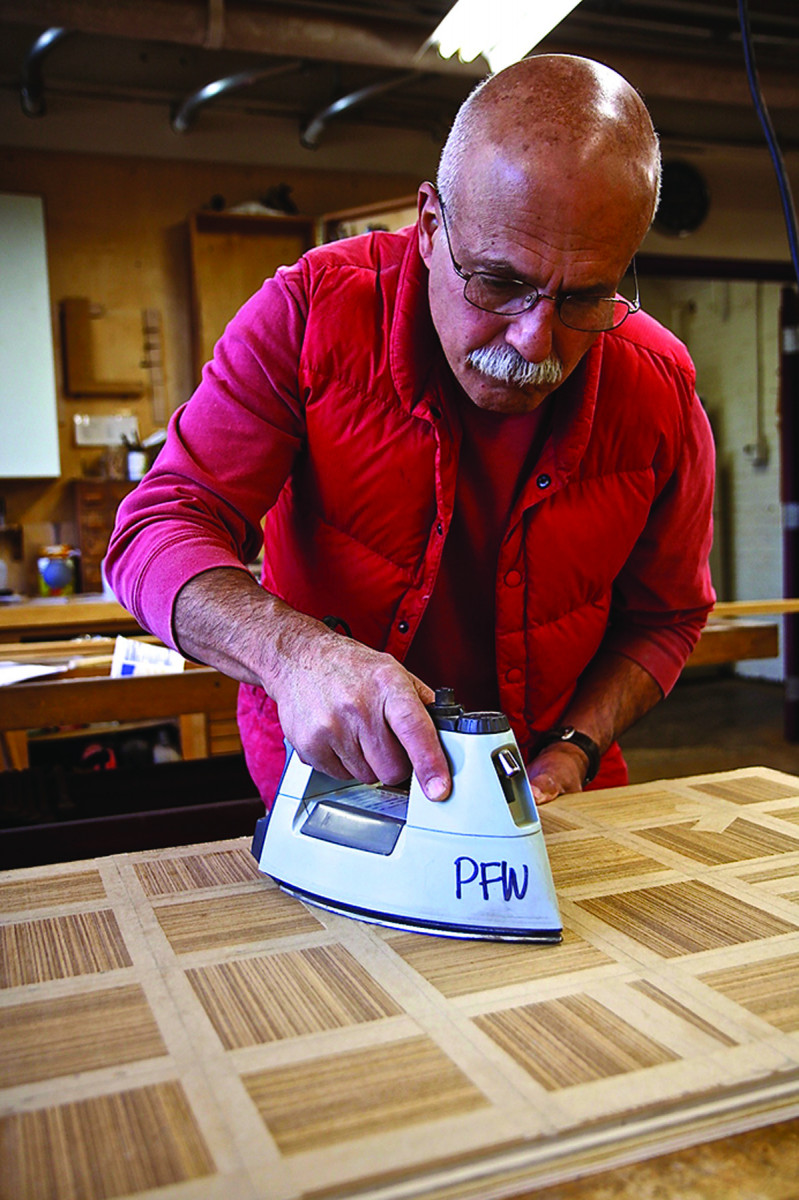
Bench press. The iron heats the veneer and the glue, adhering it to the substrate.
After about four hours, when everything is dry, carefully place the basket-weave sheet onto the substrate. Align the edges with the substrate but include about 1⁄4” of overhang all around.
With a common household iron set at medium-high, start at the center of the panel and work slowly toward the edges. After covering the entire sheet, let it cool for about an hour.
With the larger basket weave down and secure to the substrate, carefully apply yellow glue to the edging and the substrate edges with a small brush and let this dry thoroughly. Once it’s dry, use a warm iron to carefully press the edging into place, making sure it is tight up against the veneer of the top. Then leave everything to set up and cure properly. This curing or drying period will stiffen the veneer, making it easier to clean up and trim later.
Clean-up Time
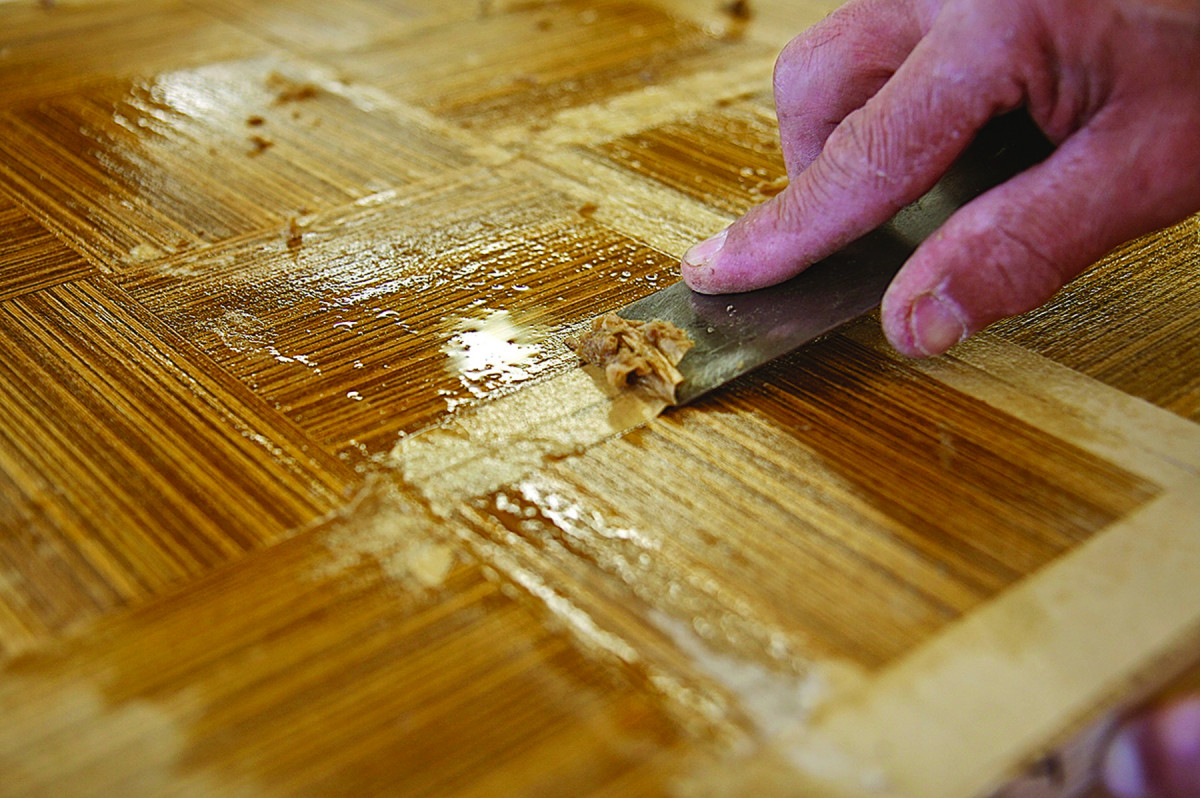
Get unstuck. After wetting down the tabletop, gently remove the tape with a scraper.
The tape is applied with water, and I remove it the same way. Once yellow glue is completely dry, it isn’t affected by a light application of moisture. So I spray a small amount of water onto the tabletop, wait a few minutes for the tape to soften, then gently scrape and peel off the tape.
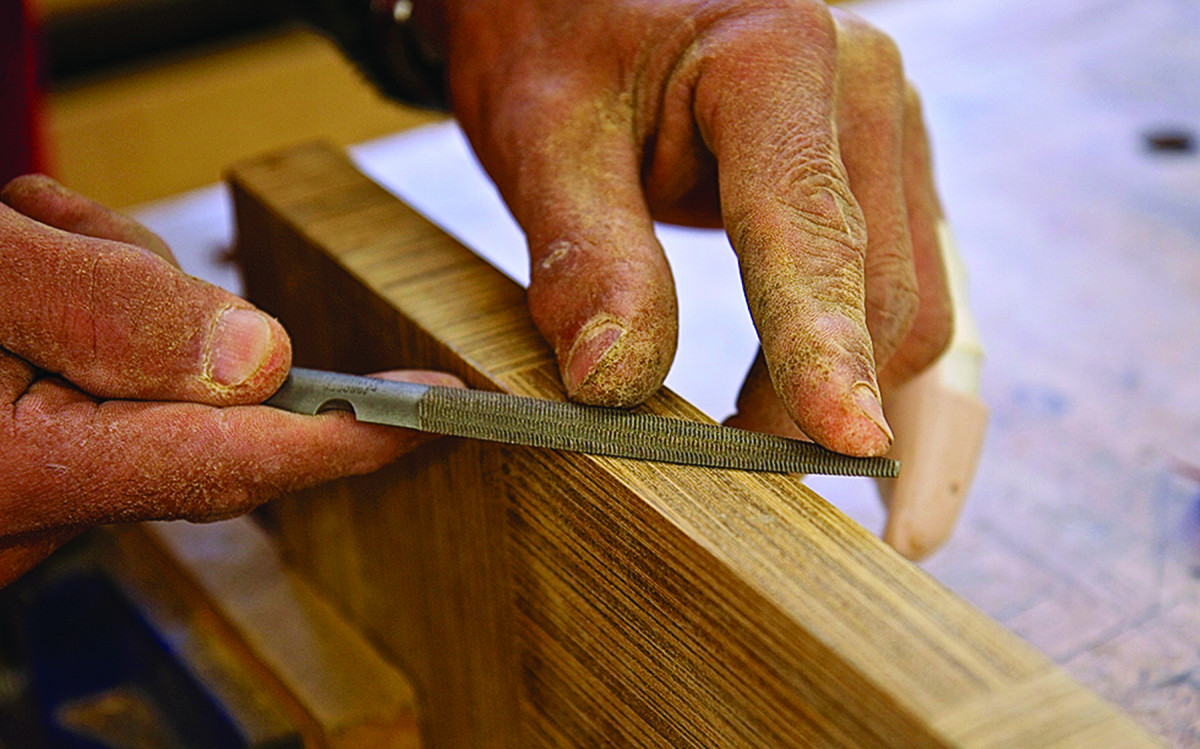
With the glue dry and all the tape removed, use various files (I like a 10″ second-cut file and a Grobet detail file), a card scraper and a sanding block to trim and flush the edges.
Once you’ve finished cleaning up the top, apply denatured alcohol to the surface and edges to make sure the veneer is securely applied. The alcohol raises the grain and swells the veneer, which causes it to rise off the substrate surface at any spots where the two didn’t fully bond. If you do have any areas that require attention, small bubbles are easily glued down by going over those areas with a warm iron.
Get unstuck. After wetting down the tabletop, gently remove the tape with a scraper.
After waiting a couple of days for the veneer to dry completely, sand the top and edges to #220 grit, then apply four coats of a wipe-on varnish. (I used a satin finish wipe-on urethane from General Finishes), sanding between the first and second coats. The last two coats are rubbed out with a fine aluminum oxide 3M Rubbing Pad.
The base is stained with a dark walnut dye that is rubbed out and allowed to dry before applying the same wipe-on varnish used for the top.
Article: Discover how Mario Rodriguez tunes up his veneer saw.
Plan: Download a free SketchUp model of this project.
Here are some supplies and tools we find essential in our everyday work around the shop. We may receive a commission from sales referred by our links; however, we have carefully selected these products for their usefulness and quality.