We may receive a commission when you use our affiliate links. However, this does not impact our recommendations.
The holiday season is upon us, and there’s no better time to tap into your creative side and make some decorations. Here are 7 different styles of ornaments for any level of woodworker!
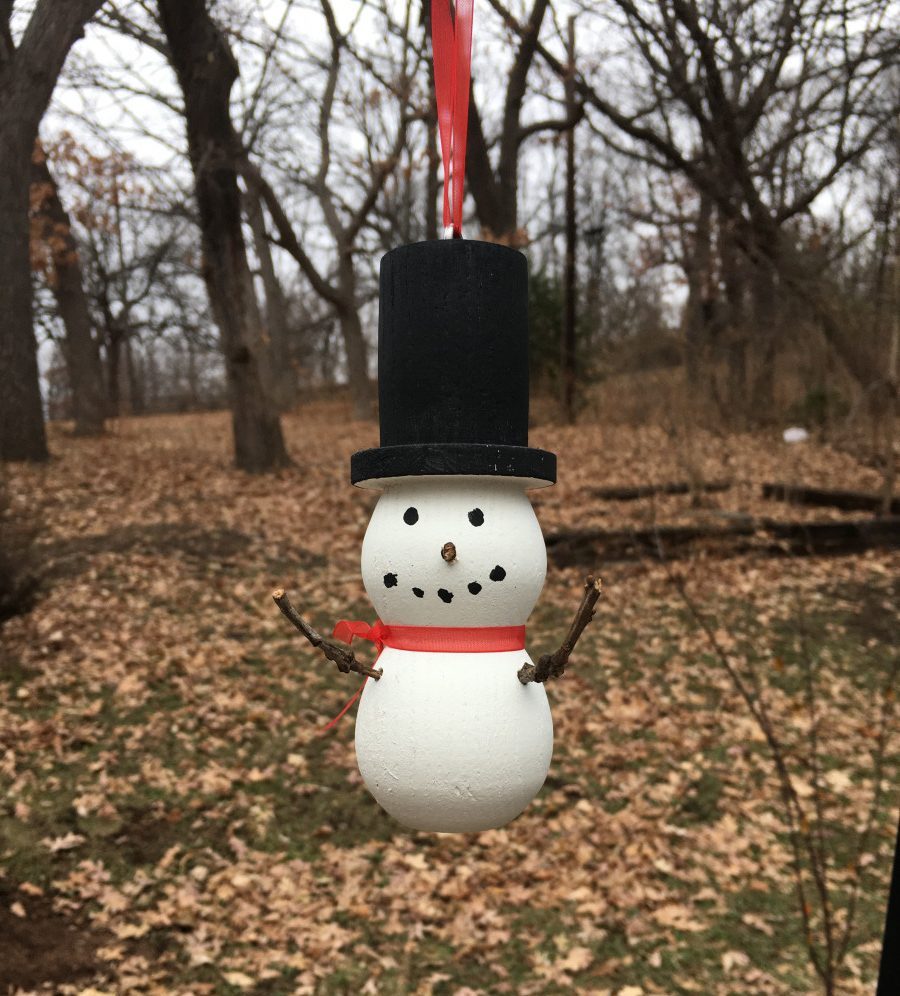
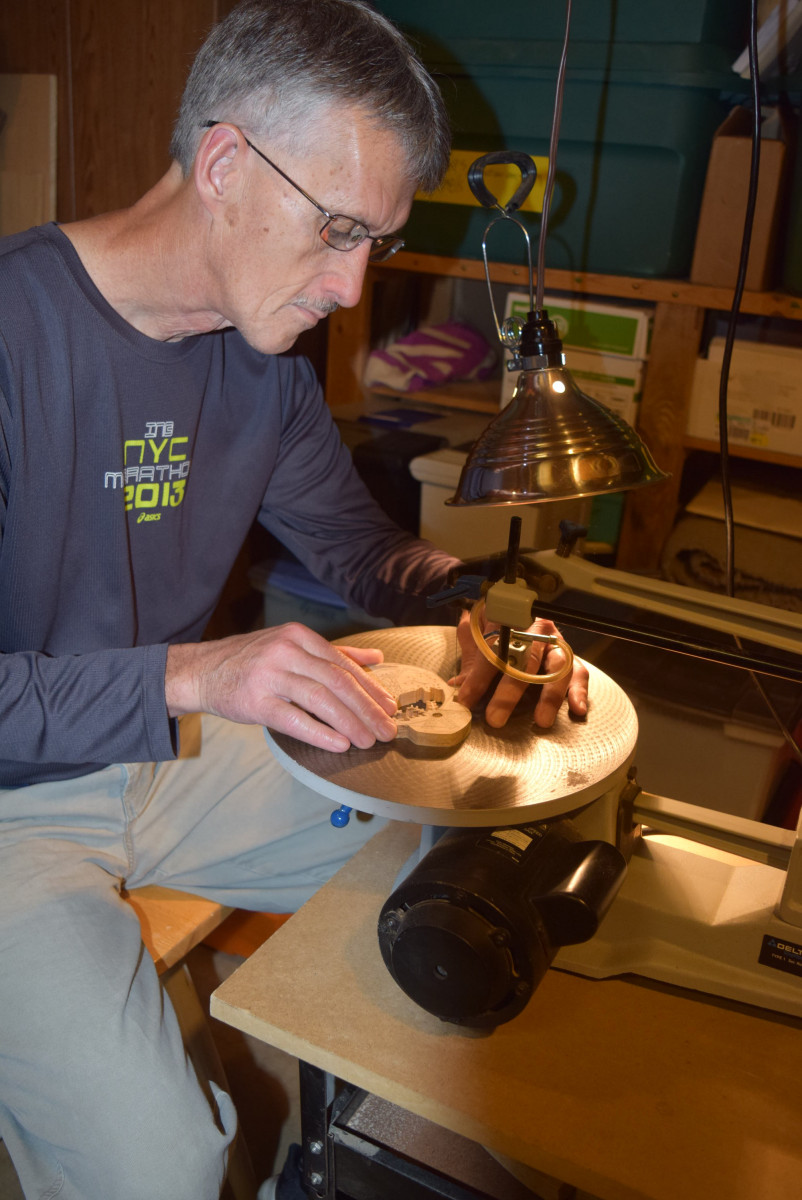
Start with a chunk of wood about 8” long or so. Rough it down to about 2-1/2” in diameter round on the lathe. Use a parting tool to mark out the three main parts: top hat, top snowball, and bottom snowball.
I used the parting tool to turn the top hat to shape. Then I switched to the skew to shape the snowballs. The middle one should be slightly smaller than the bottom snowball. If you mess up, keep turning and you’ll end up with a slightly smaller snowman.
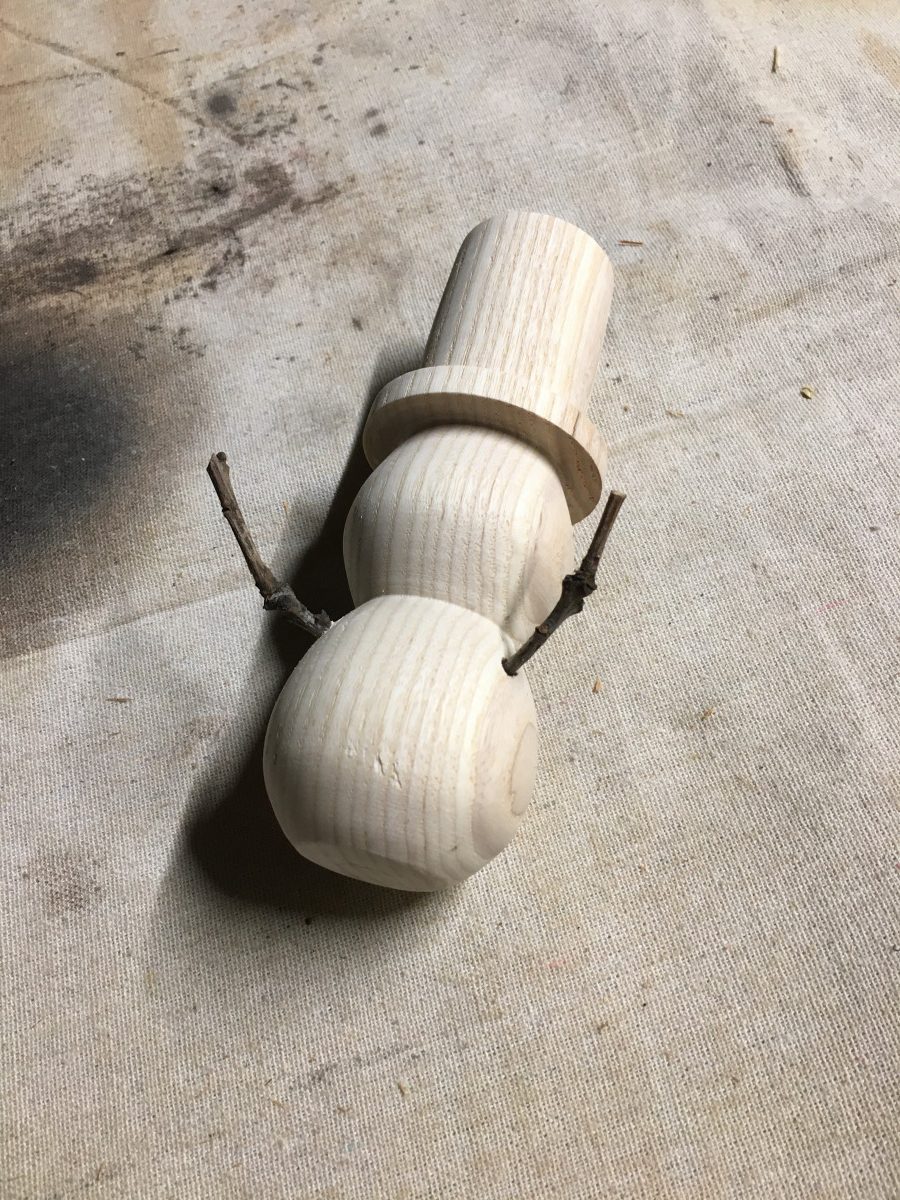 Once you’re happy with the shape and finish, drill a couple arm holes and a nose hole, find the right twigs, and glue them in place. Add a bit of ribbon for some real holiday flair.
Andrew Zoellner • Editor-in-Chief, Popular Woodworking
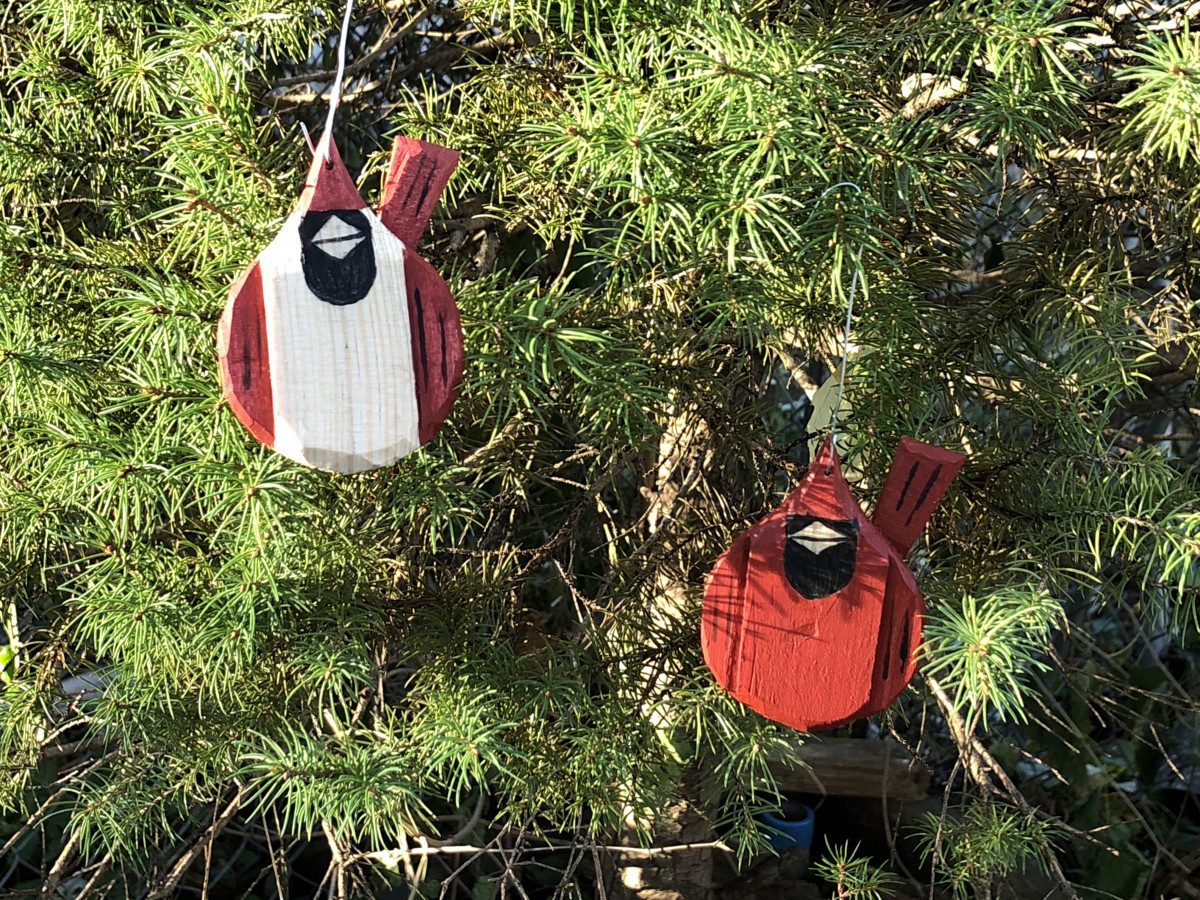
Cardinals
The body of each cardinal starts as a 5/16”-thick piece of pine. I drew the shape and rough cut it at the band saw. Motawi Tileworks makes ceramic tile based on Charely Harper’s drawings and served as my inspiration.
In order to add depth, the wing areas are recessed 1/8” using a shoulder plane. The edges of the ornament are softened with a carving knife. The facets add some texture and make it look less flat. The 1/8”-thick tail (also faceted) is glued into a shallow recess on the back of the body.
The birds are painted with General Finishes’ acrylic milk paint (brick red & lamp black). The body of the female and beaks of both are left in the natural pine. The straight grain of the pine shows through the paint adding pattern to the color.
Phil Huber • Executive Editor, Woodsmith Magazine
 Santa Golfball
Ever wonder what the inside of a golf ball looks like? Most golf balls have a solid rubber core which can easily be carved. First mark the circumference of the shell using a sharpie and a golf ball line alignment tool. Then use a PVC cutter to make the initial cut and a jeweler’s saw to cut through the shell. You may need to use a screwdriver to pop half the shell off. If both sides of the shell pop off, simply use gorilla glue to glue half the shell back on. Now it’s time to carve using simple carving tools!
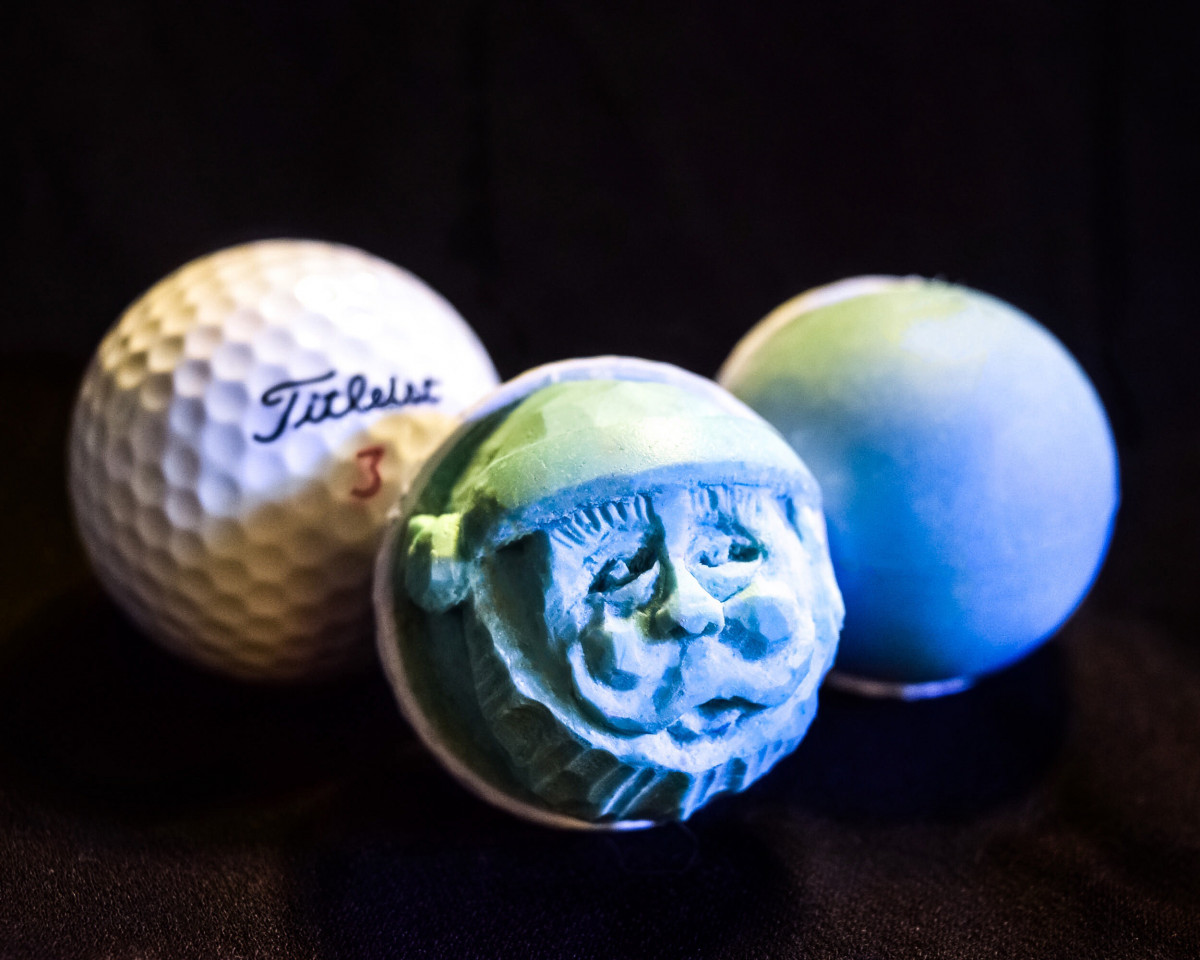 For the holiday season, you can never go wrong with a Santa face. Harlow Enlow gives a great step by step guide to carving various faces including Santa in his Carving Faces Workbook. All you have to do is adjust the design a bit since the carving will be done on a sphere. Once you’re done, either spray with an acrylic sealer to give it a shine or use acrylic paint to help bring Santa to life. Lastly, add a small screw eye to the top and a ribbon to hang and you’ll have a unique ornament everyone will be talking about!
Carved by Danielle Lowery. She is Popular Woodworking’s Graphic Designer by day and artist by night.
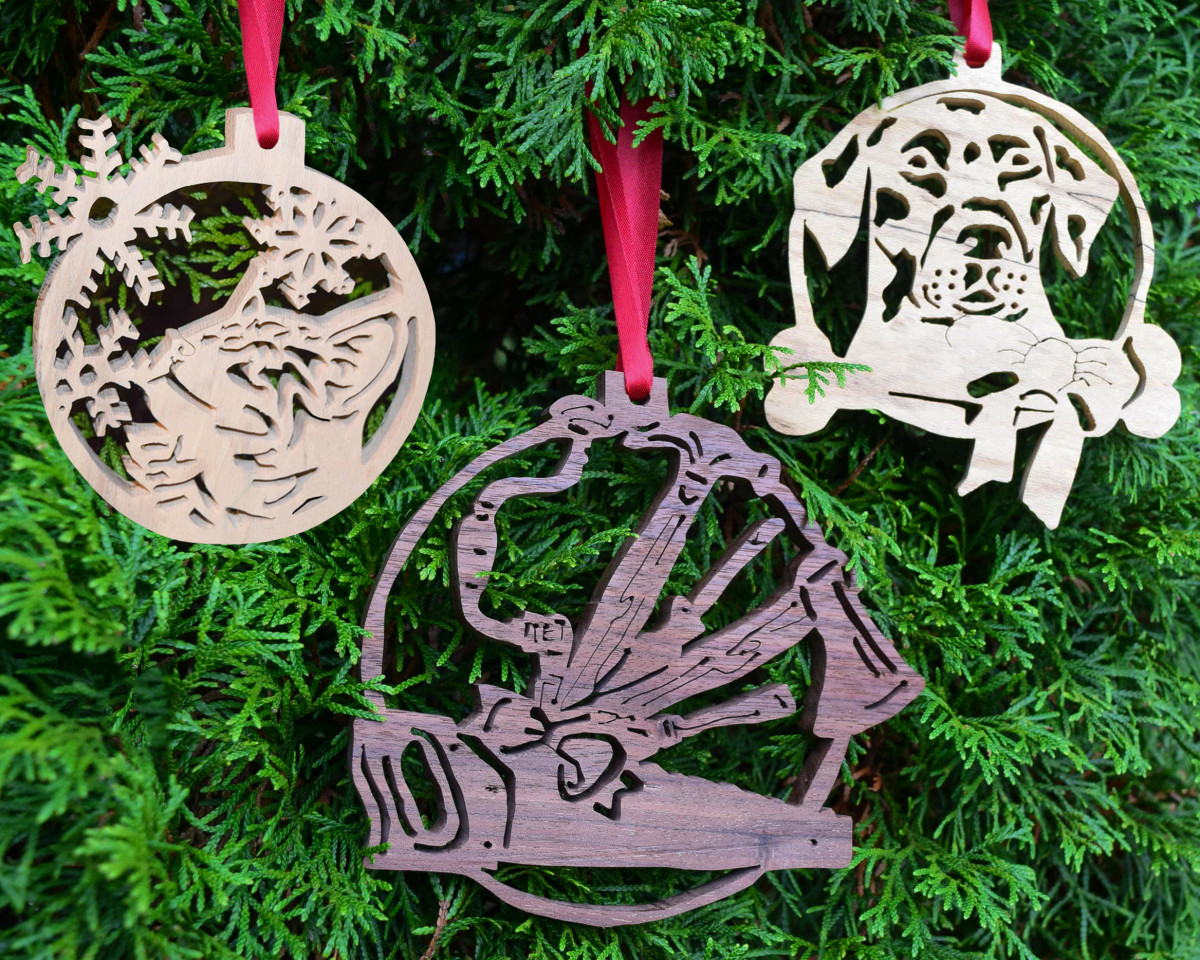 Personalize Scroll Saw Ornaments
Looking for a way to make handmade personalized wooden ornaments? Scrollsawing could be your answer. There is a wide range of patterns available online but once you get the hang of scrollsawing, you can design your own patterns. All you need to keep in mind is that a scrollsaw pattern has two values: black (the voids cut from the wood) and white (the wood itself). Begin by googling your subject as black and white vector and find an image of your liking. Either print the image(s) and use tracing paper or use a program such as Windows Paint, Adobe Illustrator, or Adobe Photoshop to finalize your pattern. Keep three things in mind as you finalize: (1) represent the size and shape of the final piece on your pattern, (2) double check that all white areas are connected to the main pattern, and (3) be careful not to get too detailed or make your pattern too small.
Once your pattern is all set, transfer it to a freshly planed piece of wood about 3/8” thick using carbon paper.
Then use a drill press and various size bits to drill holes into each black void. Lastly, begin your scrollsaw work by inserting one end of the blade (preferably a blade with 28 teeth per inch) through each predrilled hole and cut out the black voids. After all voids are finished, use sandpaper to smooth any rough edges and finish with the stain/varnish of your choice.
To get you started, here are three patterns we created [PDF]: a cat playing with snowflakes for my sister who loves cats, a dalmatian with a dog bone for my brother who owns a dalmatian mix, and a group of woodworking tools for myself, the graphic designer for Popular Woodworking. The cat and dog ornaments are 4” circles and the woodworking toolset is a 6” circle. Now it’s your turn. With the holidays right around the corner, we are sure that there are lots of loved ones you’ll miss this season. Put a smile on their face by mailing them a personalized ornament that they’ll want to keep up year round!
Created by the father/mother/daughter team, Larry, Ellen, and Danielle Lowery. Ellen and Danielle create the designs and Larry cuts the pattern.
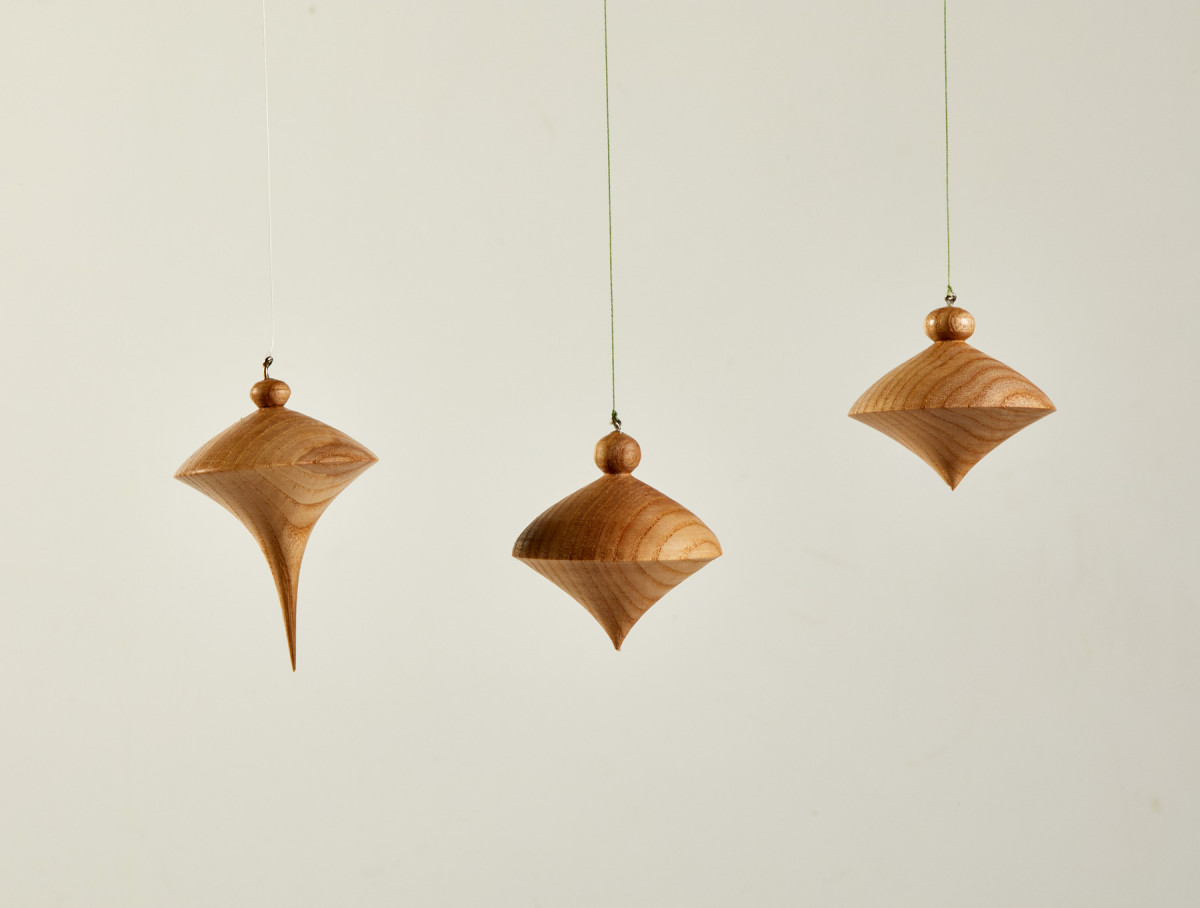 Tear drop
Logan Wittmer • Assistant Editor, Woodsmith Magazine

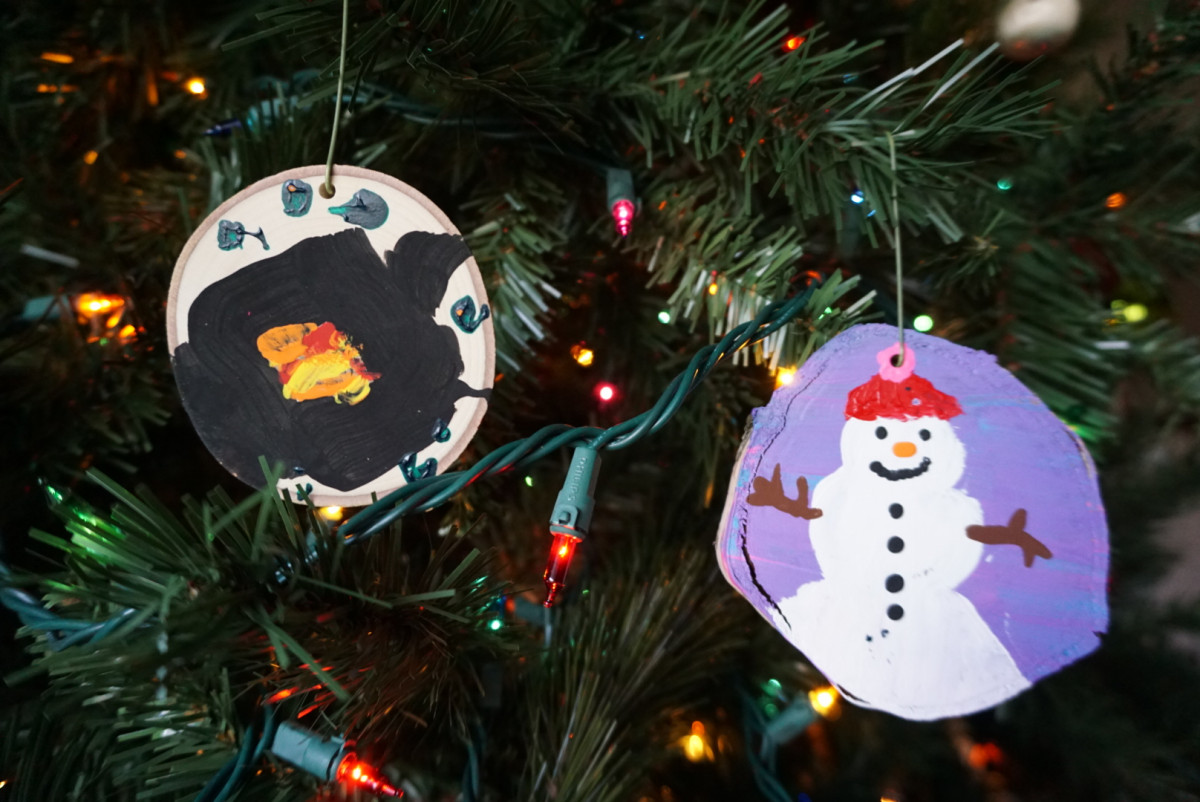 Christmas Disks
Here are some supplies and tools we find essential in our everyday work around the shop. We may receive a commission from sales referred by our links; however, we have carefully selected these products for their usefulness and quality.