We may receive a commission when you use our affiliate links. However, this does not impact our recommendations.

Jute webbing is stretched over the seat frame for a sturdy, yet forgiving base for the cushion. When shopping for jute webbing, select the sturdier “red stripe” variety for seat applications.
So you’ve built your paddle-arm chair, and all that’s left is making the cushion to sit on. I may be persnickety when it comes to armchair upholstery, but I really prefer a certain type of cushion for a large armchair or Morris chair. I like the leather or fabric to “waterfall” down the front, and disappear into the framework. In contrast, a box cushion usually sits on top of the furniture, and looks less integral to the piece. Actually box cushions are great for benches and window seats, but for armchairs I stick to integral covers.
Start by stretching natural Jute webbing over the seat frame. Weave the webbing and attach it to the seat frame with #10 or #12 upholstery tacks. Select a good quality upholstery foam for your project. I used 4” thick, high resiliency (HR) foam described as “2743.” The first number is shorthand for the foam density, 2.7 pounds per cubic foot in this case. The second number is the “ILD” or indentation load deflection, and is a measure of firmness. An ILD rating of 43 basically means it takes 43 pounds of force to compress the foam by 1”(25% of the foam thickness). A 4” cushion with 2743 foam sits well and gives a feeling of medium firmness.
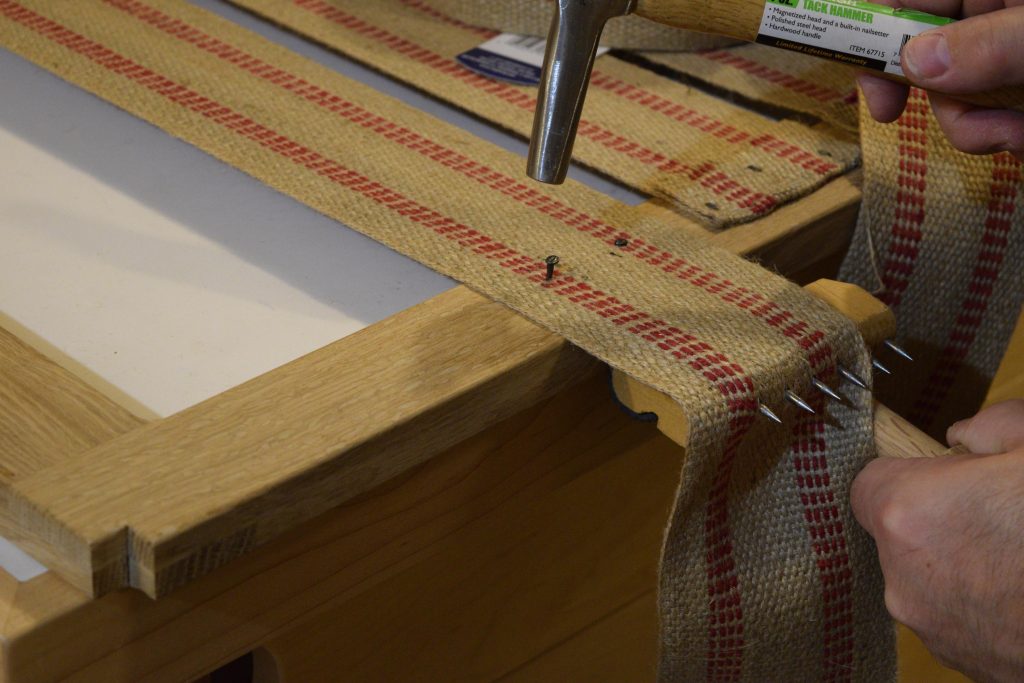
Draw the jute webbing tight with a webbing stretcher, and tack it in place. Then cut the webbing to length and fold the ends over to double its thickness. Add a few more tacks, staggering their position as you work, to avoid splitting the wooden frame.
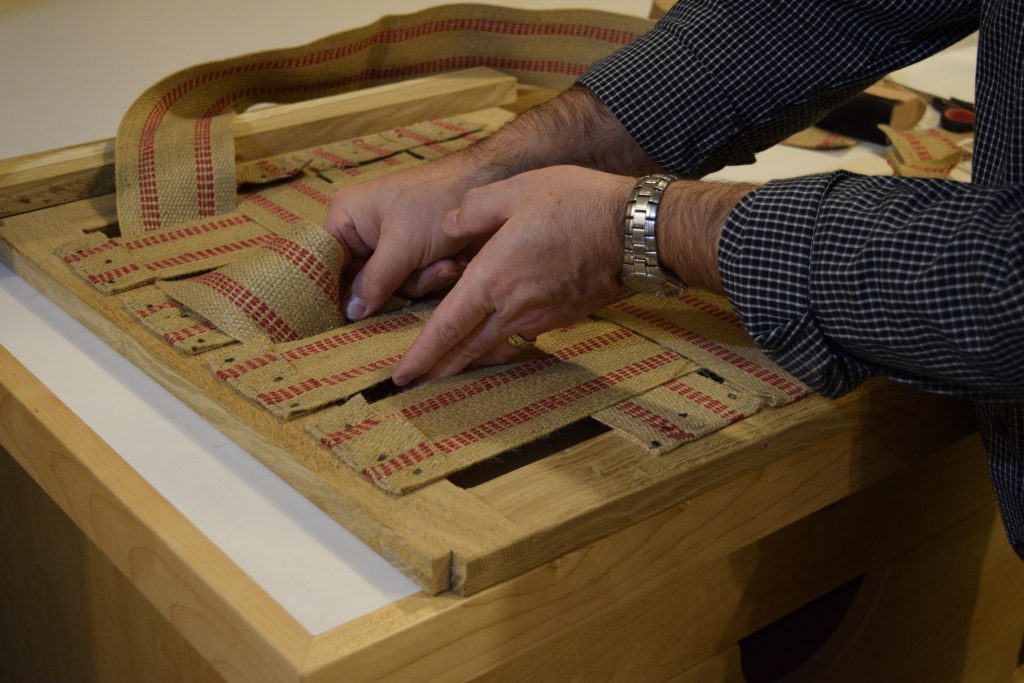
Weave webbing in the other direction and fasten it in the same way. In addition to tacks, I add a few staples to flatten the webbing where it folds over.
Lay the foam on the seat frame and trace out the size. Cut the foam with a bandsaw or electric turkey knife to the same size as the seat frame. Now decide which way the Jute webbing will be oriented, face up or face down. If you orient the webbing face down, it leaves a recess for a layer of 1” thick foam. A 15” x 17” piece of foam is required to fill the recess.
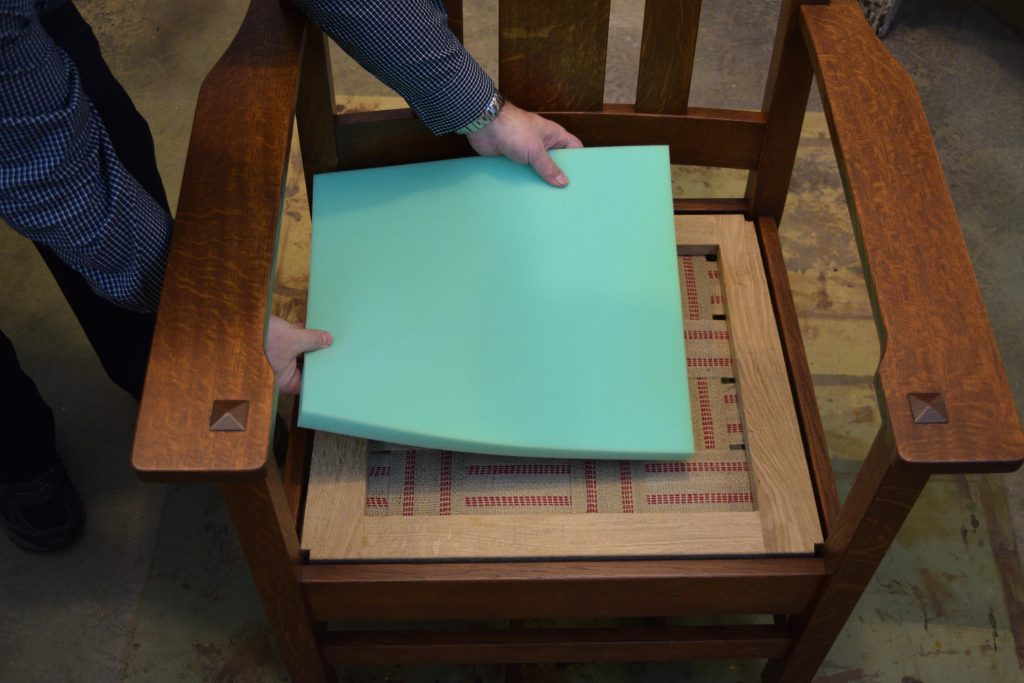
The webbing can face either upward or downward. If you elect to position the webbing face down, you can add a 1” layer of foam for an extra plush cushion.
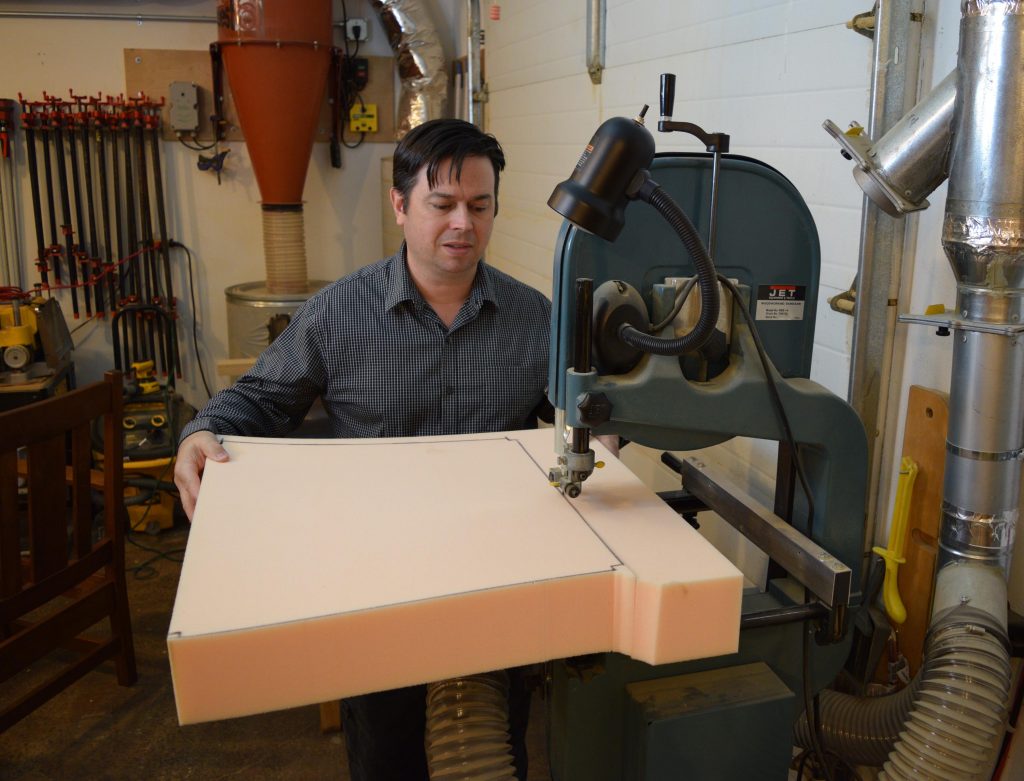
Four inch thick foam is cut to size with a bandsaw.
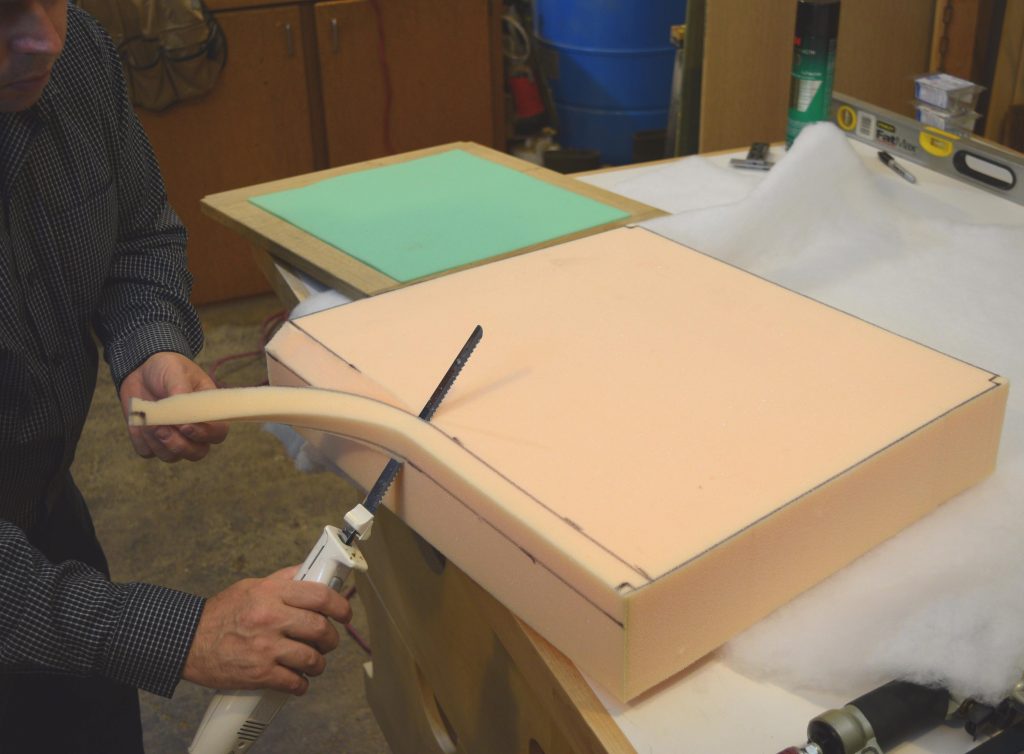
Chamfering the front edge of the foam with an electric turkey knife helps create a rounded waterfall effect on the finished cushion.
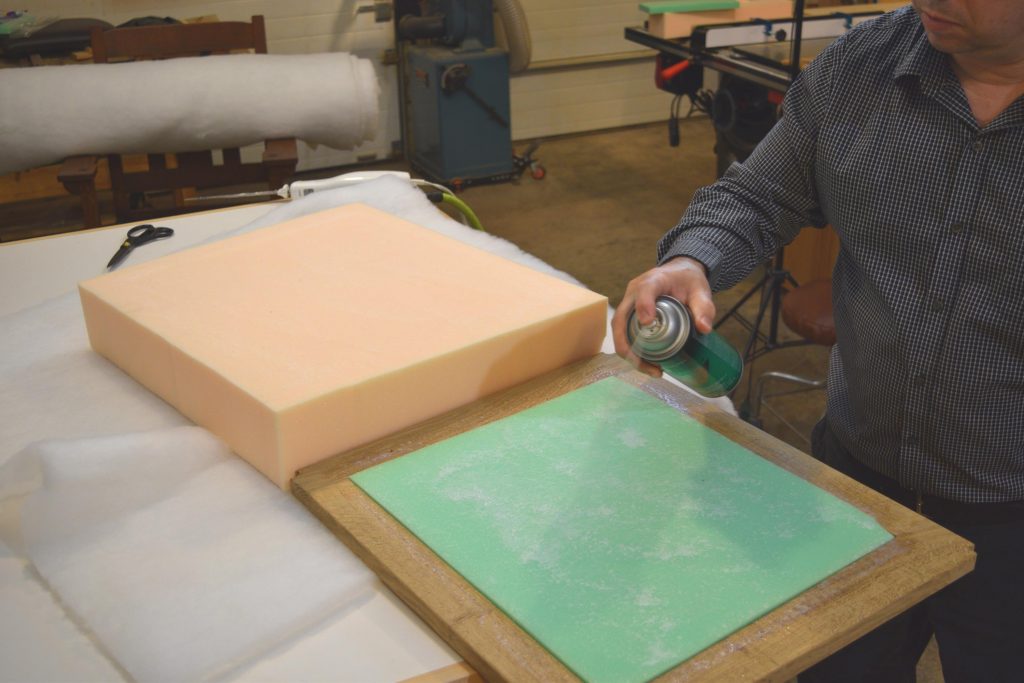
Use spray adhesive to attach a layer of 1” thick foam to the webbing, then glue the thick foam on top.
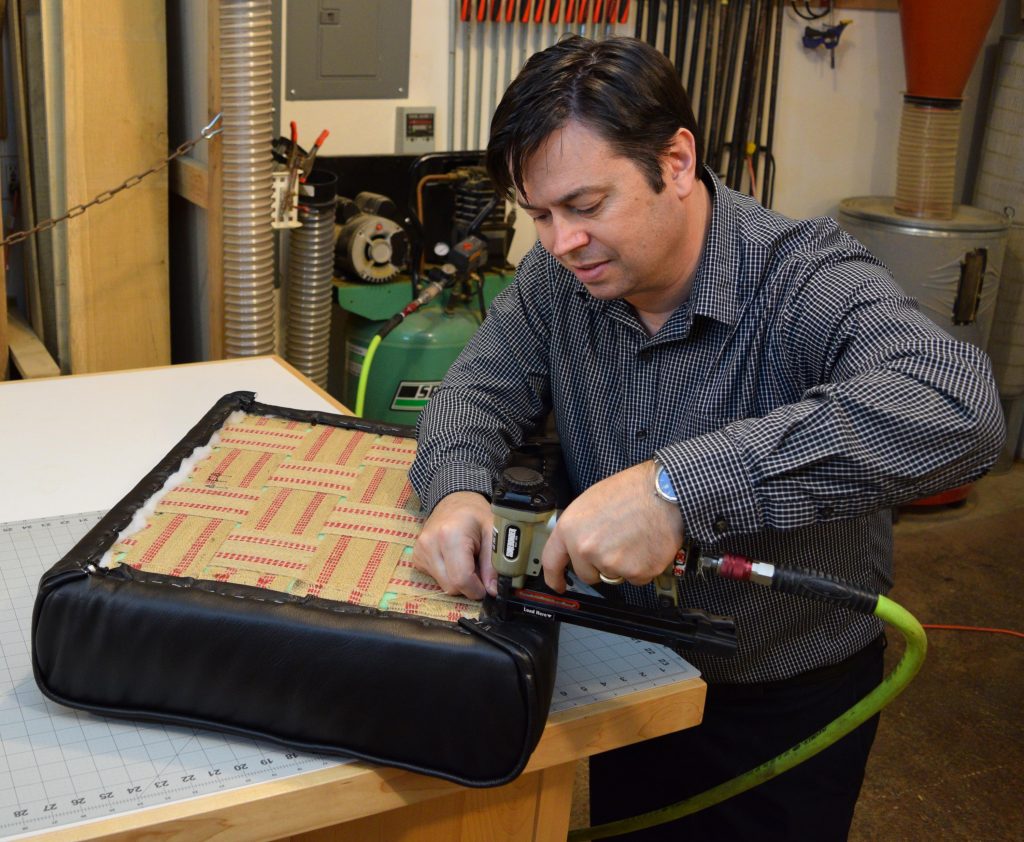
Use spray adhesive to secure the foam to the webbing platform, and to assemble the two layers of foam. Now the foam gets wrapped with two layers of high-loft polyester batting such as Dacrontm. The batting is stretched slightly, and stapled to the underside of the seat frame with a pneumatic stapler. Treat the batting with the same care and attention to detail you would with the finished upholstery. Wrinkles in the batting can telegraph through thinner fabrics.
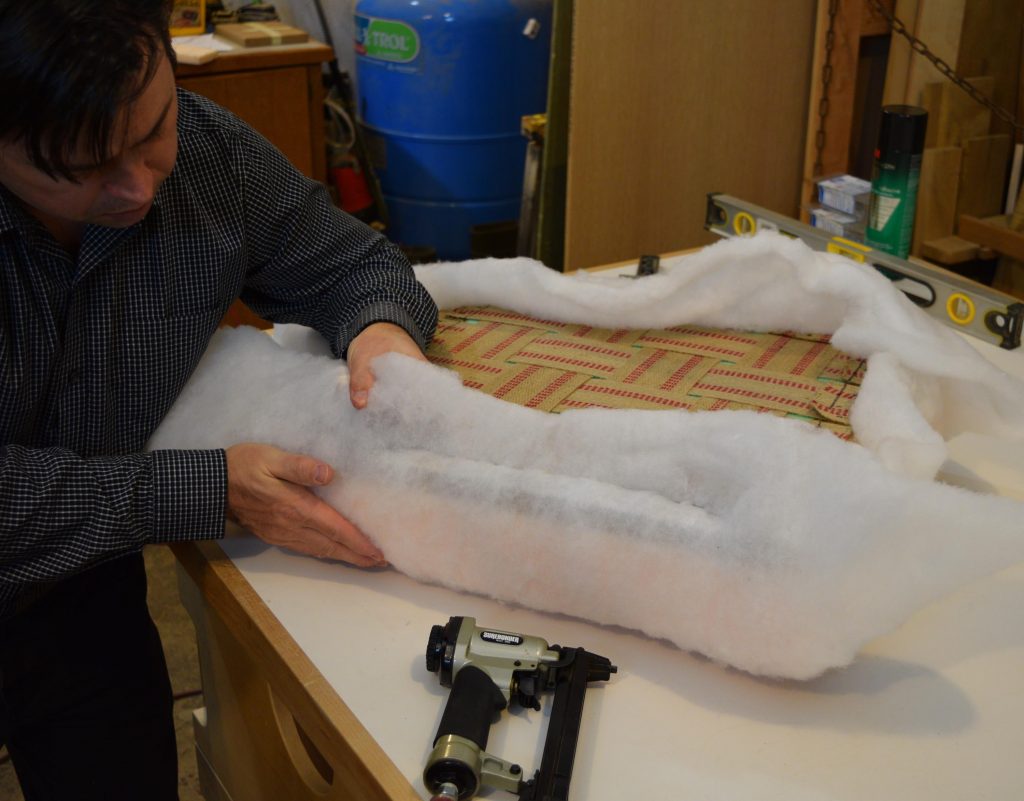
Start with two staples centered on each side of the seat frame to attach the batting. Smooth and slightly compress the foam as you work towards the corners.

Grasp the excess batting between your thumb and index finger to work the wrinkles to the underside. Apply a second layer of batting with the same technique.
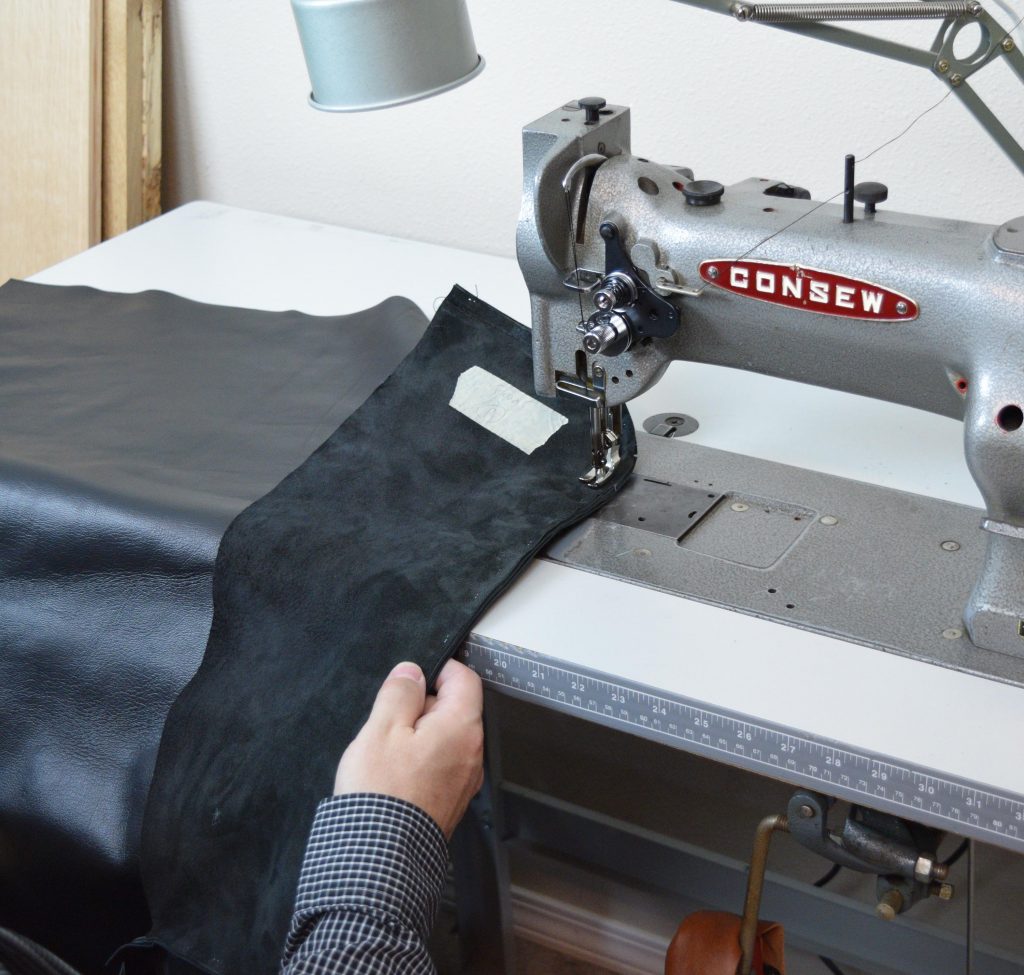
I like to sew my own leather upholstery, which does require a heavy duty walking foot machine, but if you opt for lighter weight fabric, a household machine may work just fine. Measure the actual cushion to get a length for the “top plate.” The top plate extends from the front of the cushion all the way to the back, and in fact wraps under the seat frame as well. Size the top plate length ½” from the inner perimeter of the seat frame, at both front and back. This will allow for some stretching of the leather as the cover is installed. For the width of the top plate, measure the width of the cushion and add one inch (seam allowance of ½” x 2). Remember that the seat frame is angled, so the top plate is angled as well.
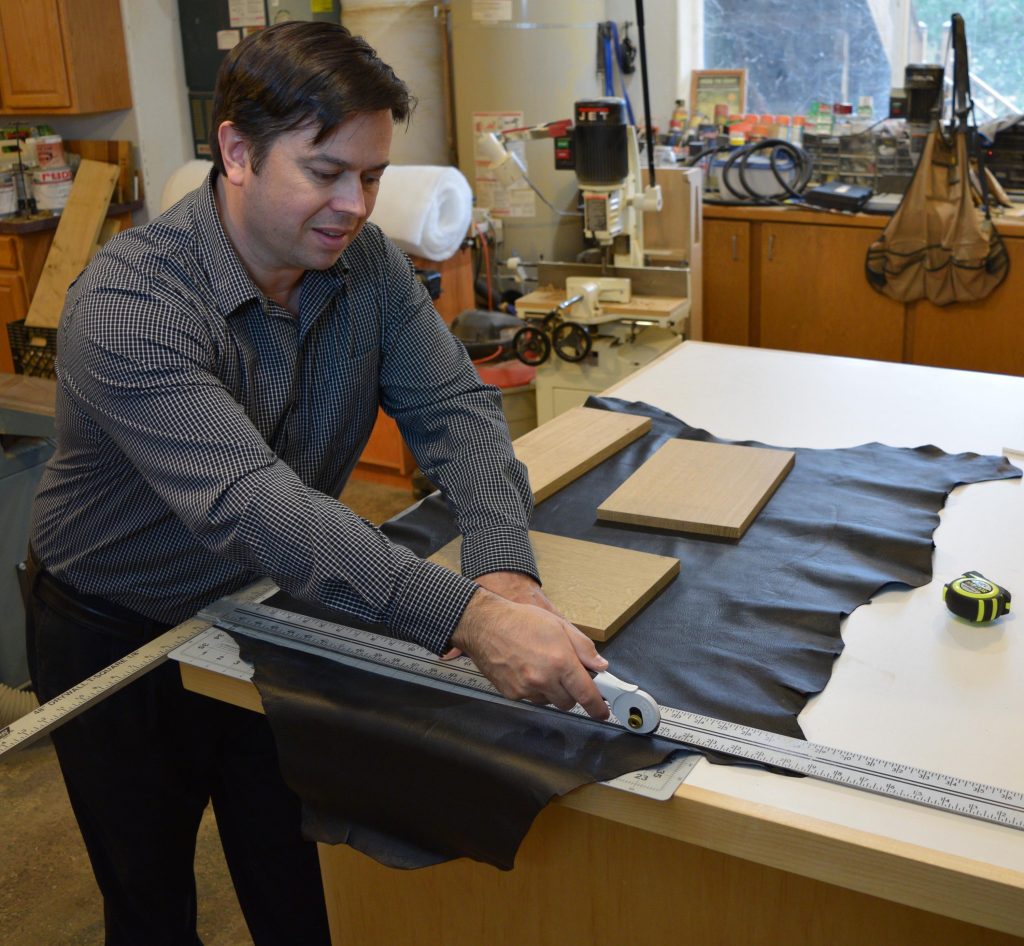
Measuring and cutting material is the real art of upholstery work. Cut the parts to final dimension, and remember to account for a ½” seam allowance where appropriate. Use weights or scraps of lumber to hold the material flat as you make the cuts.
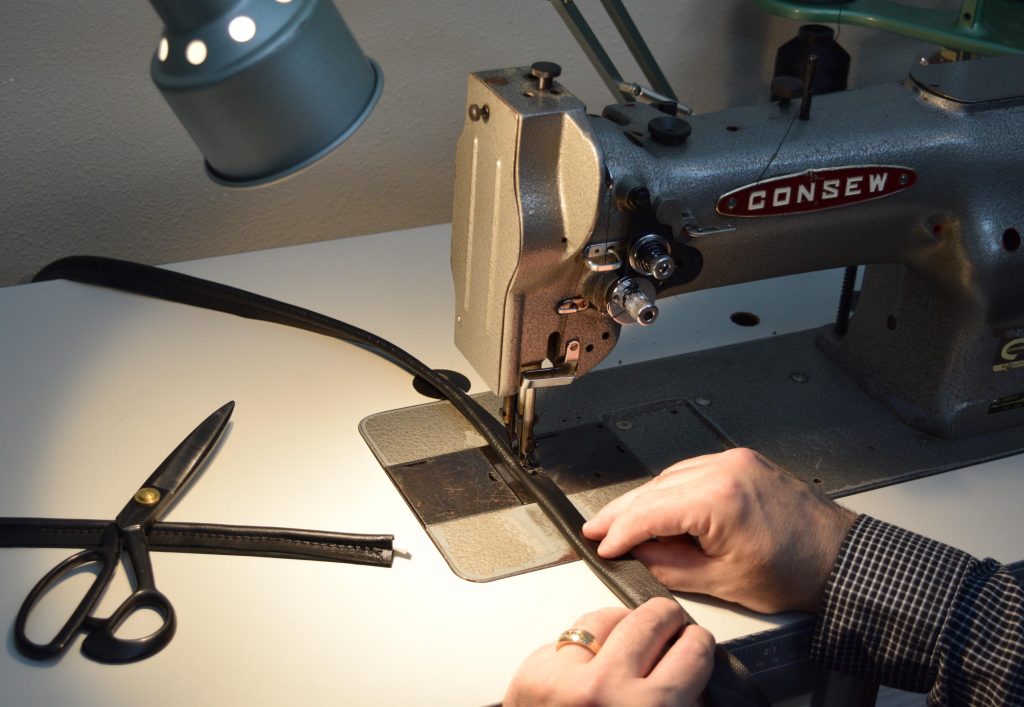
You’ll need two strips of leather 1-3/4” wide and about 3 feet long to make the piping. Lay a length of firm cording in the leather strip, and sew it closed with a zipper foot installed on your sewing machine.
To size the side strips, measure the thickness of the Dacron-wrapped foam, plus the distance to wrap underneath the seat frame. Draw a line inset 2” from the edge of the seat frame as a reference mark. Take your measurement for the side strips ½” back from this reference line. This will give you a consistent spot to stretch your leather cover to. A master upholsterer I studied with briefly passed this trick along, and it’s been one of the more helpful steps in my upholstery projects. Sometimes careful measurement and cutting is the real challenge with upholstery, not just the sewing. Plan for the material to stretch a bit, otherwise you’ll end up with a cushion that looks too loose.
There will be two long seams on either side of the cushion, and they can be standard blind seams or you can add welting or “piping.” I elected to use piping, which can be a handsome detail on leather and tapestry projects. Cut strips of your leather or fabric 1-3/4” wide, and lay some 5/32” firm piping down the center. Fold the strip in half to encase the piping, and sew it closed using a zipper foot on your sewing machine.
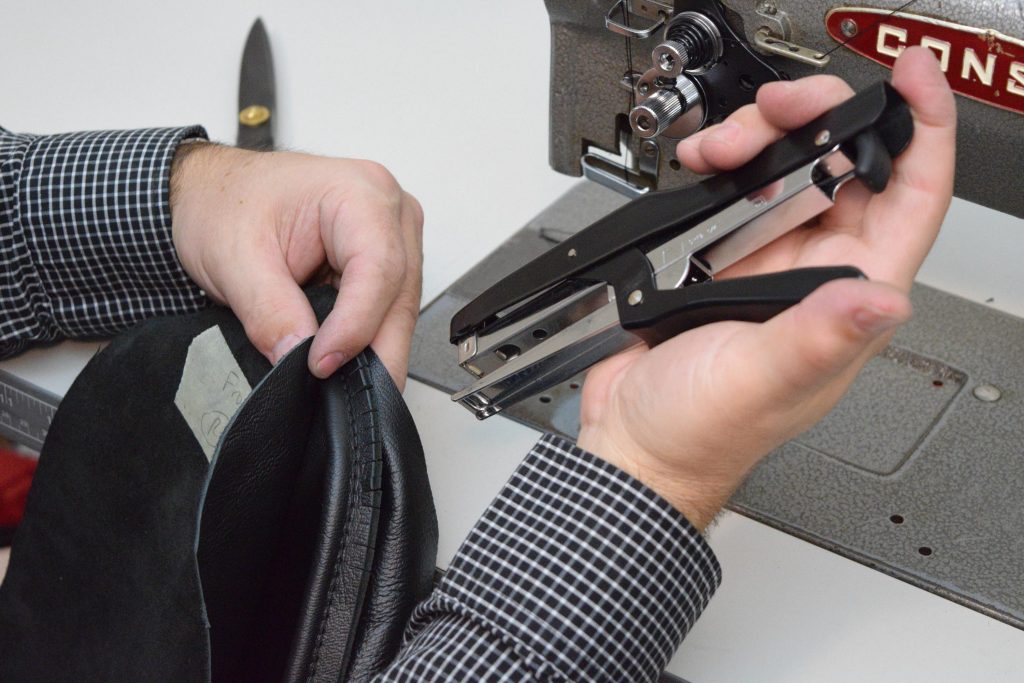
Staple piping between the top plate and one side strip.
Then sew the seam with a cording foot installed on your sewing machine. Repeat this stapling and sewing process to attach the other side of the cover.
Leather cuts well with a rotary cutter or special leather shears, but it’s tough to get a straight line with household scissors. Once you have two strips of piping in the required length, staple a length of piping between the top plate and one side strip. A Bostitch “plier stapler” is my weapon of choice to temporarily hold the leather together (it’s just a hand stapler with a long narrow nose). Once things are positioned correctly, install a ¼” cording foot on your sewing machine and sew the seam. Then repeat this stapling and sewing process on the other side of the cover.
There really isn’t a whole lot of sewing with this type of upholstery, just two long seams with piping. If the cushion cover meets your approval, remove the hand staples and fire up the air compressor. The cover is stretched down over the foam to the reference marks on the seat frame. Start by setting one or two tacks in the center of each side of the seat frame. This will allow you to check the fit, and make sure the cover is centered on the foam. Continue stretching the cover down and attach it temporarily with tacks. After making any necessary adjustments, permanently attach the cover with a pneumatic stapler.
Start the installation of the leather cover with tacks. Check that it’s centered, and pull the cover to your reference line to finish stapling it in place.
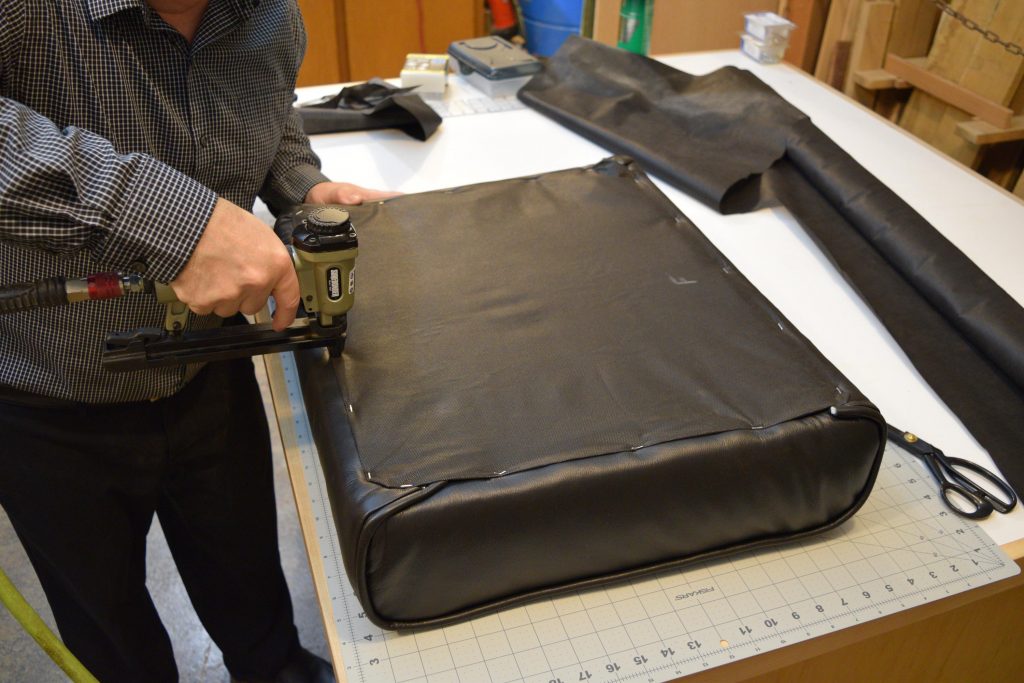
Install a dust cover (the piece of fabric that covers the bottom of the cushion assembly) and label the front of the cushion to avoid confusion during installation.
The staple gun I use is an inexpensive pneumatic gun (dirt cheap actually), that shoots common T-50 staples. I find that pneumatic staplers are easier to use, and set the staples more consistently than their hand-powered counterparts. Even if you plan to do only one or two upholstery projects, a pneumatic stapler is worth owning. Finish the cushion by adding a non-woven dust cover stapled to the underside. You can find purpose-made cambric for the dust cover, available at fabric stores, or you can use “weed barrier” landscaping fabric from the hardware store.
Corner blocks are added to reinforce the chair, and provide a convenient means to attach the seat. In addition, ledger boards are added front and back to set the final seat angle. The rear ledger board is installed flush with the corner blocks, while the front ledger board is ½” higher than the corner blocks. The front ledger board is attached with screws (no glue) so the seat angle could be adjusted if necessary. Screw the seat down through the corner blocks, and give your new chair a try.
Here are some supplies and tools we find essential in our everyday work around the shop. We may receive a commission from sales referred by our links; however, we have carefully selected these products for their usefulness and quality.