


We may receive a commission when you use our affiliate links. However, this does not impact our recommendations.
We may receive a commission when you use our affiliate links. However, this does not impact our recommendations.
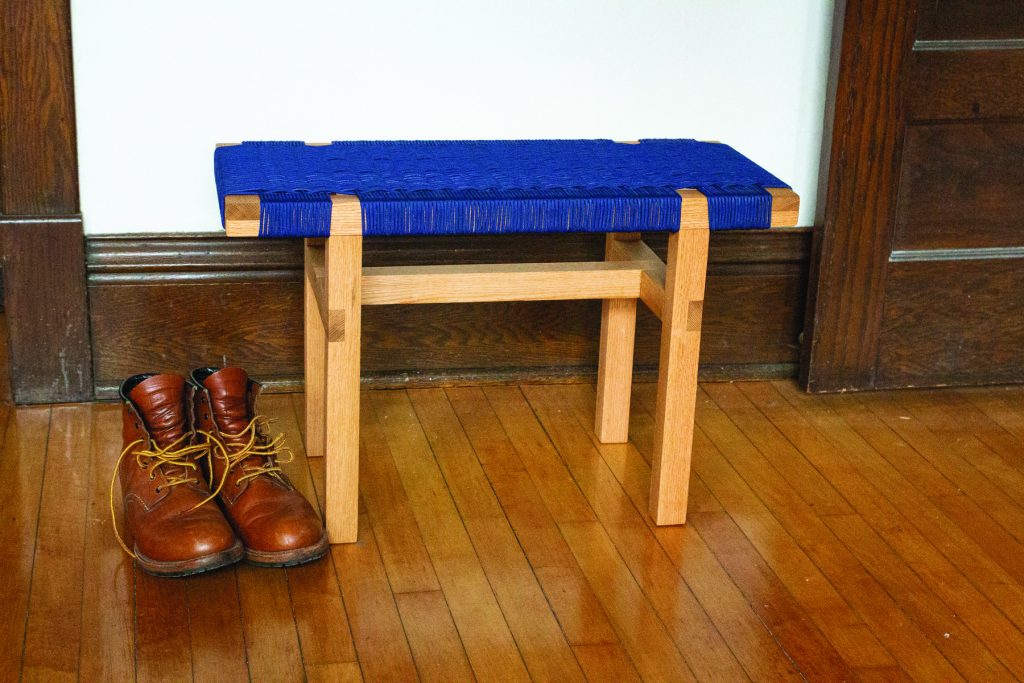
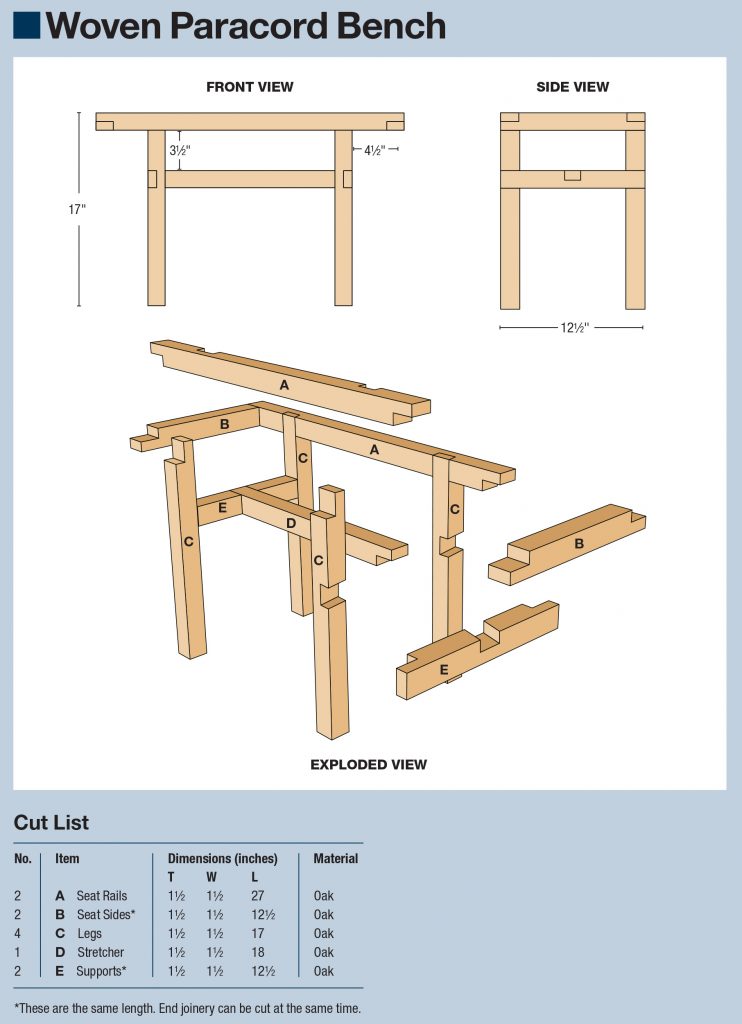
If you can cut a lap joint, you can make this bench.
PROJECT #2001 • Skill Level:Beginner • Time: 2 Days • Cost: $100
When I started woodworking, it was driven by necessity; I needed something that didn’t exist, so I made it. My woodworking was also driven by a desire to spend my time doing something productive and learn some new skills. It was also helpful if the project could be completed with readily available materials in a couple of days, because my first “shop” was just a bin full of modest tools I kept stashed in my room in a college house. That’s where this design started.
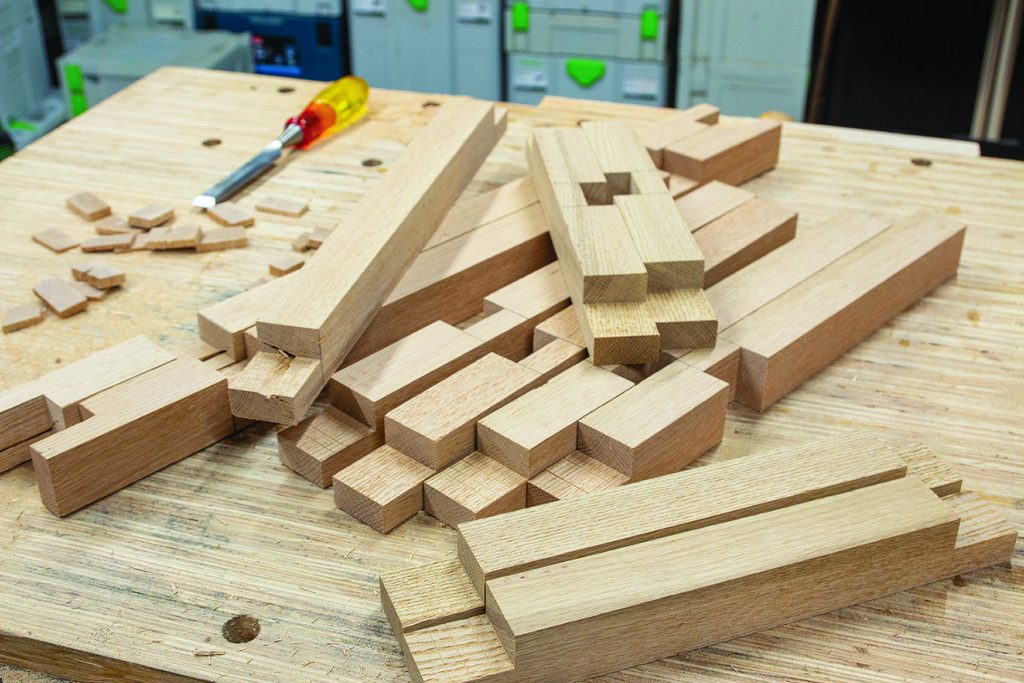
I bought the materials at the home center: two 8′ red oak 2x2s and 300′ of 1/8″ paracord. I dug through the handful of oak 2x2s in the bin to find a pair that were pretty much riftsawn (meaning the grain runs vertically on all four sides) and mostly straight. Like most home center materials, they aren’t a true 2″ x 2″; the nominal dimension is 11/2″ x 11/2″.
I landed on paracord as the seat material because there were a bunch of colors available (white, black, lime green, high-visibility orange, red/white/blue, etc.), it’s very durable and relatively inexpensive (about $30 for 500′). Plus, in an emergency, this bench provides all of the paracord I’d need to survive. (Should it be called a survival bench? Should you make one for your bunker?). All in all, I spent about $75 on materials at the home center. I did need to order the Danish nails online (about $15 shipped for a box of 100).
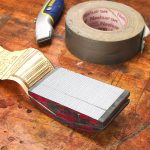
I built this bench with only a couple power tools (a circular saw and random orbital sander), a few hand tools (chisel, block plane, stapler) and some clamps. All of the joints are lap joints (lots of half laps and a few cross laps), cut using a simple straight edge jig with a circular saw.
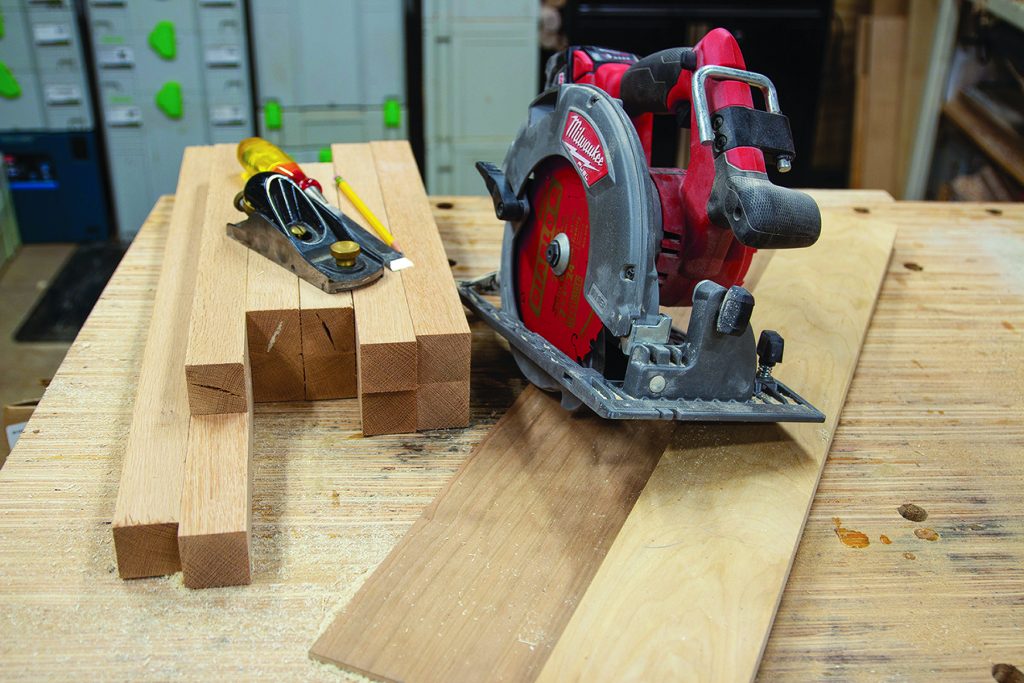
Just a few tools are needed to make this bench.
I used some scrap 2×2 to dial-in the cut depth of the circular saw. The base of my jig was a true 1/4″ piece of veneered MDF, so I was able to use the saw’s depth guide (minus 1/4″) to get close to the 3/4″ deep cuts I needed to make. After cutting a few practice joints (all of the laps needed to be 11/2″ wide and 3/4″ deep), I moved onto the real thing.
Joinery
First, cut all of my pieces to length with the circular saw (if you have a miter saw, this is also a good use for it). Then mark out the first joints, using actual stock (instead of measuring 11/2″) for spacing. Clamp the first four like pieces together and made the first cut with the circular saw, establishing the shoulder. Then, it’s just a few more relatively equally space cuts through the waste. Take your chisel and pry out the waste—it should snap out relatively cleanly.
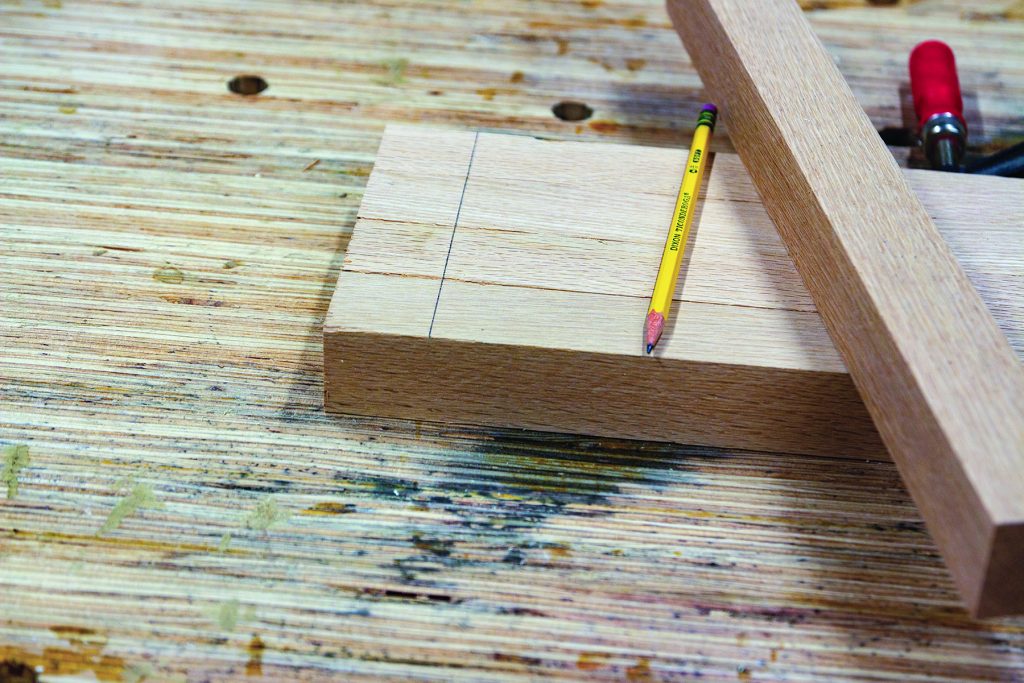
Start by cutting the joinery. Use your actual parts to mark out each joint and batch parts where you can.
Then come back and clean up the waste with the chisel and block plane (a shoulder plane would be helpful here, too, if you have one). Work through the rest of the joinery in batches like this; you’ll see some of the parts are the same dimensions. When you get to the cross laps in the legs and top pieces, pay attention to where you’ve positioned the joints—this is the part that can get a little confusing if you’re not careful.
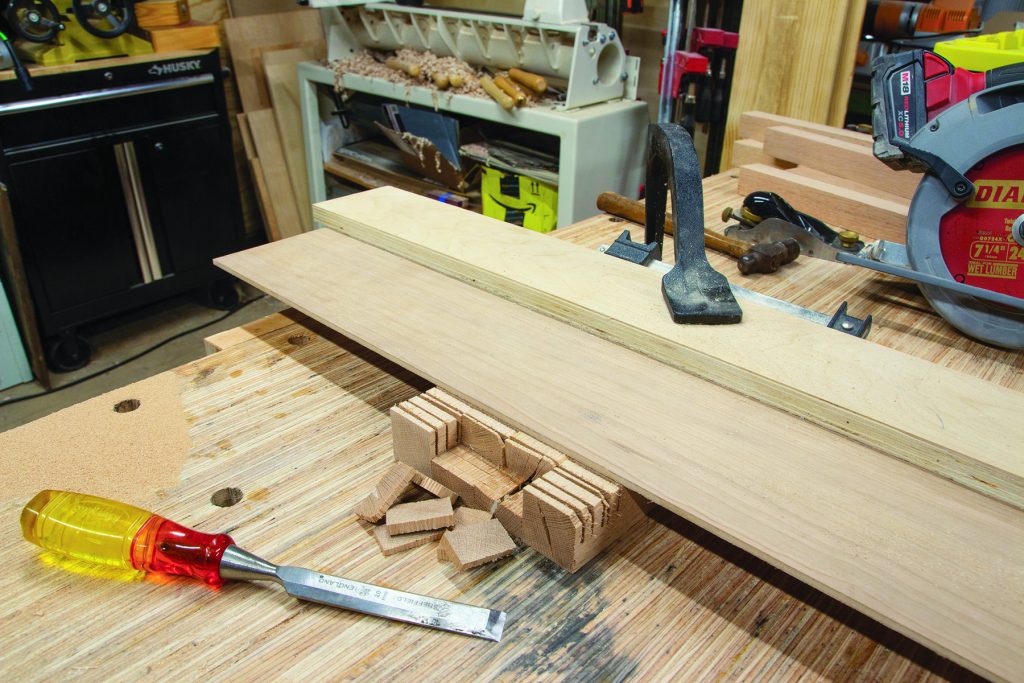
A simple edge guide for your cir-cular saw establishes the shoulder of the joint. Then make a few more cuts and pop out the waste with a chisel.
Clean up the joints with a chisel and block plane, refining the fit as needed.
Glue and Finish
With all of the joinery cut, dry fit the bench together and fine-tune the fit of your joints if needed. Rehearse your clamping sequence to make sure it’ll all come together when you have glue on it. Then, disassemble and add the glue and clamp. I try to wipe up any squeezeout with a damp rag, especially when I’m going to be sanding after the fact.
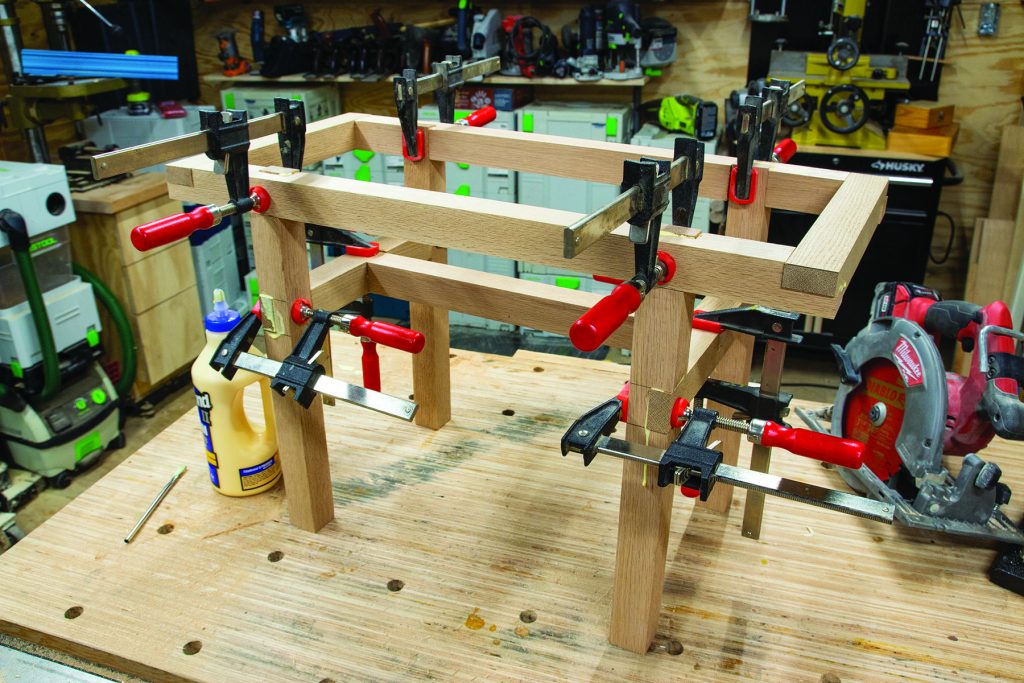
Dry fit all of the pieces, then add glue and wait for it to cure.
After the glue has cured, remove the clamps and clean up any missed glue squeeze out. If you have any gaps in your joinery, now is the time to fix them. Sawdust and wood glue mixed to a putty consistency works well for filling in small gaps. Small slices/shavings with a bit of glue work well for larger gaps. Then, sand up to 180 grit. I added a few chamfers with the block plane to knock down some sharp edges and help the pieces blend together a bit.
I’ve been experimenting with different hard wax oils lately, and used Briwax’s hard wax oil on this piece. It’s a very easy finish to apply (wipe on liberally and wipe off excess). And, it builds a nice, satin-y finish and the oil imparts a nice color.
Seat Weaving
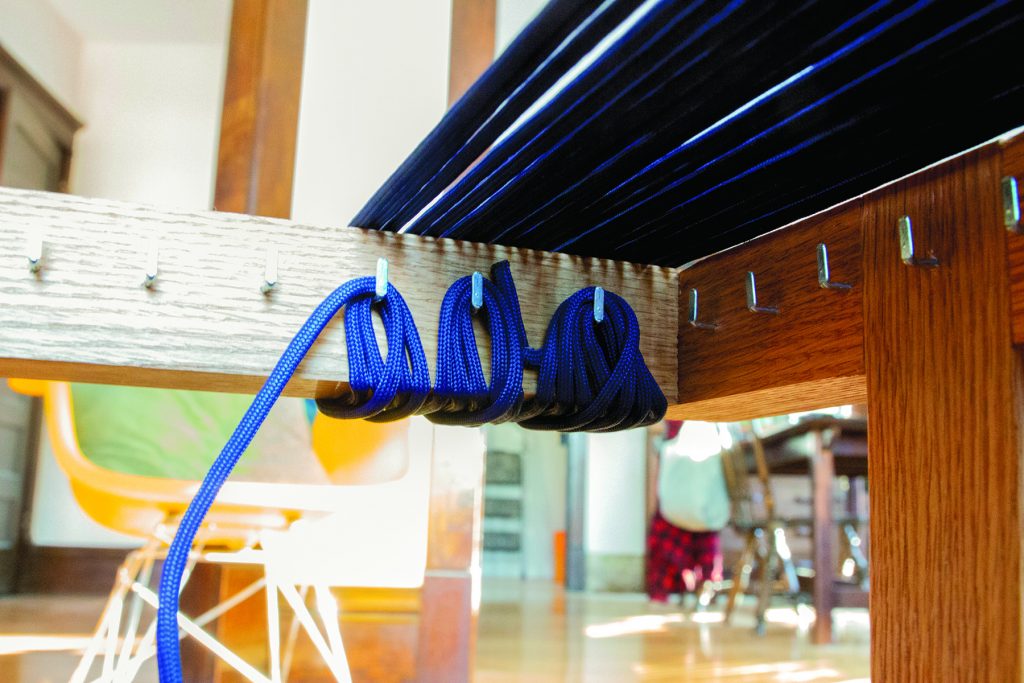
Insert Danish nails around the perimeter of the seat, with the points sticking up. Use a small drill bit to make pilot holes for the nails and then tap them into place with a hammer. The spacing isn’t critical— aim for a nail every inch or so. Then, it’s time to start weaving.
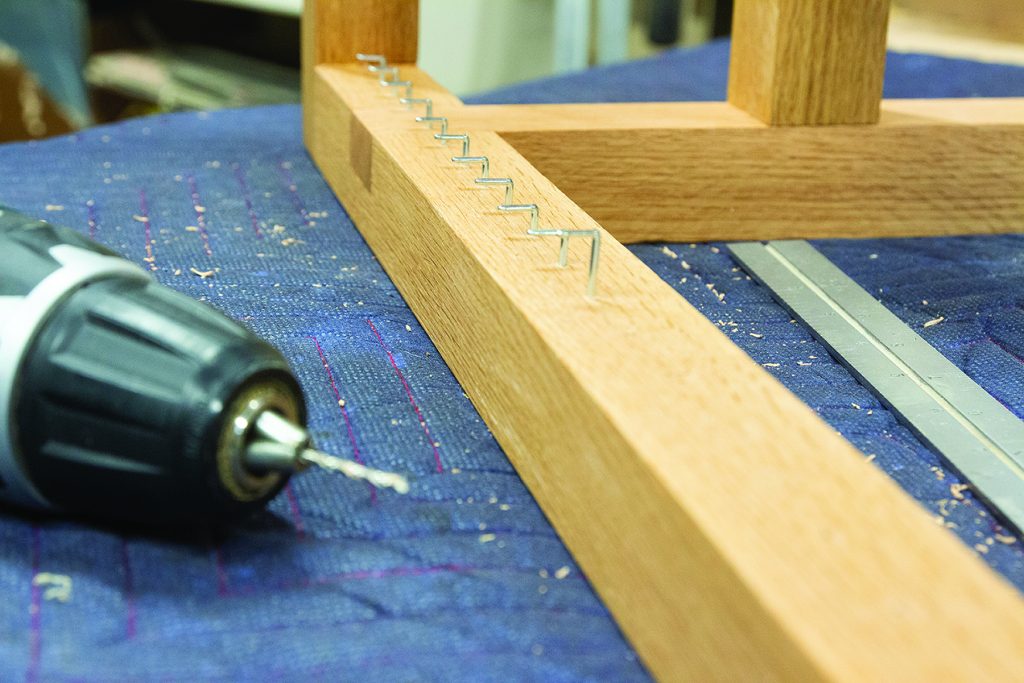
I predrilled slightly-undersized holes for the Danish nails, spaced about 1″ apart, around in the inside of the bench seat.
Start with the warp (the rows of cord you’ll weave through). Staple the end of your paracord inside the frame. Then wrap it around the outside edge of the frame, across to the other side. Go over the edge and then loop your cord on the nail and come back out over the outside edge (and repeat). It’s confusing at first, but you’ll get the hang of it. You’ll loop over each nail more than once. Try to keep things neat. When you need to add another length of cord (I kept mine in 100′ increments), secure the ends with staples, and keep weaving.
When you get the end of the warp, wrap the end of the warp around a nail and loop up around the side of the seat. Now you’re working on the weft (the part of the seat where you’re going over and under the warp). I use a pair of dowels to separate the warp so I can slide the cord through quickly.
With the first row of cord through, wrap the cord around the edge of the seat five times, and on the sixth weave the cord back through the warp to the other side. Loop over a nail then wrap around the edge five times (starting next to the previous row). With the sixth wrap, cross over the cord and wrap five more times. Weave the cord back across to the other side on the sixth and repeat.
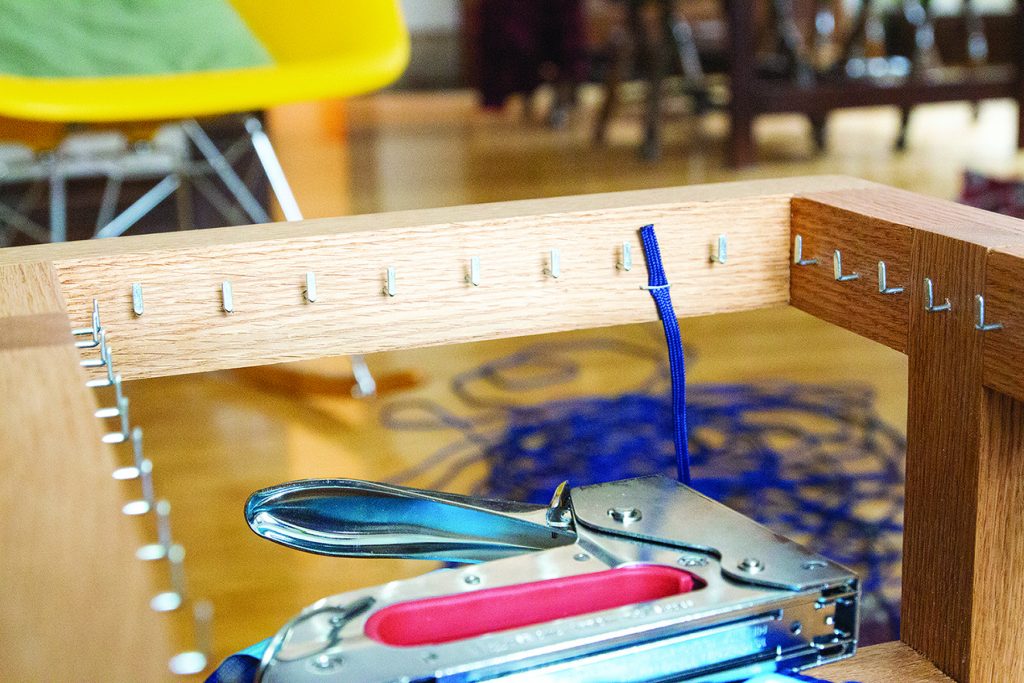
Start weaving by stapling one end of the cord to the interior of the seat.
The warp is created by wrapping over the seat and around the Danish nails.
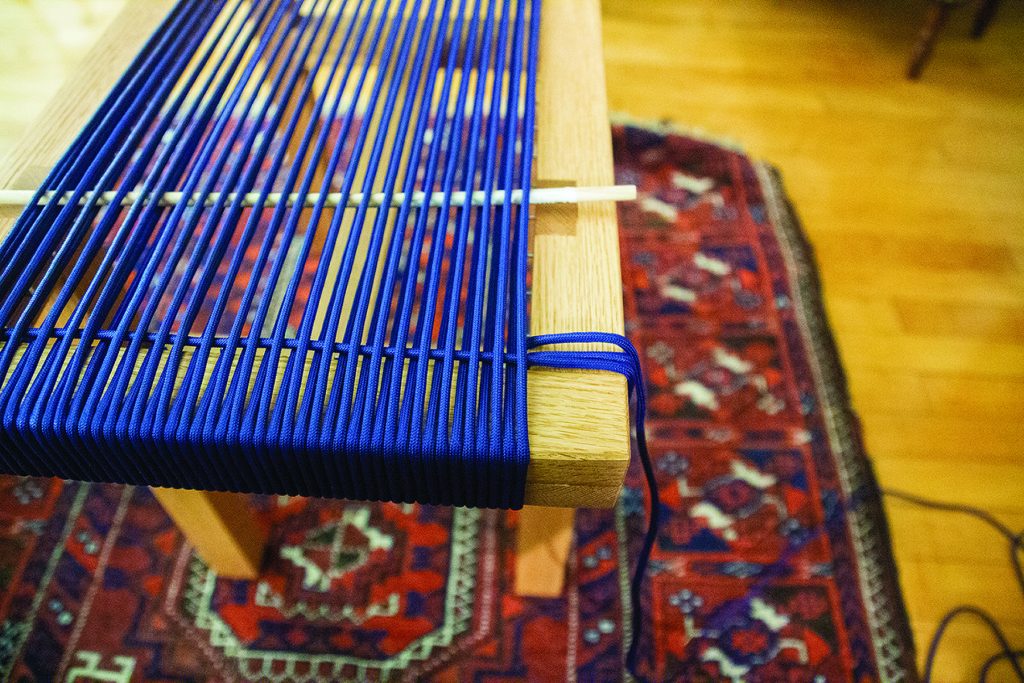
The weft is started by wrapping around the seat.
I landed on wrapping the cord around the seat five times be-tween each pass through the warp.
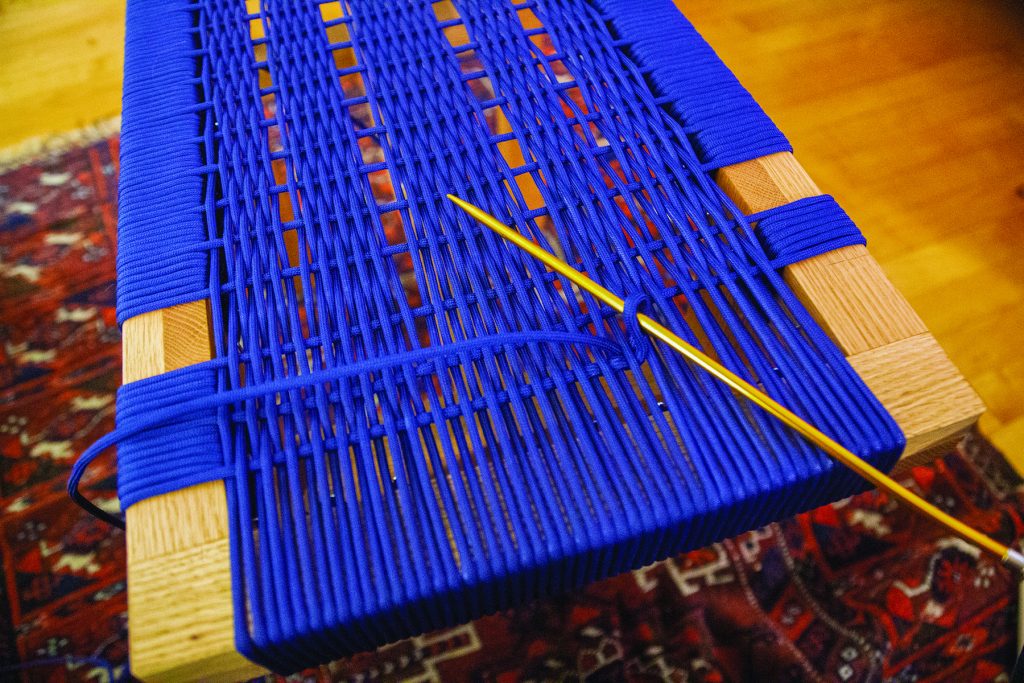
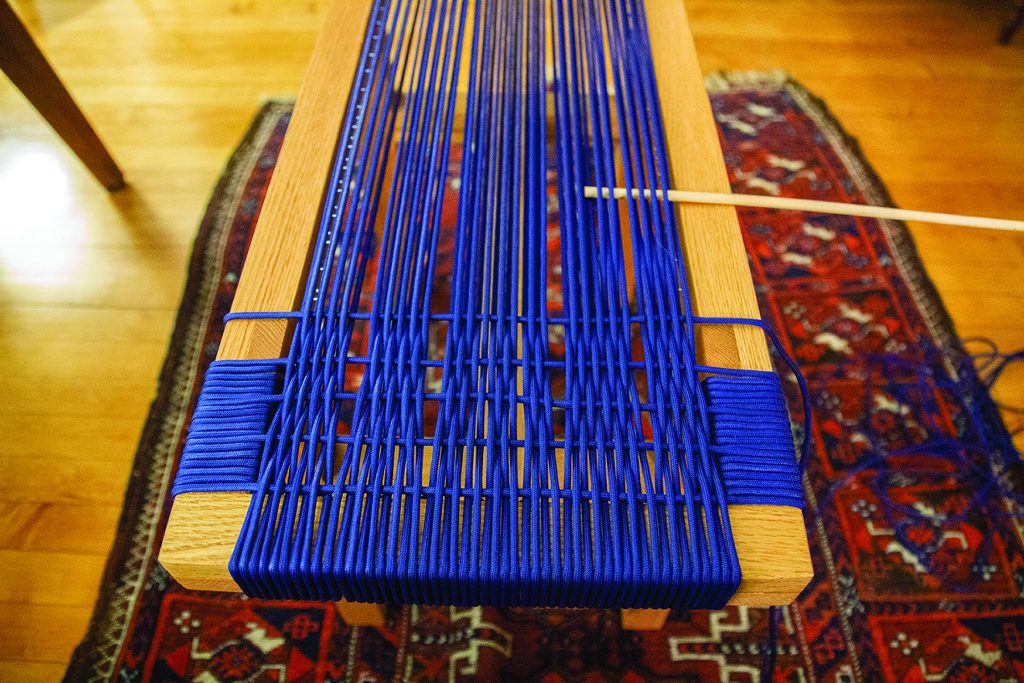
The weave gets tighter as you go, so I used a metal knitting needle to finish the last few rows.
This sounds complicated, but after a few tries it’ll start to click. You want the outside of the bench to look nice and orderly, but the inside will be a bit more chaotic. And, as you proceed through the weaving, things will start to tighten up. The last few rows were slow going as I couldn’t get my dowels in place and used a spare metal knitting needle to push the cord over/under the warp.
You’ll likely not have perfectly straight rows. That’s fine, because the last step is to eyeball everything and adjust the weave to make things appear nice and straight. Now take a seat and plan your next project.
Here are some supplies and tools we find essential in our everyday work around the shop. We may receive a commission from sales referred by our links; however, we have carefully selected these products for their usefulness and quality.


I can’t get my mind around the weave. Could you post a photo of the finished bench from underneath?