We may receive a commission when you use our affiliate links. However, this does not impact our recommendations.
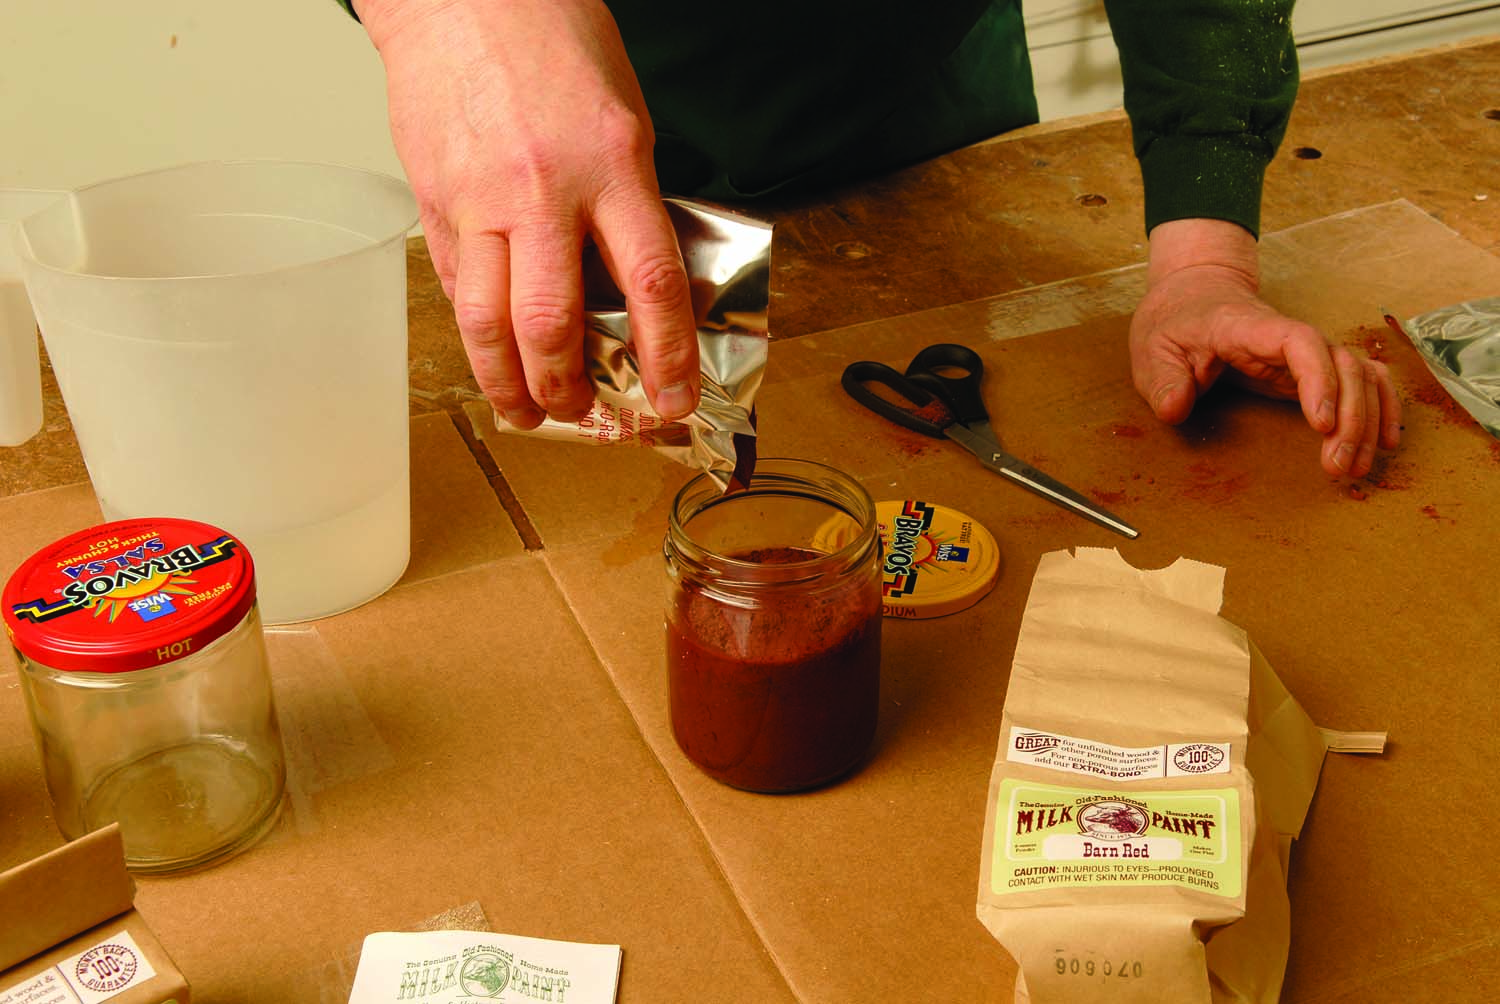
Paint prep. Mix one part water to one part paint, in a wide-mouthed jar.
Woodworkers have been painting their furniture for thousands of years. During that time, they have used many different types of paints. In fact, in historic terms what you will find at the paint store is limited: oil or latex. Modern paints are also pretty limited in their appearance. To put it simply – they are boring. Old paints looked a lot nicer.
If you want to achieve a nicer painted surface on your most recent masterpiece, you’re not going to find it in the paint store. Although it’s a bit extreme, you could make your own paint. This means mixing a bunch of hard-to-find ingredients. Some of the ingredients used in historical paints are poisonous and even illegal.
Happily, you do have a safe and easy-to-use option – milk paint. Woodworkers have used milk paint since antiquity. It remains a desirable finish today for the same reason it was favored by the ancients, and every generation of woodworkers in between. Milk paint is quick to apply, easy and forgiving. It results in a rich, lustrous and complex finish that improves with time. Yet it can be applied in an afternoon.
Milk paint doesn’t chip like regular paints and it doesn’t produce the boring, uniform color of modern products. Instead, it has subtle differences of shading that make it more like the paints used in centuries past.
As a piece of furniture finished in milk paint is used, the paint polishes where it is in contact with hands or body and takes on different levels of sheen. This is very subtle, but results in a finish that is complex and lively. Because of the way this wear plays with light, a milk-paint finish actually gets better as it ages.
Milk paint is nothing more than a mixture of lime, casein, clays and any one of a variety of earth pigments. In the past, woodworkers mixed their own milk paints using a simple formula that had been handed down from one generation to another. Today, it is far easier to buy it; I get mine from the Old Fashioned Milk Paint Company (milkpaint.com).
The paint arrives in powder form and is mixed with water. It has a distinctive earthy smell, but it is not disagreeable. There are no toxic fumes, and it can be washed down the kitchen sink. The manufacturer warns that prolonged exposure to lime can burn wet skin and can injure eyes. In 30 years of use I have never experienced any of these problems. To my mind, the finish is perfectly safe.
Milk paint is not difficult to use. However, it is very different from modern latex and oil paints. Unless you understand these differences you may not get the best results. Most of these differences stem from the fact that milk paint is water based. Oil and latex paints are much thicker than milk paint and sit as a skin on the surface of wood. There is limited penetration into the wood. When struck or scratched these paints will chip.
Milk paint and has far less body. It is much thinner and is applied in much thinner coats. Also, water-based milk paint soaks into the wood. That’s why antique collectors have always dreaded stripping this stuff. The good news is that milk paint does not chip. In normal use it will only wear.
Mixing
 To mix milk paint, just add water. The manufacturer recommends one part water to one part paint. My method for mixing it is simple. I use a clean wide-mouth plastic or glass jar. A wide mouth makes it easier to dip the brush. Salsa and peanut butter jars are perfect. In a pinch, I will use a small coffee can with a plastic lid for mixing milk paint. Because the mixture includes water, avoid a cardboard paint pot. The water may soak through and the cardboard may fall apart before you are done.
You can mix the paint with a stirrer driven by an electric drill. However, I just pretend I am a bartender making a martini for James Bond – shaken, not stirred. It doesn’t take long to mix the paint. About a minute of shaking is more than enough. The shaking or stirring will result in a paint that is frothy and full of air like whipped cream. You will not be happy trying to use this foam. I let freshly mixed milk paint sit for about an hour. This allows the foam to settle back down into a liquid.
Because milk paint is water based, the solids will not suspend like they do in oil and latex. They settle out fairly quickly. I always keep a stirring stick in the jar. I stir before I start painting and I stir regularly during the process.
Depending on the surface you want, you can either strain your milk paint or use it freshly mixed. Strained milk paint results in a slightly smoother finish. Unstrained, it is rougher to the touch. It is more matte, like an exceedingly fine sand paint. I usually do not strain, but when I do I pass the mixed paint through an old pair of panty hose. You can also buy a strainer at a paint-supply store.
A new packet of Old Fashioned Milk Paint is sealed in a foil bag. Once you open that packet the powder will slowly absorb moisture from the air. As it does, it loses some of its ability to bond. In other words, milk paint has a shelf life. For that reason, I buy one-ounce bags. If I have some powder left over, it is only a small amount. I don’t feel too bad about throwing it away. The unused product will last a lot longer if you close the bag tightly and store it in a dry environment. I’m a pretty frugal guy, but holding on to an open bag of paint strikes me as penny wise, pound foolish. I feel much safer opening a fresh bag.
Mixed milk paint, too, has a very short shelf life. Simply put, it spoils. It is a good idea to use it only on the day it is mixed. If you are not able to complete the finish in one day, you can stretch the mixed paint’s working life by keeping it in the refrigerator. After two days, it is like Ben Franklin’s advice about fish and guests: Get rid of it.
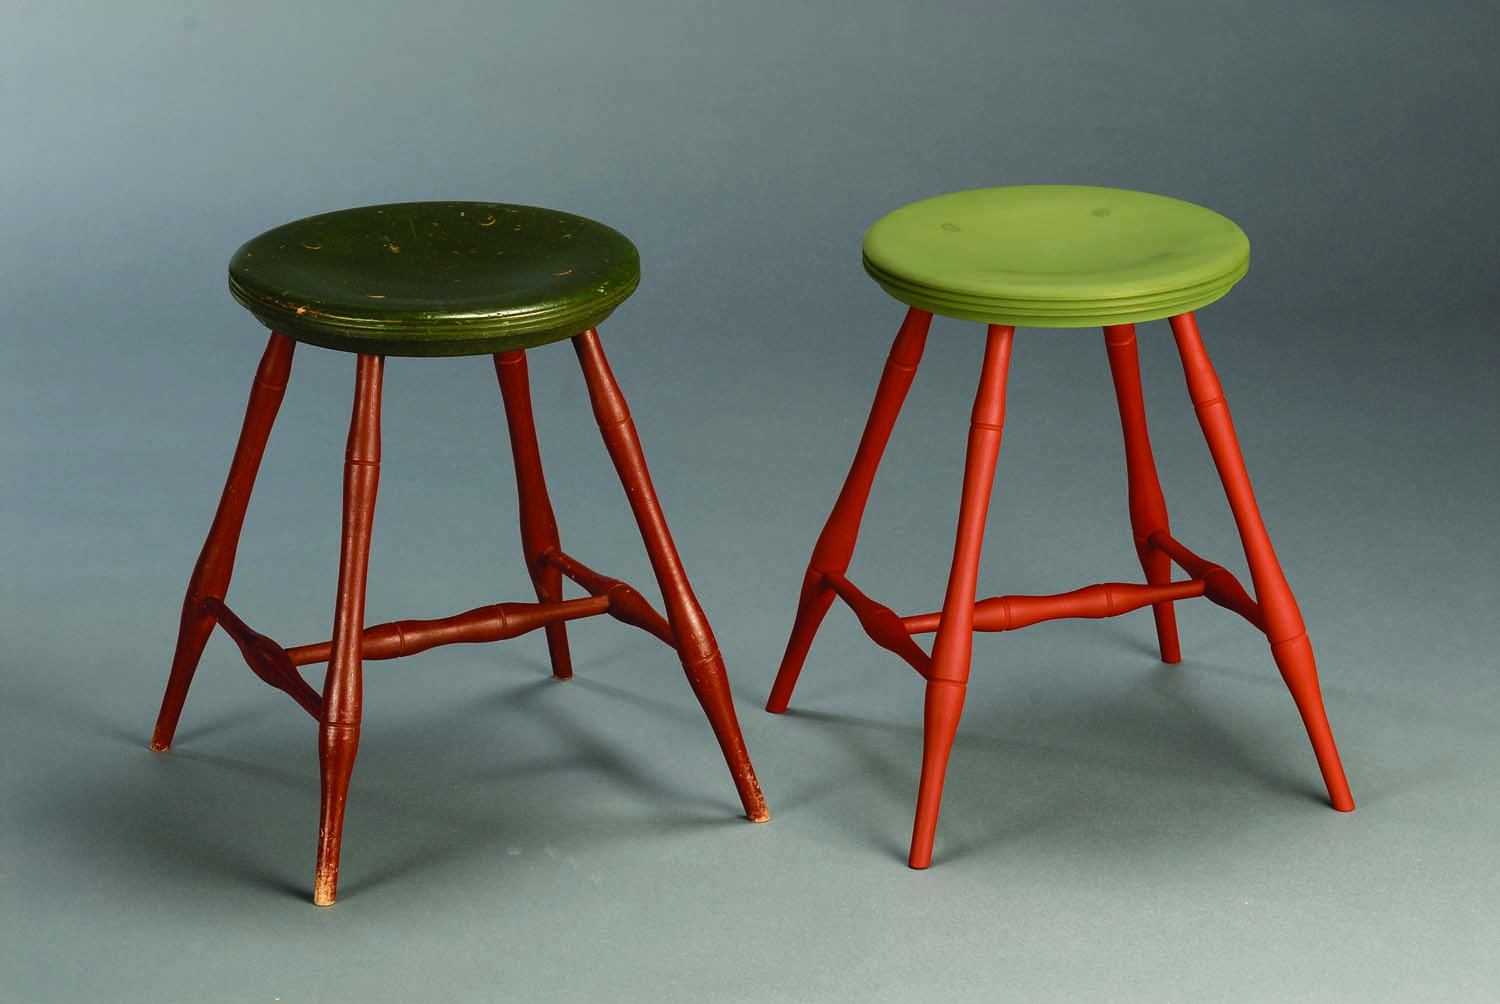
Old and new. Milk paint is quick and easy to apply, and it ages handsomely, resulting in subtle variations in color over time.
Surface Preparation
If my project has any small holes or blemishes I fill them with Plastic Wood. This material will take the paint. The water used to mix the milk paint will soften latex fillers, which may cause the milk paint to wrinkle. Remember, milk paint has almost no body. You can’t expect it to fill small holes the way oil or latex paint will. You have to take care of any voids before you begin. If not, they will show up when you are done.
While I am waiting for the froth to settle out of freshly mixed milk paint, I take on the next step in preparing my project. The water-based paint will raise the grain of the wood. If you apply milk paint directly to a freshly sanded surface, you will have to sand again between coats. I would rather not have to do this extra sanding. So, I raise the grain before I apply the first coat. I spray the wood I am painting with water.
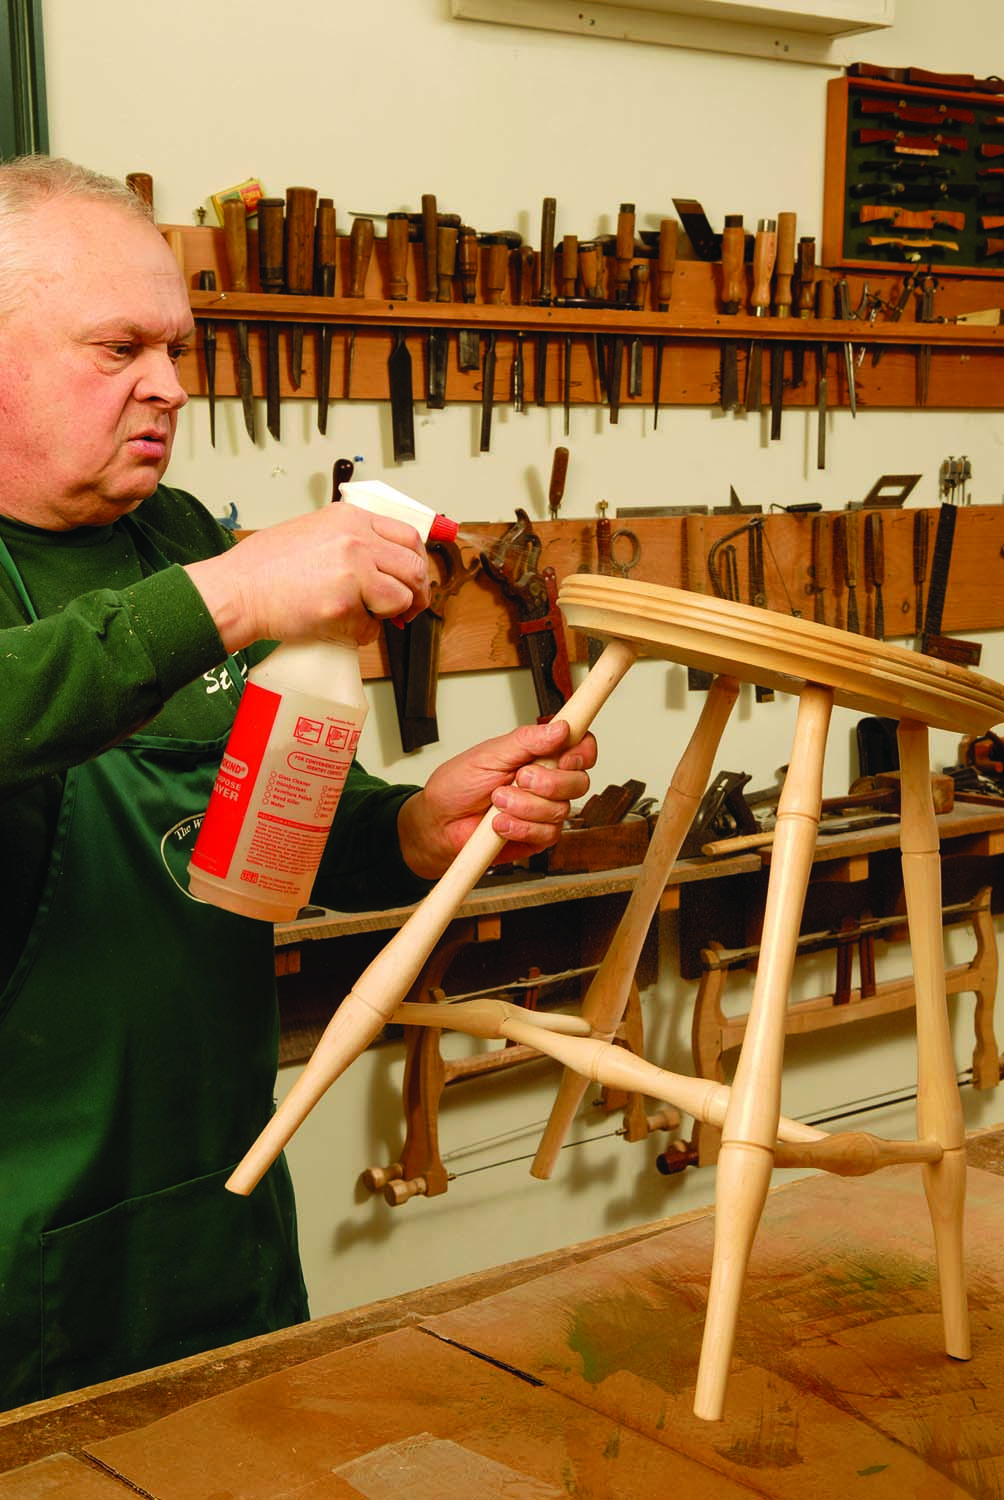 I use a plastic spray bottle, the type available at any hardware store. The trick here is to moisten the surface thoroughly, but not as if you were washing a car. If the water puddles or runs, you are being too liberal.
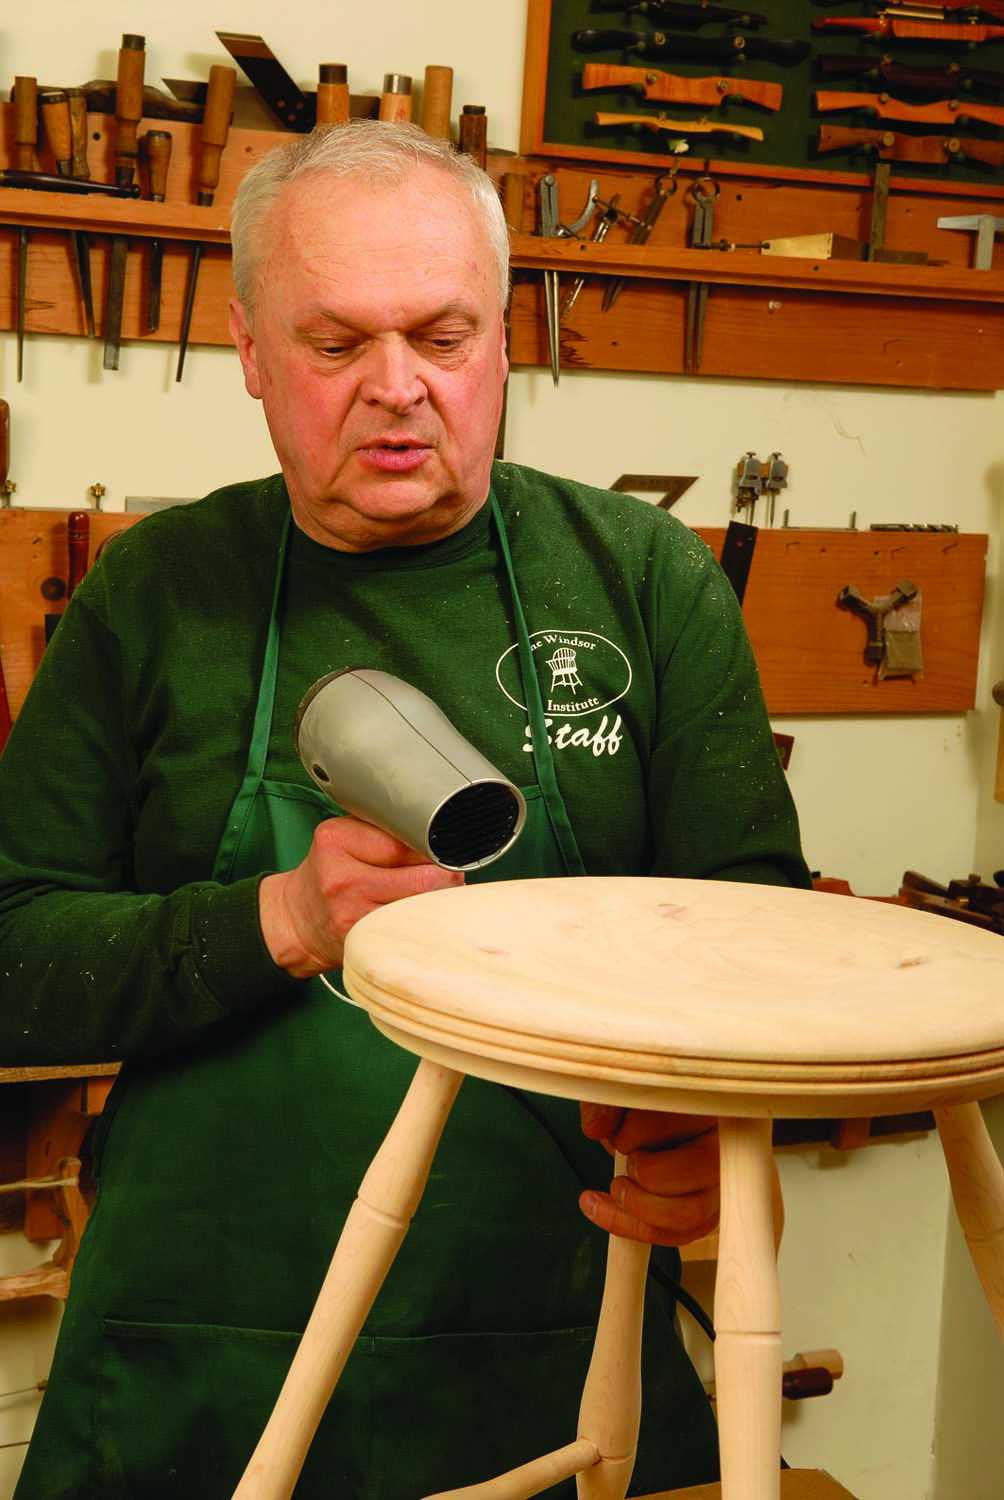
In a hurry. If you don’t want to wait for the wood to dry, speed up the process with a hair dryer.
There is another advantage to wetting the surface first. Glue spills or glue smears will prevent milk paint from bonding. You can readily see these spots on a moist surface. The glue can be removed by scraping. I use a scraper, a chisel or even a pocketknife. Once the wood is uniformly wet and all the glue is removed, allow the wood to dry. On a warm day or in a heated shop this happens very quickly. If you are in a hurry, you can speed things up with a hair dryer. Do not put your project out in the sun; that may cause parts to warp or split.
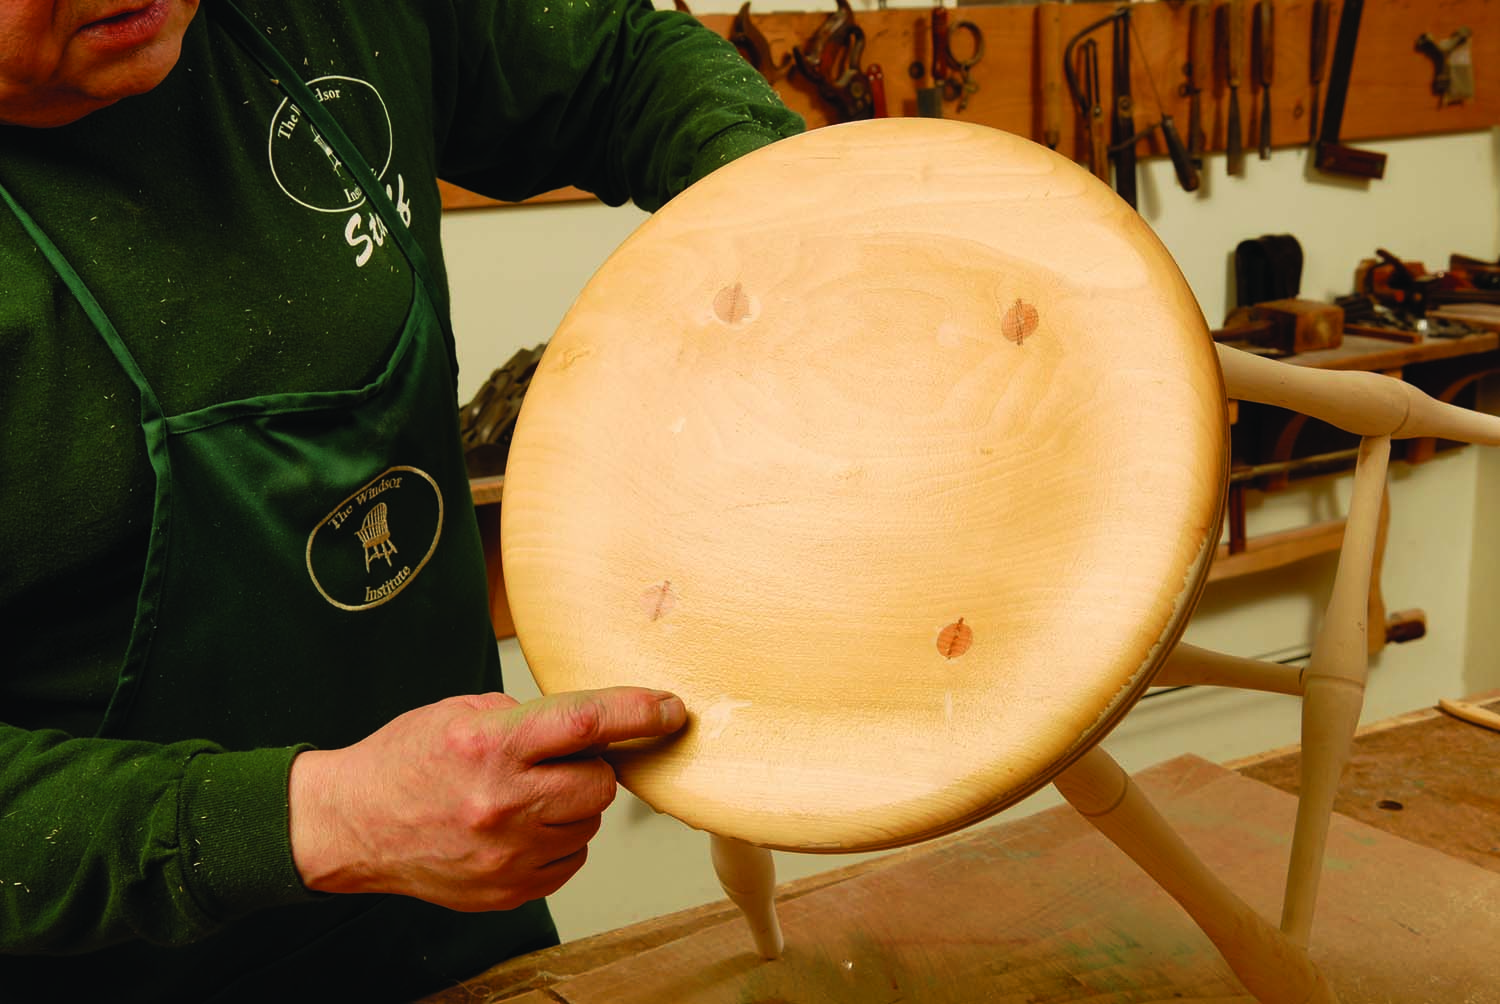
Glue alert. In addition to raising the grain, the water also highlights areas from which glue needs to be removed before painting.
Finish-sand the wood and dust it with a clean, soft cloth. You also can use a tack rag.
Milk paint dries very quickly and unless a spill or splatter is wiped up immediately it becomes difficult to remove. I protect my workbench by putting down a layer of builder’s paper or by cutting open a large cardboard box. I also wear an apron to protect my clothes. I don’t bother with gloves. The paint washes off my hands easily.
when the paint is dry and do not leave a blemish. By the time you have finished applying the first coat and washed the brush, almost all the loose bristles have dropped out. Bristles are less of a problem with the second coat.
How wide a brush to use depends on the surface. For a piece of furniture with a lot of small, shaped parts, such as a Windsor chair, I like a 2″ brush. On wider surfaces, such as a chest or tabletop, I use up to a 4″ brush.
The manufacturer recommends using a foam brush. They probably work. I have tried them, but never liked them. I guess I’m just an old-fashioned kind of guy. A brush should have bristles.
First Coat
The manufacturer recommends moistening the surface before applying paint, as this makes the application easier. While I do wet the wood to raise the grain before finish-sanding, I skip this recommended step. Yes, it easier to apply the first coat to a moist surface. However, in my experience the water used to moisten the wood thins the first coat so much that a third coat is usually necessary for complete coverage. So, I would end up doing more work in the long run.

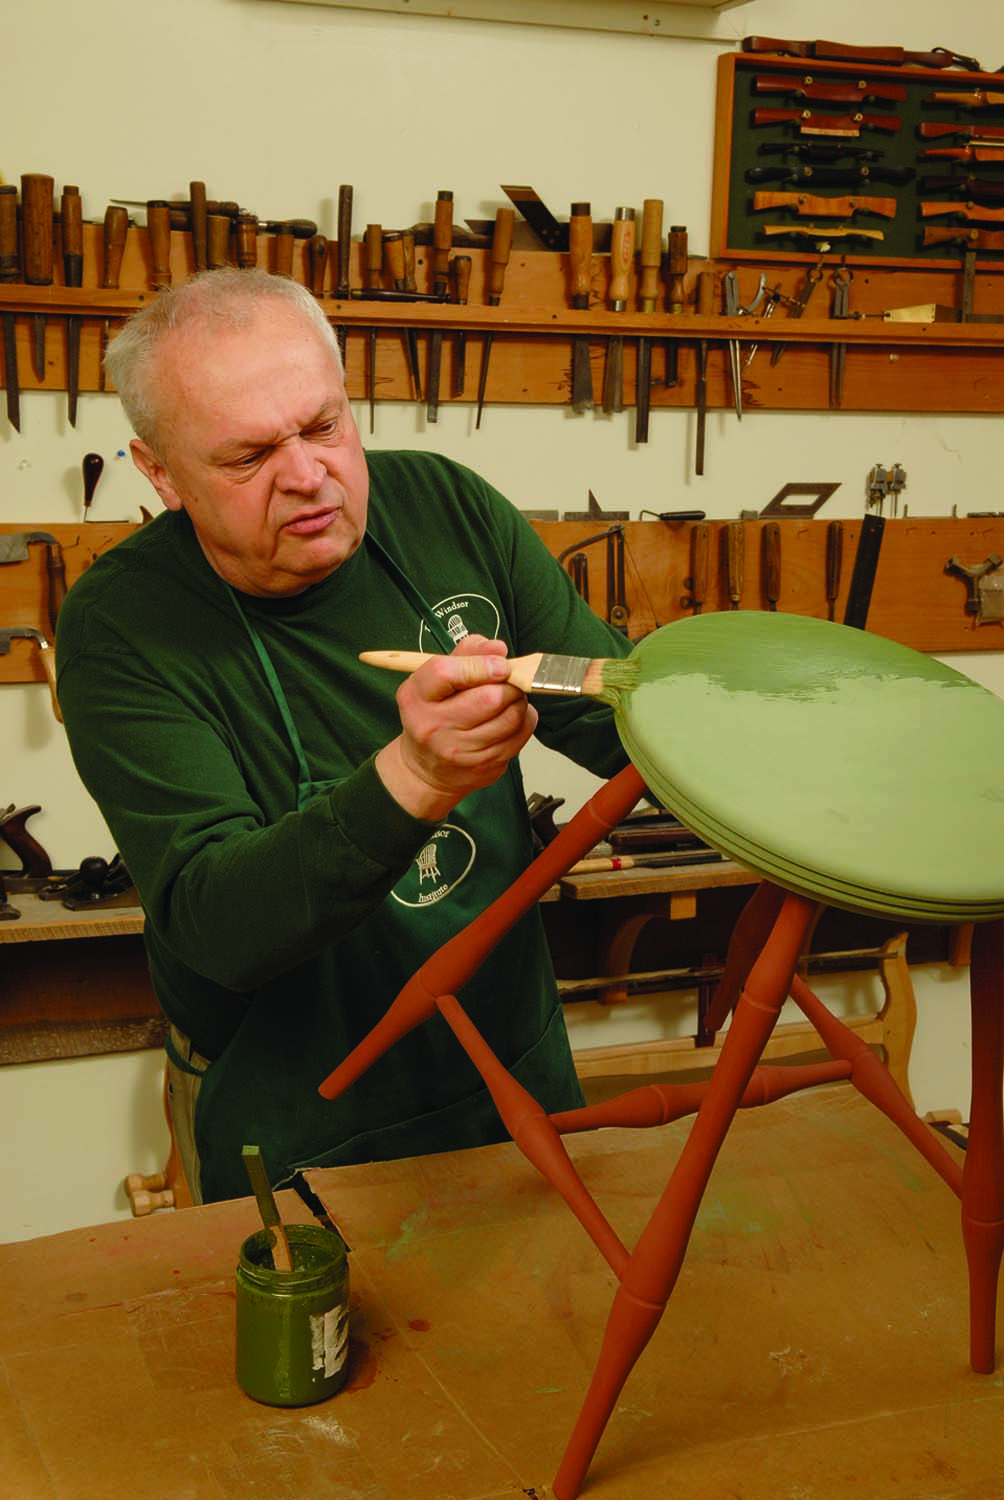
Thin coat. Apply a small amount of paint and pull it with the brush to a thin, uniform coat.
Because milk paint is nearly water thin, it draws into the wood almost as quickly as it makes contact. This means that you can’t draw it as you can oil or latex paint. The action for applying the first coat is more like daubing. Do not apply so much that the milk paint puddles. This is far too much paint. Use less paint and pull it with the brush to work it into a thin film. You do need to work it so it spreads and is absorbed uniformly. In this way too, milk paint is different. It has to be worked vigorously with the brush.
I emphasize this point for an important reason. Read the next couple sentences, then read them again. Most of the problems people have with milk paint are caused by trying to flow it on like latex or oil paints. If the milk paint puddles, you can end up with a blotchy surface, even after several coats. I cannot stress enough the need to work the paint. Remember, while easy to use, milk paint is a very different product than you’re probably used to. Also, while applying the paint, remember to stir it regularly.
Because milk paint soaks into the wood, it is difficult to use it to cut in – the process of drawing a fine line of paint with a brush. It is not impossible to pick out areas or parts in a different color, but you do have to be careful. It is easier to paint parts a different color before they are joined. While this is not possible with a lot of furniture, it is a helpful trick when you can use it.
Allow the first coat to dry completely. Milk paint dries through evaporation. So, drying time depends on how warm and dry the air is in your shop. The paint takes a lot longer to dry on a rainy summer day than in a heated shop in the winter. This means that when painting a large piece, where you began painting has often dried thoroughly long before you are done. When this happens you can apply a second coat in as little as an hour. Areas that are not fully dry are very easy to see. They are much darker than the dry areas. So, there is little doubt as to when you can move on.
Once again I have to emphasize a point and warn you. When dry, the first coat will look like something the cat dragged in. Until you become familiar with this product, you will be sure you have ruined the furniture you spent so much time making. The first coat of milk paint is splotchy and uneven. It is also dead flat, like chalk. This is no time for a faint heart. Be brave. Have faith.
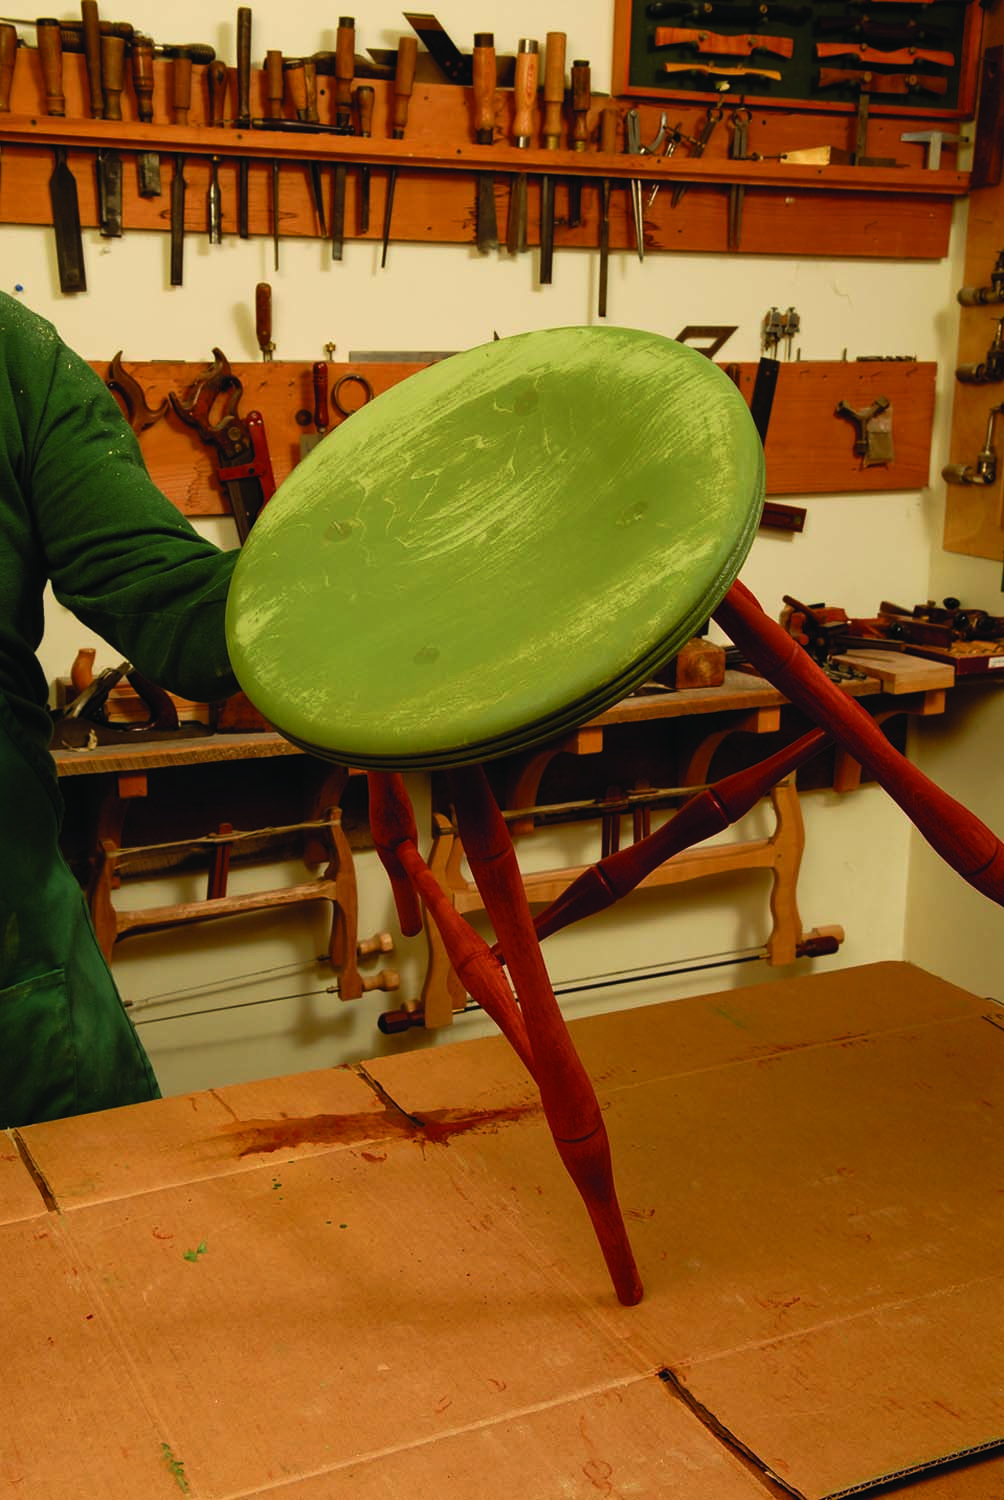
Don’t panic. The first coat will look a splotchy and uneven.
First, rinse out your brush with running water and store it in a jar of water. Remember milk paint dries fast. If you do not keep the brush wet, the paint will dry and you will not be able to use it for the second coat. That mistake could cost you a whole dollar.
You now need to decide what type of finish you want. If you want a very smooth surface, rub down the first coat. I use a fine Scotch-Brite pad. You can use #0000 steel wool, but it leaves a lot of black metal filings. No matter what fine abrasive you use, the excess milk paint will create a lot of dust. You have to clean up. You can use a tack rag, but it is probably overkill. It is only dry dust; you can brush it away with a clean, dry brush. If the piece is small enough, you can blow the dust away or even turn the piece upside down and tap it to let gravity do the job.
Smooth. If you want a smooth surface on your piece, after the first coat dries rub it down with #0000 steel wool, or a green Scotch-Brite pad.
Second Coat
Before beginning the second coat, remove the excess water from your brush. I do this by wiping it over the paper layer on the bench. You could also use a paper towel.
The first coat of milk paint seals the wood. This makes it a lot easier to apply the second coat. Even though it is water thin, you can draw the second coat in a manner similar to oil and latex paints. However, do not try to flow it on. You still need to work the paint to spread it evenly and thinly. You can still make it blotchy by slopping it on. You want to avoid puddles and runs. Because the second coat is not being absorbed almost as fast as it is applied, it will take a lot less time than the first coat to complete the job.
Like the first coat, the second coat of milk paint will give you fits of panic. While the coverage is now more uniform, the paint again dries dead flat. It is flatter than anything you have ever seen. It has no luster or highlight. You can still see brush overlaps and areas that you touched up. Again, have courage.
If you want a very smooth surface, rub the second coat too. You can use a very fine Scotch-Brite pad. You also can do this by rubbing hard and vigorously with a soft cloth, such as a dry face cloth.
You will not generally need a third coat. If you want to apply one, follow the instructions for the second coat.
Second coat. The first coat seals the wood, so the second goes on more easily. But again, spread it evenly and thinly to avoid blotching.
Overcoat
The paint needs to be sealed with a topcoat. This final surface has several purposes. First, the topcoat pulls the whole finish together by giving it a deeper, darker, rich color. It also will provide luster. Second, it protects the paint. Raw milk paint will water spot, and these spots are hard to remove.
Over the years, I have tried several different topcoats. I have finally settled on natural (untinted) wiping varnish.
I pour the wiping varnish into a wide-mouthed jar or a coffee can. I apply it with another of those cheap natural-bristle brushes. When doing this, be liberal. Be sure to wet all the painted surfaces. As you brush on the varnish, any overlaps and thin areas in the milk paint will stand out for several minutes, again causing you anxiety. But these problems that first appear as blemishes begin to blend together into a uniform color.
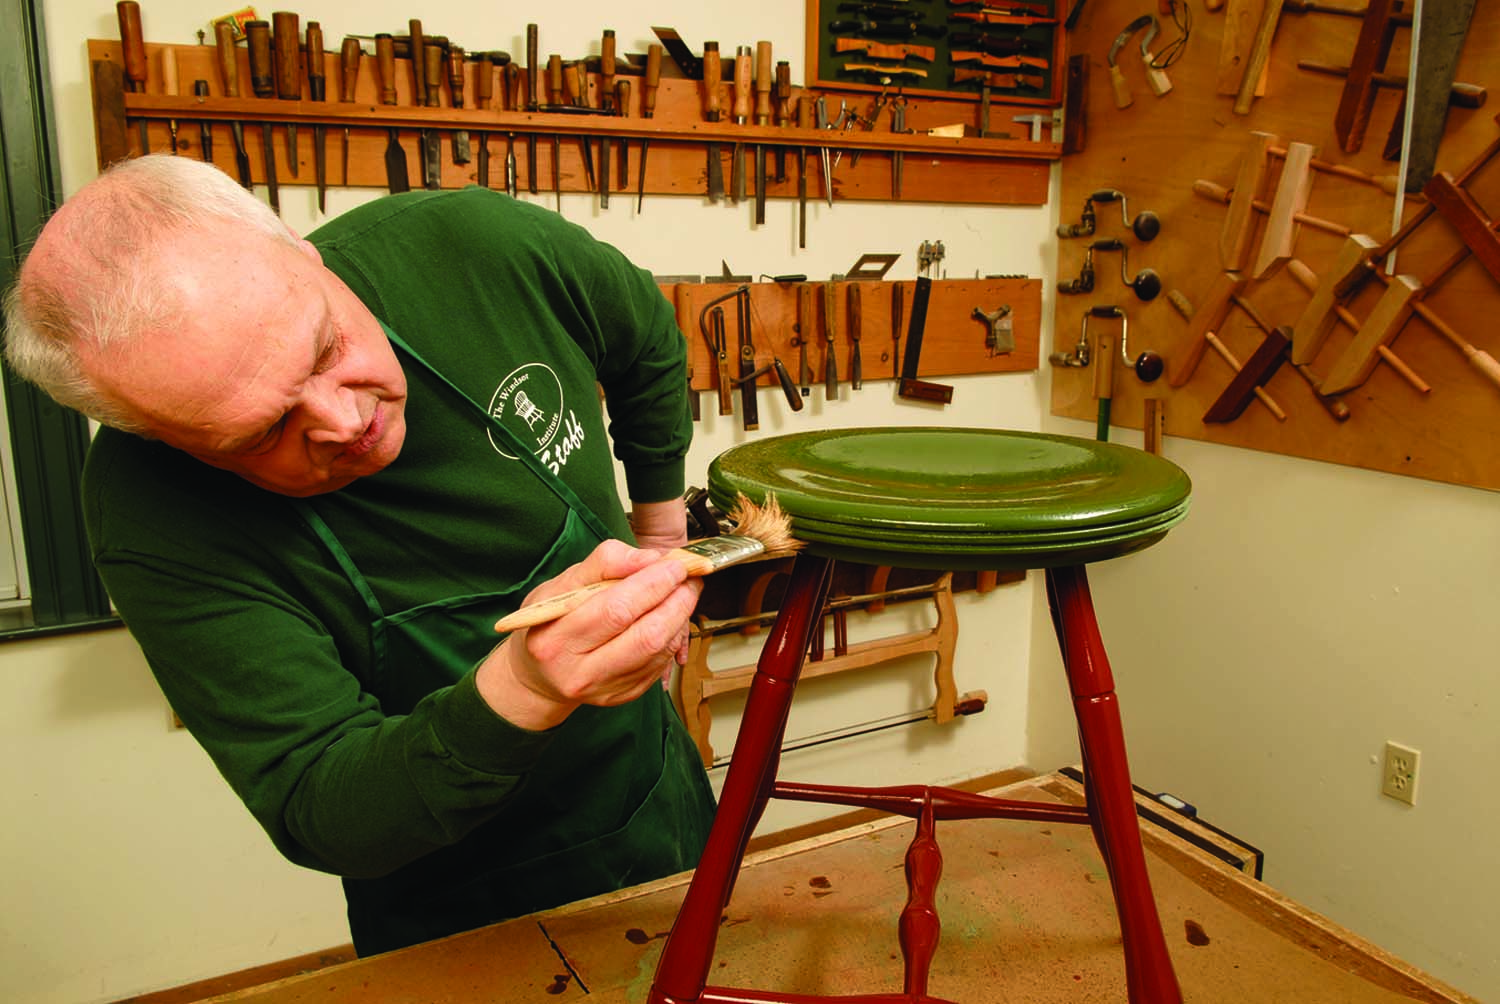
Topcoat. An untinted wiping varnish, applied liberally, will add a deep, rich look and luster, as well protect the paint.
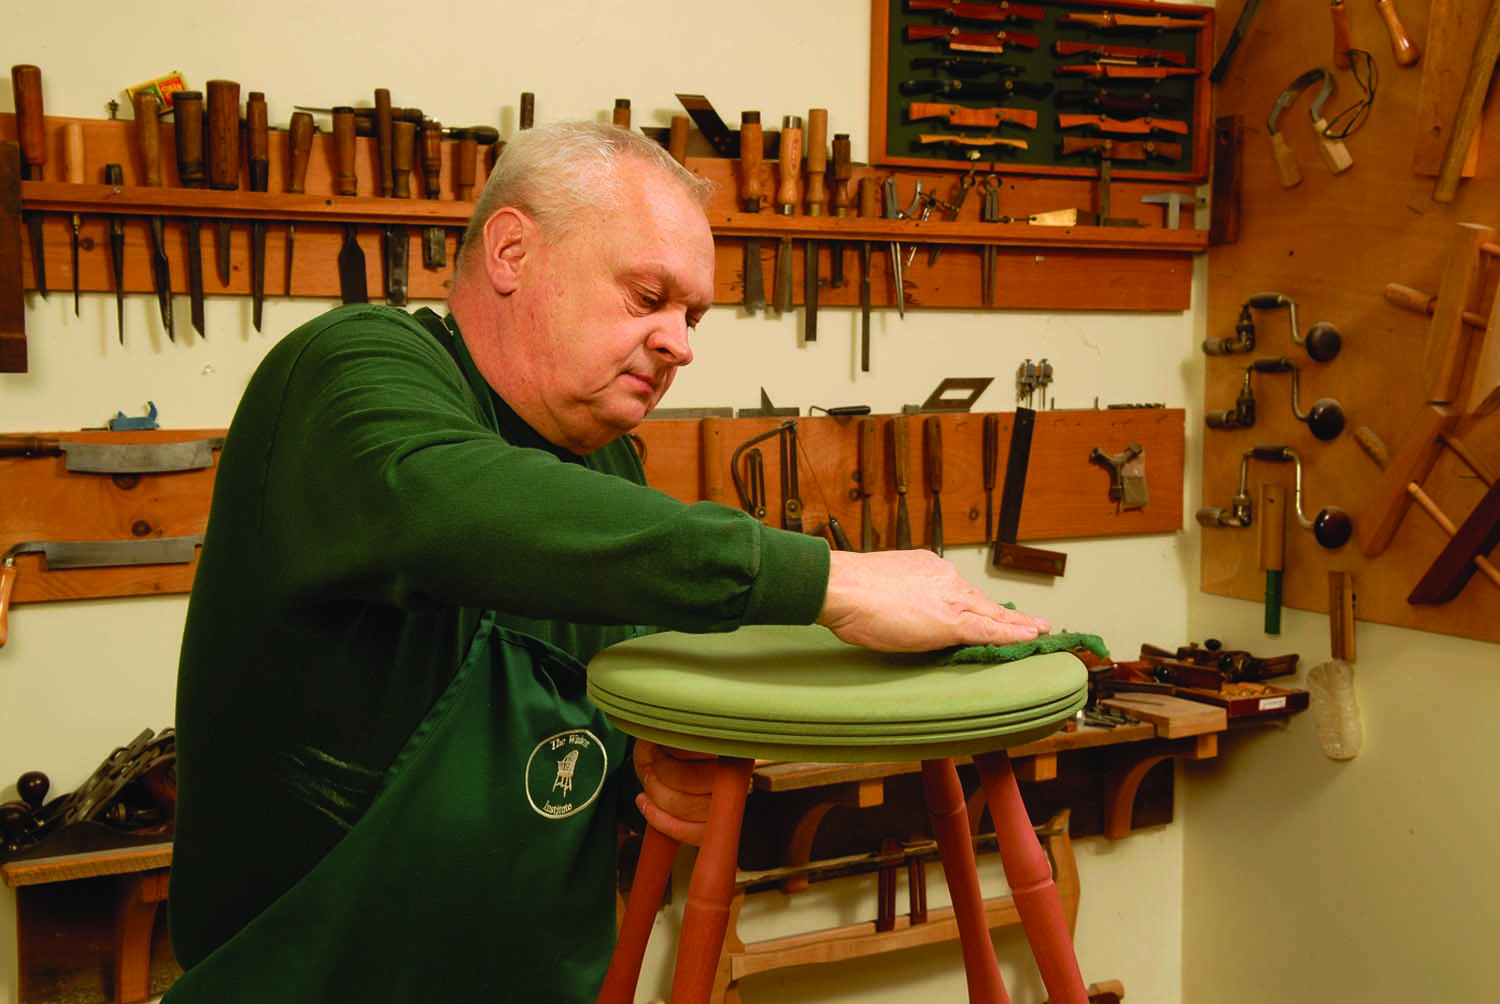
Let the wet varnish stand for about 10 minutes. Then, wipe off as much as you can with a soft, absorbent rag. Be careful with the rag. It can start a fire. Behind my shop I have an incinerator for getting rid of shavings and scraps. I throw oil-soaked rags in there, too. If you don’t have an incinerator, spread your rags on the pavement to dry.
Let this thin coat of varnish dry. Depending on the conditions, this could take as little as a couple hours. Or, you may have to wait until the next day. One coat of wiping varnish will dry to a very pleasant matte finish. If you want more sheen, apply a second coat, just as you did the first. The second coat will usually take longer to dry. Once it’s hard, I often apply a coat of Butcher’s wax.
I think of milk paint as being like a human face. A young face is perfect and beautiful, but it has no character. The interesting features we think of as character take time to develop in a human face. That is how it is with milk paint. This is a finish that gets better with age. It continues to become more subtle and complex. Use your newly finished piece of furniture as you normally would. Enjoy how the finish develops with time. Like love, the best part of milk paint is growing older together.
A chairmaker since 1971, Michael Dunbar is the founder of The Windsor Institute in Hampton, N.H. (thewindsorinstitute.com).
Here are some supplies and tools we find essential in our everyday work around the shop. We may receive a commission from sales referred by our links; however, we have carefully selected these products for their usefulness and quality.