We may receive a commission when you use our affiliate links. However, this does not impact our recommendations.

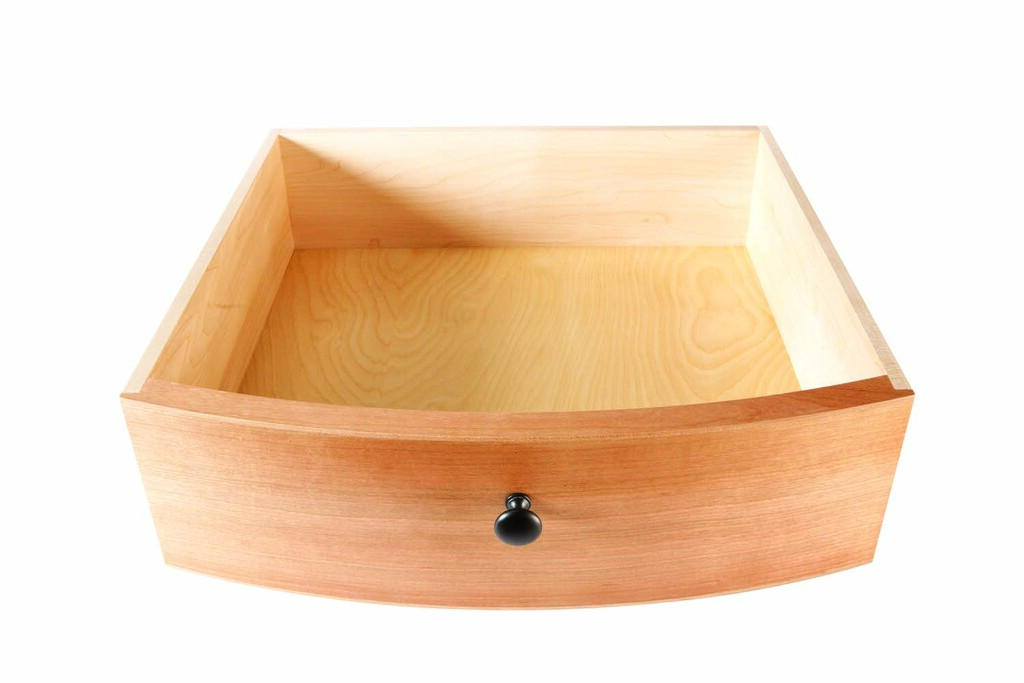
Curved-front drawers add a touch of grace and liveliness to a cabinet. But if you’re not set up to re-saw wide stock into thin, uniform laminations, you’re sunk, right? Wrong. You can use thin plywood instead of re-sawn hardwood, so the biggest obstacle is out of the way before you start!
 Build the Drawer, On Paper
Before you make even one cut, make a full size plan view drawing of your drawer. You’ll discover that the two halves of the bending form halves have different radii – the convex half slightly smaller than the concave half – to allow for the thickness of the material they’re pressing together. Not only will your drawing will help you figure out each radius, it’ll also come in handy for figuring out part sizes, angled cuts, and joinery.
Make the Two-Part Bending Form
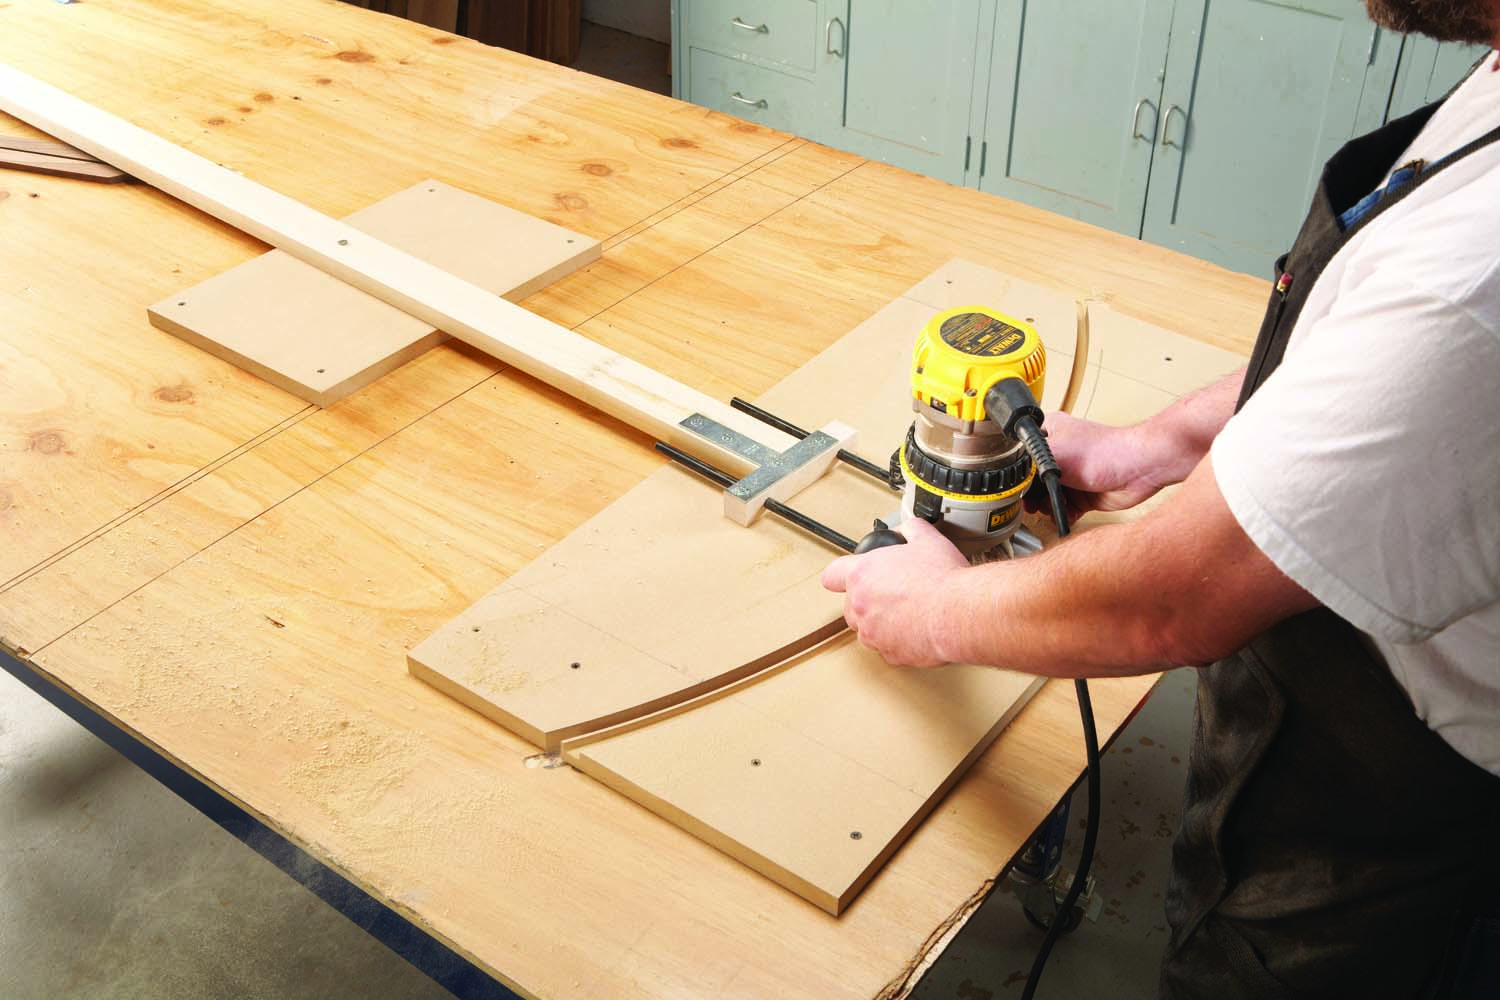
Photo 1. Rout a pattern for each half of a two-part bending form using a circle-cutting jig. The form’s convex and concave halves have different radii from the same pivot point, to allow for the thickness of the bending stock.
Start by making a pattern for each half of the form, using a router and a circle-cutting jig (Photo 1). I used 3/4″ MDF for the patterns as well as all the layers of the form, and cut both patterns from single piece. Screw the pattern board to a sacrificial board and then use a trammel to draw the two radii. After you’ve drawn the radii, make sure you won’t hit any screws with the router, and that both halves of the form are securely fastened to the sacrificial board.
Align the bit’s edge with the waste side of the smaller radius line and then make the cut in several passes. Using the same pivot point, adjust the router to cut the larger radius, again aligning the bit’s edge with the waste side of the line. After you’ve cut both radii, unscrew the patterns from the sacrificial board.
Next, determine how thick to make the form. This drawer front is 5-3/4″ tall, so I used eight thicknesses of 3/4″ MDF to make a 6″ thick form. Cut all the form’s layers rectangular first, and then trace the patterns onto each layer. Rough-cut the curves on the bandsaw, staying about 1/8″ outside the line.
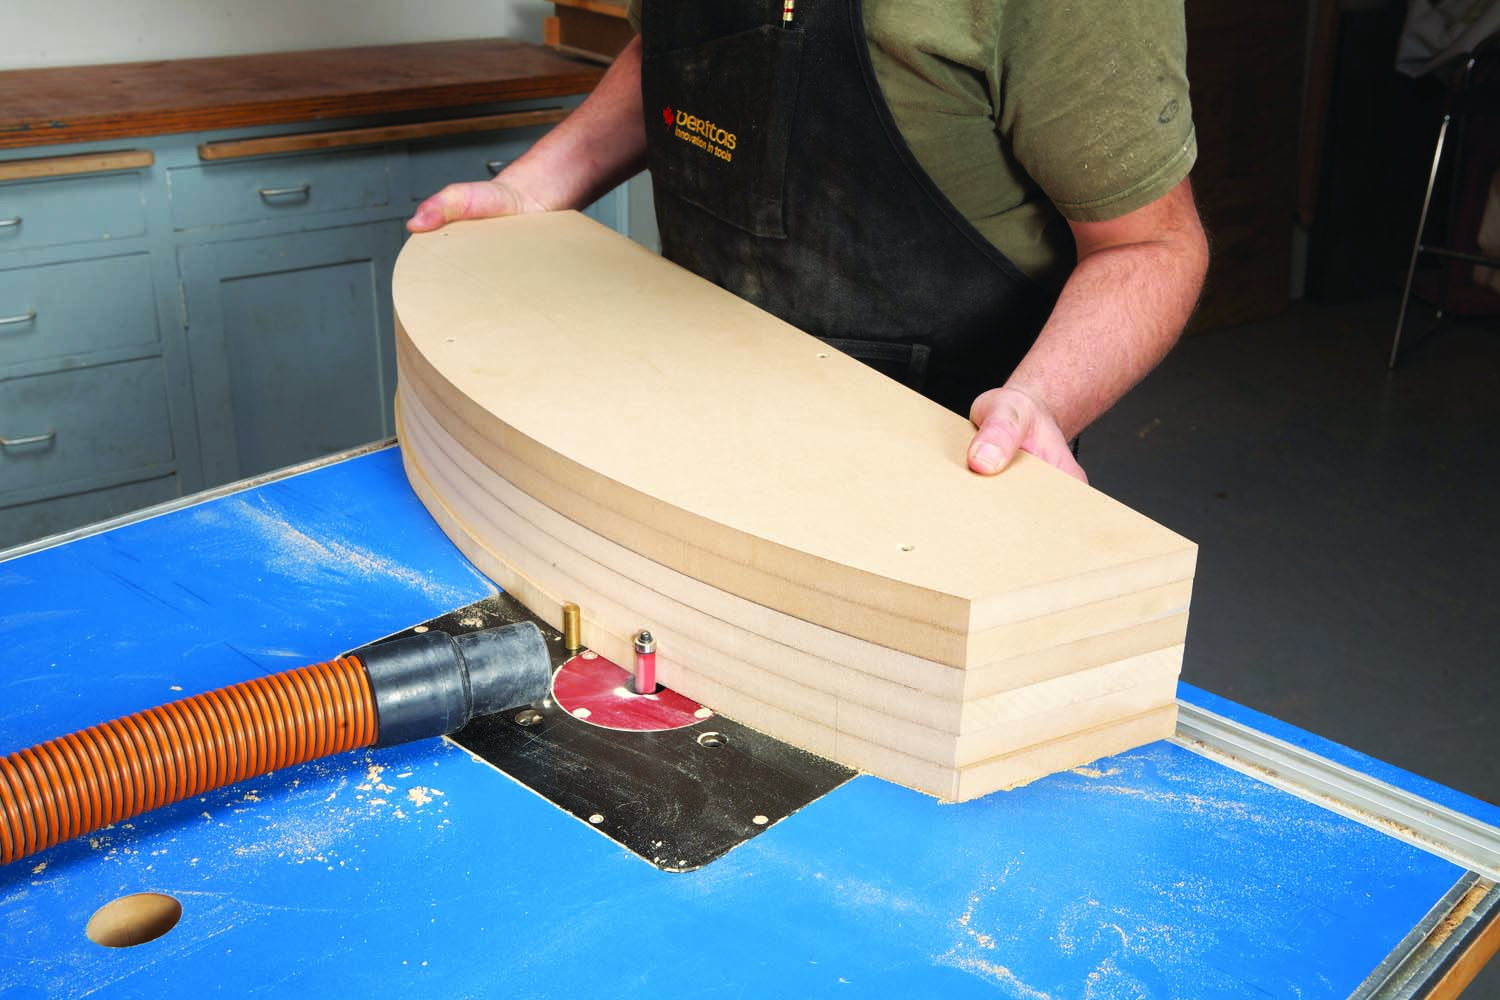
Photo 2. Build up the form halves one layer at a time, starting with the patterns. Rout each new layer flush with the last. Gluing isn’t necessary; just screw them together. Use a starting pin when routing without a fence.
Build up the form to the thickness you need by screwing on one layer at a time, and then trimming it flush (Photo 2). I didn’t use glue because I wanted to disassemble the form when I was done with it. Because the parts are curved, you can’t use a fence, so use a starting pin. It allows you to safely “rock” the piece into the bit. You could also trim these pieces using a hand-held router if you prefer.
When the form halves are built up to their full thickness, fasten battens to both sides of the concave half of the form. The battens prevent the bending stock from sliding out of the form, they keep the form halves in alignment.
Bend the Laminations
I like to do this operation vertically, on sawhorses, with the convex half on the bottom. Sawhorses allow plenty of space for clamp placement. Also, the convex half of the form is significantly heavier than the concave half. So for a shallow radius like this one, the bending is almost done before even applying clamps.
One benefit of gluing up laminations for a curve vs. steam bending is that it’s more predictable; there’s virtually no spring back. I used five-ply, 1/4″ home-center plywood for the bending stock. Its actual thickness is about 3/16″, so it bends readily.
Cut your plywood bending stock 2″ longer than the finished front, and 1/16″ narrower than the form’s thickness. Before glue-up, cover the curved surfaces and the battens with packing tape to prevent gluing the plywood laminations to the form. Spread an even layer of glue on all but one of the laminations and place them in the form, one on top of the other. The one without glue is the last to go into the form (Photo 3).
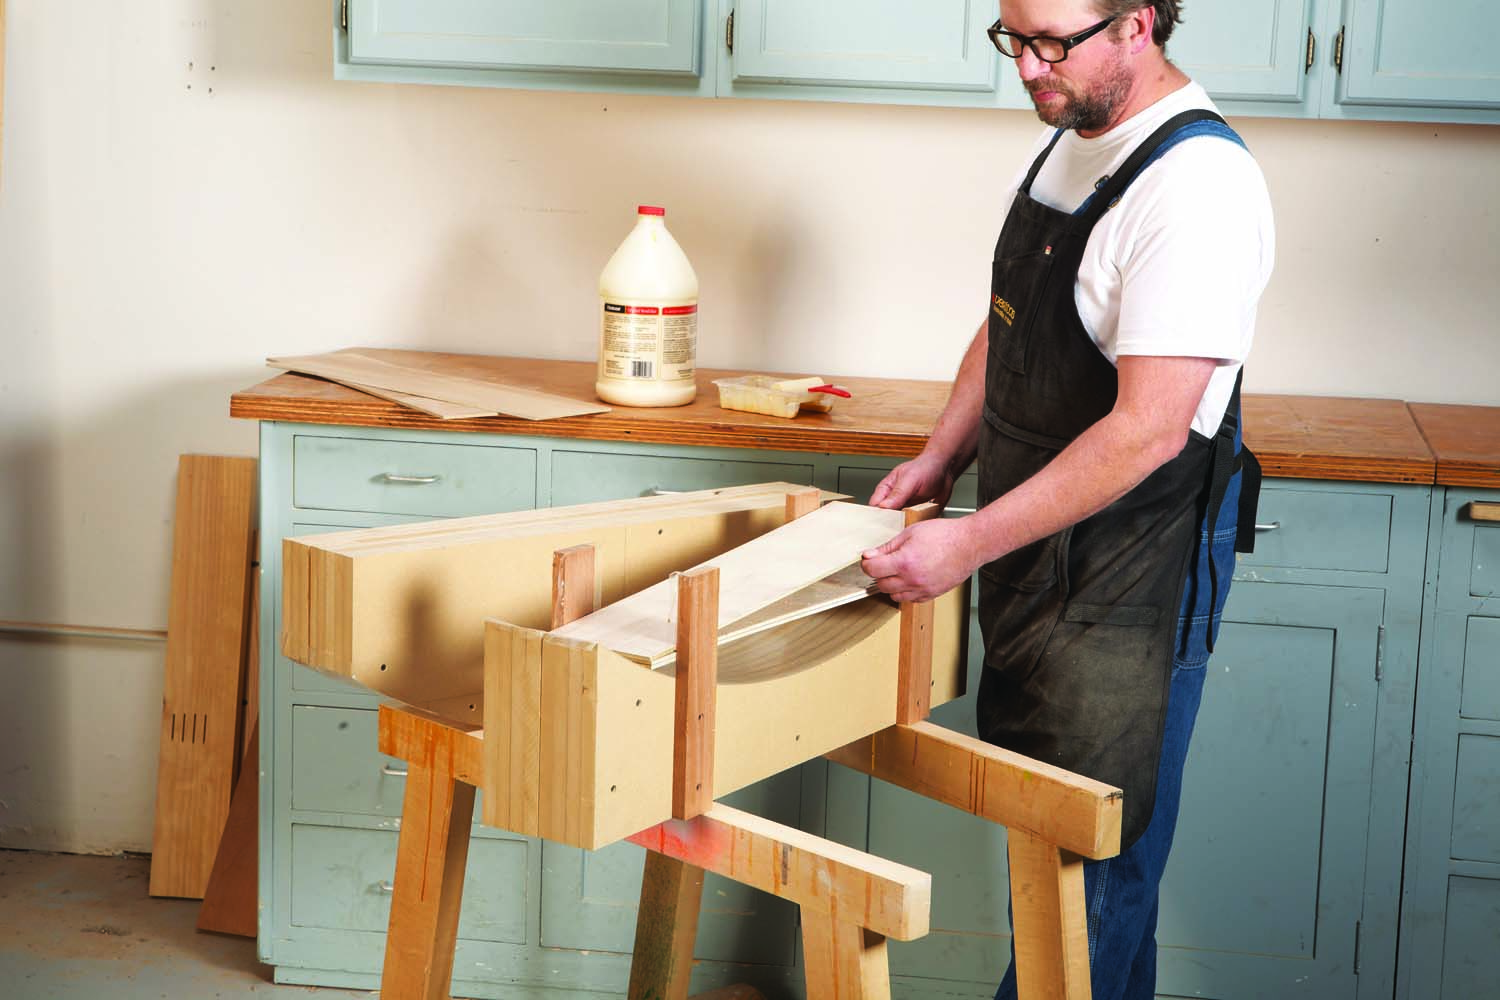
Photo 3. Cut and glue thin plywood bending stock. Battens keep the plywood and form halves aligned during clamping. Line the form and battens with packing tape so glue doesn’t stick to them.
When the laminations are all in place, set the form’s convex half in position. Make sure the laminations’ ends are lined up, and then apply clamps. The glue acts as a lubricant, allowing the parts to slide against each other, so tighten the clamps like you tighten lug nuts on a wheel; start with light pressure on one clamp in the center, then equal pressure on the opposing center clamp. Next, clamp diagonal corners, using equal, light pressure, followed by the remaining corners (Photo 4). Finish tightening each clamp in the same order, a little at a time, until the laminations are completely pressed together. Wipe off any excess glue and leave the drawer front in the form for 24 hours.
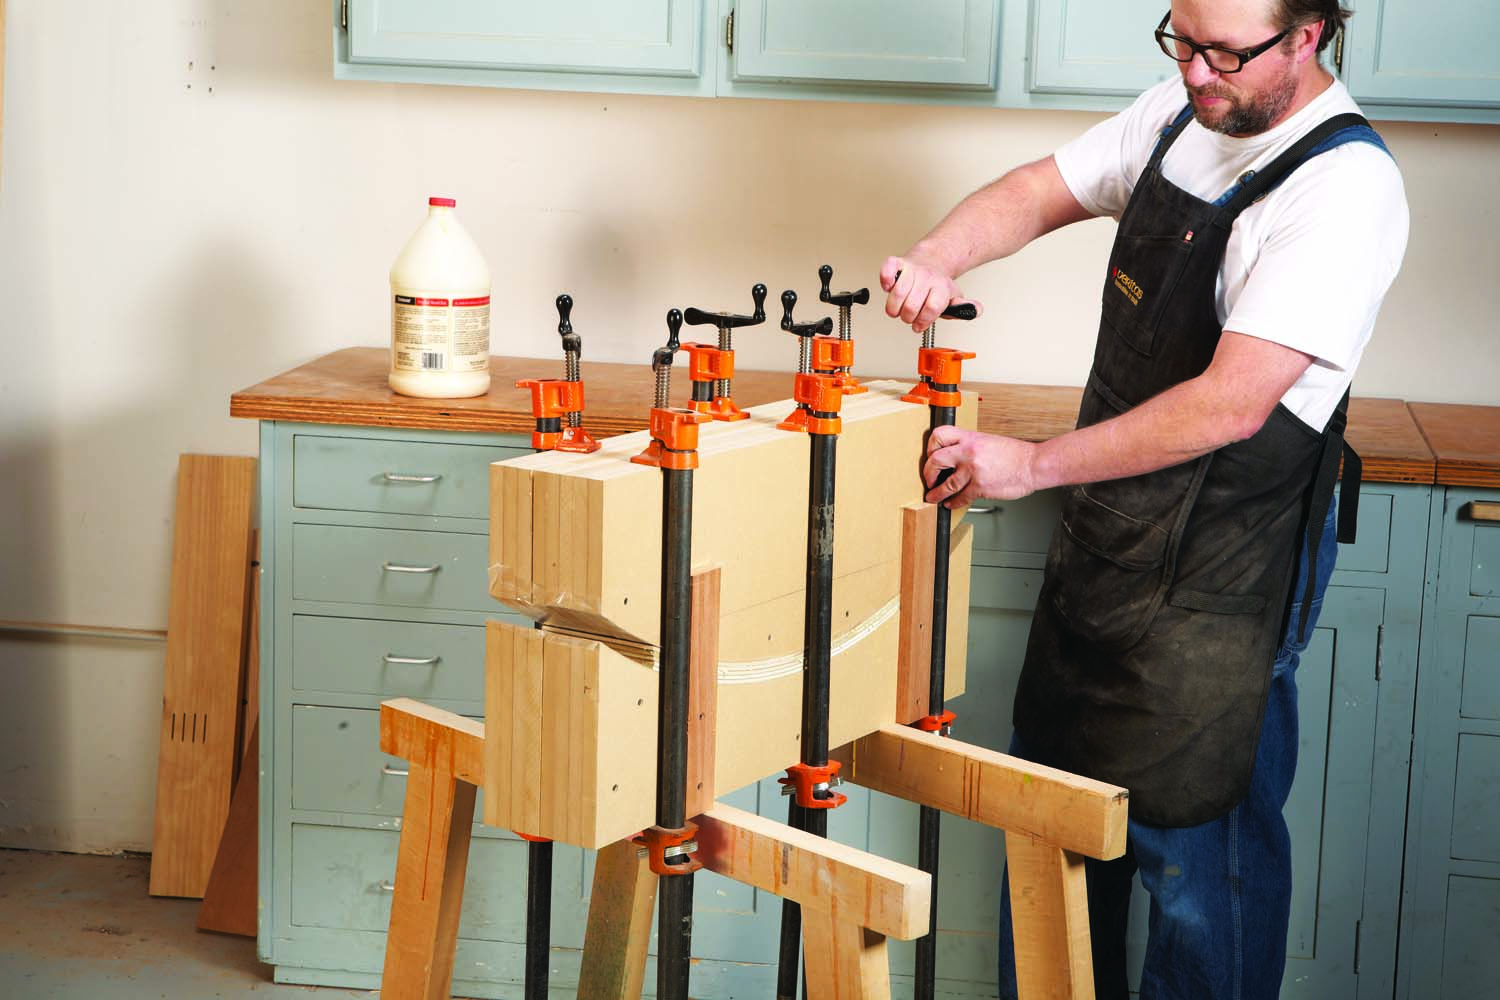
Photo 4. Clamp the plywood bending stock in the form. Apply even, opposing pressure to help prevent the stock from sliding end-for-end. Allow the lamination to cure for at least 24 hours.
When the glue is cured, remove the drawer front from the form. Cut a piece of veneer for the face and apply it using an even layer of glue (Photo 5). Clamp the drawer front in the form again to apply even pressure until the glue dries.
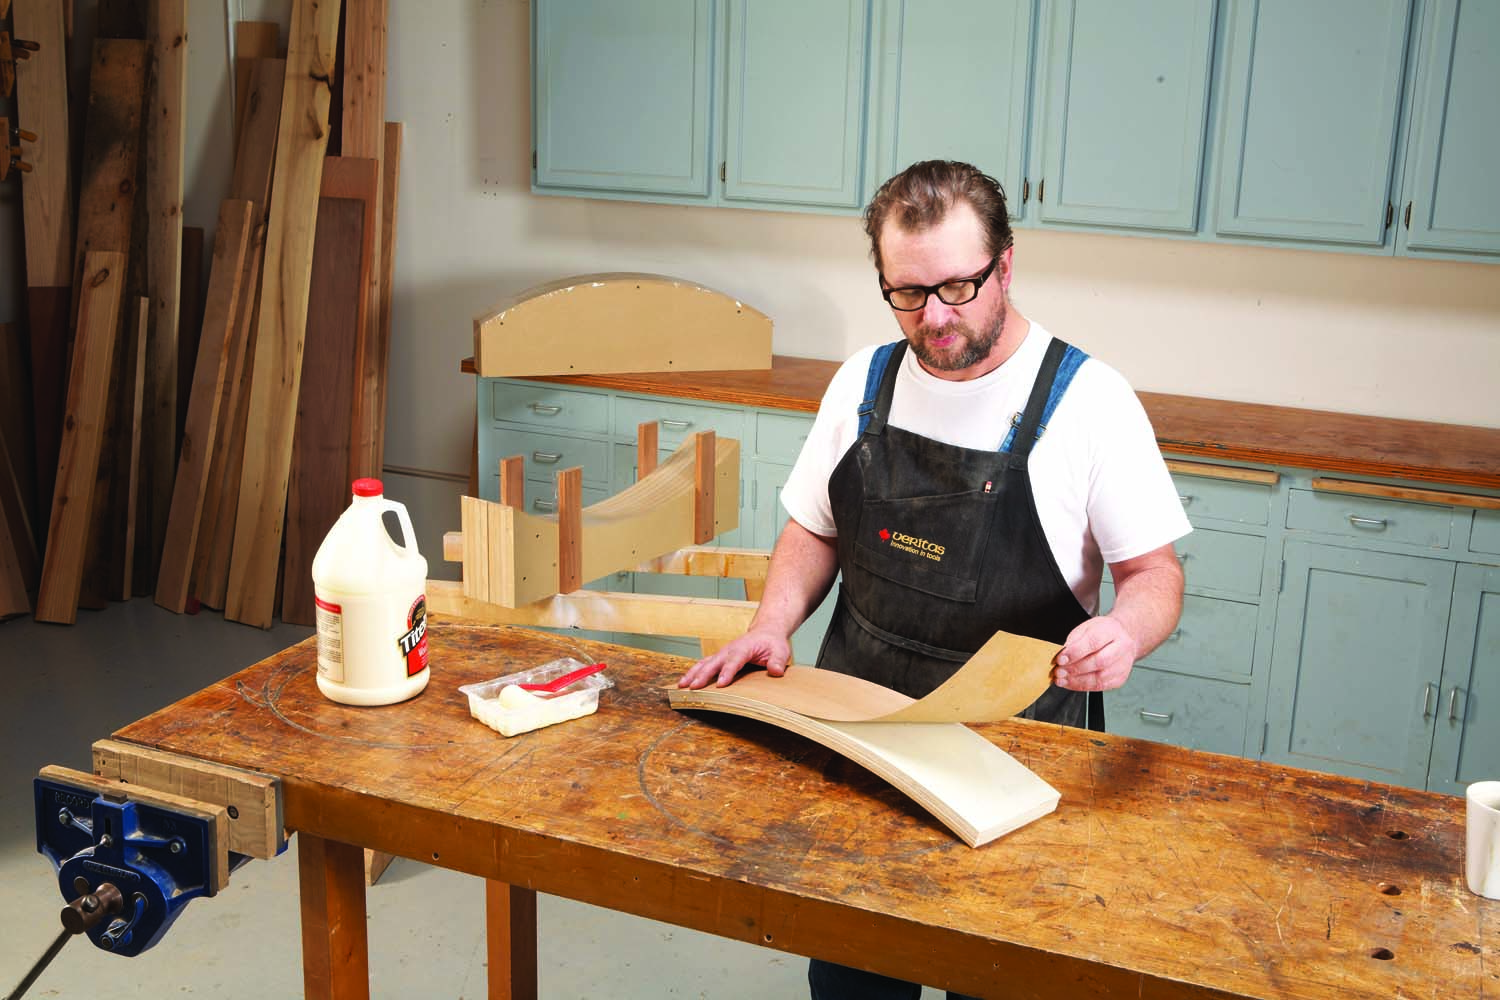
Photo 5. Spread glue evenly on the drawer front and then apply the veneer. Clamp the veneered front in the form until the glue is fully cured.
If you’re feeling lucky, you could apply the veneer at the same time you’re bending the strips.
Cap the Edges
Remove the veneered front from the form and joint one edge (Photo 6). Continue jointing until the edge is straight, square with the face, and all the laminations are flush on one edge.

Photo 6. Joint one edge of the drawer front until it’s straight, square to the face, and all of the laminations are flush.
Bandsaw the front to finished height minus 1/4″ (Photo 7). The face-up position provides two points of contact with the table at all times, so it’s pretty safe. Trim the front’s ends on the bandsaw too. Cut them approximately 90° to the front’s face. Clean up the sawn edge on the jointer.
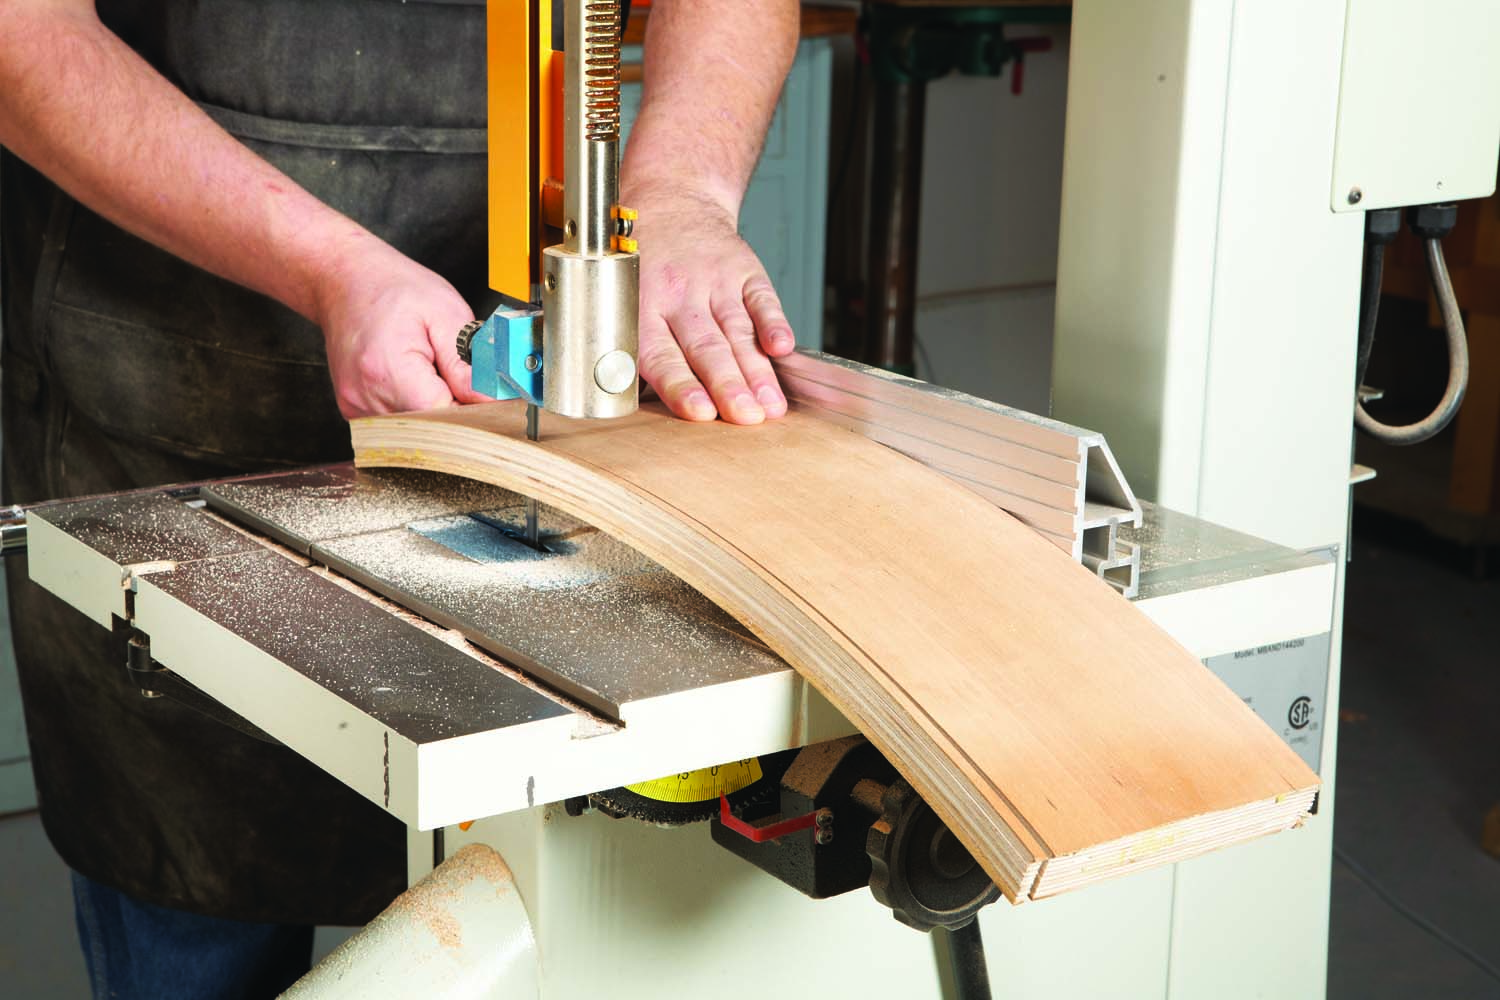
Photo 7. Rip the front to finished height. Bandsaw face-up to create two points of contact with the table and avoid tearing out the veneer. Joint the ripped edge smooth.
To make the caps, you’ll need a board that’s wide enough to accommodate the front’s curve. Re-saw and plane the board down to 1/8″ thick.
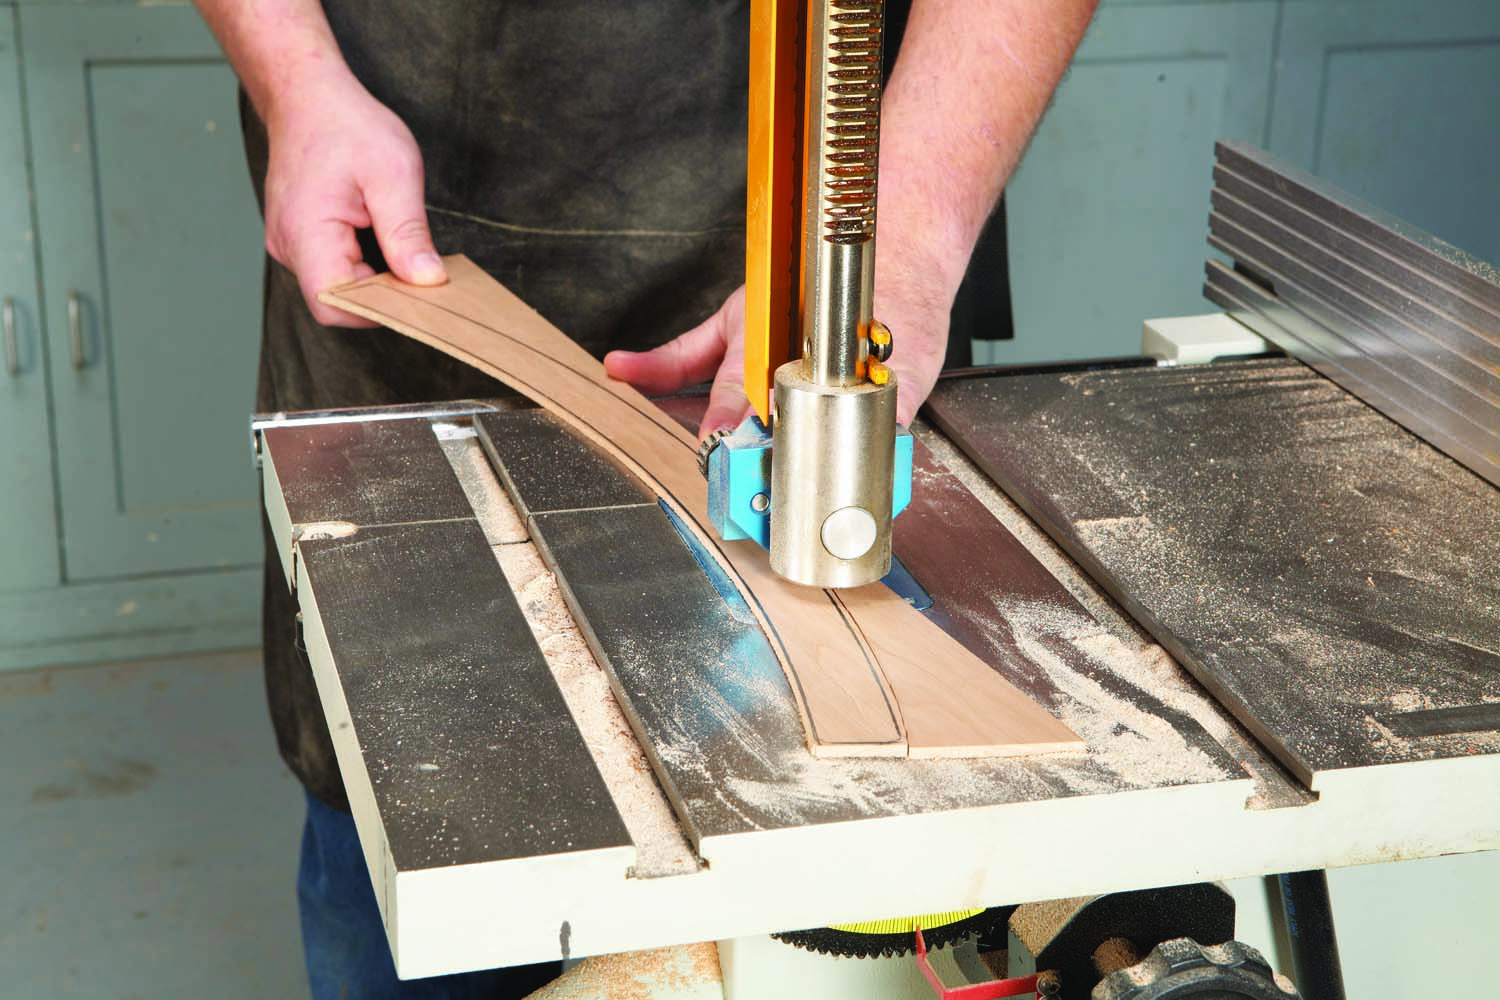
Photo 8. Bandsaw curved hardwood caps for the front’s top and bottom edges. Glue and clamp the caps to the drawer front.
Trace the front’s curve onto the 1/8″ stock and cut out two curved pieces for each drawer front (Photo 8).
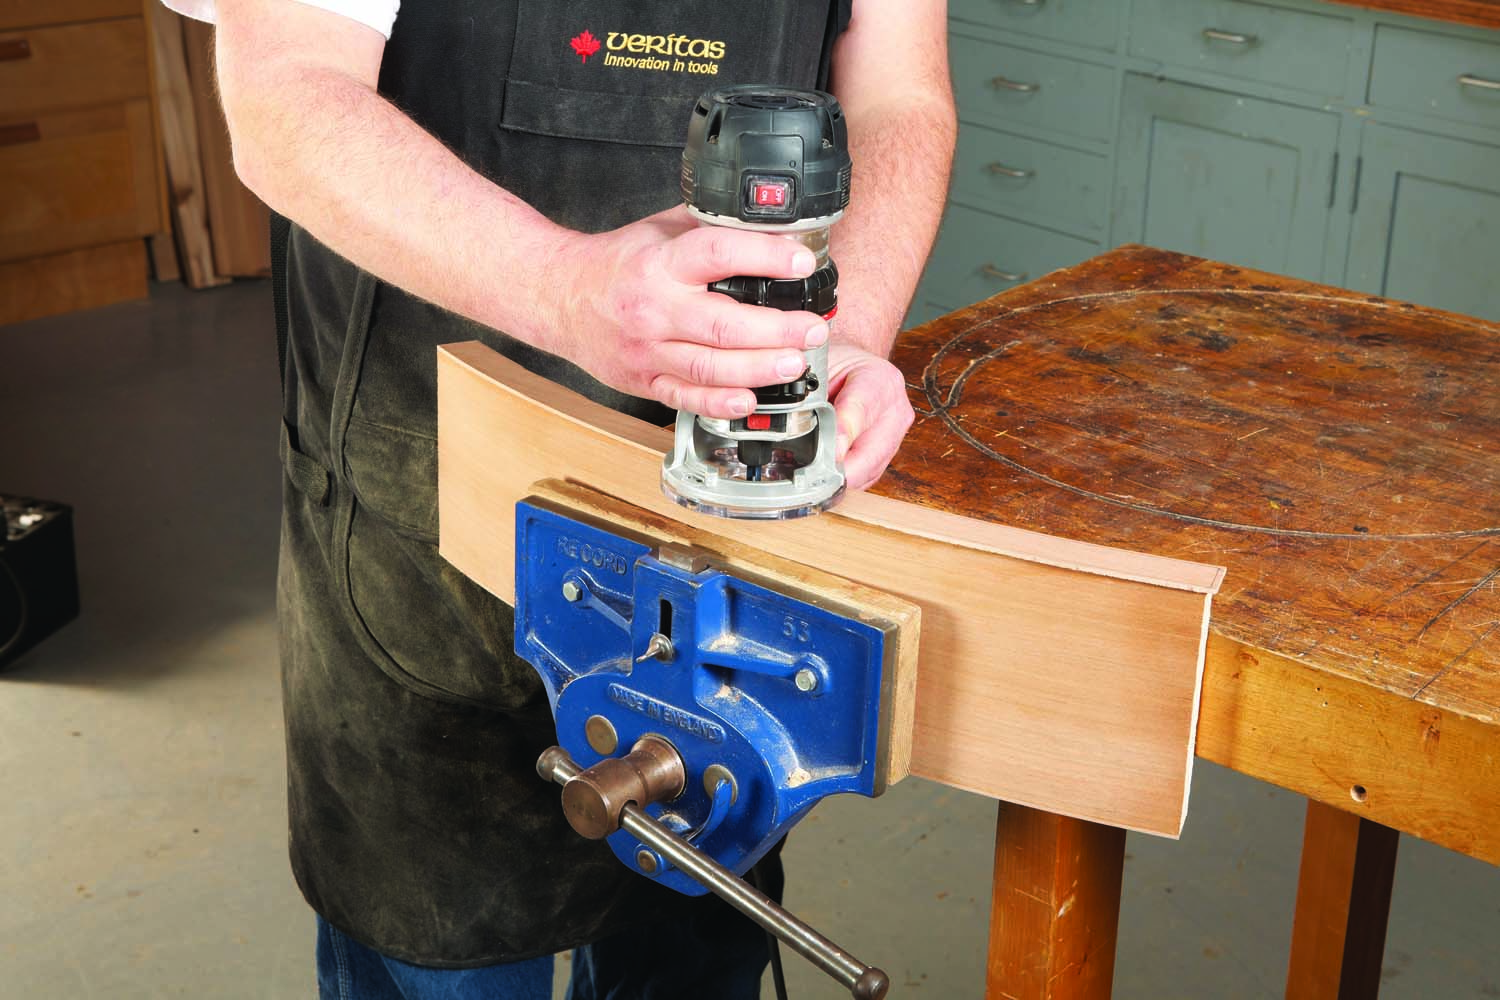
Photo 9. Trim the top and bottom caps flush. Because of the grain’s relationship to the curve, you’ll need to climb-cut half of each face to keep the caps from splitting out.
Glue on the caps and then trim them flush (Photo 9). Because the caps’ grain doesn’t follow the curve, you’ll have to rout half of each face going the “wrong” direction. This is called climb-cutting. If you don’t – particularly with thin stock like this – you’ll split out large pieces.
Cut and Rabbet the Ends
To cut the ends’ angles and rabbets, you’ll need a cutting sled matching the front’s radius. Use the sled in conjunction with an auxiliary wooden fence attached to your tablesaw’s miter gauge.
You can make this curved cutting sled by disassembling the convex half of the form, ripping all the curved sides to the right height and reassembling them. Or you can build it from scratch using the same technique you used to build the form. Make the sled just tall enough so that when you center the drawer front on it, the front’s ends clear the saw’s table by about 1/8″. The sled isn’t attached to the fence; it needs to move back and forth to position the cuts.
Use your drawing to lay out the cuts you’ll make on the drawer front’s ends. Mark centerlines across the top of the sled, and both edges of the drawer front. Keep these marks aligned as you make your cuts. Before you make the first cut, make tick mark on the drawer front and the fence where they meet. If you need to move the sled, you’ll know exactly how far you’ve moved it in relation to the fence. After you move it, make another mark on the fence and check the centerlines.
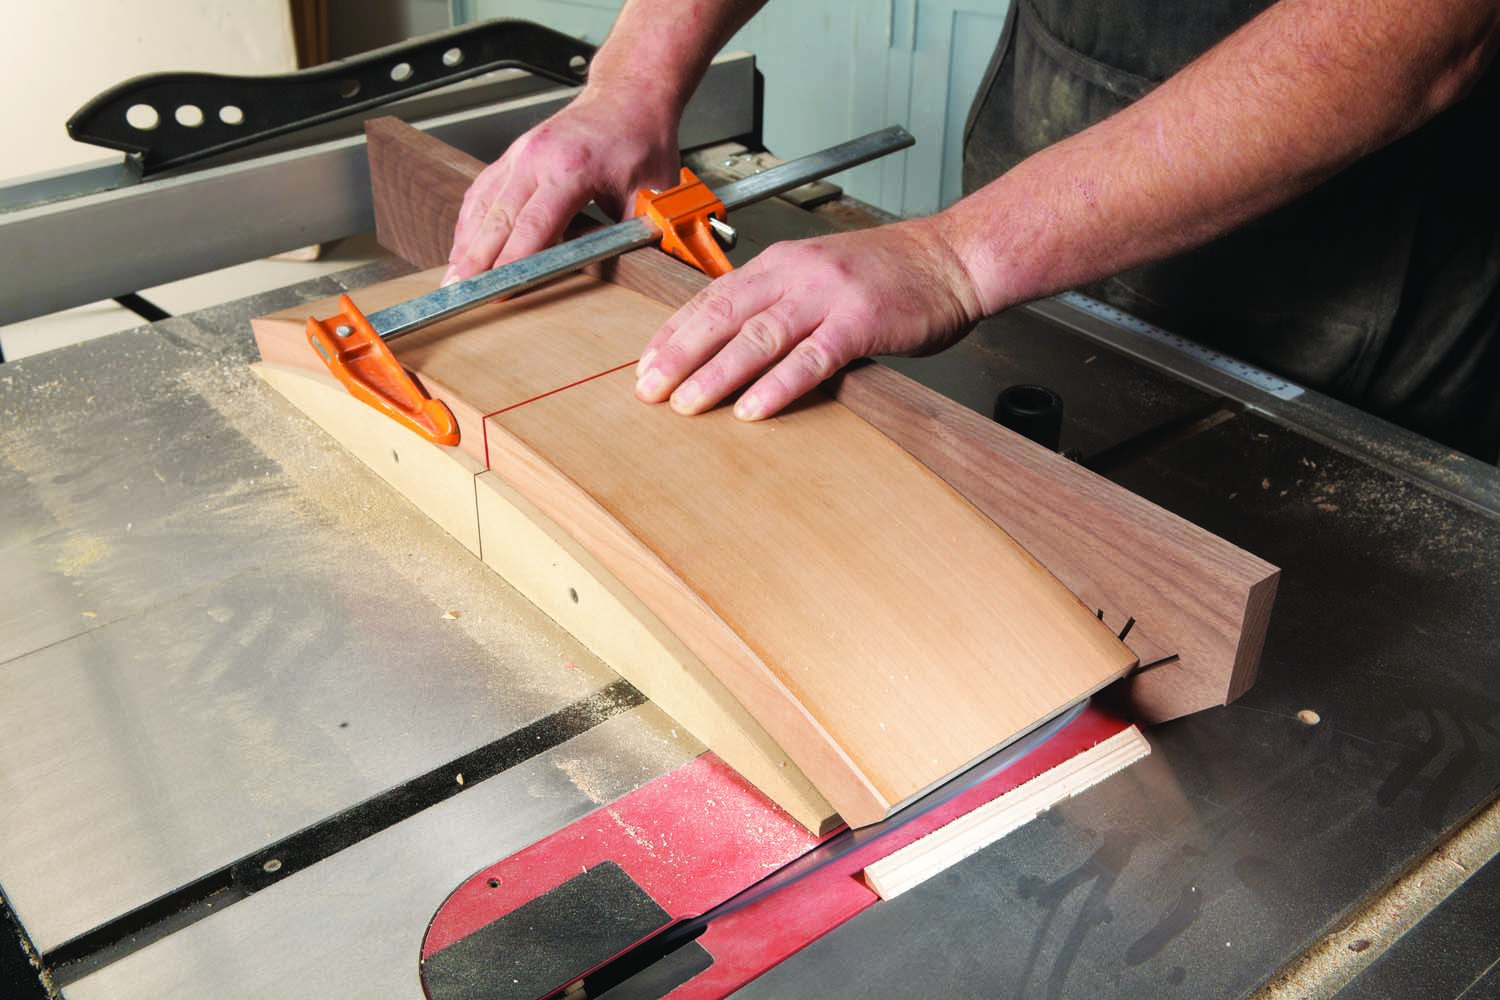
Photo 10. Use a cutting sled with your tablesaw’s miter gauge to cut two angles on each of the front’s ends. You need a 45° angle to make the drawer triangular. The 70° angle creates a “flat”, so the end doesn’t come to a point.
Because this drawer is triangular, it requires the front’s ends to be cut at 45°. But that would make the veneered ends to come to a sharp, vulnerable point. So a second angle is needed to create a narrow flat at the front edge. For a square drawer, all the cuts are 90°.
Tilt your saw to 45°, line up the blade with your layout line, and then clamp the drawer front to the fence. Cut one end, then spin the front 180° and cut the other end. Next, tilt the blade to 20° (making a 70° angle) and cut just the front edge of the ends, leaving a 1/4″ flat (Photo 10).
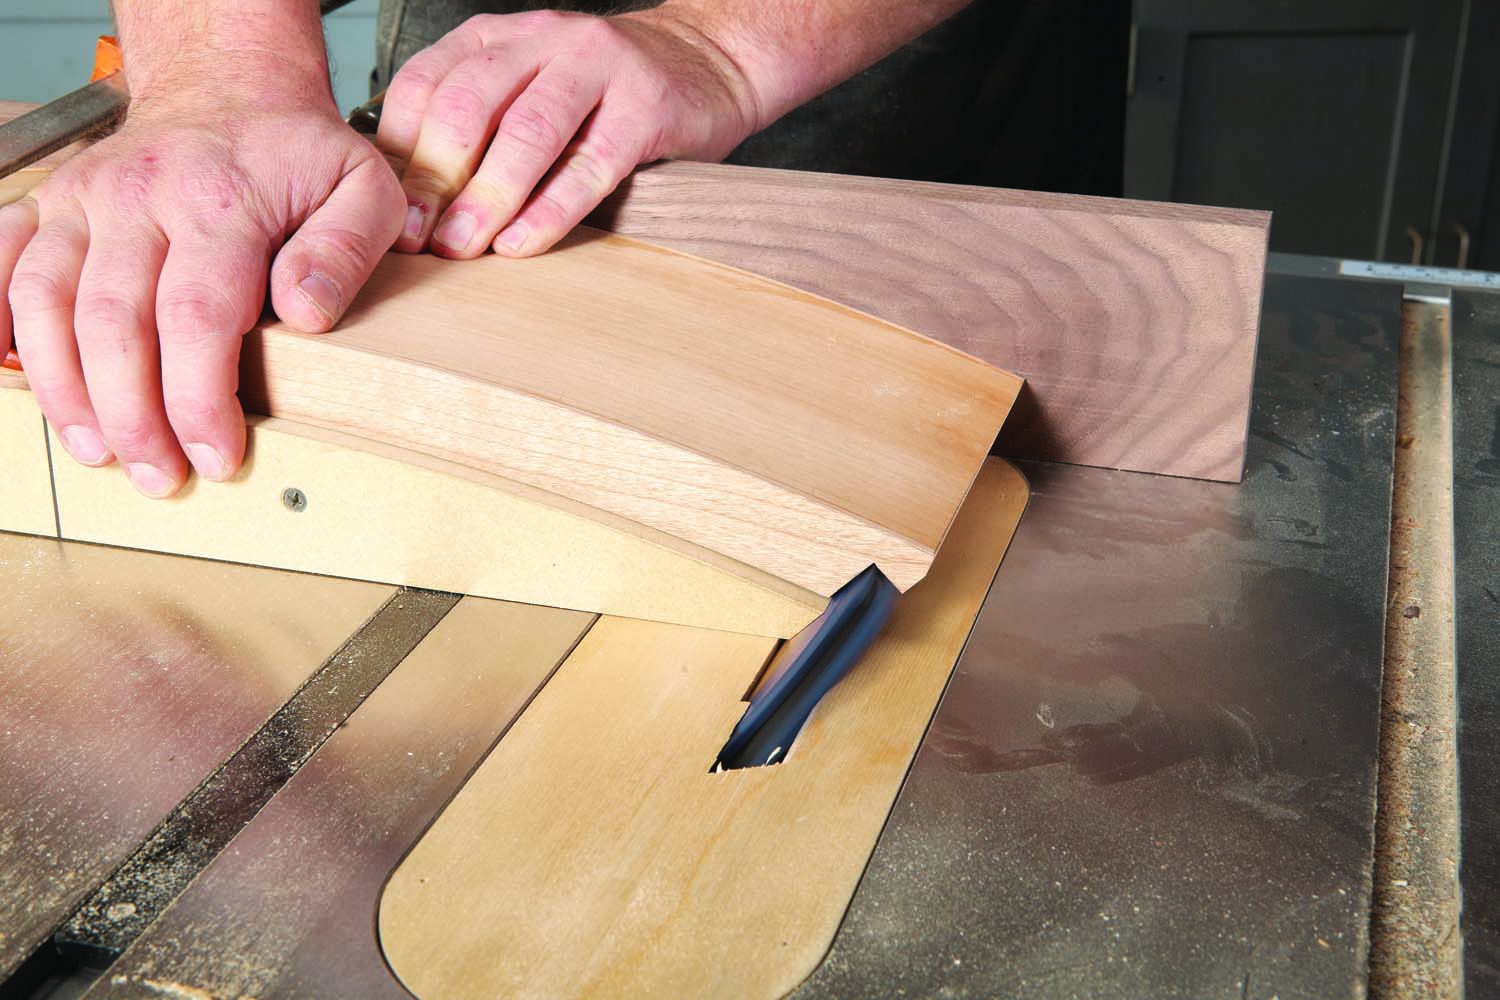
Photo 11. Cut rabbets for the drawer’s sides using a dado set tilted at 45°. Flip the fence end-for-end to make a fresh backer board to prevent tear-out.
To cut the rabbets for the drawer sides, install a dado set and tilt it to 45°. Flip the fence end for end so you have a fresh end with no cuts through it to act as a backer board and prevent tear-out. Cut a rabbet in both ends (Photo 11). Again, use tick marks on the fence and drawer front so you can make incremental side-to-side adjustments to fit the rabbet perfectly to the drawer sides. The rabbets’ inside corner is 3/4″ deep to allow lots of gluing surface and plenty of room for screws.
Assemble the Drawer
Mark the sides’ length directly from your drawing, and then cut the two sides to finished length. Cut the drawer’s bottom rectangular, trace its front curve using the drawer front as a guide, and then cut the curve on the bandsaw.
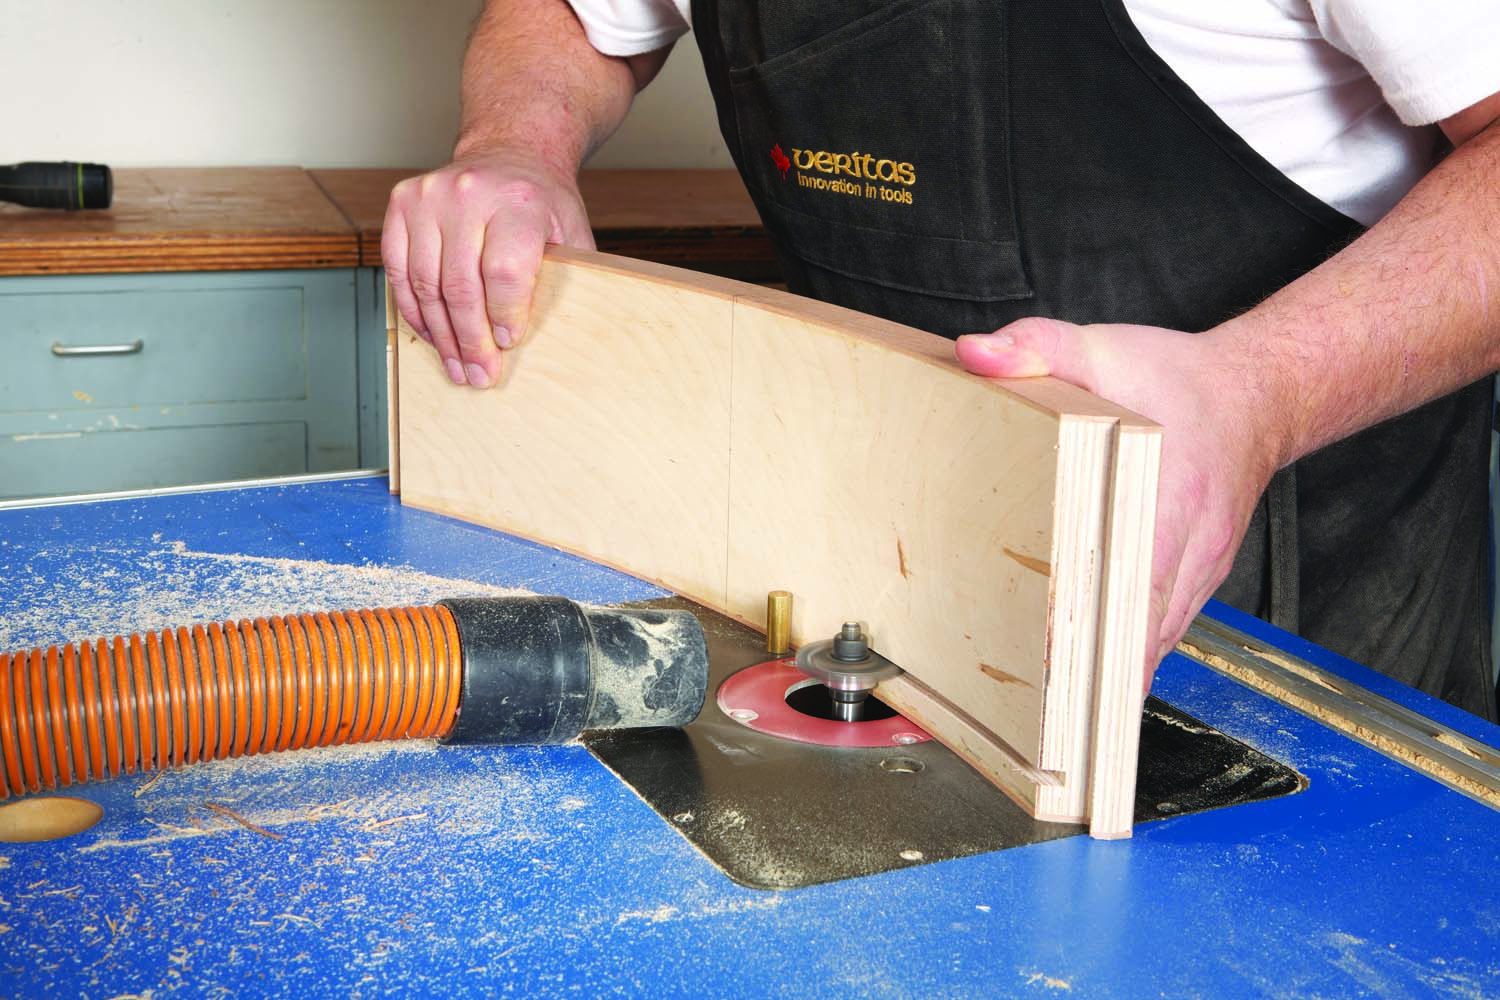
Photo 12. Rout a groove for the bottom in the drawer’s front and sides. Again, there’s no fence, so use a starting pin.
Cut a groove for the bottom in the front and sides using a slot cutter in your router table. You can’t use a fence to rout a groove in the curved drawer front, so use a starting pin to rock the front into the bit (Photo 12). Dry fit the parts and make any necessary adjustments.
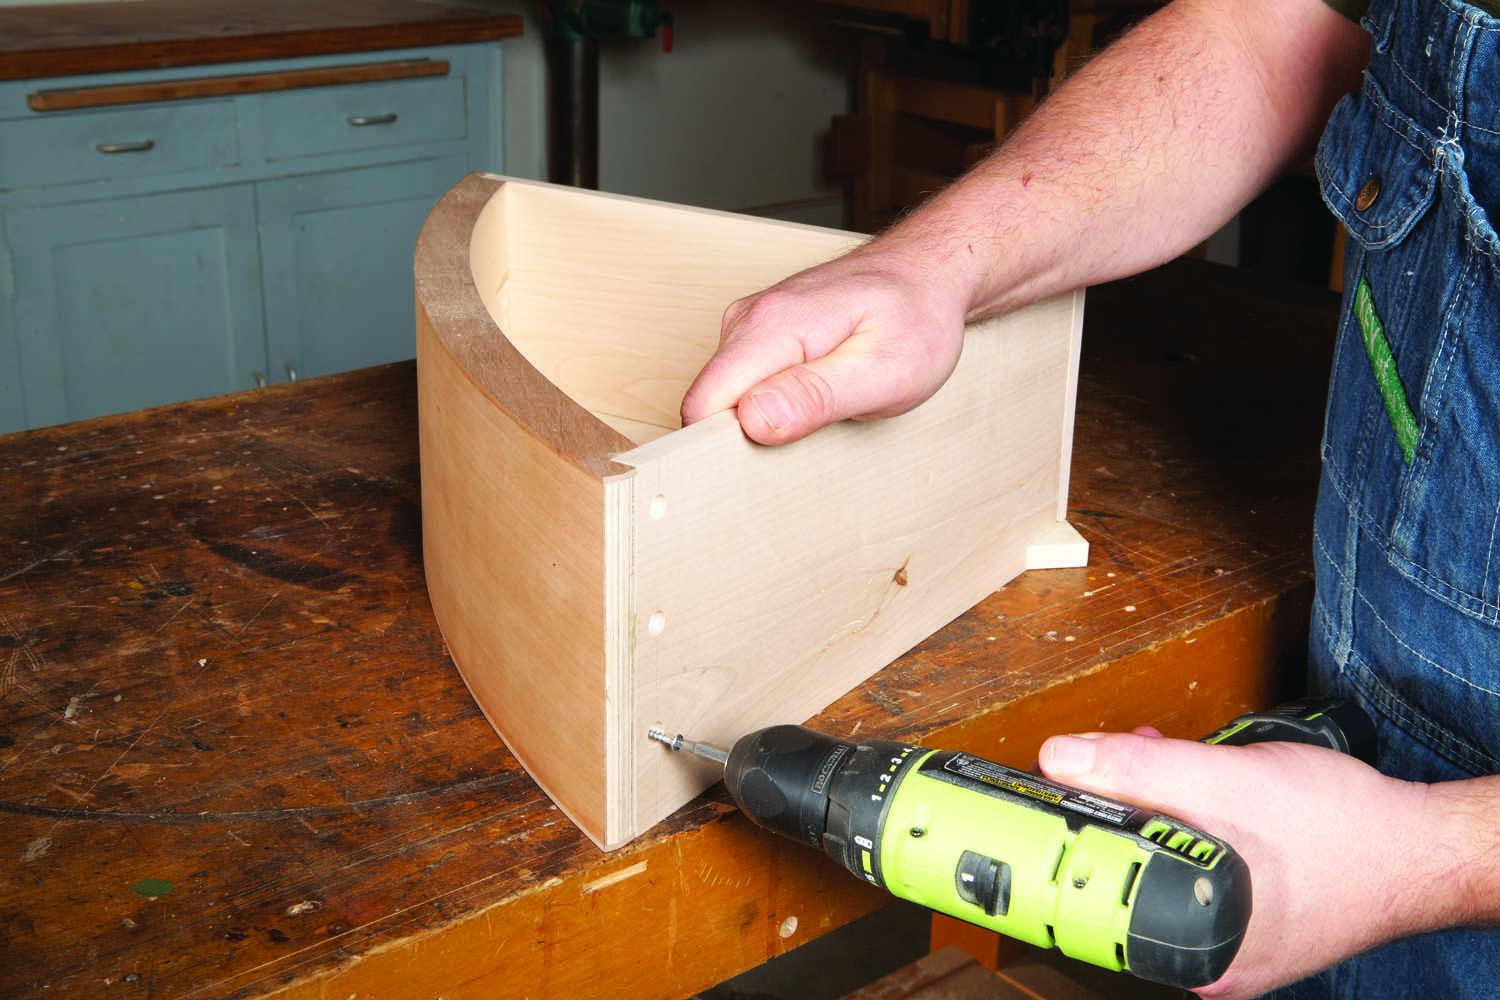
Photo 13. Assemble the drawer using glue and screws, and then glue in wooden plugs to cover the screw heads.
Make or buy 3/8″ diameter wooden plugs or 3/8″ dowel rod. Drill 3/8″ counter-bores for all of the screws. Glue and screw one side in place, and then install the bottom and the other side (Photo 13).
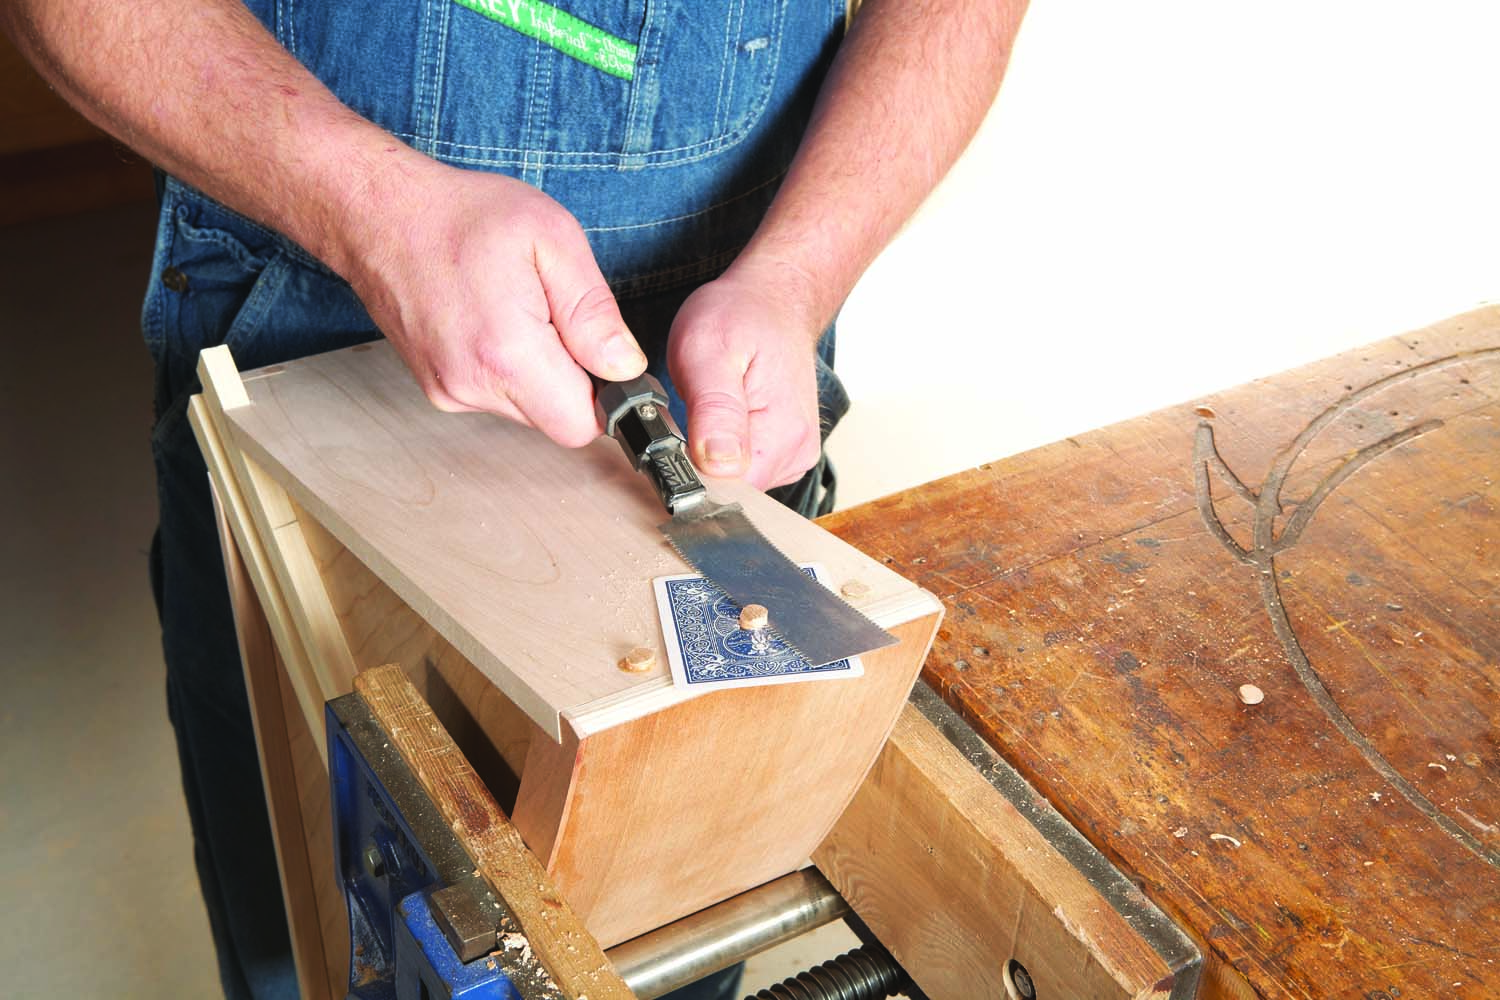
Photo 14. Trim the plugs and then sand them flush. Even a flush-cut saw can leave marks, so use a shield to protect the drawer’s sides.
Glue in the plugs to cover the screw heads. When the glue is dry, trim the plugs and sand them flush (Photo 14). Even a flush-trim saw with no set to the teeth can leave marks, so use a shield to protect the workpiece. A playing card with a hole for the plug works great.
Here are some supplies and tools we find essential in our everyday work around the shop. We may receive a commission from sales referred by our links; however, we have carefully selected these products for their usefulness and quality.